
 Database
Mysql Tutorial
Share the installation and configuration tutorial of mysql5.7.18 under centos6.4 (picture and text)
Database
Mysql Tutorial
Share the installation and configuration tutorial of mysql5.7.18 under centos6.4 (picture and text)
Share the installation and configuration tutorial of mysql5.7.18 under centos6.4 (picture and text)

This article mainly introduces the graphic tutorial on the installation and configuration method of mysql5.7.18 under centos6.4 in detail. It has certain reference value. Interested friends can refer to it
centos6.4 Below are the specific steps to install mysql5.7.18 and share them with everyone.
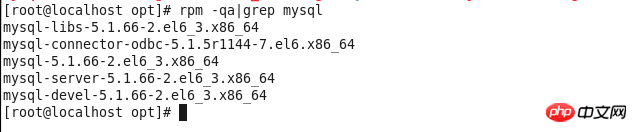
1. First check whether mysql has been installed and search for the mysql related software rpm package
#rpm -qa | grep mysql
2. Delete all mysql related things
#yum -y remove mysql-libs-5.1.66-2.el6_3.x86_64

3. Install dependency packages
#yum -y install make gcc-c++ cmake bison-devel ncurses-devellibaio libaio-devel

4. Create mysql user group
#groupadd mysql
5. Create user mysql
#useradd mysql -g mysql
6 under the mysql user group. Download mysql-5.7.19-linux-glibc2.12-x86_64.tar.gz
from the official website. Download address: https:// dev.mysql.com/downloads/mysql/
7. Place mysql-5.7.19-linux-glibc2.12-x86_64.tar in the /opt folder
8. Unzip File mysql-5.7.19-linux-glibc2.12-x86_64.tar.gz
#tar xzvfmysql-5.7.19-linux-glibc2.12-x86_64.tar.gz
9. Rename mysql-5.7.19-linux-glibc2.12-x86_64 to mysql and move it to /usr/ Under local/mysql
#mv mysql-5.7.19-linux-glibc2.12-x86_64 /usr/local/mysql
Create the data directory under /usr/local/mysql
#mkdir /usr/local/mysql/data
10. Return to the local directory
#cd /usr/local
Change the mysql directory and the following files and subtitles Change the directory file master to mysql
#chown -R mysql:mysql mysql/
Give the mysql directory and the files and subdirectories below 755 permissions
#chmod -R 755 mysql/
11. Compile, install and initialize mysql, remember the password at the end of the command line
#/usr/local/mysql/bin/mysqld --initialize --user=mysql --datadir=/usr/local/mysql/data --basedir=/usr/local/mysql

12. Start the mysql service
#/usr/local/mysql/support-files/mysql.server start

13. Make a soft connection and restart the mysql service
#ln -s /usr/local/mysql/support-files/mysql.server /etc/init.d/mysql
#service mysql restart
14. Make a soft link and place mysql in the installation directory in the /usr/bin directory
#ln -s /usr/local/mysql/bin/mysql /usr/bin
15. Log in to msyql and enter the password (the password is the password generated during the initialization in step 11)
#mysql -u root -p

16. Change the password to 123456
msql>alter user 'root'@'localhost' identified by '123456';
mysql>use mysql;
msyql>update user set user.Host='%' where user.User='root';
mysql>flush privileges;
mysql>quit
17. Edit my.cnf and add the configuration file. The configuration content is
#vi /usr/local/mysql/my.cnf

[mysqld]
port = 3306
sql_mode=NO_ENGINE_SUBSTITUTION,STRICT_TRANS_TABLES
18. Allow port 3306
#iptables -I INPUT -p tcp -m state --state NEW -m tcp --dport 3306 -j ACCEPT
#iptables -L -n
#service iptables save
The above is the detailed content of Share the installation and configuration tutorial of mysql5.7.18 under centos6.4 (picture and text). For more information, please follow other related articles on the PHP Chinese website!

Hot AI Tools

Undresser.AI Undress
AI-powered app for creating realistic nude photos

AI Clothes Remover
Online AI tool for removing clothes from photos.

Undress AI Tool
Undress images for free

Clothoff.io
AI clothes remover

Video Face Swap
Swap faces in any video effortlessly with our completely free AI face swap tool!

Hot Article
Hot Tools

Notepad++7.3.1
Easy-to-use and free code editor

SublimeText3 Chinese version
Chinese version, very easy to use

Zend Studio 13.0.1
Powerful PHP integrated development environment

Dreamweaver CS6
Visual web development tools

SublimeText3 Mac version
God-level code editing software (SublimeText3)
Hot Topics


 How to set up Git configuration in PyCharm
Feb 20, 2024 am 09:47 AM
How to set up Git configuration in PyCharm
Feb 20, 2024 am 09:47 AM
Title: How to correctly configure Git in PyCharm In modern software development, the version control system is a very important tool, and Git, as one of the popular version control systems, provides developers with powerful functions and flexible operations. As a powerful Python integrated development environment, PyCharm comes with support for Git, allowing developers to manage code versions more conveniently. This article will introduce how to correctly configure Git in PyCharm to facilitate better development during the development process.
 The working principle and configuration method of GDM in Linux system
Mar 01, 2024 pm 06:36 PM
The working principle and configuration method of GDM in Linux system
Mar 01, 2024 pm 06:36 PM
Title: The working principle and configuration method of GDM in Linux systems In Linux operating systems, GDM (GNOMEDisplayManager) is a common display manager used to control graphical user interface (GUI) login and user session management. This article will introduce the working principle and configuration method of GDM, as well as provide specific code examples. 1. Working principle of GDM GDM is the display manager in the GNOME desktop environment. It is responsible for starting the X server and providing the login interface. The user enters
 The perfect combination of PyCharm and PyTorch: detailed installation and configuration steps
Feb 21, 2024 pm 12:00 PM
The perfect combination of PyCharm and PyTorch: detailed installation and configuration steps
Feb 21, 2024 pm 12:00 PM
PyCharm is a powerful integrated development environment (IDE), and PyTorch is a popular open source framework in the field of deep learning. In the field of machine learning and deep learning, using PyCharm and PyTorch for development can greatly improve development efficiency and code quality. This article will introduce in detail how to install and configure PyTorch in PyCharm, and attach specific code examples to help readers better utilize the powerful functions of these two. Step 1: Install PyCharm and Python
 Understand Linux Bashrc: functions, configuration and usage
Mar 20, 2024 pm 03:30 PM
Understand Linux Bashrc: functions, configuration and usage
Mar 20, 2024 pm 03:30 PM
Understanding Linux Bashrc: Function, Configuration and Usage In Linux systems, Bashrc (BourneAgainShellruncommands) is a very important configuration file, which contains various commands and settings that are automatically run when the system starts. The Bashrc file is usually located in the user's home directory and is a hidden file. Its function is to customize the Bashshell environment for the user. 1. Bashrc function setting environment
 How to configure workgroup in win11 system
Feb 22, 2024 pm 09:50 PM
How to configure workgroup in win11 system
Feb 22, 2024 pm 09:50 PM
How to configure a workgroup in Win11 A workgroup is a way to connect multiple computers in a local area network, which allows files, printers, and other resources to be shared between computers. In Win11 system, configuring a workgroup is very simple, just follow the steps below. Step 1: Open the "Settings" application. First, click the "Start" button of the Win11 system, and then select the "Settings" application in the pop-up menu. You can also use the shortcut "Win+I" to open "Settings". Step 2: Select "System" In the Settings app, you will see multiple options. Please click the "System" option to enter the system settings page. Step 3: Select "About" In the "System" settings page, you will see multiple sub-options. Please click
 Simple and easy-to-understand PyCharm configuration Git tutorial
Feb 20, 2024 am 08:28 AM
Simple and easy-to-understand PyCharm configuration Git tutorial
Feb 20, 2024 am 08:28 AM
PyCharm is a commonly used integrated development environment (IDE). In daily development, using Git to manage code is essential. This article will introduce how to configure Git in PyCharm and use Git for code management, with specific code examples. Step 1: Install Git First, make sure Git is installed on your computer. If it is not installed, you can go to [Git official website](https://git-scm.com/) to download and install the latest version of Git
 How to configure and install FTPS in Linux system
Mar 20, 2024 pm 02:03 PM
How to configure and install FTPS in Linux system
Mar 20, 2024 pm 02:03 PM
Title: How to configure and install FTPS in Linux system, specific code examples are required. In Linux system, FTPS is a secure file transfer protocol. Compared with FTP, FTPS encrypts the transmitted data through TLS/SSL protocol, which improves Security of data transmission. In this article, we will introduce how to configure and install FTPS in a Linux system and provide specific code examples. Step 1: Install vsftpd Open the terminal and enter the following command to install vsftpd: sudo
 Avoid common mistakes in Maven environment configuration: Solve configuration problems
Feb 19, 2024 pm 04:56 PM
Avoid common mistakes in Maven environment configuration: Solve configuration problems
Feb 19, 2024 pm 04:56 PM
Maven is a Java project management and build tool that is widely used in the development of Java projects. In the process of using Maven to build projects, you often encounter some common environment configuration problems. This article will answer these common questions and provide specific code examples to help readers avoid common configuration errors. 1. Maven environment variables are incorrectly configured. Problem description: When using Maven, if the environment variables are incorrectly configured, Maven may not work properly. Solution: Make sure
