

Vue는 여러 방법을 사용하여 고정 테이블 헤더와 첫 번째 열을 구현합니다.

이 글에서는 테이블 헤더와 첫 번째 열을 수정하기 위한 샘플 코드를 구현하는 Vue의 다양한 방법을 주로 소개합니다. 내용이 꽤 좋아서 지금 공유하고 참고하겠습니다.
테이블이 너무 커서 스크롤할 때 정보를 보기가 불편한 경우가 있습니다. 테이블의 전역 헤더와 첫 번째 열을 수정해야 합니다.
위 효과:
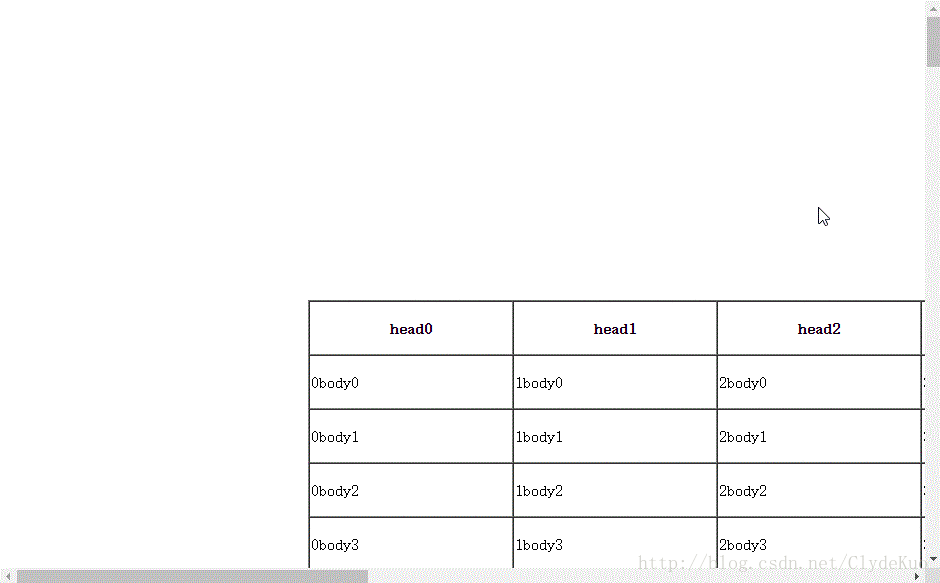
1. 이를 포함할 여러 테이블 생성
아이디어: 페이지가 임계 값으로 스크롤되면 고정 헤더와 첫 번째 열이 나타납니다
먼저 활성 테이블을 생성하고
<!DOCTYPE html>
<html>
  <head>
    <meta charset="UTF-8">
    <title></title>
    <style type="text/css">
      th,
      td {
        min-width: 200px;
        height: 50px;
      }
      #sTable {
        margin-top: 300px
      }
      [v-cloak]{
        display: none;
      }
    </style>
  </head>
  <body v-cloak>
    <!--活动的表格-->
    <table id="sTable" border="1" cellspacing="0">
      <thead>
        <tr>
          <th v-for="item in th">{{item.key}}</th>
        </tr>
      </thead>
      <tbody>
        <tr v-for="item in tl">
          <td v-for="list in item">{{list.key}}</td>
        </tr>
      </tbody>
    </table>
    <script src="vue.js"></script>
    <script src="jquery.js"></script>
    <script>
      var vm = new Vue({
        el: "body",
        data: function() {
          return {
            th: [],
            tl: [],
            temp: [],
          }
        },
        methods: {
          //生成表格
          CTable: function() {
            for(var i = 0; i < 10; i++) {
              this.th.push({
                key: "head" + i
              })
            }
            for(var i = 0; i < 100; i++) {
              for(var j = 0; j < 10; j++) {
                this.temp.push({
                  key: j + "body" + i
                })
              }
              this.tl.push(this.temp)
              this.temp = []
            }
          },
        },
        ready: function() {
          this.CTable();
        },
      })
    </script>
  </body>
</html>그런 다음 고정 헤더를 추가하세요.
#fHeader {
  background: lightblue;
  position: fixed;
  top: 0;
}<!--固定表头-->
<table border="1" id="fHeader" cellspacing="0" v-show="fixedHeader">
<thead>
<tr >
<th v-for="item in th">{{item.key}}</th>
</tr>
</thead>
</table>고정 헤더 모니터링 테이블 위치가 창 상단에 도달하면 헤더가 나타납니다
//监控表头位置
headerMonitor:function(){
var self=this
var hHeight=$("#sTable").offset().top;
$(document).scroll(function(){
//当滚动条达到偏移值的时候,出现固定表头
if($(this).scrollTop()>hHeight){
self.fixedHeader=true
}else{
self.fixedHeader=false
}
})
}물론 이 메서드를 호출해야 합니다
ready: function() {
this.CTable();
this.headerMonitor()
},그 다음 고정된 첫 번째 열과 고정된 A1 셀을 추가합니다
#fHeader {
background: lightblue;
position: fixed;
top: 0;
z-index: 1;
}
.fixedA1{
background: lightblue;
position: fixed;
top: 0;
left: 0;
z-index:2;
}<!--固定A1-->
<table border="1" cellspacing="0" class="fixedA1" v-show="fixedA1">
<thead>
<tr>
<th v-for="item in th" v-if="$index==0">{{item.key}}</th>
</tr>
</thead>
</table>
<!--固定首列-->
<table border="1" cellspacing="0" class="fixedCol" v-show="fixedCol">
<thead>
<tr>
<th v-for="item in th" v-if="$index==0">{{item.key}}</th>
</tr>
</thead>
<tbody>
<tr v-for="item in tl">
<td v-for="list in item" v-if="$index==0">{{list.key}}</td>
</tr>
</tbody>
</table >마찬가지로 테이블의 위치를 모니터링합니다
//监控表头、首列位置
monitor:function(){
var self=this
$(document).scroll(function(){
self.setPosition()
//当滚动条达到左偏移值的时候,出现固定列头
if($(this).scrollLeft()>self.hLeft){
self.fixedCol=true
}else{
self.fixedCol=false
}
//当滚动条达到上偏移值的时候,出现固定表头
if($(this).scrollTop()>self.hHeight){
self.fixedHeader=true
}else{
self.fixedHeader=false
}
//当表格移到左上角时,出现固定的A1表格
if($(this).scrollLeft()>self.hLeft&&$(this).scrollTop()>self.hHeight){
self.fixedA1=true
}else{
self.fixedA1=false
}
})
},테이블의 이동은 테이블 헤더의 위치에 영향을 미치기 때문에 현재 위치를 변경해야 합니다. 테이블의 오프셋 값은 고정 헤더에 할당됩니다. 첫 번째 열
setPosition:function(){
$("#fHeader").css("left",this.hLeft-$(document).scrollLeft())
$(".fixedCol").css("top",this.hHeight-$(document).scrollTop())
}Jq는 고정된 헤더와 첫 번째 열을 달성하기 위해 여러 테이블을 생성하기 위해 모니터링하고 스크롤합니다.html
2 고정된 헤더와 첫 번째 열을 달성하기 위해 스타일을 제어합니다
아이디어: 테이블이 임계 값에 도달할 때 , 헤더 변경, 첫 번째 열의 스타일
먼저 고정 헤더 구현
<!DOCTYPE html>
<html>
<head>
<meta charset="UTF-8">
<title></title>
<style type="text/css">
th,
td {
min-width: 200px;
height: 50px;
}
table {
margin: 300px
}
.fHeader {
background: lightblue;
position: fixed;
top: 0;
}
[v-cloak]{
display: none;
}
</style>
</head>
<body v-cloak>
<table border="1" cellspacing="0">
<thead>
<tr :class="{fHeader:fixedHeader}">
<th v-for="item in th">{{item.key}}</th>
</tr>
</thead>
<tbody>
<tr v-for="item in tl">
<td v-for="list in item">{{list.key}}</td>
</tr>
</tbody>
</table>
<script src="vue.js"></script>
<script src="jquery.js"></script>
<script>
var vm = new Vue({
el: "body",
data: function() {
return {
th: [],
tl: [],
temp: [],
fixedHeader: false,
}
},
methods: {
//生成表格,代码相同,省略
CTable: function() {},
//监控表头位置
headerMonitor:function(){
var self=this
var hHeight=$("table").offset().top;
$(document).scroll(function(){
//当滚动条达到偏移值的时候,出现固定表头
if($(this).scrollTop()>hHeight){
self.fixedHeader=true
}else{
self.fixedHeader=false
}
})
}
},
ready: function() {
this.CTable();
this.headerMonitor()
},
})
</script>
</body>
</html>고정 첫 번째 열 추가
.fixedCol>:first-child{
background: lightblue;
position: fixed;
z-index: 1;
border:1px solid grey;
left: 0;
line-height: 50px;
}테이블 위치 모니터링
//监控表头,首列位置
monitor:function(){
this.setPosition()
var self=this
$(document).scroll(function(){
self.setPosition();
//当滚动条达到偏移值的时候,出现固定表头
if($(this).scrollTop()>self.hHeight){
self.fixedHeader=true;
}else{
self.fixedHeader=false
}
//当滚动条达到左偏移值的时候,出现固定列头
if($(this).scrollLeft()>self.hLeft){
self.fixedCol=true
}else{
self.fixedCol=false
}
//当表格移到左上角时,出现固定的A1表格
if($(this).scrollLeft()>self.hLeft&&$(this).scrollTop()>self.hHeight){
self.fixedA1=true
}else{
self.fixedA1=false
}
})
},오프셋 값 설정
//使固定表头与列头的偏差与当前表格的偏移值相等
setPosition:function(){
$(".fixedHeader").css("left",this.hLeft-$(document).scrollLeft())
for(var i=0,len=this.tl.length+1;i<len;i++){
//因为设置了“border-collapse:collapse”,所以要加“54-1”
$(".fixedCol>:first-child").eq(i).css("top",this.hHeight-$(document).scrollTop()+53*i)
}
}헤더가 고정되면 되기 때문이죠 위치 지정하면 문서 흐름과 테이블에서 벗어나게 됩니다. 두 번째 행이 숨겨지므로 너비와 높이를 확장하려면 두 번째 열이 필요합니다
/*因为fixed定位不占位,当固定表头出现时,有一行会补到表头位置,即有一行跳空,将tbody的第一行行高加倍*/
.fixedHeaderGap:first-child>td{
padding-top:54px;
}
/*因为fixed定位不占位,当固定列头出现时,有一列会补到列头位置,即有一列跳空,将tbody的第二列p设置padding*/
.fixedCol>:nth-child(2){
padding-left: 205px;
}브라우저가 페이지를 다시 열 때 테이블은 여전히 고정 헤더의 위험 상태에 도달합니다
watch:{
//页面初始加载时,使固定表头与列头的偏差与当前表格的偏移值相等
"fixedHeader":function(){
this.setPosition()
},
"fixedCol":function(){
this.setPosition()
},
},스타일을 변경하여 테이블 헤더의 첫 번째 열을 수정했습니다.html
3. 스크롤 모니터링을 구현하기 위한 Vue 사용자 정의 지침
vue를 사용하면 엄청난 라이브러리가 발생합니다. Jq는 거의 사용되지 않으며 vue 관계자는 Dom 요소 작동을 권장하지 않으므로 고정 헤더와 첫 번째 열을 구현하도록 지침을 사용자 정의할 수 있습니다. 이 글에서는 Vue.js v1.0.26을 사용하고 있지만 실제로는 V2.0의 아이디어도 같습니다.
코드 바로가기
<!DOCTYPE html>
<html>
<head>
<meta charset="UTF-8">
<title></title>
<style type="text/css">
th,
td {
min-width: 200px;
height: 50px;
}
#sTable {
margin: 300px
}
.fixedCol{
position: fixed;
left: 0;
background: lightblue;
z-index: 1;
}
#fHeader {
background: lightblue;
position: fixed;
top: 0;
z-index: 1;
}
.fixedA1{
background: lightblue;
position: fixed;
top: 0;
left: 0;
z-index:2;
}
[v-cloak]{
display: none;
}
</style>
</head>
<body v-cloak>
<!--固定A1-->
<table border="1" cellspacing="0" class="fixedA1" v-show="fixedA1">
<thead>
<tr>
<th v-for="item in th" v-if="$index==0">{{item.key}}</th>
</tr>
</thead>
</table>
<!--固定列头-->
<table border="1" cellspacing="0" class="fixedCol" v-show="fixedCol">
<thead>
<tr>
<th v-for="item in th" v-if="$index==0">{{item.key}}</th>
</tr>
</thead>
<tbody>
<tr v-for="item in tl">
<td v-for="list in item" v-if="$index==0">{{list.key}}</td>
</tr>
</tbody>
</table >
<!--固定表头-->
<table border="1" id="fHeader" cellspacing="0" v-show="fixedHeader">
  <thead>
    <tr >
      <th v-for="item in th">{{item.key}}</th>
    </tr>
  </thead>
</table>
<!--活动的表格,绑定自定义指令-->
<table id="sTable" border="1" cellspacing="0" v-scroll>
<thead>
<tr>
<th v-for="item in th">{{item.key}}</th>
</tr>
</thead>
<tbody>
<tr v-for="item in tl">
<td v-for="list in item">{{list.key}}</td>
</tr>
</tbody>
</table>
<script src="vue.js"></script>
<script>
var vm = new Vue({
el: "body",
data: function() {
return {
th: [],
tl: [],
temp: [],
fixedCol: false,
fixedHeader:false,
fixedA1:false,
hLeft:0,
hHeight:0,
}
},
directives:{
scroll:{
bind:function(){
//触发滚动监听事件
window.addEventListener('scroll',function(){
this.vm.monitor()
})
}
}
},
methods: {
//生成表格
CTable: function() {},
//监控表头、列头位置
monitor:function(){
this.setPosition();
//当滚动条达到左偏移值的时候,出现固定列头
if(document.body.scrollLeft>this.hLeft){
this.fixedCol=true;
}else{
this.fixedCol=false;
}
//当滚动条达到上偏移值的时候,出现固定表头
if(document.body.scrollTop>this.hHeight){
this.fixedHeader=true;
}else{
this.fixedHeader=false;
}
//当表格移到左上角时,出现固定的A1表格
if(document.body.scrollLeft>this.hLeft&&document.body.scrollTop>this.hHeight){
this.fixedA1=true;
}else{
this.fixedA1=false;
}
},
//使固定表头与列头的偏差与当前表格的偏移值相等
setPosition:function(){
document.getElementById("fHeader").style.left=this.hLeft-document.body.scrollLeft+"px";
document.getElementsByClassName("fixedCol")[0].style.top=this.hHeight-document.body.scrollTop+"px";
},
},
ready: function() {
this.CTable();
this.hLeft=document.getElementById("sTable").offsetLeft;
this.hHeight=document.getElementById("sTable").offsetTop
this.monitor()
},
})
</script>
</body>
</html>커스텀 콜백 이벤트를 만들고 싶다면 eval()을 사용하면 되고,
<table id="sTable" border="1" cellspacing="0" v-scroll="monitor">
directives:{
  scroll:{
    bind:function(){
      var self=this;
      //触发滚动监听事件
      window.addEventListener('scroll',function(){
        //触发滚动回调事件
        eval("self.vm."+self.expression)()
      })
    }
  }
},커스텀 콜백 명령어로 테이블 컬럼 수정 가능 header.html
위 내용은 전체 내용입니다 이 글의 내용이 도움이 되었으면 좋겠습니다. 모두의 학습에 도움이 되기를 바랍니다. 더 많은 관련 내용은 PHP 중국어 홈페이지를 주목해주세요!
관련 권장 사항:
vue 코딩 스타일을 vscode에서 통합하는 방법 소개
Keep-alive 데이터 캐싱을 통한 vue 프로젝트 최적화 방법
Vue.js와 Ueditor 리치 텍스트 편집기 결합 방법
을 사용하세요.
위 내용은 Vue는 여러 방법을 사용하여 고정 테이블 헤더와 첫 번째 열을 구현합니다.의 상세 내용입니다. 자세한 내용은 PHP 중국어 웹사이트의 기타 관련 기사를 참조하세요!

핫 AI 도구

Undresser.AI Undress
사실적인 누드 사진을 만들기 위한 AI 기반 앱

AI Clothes Remover
사진에서 옷을 제거하는 온라인 AI 도구입니다.

Undress AI Tool
무료로 이미지를 벗다

Clothoff.io
AI 옷 제거제

Video Face Swap
완전히 무료인 AI 얼굴 교환 도구를 사용하여 모든 비디오의 얼굴을 쉽게 바꾸세요!

인기 기사
뜨거운 도구

메모장++7.3.1
사용하기 쉬운 무료 코드 편집기

SublimeText3 중국어 버전
중국어 버전, 사용하기 매우 쉽습니다.

스튜디오 13.0.1 보내기
강력한 PHP 통합 개발 환경

드림위버 CS6
시각적 웹 개발 도구

SublimeText3 Mac 버전
신 수준의 코드 편집 소프트웨어(SublimeText3)


 Vue에서 부트 스트랩을 사용하는 방법
Apr 07, 2025 pm 11:33 PM
Vue에서 부트 스트랩을 사용하는 방법
Apr 07, 2025 pm 11:33 PM
vue.js에서 bootstrap 사용은 5 단계로 나뉩니다 : Bootstrap 설치. main.js.의 부트 스트랩 가져 오기 부트 스트랩 구성 요소를 템플릿에서 직접 사용하십시오. 선택 사항 : 사용자 정의 스타일. 선택 사항 : 플러그인을 사용하십시오.
 Vue 용 버튼에 기능을 추가하는 방법
Apr 08, 2025 am 08:51 AM
Vue 용 버튼에 기능을 추가하는 방법
Apr 08, 2025 am 08:51 AM
HTML 템플릿의 버튼을 메소드에 바인딩하여 VUE 버튼에 함수를 추가 할 수 있습니다. 메소드를 정의하고 VUE 인스턴스에서 기능 로직을 작성하십시오.
 Vue에서 시계를 사용하는 방법
Apr 07, 2025 pm 11:36 PM
Vue에서 시계를 사용하는 방법
Apr 07, 2025 pm 11:36 PM
vue.js의 시계 옵션을 사용하면 개발자가 특정 데이터의 변경 사항을들을 수 있습니다. 데이터가 변경되면 콜백 기능을 트리거하여 업데이트보기 또는 기타 작업을 수행합니다. 구성 옵션에는 즉시 콜백을 실행할지 여부와 DEEP를 지정하는 즉시 포함되며, 이는 객체 또는 어레이에 대한 변경 사항을 재귀 적으로 듣는 지 여부를 지정합니다.
 Vue가 이전 페이지로 돌아 오는 방법
Apr 07, 2025 pm 11:30 PM
Vue가 이전 페이지로 돌아 오는 방법
Apr 07, 2025 pm 11:30 PM
vue.js는 이전 페이지로 돌아갈 수있는 네 가지 방법이 있습니다. $ router.go (-1) $ router.back () 사용 & lt; router-link to = & quot;/quot; Component Window.history.back () 및 메소드 선택은 장면에 따라 다릅니다.
 Vue 다중 페이지 개발은 무엇을 의미합니까?
Apr 07, 2025 pm 11:57 PM
Vue 다중 페이지 개발은 무엇을 의미합니까?
Apr 07, 2025 pm 11:57 PM
VUE 멀티 페이지 개발은 vue.js 프레임 워크를 사용하여 응용 프로그램을 구축하는 방법입니다. 여기서 응용 프로그램은 별도의 페이지로 나뉩니다. 코드 유지 보수 : 응용 프로그램을 여러 페이지로 분할하면 코드를보다 쉽게 관리하고 유지 관리 할 수 있습니다. 모듈 식 : 각 페이지는 쉬운 재사용 및 교체를 위해 별도의 모듈로 사용할 수 있습니다. 간단한 라우팅 : 페이지 간의 탐색은 간단한 라우팅 구성을 통해 관리 할 수 있습니다. SEO 최적화 : 각 페이지에는 자체 URL이있어 SEO가 도움이됩니다.
 React vs. Vue : Netflix는 어떤 프레임 워크를 사용합니까?
Apr 14, 2025 am 12:19 AM
React vs. Vue : Netflix는 어떤 프레임 워크를 사용합니까?
Apr 14, 2025 am 12:19 AM
NetflixusesAcustomFrameworkCalled "Gibbon"BuiltonReact, NotreactorVuedirectly.1) TeamExperience : 2) ProjectComplexity : vueforsimplerProjects, 3) CustomizationNeeds : reactoffersmoreflex.4)
 vue.js로 JS 파일을 참조하는 방법
Apr 07, 2025 pm 11:27 PM
vue.js로 JS 파일을 참조하는 방법
Apr 07, 2025 pm 11:27 PM
vue.js에서 JS 파일을 참조하는 세 가지 방법이 있습니다. & lt; script & gt; 꼬리표;; mounted () 라이프 사이클 후크를 사용한 동적 가져 오기; Vuex State Management Library를 통해 수입.
 Vue Traversal 사용 방법
Apr 07, 2025 pm 11:48 PM
Vue Traversal 사용 방법
Apr 07, 2025 pm 11:48 PM
vue.js가 트래버스 어레이 및 객체에 대한 세 가지 일반적인 방법이 있습니다. V- 결합 지시문은 V-FOR와 함께 사용하여 각 요소의 속성 값을 동적으로 설정할 수 있습니다. .MAP 메소드는 배열 요소를 새 배열로 변환 할 수 있습니다.
