

How to use VUE to extend ElTableColumn in element-ui
This time I will show you how to use VUE to extend ElTableColumn in element-ui, and what are the precautions for using VUE to extend ElTableColumn in element-ui. The following is a practical case, let's take a look. .
The company has a new requirement. Click on the head of ElTableColumn to search. My colleagues have already made this function, but it is a bit inconvenient to use. I plan to encapsulate it into a component and learn about it. ElTableColumn originally looked like this: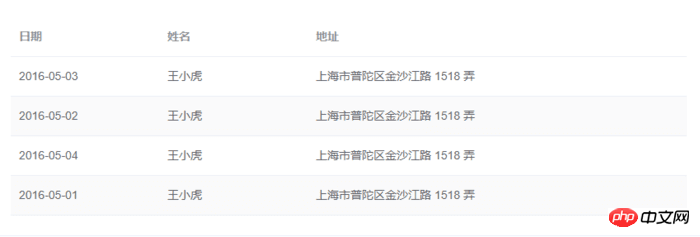
<!-- ElTableColumnPro.vue -->
<template>
<el-table-column v-if="visible" :formatter="formatter" :align='align' :prop="prop" :header-align="headerAlign" :label="label" :width="width" :render-header="renderHeader" >
<template slot-scope="scope">
<slot :row="scope.row" :$index="scope.$index" >
<span>{{fomatMethod(scope.row[prop])}}</span>
</slot>
</template>
</el-table-column>
</template>
<script>
import moment from "moment";
export default {
name: "el-table-column-pro",
props: {
prop: {
type: String
},
label: {
type: String
},
width: {
type: Number
},
renderType: {
type: String,
validator: value => ["date", "input", "select"].includes(value)
},
placeholder: {
type: String
},
rederWidth: {
type: String,
default: "230px"
},
param: {
type: String,
default: ""
},
startDate: {
type: String
},
endDate: {
type: String
},
selectList: {
type: Array
},
isClear: {
type: Boolean,
default:true
},
visible: {
type: Boolean,
default: true
},
filterIcon: {
type: String,
default: "el-icon-search"
},
callback: {
type: Function
},
formatter: {
type: Function,
default:(row, column, cellValue)=>cellValue
},
align:{
type:String
},
headerAlign:{
type:String
}
},
data() {
return {
formatD:this.filterIcon
};
},
methods: {
fomatMethod(value){
return this.formatter('','',value)
},
renderHeader(createElement, { column, $index }) {
switch (this.renderType) {
case "date":
return this.renderDate(createElement, { column, $index });
case "input":
return this.rederInput(createElement, { column, $index });
case "select":
return this.rederSelect(createElement, { column, $index });
default:
return column.label;
}
},
rederInput(createElement, { column, $index }) {
return createElement(
"p",
{
class: "filters",
style: {
color: column.color
}
},
[
createElement(
"el-popover",
{
props: {
placement: "bottom",
width: "200",
trigger: "click"
}
},
[
createElement("el-input", {
props: {
placeholder: this.placeholder,
value: this.param
},
nativeOn: {
keyup: event => {
if (event.keyCode === 13) {
this.$emit("update:param", event.target.value);
this.callback && this.callback();
}
}
},
on: {
blur: event => {
this.$emit("update:param", event.target.value);
this.callback && this.callback();
}
}
}),
createElement(
"span",
{
slot: "reference"
},
[
column.label,
createElement("i", {
class: this.filterIcon,
style: {
marginLeft: "4px"
}
})
]
)
]
)
]
);
},
rederSelect(createElement, { column, $index }) {
return createElement(
"p",
{
class: "filters",
style: {
color: column.color
}
},
[
createElement(
"el-popover",
{
props: {
placement: "bottom",
width: "200",
trigger: "click"
}
},
[
createElement(
"el-select",
{
props: {
placeholder: this.placeholder,
value: this.param,
clearable: this.isClear
},
on: {
input: value => {
this.$emit("update:param", value);
this.callback && this.callback();
}
}
},
[
this.selectList.map(item => {
return createElement("el-option", {
props: {
value: item.value,
label: item.label
}
});
})
]
),
createElement(
"span",
{
slot: "reference"
},
[
column.label,
createElement("i", {
class: this.filterIcon,
style: {
marginLeft: "4px"
}
})
]
)
]
)
]
);
},
renderDate(createElement, { column, $index }) {
return createElement(
"p",
{
class: "filters"
},
[
createElement(
"el-popover",
{
props: {
placement: "bottom",
width: this.rederWidth,
trigger: "click"
}
},
[
createElement("el-date-picker", {
props: {
placeholder: this.placeholder,
value: this.value,
type: "daterange",
rangeSeparator:"至",
startPlaceholder:"开始日期",
endPlaceholder:"结束日期",
},
style: {
width: this.rederWidth
},
on: {
input: value => {
if (value) {
const startDate = moment(value[0]).format("YYYY-MM-DD");
const endDate = moment(value[1]).format("YYYY-MM-DD");
this.$emit("update:startDate", startDate);
this.$emit("update:endDate", endDate);
this.callback && this.callback();
}
}
}
}),
createElement(
"span",
{
slot: "reference"
},
[
column.label,
createElement("i", {
class: this.filterIcon,
style: {
marginLeft: "4px"
}
})
]
)
]
)
]
);
}
}
};
</script>
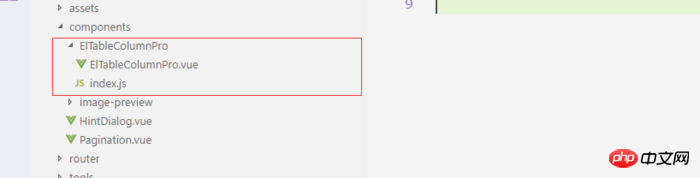
<!-- index.js -->
import ElTableColumnPro from './ElTableColumnPro'
ElTableColumnPro.install = function(Vue) {
Vue.component(ElTableColumnPro.name, ElTableColumnPro);
};
export default ElTableColumnPro;Installation
import ElTableColumnPro from 'components/ElTableColumnPro/index'
...
...
...
Vue.use(ElTableColumnPro)
Use
 <el-table :data="bankFlow" style="width:100%" stripe>
    <el-table-column-pro :visible="showMore" prop="transactionId" label="流水号" :width="120"> </el-table-column-pro>
    <el-table-column-pro prop="clientCode" label="客户代码 " :width="120" placeholder="请输入客户代码" :callback="requestTransactionLogs" renderType="input" :param.sync="request_params.clientCode"> </el-table-column-pro>
    <el-table-column-pro prop="eventTypeName" label="事件 " placeholder="请选择事件"  :selectList="listEventEnum" :callback="requestTransactionLogs" renderType="select" :param.sync="request_params.event" :width="100"> </el-table-column-pro>
    <el-table-column-pro prop="createTime" :callback="requestTransactionLogs" :startDate.sync="request_params.startDate" :endDate.sync="request_params.endDate" :formatter="$timeformat" label="时间" renderType="date" :width="180" ></el-table-column-pro>
 </el-table>
 <el-table :data="lists.content" v-loading="loading" @row-dblclick="detail" >
    <el-table-column-pro :width="120" prop="clientCode" label="客户代码 " align="center" header-align="center" placeholder="请输入客户代码" :callback="getLists" renderType="input" :param.sync="params.clientCode"></el-table-column-pro>
    <el-table-column-pro label="内容 " placeholder="请输入内容" :callback="getLists" renderType="input" :param.sync="params.content">
        <template slot-scope="scope">
           <pre class="brush:php;toolbar:false">{{scope.row.content}}
How to verify the E-mail address format in JS
How to use Vue data monitoring method watch
The above is the detailed content of How to use VUE to extend ElTableColumn in element-ui. For more information, please follow other related articles on the PHP Chinese website!

Hot AI Tools

Undresser.AI Undress
AI-powered app for creating realistic nude photos

AI Clothes Remover
Online AI tool for removing clothes from photos.

Undress AI Tool
Undress images for free

Clothoff.io
AI clothes remover

Video Face Swap
Swap faces in any video effortlessly with our completely free AI face swap tool!

Hot Article
Hot Tools

Notepad++7.3.1
Easy-to-use and free code editor

SublimeText3 Chinese version
Chinese version, very easy to use

Zend Studio 13.0.1
Powerful PHP integrated development environment

Dreamweaver CS6
Visual web development tools

SublimeText3 Mac version
God-level code editing software (SublimeText3)
Hot Topics


 From start to finish: How to use php extension cURL to make HTTP requests
Jul 29, 2023 pm 05:07 PM
From start to finish: How to use php extension cURL to make HTTP requests
Jul 29, 2023 pm 05:07 PM
From start to finish: How to use php extension cURL for HTTP requests Introduction: In web development, it is often necessary to communicate with third-party APIs or other remote servers. Using cURL to make HTTP requests is a common and powerful way. This article will introduce how to use PHP to extend cURL to perform HTTP requests, and provide some practical code examples. 1. Preparation First, make sure that php has the cURL extension installed. You can execute php-m|grepcurl on the command line to check
 How to use Vue and Element-UI to implement lazy loading of images
Jul 22, 2023 pm 04:05 PM
How to use Vue and Element-UI to implement lazy loading of images
Jul 22, 2023 pm 04:05 PM
How to use Vue and Element-UI to implement lazy loading of images Lazy loading (Lazyloading) is a technology that delays loading of images, which can effectively increase page loading speed, save bandwidth and improve user experience. In the Vue project, we can use Element-UI and some plug-ins to implement the image lazy loading function. This article will introduce how to use Vue and Element-UI to implement lazy loading of images, and attach corresponding code examples. 1. Install the necessary dependencies before starting
 Extensions and third-party modules for PHP functions
Apr 13, 2024 pm 02:12 PM
Extensions and third-party modules for PHP functions
Apr 13, 2024 pm 02:12 PM
To extend PHP function functionality, you can use extensions and third-party modules. Extensions provide additional functions and classes that can be installed and enabled through the pecl package manager. Third-party modules provide specific functionality and can be installed through the Composer package manager. Practical examples include using extensions to parse complex JSON data and using modules to validate data.
 How to implement calendar and date selection functions using Vue and Element-UI
Jul 22, 2023 pm 05:30 PM
How to implement calendar and date selection functions using Vue and Element-UI
Jul 22, 2023 pm 05:30 PM
Introduction to how to use Vue and Element-UI to implement calendar and date selection functions: In front-end development, calendar and date selection functions are one of the very common requirements. Vue and Element-UI are a pair of very powerful development tools. Combining them can easily implement calendar and date selection functions. This article will introduce how to use Vue and Element-UI to create a simple calendar and date selection function, and provide code examples to help readers understand the specific steps and methods of implementation. Preparation: at the beginning
 How to install mbstring extension under CENTOS7?
Jan 06, 2024 pm 09:59 PM
How to install mbstring extension under CENTOS7?
Jan 06, 2024 pm 09:59 PM
1.UncaughtError:Calltoundefinedfunctionmb_strlen(); When the above error occurs, it means that we have not installed the mbstring extension; 2. Enter the PHP installation directory cd/temp001/php-7.1.0/ext/mbstring 3. Start phpize(/usr/local/bin /phpize or /usr/local/php7-abel001/bin/phpize) command to install php extension 4../configure--with-php-config=/usr/local/php7-abel
 How to use Vue and Element-UI to implement data filtering and search functions
Jul 21, 2023 pm 08:40 PM
How to use Vue and Element-UI to implement data filtering and search functions
Jul 21, 2023 pm 08:40 PM
How to use Vue and Element-UI to implement data filtering and search functions. In modern web development, data filtering and search functions are very common and important requirements. Vue and Element-UI are currently very popular front-end frameworks. They provide many powerful tools and components that can help us easily implement data filtering and search functions. This article will introduce how to use Vue and Element-UI to implement these functions, and provide detailed code examples. First, we need to prepare a
 How to use Vue and Element-UI to implement message notification function
Jul 21, 2023 pm 12:40 PM
How to use Vue and Element-UI to implement message notification function
Jul 21, 2023 pm 12:40 PM
How to use Vue and Element-UI to implement message notification functions. With the continuous development of front-end technology, more and more websites and applications need to implement message notification functions in order to display important information to users in a timely manner. In Vue development, this function can be quickly realized by combining the Element-UI framework. This article will introduce in detail how to use Vue and Element-UI to implement the message notification function, and provide relevant code examples. 1. Preparation work is implemented using Vue and Element-UI
 How to use Vue and Element-UI to group and summarize data
Jul 21, 2023 pm 02:37 PM
How to use Vue and Element-UI to group and summarize data
Jul 21, 2023 pm 02:37 PM
How to use Vue and Element-UI to group and summarize data. In front-end development, we often encounter situations where we need to group and summarize data. Vue is a very popular JavaScript framework, and Element-UI is a component library based on Vue. It provides a rich set of UI components that can help us quickly build pages. This article will introduce how to use Vue and Element-UI to group and summarize data, and illustrate it with code examples. Preparatory work
