

Using jquery plug-in ajaxupload for file upload
这次给大家带来使用jquery插件ajaxupload进行文件上传,使用jquery插件ajaxupload进行文件上传的注意事项有哪些,下面就是实战案例,一起来看一下。
本文实例讲述了jquery插件ajaxupload实现文件上传操作代码。分享给大家供大家参考。具体如下:
运行效果截图如下:
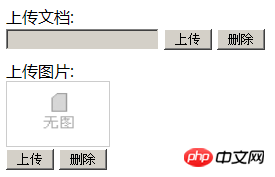
图1 文件上传前

图2 文件上传后
具体代码如下:
1、创建页面并编写HTML
上传文档:
<p class="uploadFile">
 <span id="doc"><input type="text" disabled="disabled" /></span>
 <input type="hidden" id="hidFileName" />
 <input type="button" id="btnUploadFile" value="上传" />
 <input type="button" id="btnDeleteFile" value="删除" />
</p>
上传图片:
<p class="uploadImg">
 <img id="imgShow" src="/images/nophoto.gif" />
 <input type="hidden" id="hidImgName" />
 <input type="button" id="btnUploadImg" value="上传" />
 <input type="button" id="btnDeleteImg" value="删除" />
</p>
2、引用AjaxUpload.js文件
<script src="/js/common/AjaxUpload.js" type="text/javascript"></script>
3、编写JS脚本
window.onload = function() {
init(); //初始化
}
//初始化
function init() {
//初始化文档上传
var btnFile = document.getElementById("btnUploadFile");
var doc = document.getElementById("doc");
var hidFileName = document.getElementById("hidFileName");
document.getElementById("btnDeleteFile").onclick = function() { DelFile(doc, hidFileName); };
g_AjxUploadFile(btnFile, doc, hidFileName);
//初始化图片上传
var btnImg = document.getElementById("btnUploadImg");
var img = document.getElementById("imgShow");
var hidImgName = document.getElementById("hidImgName");
document.getElementById("btnDeleteImg").onclick = function() { DelImg(img, hidImgName); };
g_AjxUploadImg(btnImg, img, hidImgName);
}
var g_AjxTempDir = "/file/temp/";
//文档上传
function g_AjxUploadFile(btn, doc, hidPut, action) {
var button = btn, interval;
new AjaxUpload(button, {
action: ((action == null || action == undefined) ? '/Common/UploadHandler.ashx?fileType=file' : action),
data: {},
name: 'myfile',
onSubmit: function(file, ext) {
if (!(ext && /^(rar|zip|pdf|pdfx|txt|csv|xls|xlsx|doc|docx|RAR|ZIP|PDF|PDFX|TXT|CSV|XLS|XLSX|DOC|DOCX)$/.test(ext))) {
alert("您上传的文档格式不对,请重新选择!");
return false;
}
},
onComplete: function(file, response) {
flagValue = response;
if (flagValue == "1") {
alert("您上传的文档格式不对,请重新选择!");
}
else if (flagValue == "2") {
alert("您上传的文档大于2M,请重新选择!");
}
else if (flagValue == "3") {
alert("文档上传失败!");
}
else {
hidPut.value = response;
doc.innerHTML="<a href='" + g_AjxTempDir + response + "' target='_blank'>" + response + "</a>";
}
}
});
}
//图片上传
function g_AjxUploadImg(btn, img, hidPut) {
var button = btn, interval;
new AjaxUpload(button, {
action: '/Common/UploadHandler.ashx?fileType=img',
data: {},
name: 'myfile',
onSubmit: function(file, ext) {
if (!(ext && /^(jpg|JPG|png|PNG|gif|GIF)$/.test(ext))) {
alert("您上传的图片格式不对,请重新选择!");
return false;
}
},
onComplete: function(file, response) {
flagValue = response;
if (flagValue == "1") {
alert("您上传的图片格式不对,请重新选择!");
}
else if (flagValue == "2") {
alert("您上传的图片大于200K,请重新选择!");
}
else if (flagValue == "3") {
alert("图片上传失败!");
}
else {
hidPut.value = response;
img.src = g_AjxTempDir + response;
}
}
});
}
//删除文档
function DelFile(doc, hidPut) {
hidPut.value = "";
doc.innerHTML = "<input type=\"text\" disabled=\"disabled\" />";
}
//删除图片
function DelImg(img, hidPut) {
hidPut.value = "";
img.src = "/images/nophoto.gif";
}4、创建/Common/UploadHandler.ashx处理程序
<%@ WebHandler Language="C#" Class="UploadHandler" %>

using System;
using System.Web;
using System.Text.RegularExpressions;
using System.IO;

public class UploadHandler : IHttpHandler {
 private string _filedir = ""; //文件目录
 /// <summary>
 /// 处理上传文件(1:文件格式不正确、2:文件大小不正确、3:上传失败、文件名称:上传成功)
 /// </summary>
 /// <param name="context"></param>
 public void ProcessRequest (HttpContext context) {
  _filedir = context.Server.MapPath(@"/file/temp/");
  try
  {
   string result = "3";
   string fileType = context.Request.QueryString["fileType"]; //获取上传文件类型
   if (fileType == "file")
   {
    result = UploadFile(context); //文档上传
   }
   else if (fileType == "img")
   {
    result = UploadImg(context); //图片上传
   }
   context.Response.Write(result);
  }
  catch
  {
   context.Response.Write("3");//3文件上传失败
  }
 }

 /// <summary>
 /// 文档上传
 /// </summary>
 /// <param name="context"></param>
 /// <returns></returns>
 private string UploadFile(HttpContext context)
 {
  int cout = context.Request.Files.Count;
  if (cout > 0)
  {
   HttpPostedFile hpf = context.Request.Files[0];
   if (hpf != null)
   {
    string fileExt = Path.GetExtension(hpf.FileName).ToLower();
    //只能上传文件,过滤不可上传的文件类型
    string fileFilt = ".rar|.zip|.pdf|.pdfx|.txt|.csv|.xls|.xlsx|.doc|.docx......";
    if (fileFilt.IndexOf(fileExt) <= -1)
    {
     return "1";
    }

    //判断文件大小
    int length = hpf.ContentLength;
    if (length > 2097152)
    {
     return "2";
    }

    Random rd = new Random();
    DateTime nowTime = DateTime.Now;
    string newFileName = nowTime.Year.ToString() + nowTime.Month.ToString() + nowTime.Day.ToString() + nowTime.Hour.ToString() + nowTime.Minute.ToString() + nowTime.Second.ToString() + rd.Next(1000, 1000000) + Path.GetExtension(hpf.FileName);
    if (!Directory.Exists(_filedir))
    {
     Directory.CreateDirectory(_filedir);
    }
    string fileName = _filedir + newFileName;
    hpf.SaveAs(fileName);
    return newFileName;
   }

  }
  return "3";
 }

 /// <summary>
 /// 图片上传
 /// </summary>
 /// <param name="context"></param>
 /// <returns></returns>
 private string UploadImg(HttpContext context)
 {
  int cout = context.Request.Files.Count;
  if (cout > 0)
  {
   HttpPostedFile hpf = context.Request.Files[0];
   if (hpf != null)
   {
    string fileExt = Path.GetExtension(hpf.FileName).ToLower();
    //只能上传文件,过滤不可上传的文件类型
    string fileFilt = ".gif|.jpg|.php|.jsp|.jpeg|.png|......";
    if (fileFilt.IndexOf(fileExt) <= -1)
    {
     return "1";
    }

    //判断文件大小
    int length = hpf.ContentLength;
    if (length > 204800)
    {
     return "2";
    }

    Random rd = new Random();
    DateTime nowTime = DateTime.Now;
    string newFileName = nowTime.Year.ToString() + nowTime.Month.ToString() + nowTime.Day.ToString() + nowTime.Hour.ToString() + nowTime.Minute.ToString() + nowTime.Second.ToString() + rd.Next(1000, 1000000) + Path.GetExtension(hpf.FileName);
    if (!Directory.Exists(_filedir))
    {
     Directory.CreateDirectory(_filedir);
    }
    string fileName = _filedir + newFileName;
    hpf.SaveAs(fileName);
    return newFileName;
   }

  }
  return "3";
 }

 #region IHttpHandler 成员

 public bool IsReusable
 {
  get { throw new NotImplementedException(); }
 }

 #endregion
}附件1:页面CSS样式
/*上传文件*/
.uploadFile{margin-bottom:10px;}
/*上传图片*/
.uploadImg{}
.uploadImg img{width:102px; height:64px; border:1px solid #CCCCCC; display: block;}附件2:AjaxUpload.js文件
/**
* AJAX Upload ( http://valums.com/ajax-upload/ )
* Copyright (c) Andris Valums
* Licensed under the MIT license ( http://valums.com/mit-license/ )
* Thanks to Gary Haran, David Mark, Corey Burns and others for contributions
*/
(function () {
/* global window */
/* jslint browser: true, devel: true, undef: true, nomen: true, bitwise: true, regexp: true, newcap: true, immed: true */
/**
* Wrapper for FireBug's console.log
*/
function log() {
if (typeof(console) != 'undefined' && typeof(console.log) == 'function') {
Array.prototype.unshift.call(arguments, '[Ajax Upload]');
console.log(Array.prototype.join.call(arguments, ' '));
}
}
/**
* Attaches event to a dom element.
* @param {Element} el
* @param type event name
* @param fn callback This refers to the passed element
*/
function addEvent(el, type, fn) {
if (el.addEventListener) {
el.addEventListener(type, fn, false);
} else if (el.attachEvent) {
el.attachEvent('on' + type, function () {
fn.call(el);
});
} else {
throw new Error('not supported or DOM not loaded');
}
}
/**
* Attaches resize event to a window, limiting
* number of event fired. Fires only when encounteres
* delay of 100 after series of events.
*
* Some browsers fire event multiple times when resizing
* http://www.quirksmode.org/dom/events/resize.html
*
* @param fn callback This refers to the passed element
*/
function addResizeEvent(fn) {
var timeout;
addEvent(window, 'resize', function () {
if (timeout) {
clearTimeout(timeout);
}
timeout = setTimeout(fn, 100);
});
}
// Needs more testing, will be rewriten for next version
// getOffset function copied from jQuery lib (http://jquery.com/)
if (document.documentElement.getBoundingClientRect) {
// Get Offset using getBoundingClientRect
// http://ejohn.org/blog/getboundingclientrect-is-awesome/
var getOffset = function (el) {
var box = el.getBoundingClientRect();
var doc = el.ownerDocument;
var body = doc.body;
var docElem = doc.documentElement; // for ie
var clientTop = docElem.clientTop || body.clientTop || 0;
var clientLeft = docElem.clientLeft || body.clientLeft || 0;
// In Internet Explorer 7 getBoundingClientRect property is treated as physical,
// while others are logical. Make all logical, like in IE8.
var zoom = 1;
if (body.getBoundingClientRect) {
var bound = body.getBoundingClientRect();
zoom = (bound.right - bound.left) / body.clientWidth;
}
if (zoom > 1) {
clientTop = 0;
clientLeft = 0;
}
var top = box.top / zoom + (window.pageYOffset || docElem && docElem.scrollTop / zoom || body.scrollTop / zoom) - clientTop,
left = box.left / zoom + (window.pageXOffset || docElem && docElem.scrollLeft / zoom || body.scrollLeft / zoom) - clientLeft;
return {
top: top,
left: left
};
};
} else {
// Get offset adding all offsets
var getOffset = function (el) {
var top = 0,
left = 0;
do {
top += el.offsetTop || 0;
left += el.offsetLeft || 0;
el = el.offsetParent;
} while (el);
return {
left: left,
top: top
};
};
}
/**
* Returns left, top, right and bottom properties describing the border-box,
* in pixels, with the top-left relative to the body
* @param {Element} el
* @return {Object} Contains left, top, right,bottom
*/
function getBox(el) {
var left, right, top, bottom;
var offset = getOffset(el);
left = offset.left;
top = offset.top;
right = left + el.offsetWidth;
bottom = top + el.offsetHeight;
return {
left: left,
right: right,
top: top,
bottom: bottom
};
}
/**
* Helper that takes object literal
* and add all properties to element.style
* @param {Element} el
* @param {Object} styles
*/
function addStyles(el, styles) {
for (var name in styles) {
if (styles.hasOwnProperty(name)) {
el.style[name] = styles[name];
}
}
}
/**
* Function places an absolutely positioned
* element on top of the specified element
* copying position and dimentions.
* @param {Element} from
* @param {Element} to
*/
function copyLayout(from, to) {
var box = getBox(from);
addStyles(to, {
position: 'absolute',
left: box.left + 'px',
top: box.top + 'px',
width: from.offsetWidth + 'px',
height: from.offsetHeight + 'px'
});
}
/**
* Creates and returns element from html chunk
* Uses innerHTML to create an element
*/
var toElement = (function () {
var p = document.createElement('p');
return function (html) {
p.innerHTML = html;
var el = p.firstChild;
return p.removeChild(el);
};
})();
/**
* Function generates unique id
* @return unique id
*/
var getUID = (function () {
var id = 0;
return function () {
return 'ValumsAjaxUpload' + id++;
};
})();
/**
* Get file name from path
* @param {String} file path to file
* @return filename
*/
function fileFromPath(file) {
return file.replace(/.*(\/|\\)/, "");
}
/**
* Get file extension lowercase
* @param {String} file name
* @return file extenstion
*/
function getExt(file) {
return (-1 !== file.indexOf('.')) ? file.replace(/.*[.]/, '') : '';
}
function hasClass(el, name) {
var re = new RegExp('\\b' + name + '\\b');
return re.test(el.className);
}
function addClass(el, name) {
if (!hasClass(el, name)) {
el.className += ' ' + name;
}
}
function removeClass(el, name) {
var re = new RegExp('\\b' + name + '\\b');
el.className = el.className.replace(re, '');
}
function removeNode(el) {
el.parentNode.removeChild(el);
}
/**
* Easy styling and uploading
* @constructor
* @param button An element you want convert to
* upload button. Tested dimentions up to 500x500px
* @param {Object} options See defaults below.
*/
window.AjaxUpload = function (button, options) {
this._settings = {
// Location of the server-side upload script
action: 'upload.php',
// File upload name
name: 'userfile',
// Additional data to send
data: {},
// Submit file as soon as it's selected
autoSubmit: true,
// The type of data that you're expecting back from the server.
// html and xml are detected automatically.
// Only useful when you are using json data as a response.
// Set to "json" in that case.
responseType: false,
// Class applied to button when mouse is hovered
hoverClass: 'hover',
// Class applied to button when AU is disabled
disabledClass: 'disabled',
// When user selects a file, useful with autoSubmit disabled
// You can return false to cancel upload
onChange: function (file, extension) {},
// Callback to fire before file is uploaded
// You can return false to cancel upload
onSubmit: function (file, extension) {},
// Fired when file upload is completed
// WARNING! DO NOT USE "FALSE" STRING AS A RESPONSE!
onComplete: function (file, response) {}
};
// Merge the users options with our defaults
for (var i in options) {
if (options.hasOwnProperty(i)) {
this._settings[i] = options[i];
}
}
// button isn't necessary a dom element
if (button.jquery) {
// jQuery object was passed
button = button[0];
} else if (typeof button == "string") {
if (/^#.*/.test(button)) {
// If jQuery user passes #elementId don't break it
button = button.slice(1);
}
button = document.getElementById(button);
}
if (!button || button.nodeType !== 1) {
throw new Error("Please make sure that you're passing a valid element");
}
if (button.nodeName.toUpperCase() == 'A') {
// disable link
addEvent(button, 'click', function (e) {
if (e && e.preventDefault) {
e.preventDefault();
} else if (window.event) {
window.event.returnValue = false;
}
});
}
// DOM element
this._button = button;
// DOM element
this._input = null;
// If disabled clicking on button won't do anything
this._disabled = false;
// if the button was disabled before refresh if will remain
// disabled in FireFox, let's fix it
this.enable();
this._rerouteClicks();
};
// assigning methods to our class
AjaxUpload.prototype = {
setData: function (data) {
this._settings.data = data;
},
disable: function () {
addClass(this._button, this._settings.disabledClass);
this._disabled = true;
var nodeName = this._button.nodeName.toUpperCase();
if (nodeName == 'INPUT' || nodeName == 'BUTTON') {
this._button.setAttribute('disabled', 'disabled');
}
// hide input
if (this._input) {
// We use visibility instead of display to fix problem with Safari 4
// The problem is that the value of input doesn't change if it
// has display none when user selects a file
this._input.parentNode.style.visibility = 'hidden';
}
},
enable: function () {
removeClass(this._button, this._settings.disabledClass);
this._button.removeAttribute('disabled');
this._disabled = false;
},
/**
* Creates invisible file input
* that will hover above the button
* <p><input type='file' /></p>
*/
_createInput: function () {
var self = this;
var input = document.createElement("input");
input.setAttribute('type', 'file');
input.setAttribute('name', this._settings.name);
addStyles(input, {
'position': 'absolute',
// in Opera only 'browse' button
// is clickable and it is located at
// the right side of the input
'right': 0,
'margin': 0,
'padding': 0,
'fontSize': '480px',
'cursor': 'pointer'
});
var p = document.createElement("p");
addStyles(p, {
'display': 'block',
'position': 'absolute',
'overflow': 'hidden',
'margin': 0,
'padding': 0,
'opacity': 0,
// Make sure browse button is in the right side
// in Internet Explorer
'direction': 'ltr',
//Max zIndex supported by Opera 9.0-9.2
'zIndex': 2147483583
});
// Make sure that element opacity exists.
// Otherwise use IE filter
if (p.style.opacity !== "0") {
if (typeof(p.filters) == 'undefined') {
throw new Error('Opacity not supported by the browser');
}
p.style.filter = "alpha(opacity=0)";
}
addEvent(input, 'change', function () {
if (!input || input.value === '') {
return;
}
// Get filename from input, required
// as some browsers have path instead of it
var file = fileFromPath(input.value);
if (false === self._settings.onChange.call(self, file, getExt(file))) {
self._clearInput();
return;
}
// Submit form when value is changed
if (self._settings.autoSubmit) {
self.submit();
}
});
addEvent(input, 'mouseover', function () {
addClass(self._button, self._settings.hoverClass);
});
addEvent(input, 'mouseout', function () {
removeClass(self._button, self._settings.hoverClass);
// We use visibility instead of display to fix problem with Safari 4
// The problem is that the value of input doesn't change if it
// has display none when user selects a file
input.parentNode.style.visibility = 'hidden';
});
p.appendChild(input);
document.body.appendChild(p);
this._input = input;
},
_clearInput: function () {
if (!this._input) {
return;
}
// this._input.value = ''; Doesn't work in IE6
removeNode(this._input.parentNode);
this._input = null;
this._createInput();
removeClass(this._button, this._settings.hoverClass);
},
/**
* Function makes sure that when user clicks upload button,
* the this._input is clicked instead
*/
_rerouteClicks: function () {
var self = this;
// IE will later display 'access denied' error
// if you use using self._input.click()
// other browsers just ignore click()
addEvent(self._button, 'mouseover', function () {
if (self._disabled) {
return;
}
if (!self._input) {
self._createInput();
}
var p = self._input.parentNode;
copyLayout(self._button, p);
p.style.visibility = 'visible';
});
// commented because we now hide input on mouseleave
/**
* When the window is resized the elements
* can be misaligned if button position depends
* on window size
*/
//addResizeEvent(function(){
// if (self._input){
// copyLayout(self._button, self._input.parentNode);
// }
//});
},
/**
* Creates iframe with unique name
* @return {Element} iframe
*/
_createIframe: function () {
// We can't use getTime, because it sometimes return
// same value in safari :(
var id = getUID();
// We can't use following code as the name attribute
// won't be properly registered in IE6, and new window
// on form submit will open
// var iframe = document.createElement('iframe');
// iframe.setAttribute('name', id);
var iframe = toElement('<iframe src="javascript:false;" name="' + id + '" />');
// src="javascript:false; was added
// because it possibly removes ie6 prompt
// "This page contains both secure and nonsecure items"
// Anyway, it doesn't do any harm.
iframe.setAttribute('id', id);
iframe.style.display = 'none';
document.body.appendChild(iframe);
return iframe;
},
/**
* Creates form, that will be submitted to iframe
* @param {Element} iframe Where to submit
* @return {Element} form
*/
_createForm: function (iframe) {
var settings = this._settings;
// We can't use the following code in IE6
// var form = document.createElement('form');
// form.setAttribute('method', 'post');
// form.setAttribute('enctype', 'multipart/form-data');
// Because in this case file won't be attached to request
var form = toElement('<form method="post" enctype="multipart/form-data"></form>');
form.setAttribute('action', settings.action);
form.setAttribute('target', iframe.name);
form.style.display = 'none';
document.body.appendChild(form);
// Create hidden input element for each data key
for (var prop in settings.data) {
if (settings.data.hasOwnProperty(prop)) {
var el = document.createElement("input");
el.setAttribute('type', 'hidden');
el.setAttribute('name', prop);
el.setAttribute('value', settings.data[prop]);
form.appendChild(el);
}
}
return form;
},
/**
* Gets response from iframe and fires onComplete event when ready
* @param iframe
* @param file Filename to use in onComplete callback
*/
_getResponse: function (iframe, file) {
// getting response
var toDeleteFlag = false,
self = this,
settings = this._settings;
addEvent(iframe, 'load', function () {
if ( // For Safari
iframe.src == "javascript:'%3Chtml%3E%3C/html%3E';" ||
// For FF, IE
iframe.src == "javascript:'<html></html>';") {
// First time around, do not delete.
// We reload to blank page, so that reloading main page
// does not re-submit the post.
if (toDeleteFlag) {
// Fix busy state in FF3
setTimeout(function () {
removeNode(iframe);
},
0);
}
return;
}
var doc = iframe.contentDocument ? iframe.contentDocument : window.frames[iframe.id].document;
// fixing Opera 9.26,10.00
if (doc.readyState && doc.readyState != 'complete') {
// Opera fires load event multiple times
// Even when the DOM is not ready yet
// this fix should not affect other browsers
return;
}
// fixing Opera 9.64
if (doc.body && doc.body.innerHTML == "false") {
// In Opera 9.64 event was fired second time
// when body.innerHTML changed from false
// to server response approx. after 1 sec
return;
}
var response;
if (doc.XMLDocument) {
// response is a xml document Internet Explorer property
response = doc.XMLDocument;
} else if (doc.body) {
// response is html document or plain text
response = doc.body.innerHTML;
if (settings.responseType && settings.responseType.toLowerCase() == 'json') {
// If the document was sent as 'application/javascript' or
// 'text/javascript', then the browser wraps the text in a <pre class="brush:php;toolbar:false">
// tag and performs html encoding on the contents. In this case,
// we need to pull the original text content from the text node's
// nodeValue property to retrieve the unmangled content.
// Note that IE6 only understands text/html
if (doc.body.firstChild && doc.body.firstChild.nodeName.toUpperCase() == 'PRE') {
response = doc.body.firstChild.firstChild.nodeValue;
}
if (response) {
response = eval("(" + response + ")");
} else {
response = {};
}
}
} else {
// response is a xml document
response = doc;
}
settings.onComplete.call(self, file, response);
// Reload blank page, so that reloading main page
// does not re-submit the post. Also, remember to
// delete the frame
toDeleteFlag = true;
// Fix IE mixed content issue
iframe.src = "javascript:'<html></html>';";
});
},
/**
* Upload file contained in this._input
*/
submit: function () {
var self = this,
settings = this._settings;
if (!this._input || this._input.value === '') {
return;
}
var file = fileFromPath(this._input.value);
// user returned false to cancel upload
if (false === settings.onSubmit.call(this, file, getExt(file))) {
this._clearInput();
return;
}
// sending request
var iframe = this._createIframe();
var form = this._createForm(iframe);
// assuming following structure
// p -> input type='file'
removeNode(this._input.parentNode);
removeClass(self._button, self._settings.hoverClass);
form.appendChild(this._input);
form.submit();
// request set, clean up
removeNode(form);
form = null;
removeNode(this._input);
this._input = null;
// Get response from iframe and fire onComplete event when ready
this._getResponse(iframe, file);
// get ready for next request
this._createInput();
}
};
})();相信看了本文案例你已经掌握了方法,更多精彩请关注php中文网其它相关文章!
推荐阅读:
The above is the detailed content of Using jquery plug-in ajaxupload for file upload. For more information, please follow other related articles on the PHP Chinese website!

Hot AI Tools

Undresser.AI Undress
AI-powered app for creating realistic nude photos

AI Clothes Remover
Online AI tool for removing clothes from photos.

Undress AI Tool
Undress images for free

Clothoff.io
AI clothes remover

Video Face Swap
Swap faces in any video effortlessly with our completely free AI face swap tool!

Hot Article
Hot Tools

Notepad++7.3.1
Easy-to-use and free code editor

SublimeText3 Chinese version
Chinese version, very easy to use

Zend Studio 13.0.1
Powerful PHP integrated development environment

Dreamweaver CS6
Visual web development tools

SublimeText3 Mac version
God-level code editing software (SublimeText3)
Hot Topics


 Detailed explanation of jQuery reference methods: Quick start guide
Feb 27, 2024 pm 06:45 PM
Detailed explanation of jQuery reference methods: Quick start guide
Feb 27, 2024 pm 06:45 PM
Detailed explanation of jQuery reference method: Quick start guide jQuery is a popular JavaScript library that is widely used in website development. It simplifies JavaScript programming and provides developers with rich functions and features. This article will introduce jQuery's reference method in detail and provide specific code examples to help readers get started quickly. Introducing jQuery First, we need to introduce the jQuery library into the HTML file. It can be introduced through a CDN link or downloaded
 How to use PUT request method in jQuery?
Feb 28, 2024 pm 03:12 PM
How to use PUT request method in jQuery?
Feb 28, 2024 pm 03:12 PM
How to use PUT request method in jQuery? In jQuery, the method of sending a PUT request is similar to sending other types of requests, but you need to pay attention to some details and parameter settings. PUT requests are typically used to update resources, such as updating data in a database or updating files on the server. The following is a specific code example using the PUT request method in jQuery. First, make sure you include the jQuery library file, then you can send a PUT request via: $.ajax({u
 jQuery Tips: Quickly modify the text of all a tags on the page
Feb 28, 2024 pm 09:06 PM
jQuery Tips: Quickly modify the text of all a tags on the page
Feb 28, 2024 pm 09:06 PM
Title: jQuery Tips: Quickly modify the text of all a tags on the page In web development, we often need to modify and operate elements on the page. When using jQuery, sometimes you need to modify the text content of all a tags in the page at once, which can save time and energy. The following will introduce how to use jQuery to quickly modify the text of all a tags on the page, and give specific code examples. First, we need to introduce the jQuery library file and ensure that the following code is introduced into the page: <
 How to remove the height attribute of an element with jQuery?
Feb 28, 2024 am 08:39 AM
How to remove the height attribute of an element with jQuery?
Feb 28, 2024 am 08:39 AM
How to remove the height attribute of an element with jQuery? In front-end development, we often encounter the need to manipulate the height attributes of elements. Sometimes, we may need to dynamically change the height of an element, and sometimes we need to remove the height attribute of an element. This article will introduce how to use jQuery to remove the height attribute of an element and provide specific code examples. Before using jQuery to operate the height attribute, we first need to understand the height attribute in CSS. The height attribute is used to set the height of an element
 Use jQuery to modify the text content of all a tags
Feb 28, 2024 pm 05:42 PM
Use jQuery to modify the text content of all a tags
Feb 28, 2024 pm 05:42 PM
Title: Use jQuery to modify the text content of all a tags. jQuery is a popular JavaScript library that is widely used to handle DOM operations. In web development, we often encounter the need to modify the text content of the link tag (a tag) on the page. This article will explain how to use jQuery to achieve this goal, and provide specific code examples. First, we need to introduce the jQuery library into the page. Add the following code in the HTML file:
 Understand the role and application scenarios of eq in jQuery
Feb 28, 2024 pm 01:15 PM
Understand the role and application scenarios of eq in jQuery
Feb 28, 2024 pm 01:15 PM
jQuery is a popular JavaScript library that is widely used to handle DOM manipulation and event handling in web pages. In jQuery, the eq() method is used to select elements at a specified index position. The specific usage and application scenarios are as follows. In jQuery, the eq() method selects the element at a specified index position. Index positions start counting from 0, i.e. the index of the first element is 0, the index of the second element is 1, and so on. The syntax of the eq() method is as follows: $("s
 How to tell if a jQuery element has a specific attribute?
Feb 29, 2024 am 09:03 AM
How to tell if a jQuery element has a specific attribute?
Feb 29, 2024 am 09:03 AM
How to tell if a jQuery element has a specific attribute? When using jQuery to operate DOM elements, you often encounter situations where you need to determine whether an element has a specific attribute. In this case, we can easily implement this function with the help of the methods provided by jQuery. The following will introduce two commonly used methods to determine whether a jQuery element has specific attributes, and attach specific code examples. Method 1: Use the attr() method and typeof operator // to determine whether the element has a specific attribute
 Introduction to how to add new rows to a table using jQuery
Feb 29, 2024 am 08:12 AM
Introduction to how to add new rows to a table using jQuery
Feb 29, 2024 am 08:12 AM
jQuery is a popular JavaScript library widely used in web development. During web development, it is often necessary to dynamically add new rows to tables through JavaScript. This article will introduce how to use jQuery to add new rows to a table, and provide specific code examples. First, we need to introduce the jQuery library into the HTML page. The jQuery library can be introduced in the tag through the following code:
