

How to use jQuery to achieve a magnifying glass effect
Principle of implementation
First of all, let’s explain how to achieve the magnifying glass effect:
Method 1: Prepare a high-pixel large Picture, when the mouse is placed on the original picture, the corresponding position of the large picture is loaded and displayed.
Method 2: Enlarge the original image, that is, adjust the length and width of the original image.
Above we introduced two ways to achieve the magnifying glass effect. Next, we apply the above two ways to our jQuery plug-in.
First of all, we need an img element to display the original image object, and a container as a display box; the large image object is stored in the display box. When the mouse moves over the original image, the corresponding part is displayed by absolute positioning of the large image, achieving a magnifying glass-like effect.
Next, let us define the Index.html page, the specific implementation is as follows:
<!doctype html>
<html lang="en-US">
<head>
  <meta http-equiv="Content-Type" content="text/html;charset=utf-8">
  <title>jQuery Image Zoom Demo</title>
  <meta name="author" content="Jackson Huang">
</head>
<body>
<p class="magnify">
<p class="large"></p>
<img  class="small lazy"  src="/static/imghw/default1.png"  data-src="./img/1.jpg"       style="max-width:90%" / alt="How to use jQuery to achieve a magnifying glass effect" >
</p>
</body>
</html>
Above, we defined the small object to display the original image, and the large object as a display The frame is used to display the corresponding position of the large image.
mousemove event
Next, we use the jQuery plug-in to achieve the magnifying glass effect when the mouse moves over the small object , the corresponding position of the large image will be displayed in the large object, which involves the mousemove event, so we need to implement the listening method of the mousemove event (how to define the jQuery plug-in, please refer to "Customize jQuery plug-in Step by Step》).
Now, let’s implement the jquery.imagezoom.js plug-in!
(function ($) {

    $.fn.imageZoom = function (options) {

    // The native width and height of the image.
    var native_width = 0,
        native_height = 0,
        current_width = 0,
        current_height = 0,
        $small = $(".small"),
        $large = $(".large");

    $(".magnify").mousemove(function (e) {
        /* Act on the event */
        if (!native_width && !native_height) {
            var image_object = new Image();
            image_object.src = $small.attr('src');

            // Gets the image native height and width.
            native_height = image_object.height;
            native_width = image_object.width;

            // Gets the image current height and width.
            current_height = $small.height();
            current_width = $small.width();

        } else {

            // Gets .maginfy offset coordinates.
            var magnify_offset = $(this).offset(),

                // Gets coordinates within .maginfy.
                mx = e.pageX - magnify_offset.left,
                my = e.pageY - magnify_offset.top;

            // Checks the mouse within .maginfy or not.
            if (mx < $(this).width() && my < $(this).height() && mx > 0 && my > 0) {
                $large.fadeIn(100);
            } else {
                $large.fadeOut(100);
            } if ($large.is(":visible")) {
                /* Gets the large image coordinate by ratio
                   small.x / small.width = large.x / large.width
                   small.y / small.height = large.y / large.height
                   then we need to keep pointer in the centre,
                   so deduct the half of .large width and height.
                */
                var rx = Math.round(mx / $small.width() * native_width - $large.width() / 2) * -1,
                    ry = Math.round(my / $small.height() * native_height - $large.height() / 2) * -1,
                    bgp = rx + "px " + ry + "px",
                    px = mx - $large.width() / 2,
                    py = my - $large.height() / 2;
                $large.css({
                    left: px,
                    top: py,
                    backgroundPosition: bgp
                });
            }

        }
    });
});
Above, I implemented the listening method of the mousemove event. When the mouse moves to the magnify object, we need to get the relative coordinate position of the current mouse. Let’s explain how to get the mouse through pictures. relative coordinate position.
#Relative coordinates
Figure 1 Mouse relative coordinates 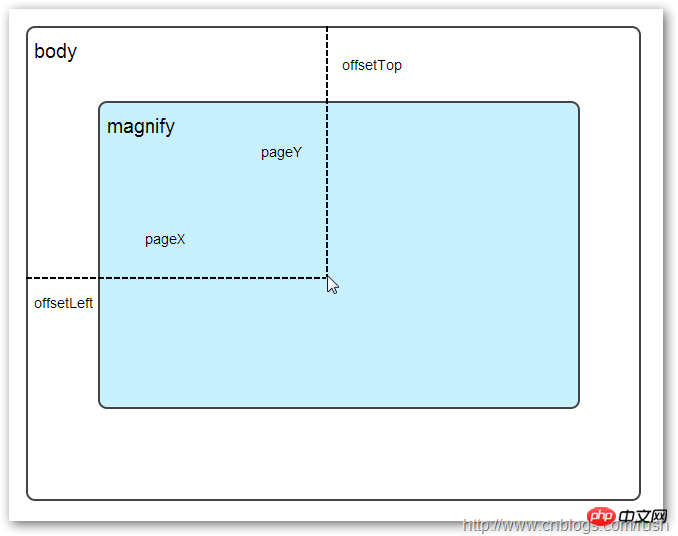
## When the mouse moves to the Magnify object, we need to get the mouse in Magnify The relative coordinate position in , here we define the relative coordinate as (mx,my). From the above figure, we know that the relative coordinate is equal to (pageX - offsetLeft, pageY - offsetTop).
mx / small.width (width of the original image) = rx / native_width (width of the large image)
my / small.height (length of the original image) = ry / native_height (large The length of the picture) Through the above proportional relationship, we know that the coordinates (rx, ry) of the large picture are equal to (mx/small.width*native_width, my/small.height*native_height). Through the above formula, we can obtain the corresponding coordinate position of the large image. When the mouse moves to the magnify object, the corresponding part of the large image will be displayed. Next, we need to implement the loading of the large image. background-position attributeBefore implementing the loading and display of large images, first introduce the knowledge of background positioning background-position in CSS. Figure 2 CSS background-position
Above, there is a 100x100 pixel image which is composed of four colors, and each color occupies 50x50 pixels. Next, we will display the image by modifying the background-position attribute value of the CSS of the image. Different positions of the picture.
We see that there are two rows of small squares under the big square. They display different colors and positions. Here we achieve this by modifying the background-position attribute value of each p element CSS. 例如:第一行的蓝色方形,我们设置CSS的background-position属性为:0px -50px;这相当于原图往上移动50px,第一行的其他方形也通过左右和上下移动实现的。 但第二行的方形就显得更加奇怪了,因为它们都由四种颜色组成,而且颜色的位置都不一样,这究竟是怎样实现的呢? 例如:第二行的第一个方形,我们设置CSS的background-position属性为:25px 25px;这相当于原图向下和向右移动了25px,由于image wrap的作用它会填充剩余位置的颜色。 现在,我们已经了解到了CSS的background-position属性的作用,所以我们通过修改large对象的background-position属性来显示对应的图像部分,具体实现如下: 上面,我们通过加载大图的方式来实现放大镜效果,接下来,我们将介绍通过调整原图的长和宽来实现放大镜效果。 前面,我们通过mousemove事件来放大图片,这里我们将通过鼠标的滚轮事件实现图片放大效果。 由于,不同的浏览器有不同的滚轮事件。主要是有三种:onmousewheel(IE 6/7/8)、mousewheel(IE9,Chrome,Safari和Opera)和DOMMouseScroll(只有Firefox支持),关于这三个事件这里不做详细的介绍了。 由于不同浏览器之间存在着差异,为了实现浏览器之间的兼容,所以,我们需要监听以上三种滚轮事件(onmousewheel,mousewheel和DOMMouseScroll),具体实现如下: 上面,我们实现了兼容不同浏览器的滚轮事件监听方法,接下来,判断滚轮向上或向下也要考虑不同浏览器的兼容性,主流的览器(IE、Opera、Safari、Firefox、Chrome)中Firefox 使用detail,其余四类使用wheelDelta;两者只在取值上不一致,代表含义一致,detail与wheelDelta只各取两个值,detail只取±3,wheelDelta只取±120,其中正数表示为向上,负数表示向下。 由于detail和wheelDelta都有两个值表示向上或向下滚动,所以不同浏览器间可以通过以下方式实现兼容,具体实现如下: 上面,我们已经处理了不同浏览器滚轮监听方法,当用户滚动滚轮时需要动态地修改原图的尺寸,这里我们定义缩放比scaling为0.3,也就是说每当用户滚动一下滚轮原图就按0.3的比例进行缩放,具体实现如下: 现在,我们已经实现了通过滚轮对图片进行缩放查看的效果,完整的实现如下: 上面,我们实现了放大镜效果,当我们鼠标停留在图片上方会自动放大图片的相应部位,当然我们可以通过滚轮调整放大的比例。 The above is the detailed content of How to use jQuery to achieve a magnifying glass effect. For more information, please follow other related articles on the PHP Chinese website!$large.css({
left: px,
top: py,
backgroundPosition: bgp
});mousewheel事件
$(".magnify").bind('DOMMouseScroll mousewheel onmousewheel', function(e) {
});$(".magnify").bind('DOMMouseScroll mousewheel onmousewheel', function(e) {
// cross-browser wheel delta
var e = window.event || e; // old IE support.
var delta = Math.max(-1, Math.min(1, (e.wheelDelta || -e.detail)));
});// Gets the image scaling height and width.
native_height += (native_height * scaling * delta);
native_width += (native_width * scaling * delta);
// Update backgroud image size.
$large.css('background-size', native_width + "px " + native_height + "px");
(function($) {
$.fn.imageZoom = function(options) {
// The native width and height of the image.
var defaults = {
scaling: 0.3
};
// Combines object defaults and options.
options = $.extend(defaults, options),
native_width = 0,
native_height = 0,
current_width = 0,
current_height = 0,
$small = $(".small"),
$large = $(".large");
$(".magnify").mousemove(function(e) {
/* Act on the event */
if (!native_width && !native_height) {
var image_object = new Image();
image_object.src = $small.attr('src');
// Gets the image native height and width.
native_height = image_object.height;
native_width = image_object.width;
// Gets the image current height and width.
current_height = $small.height();
current_width = $small.width();
} else {
// Gets .maginfy offset coordinates.
var magnify_offset = $(this).offset(),
// Gets coordinates within .maginfy.
mx = e.pageX - magnify_offset.left,
my = e.pageY - magnify_offset.top;
// Checks the mouse within .maginfy or not.
if (mx < $(this).width() && my < $(this).height() && mx > 0 && my > 0) {
$large.fadeIn(100);
} else {
$large.fadeOut(100);
}
if ($large.is(":visible")) {
/* Gets the large image coordinate by ratio
small.x / small.width = large.x / large.width
small.y / small.height = large.y / large.height
then we need to keep pointer in the centre,
so deduct the half of .large width and height.
*/
var rx = Math.round(mx / $small.width() * native_width - $large.width() / 2) * -1,
ry = Math.round(my / $small.height() * native_height - $large.height() / 2) * -1,
bgp = rx + "px " + ry + "px",
px = mx - $large.width() / 2,
py = my - $large.height() / 2;
$large.css({
    left: px,
    top: py,
    backgroundPosition: bgp
});
}
}
});
$(".magnify").bind('DOMMouseScroll mousewheel onmousewheel', function(e) {
var image_object = new Image();
image_object.src = $large.attr('src');
// cross-browser wheel delta
e = window.event || e; // old IE support.
var delta = Math.max(-1, Math.min(1, (e.wheelDelta || -e.detail)));
// Gets the image scaling height and width.
native_height += (native_height * defaults.scaling * delta);
native_width += (native_width * defaults.scaling * delta);
// The image can't smaller than the original.
if (native_height < current_height) {
native_height = current_height;
}
if (native_width < current_width) {
native_width = current_width;
}
// console.log("native_height: " + native_height + " native_width: " + native_width);
// Gets .maginfy offset coordinates.
var magnify_offset = $(this).offset(),
mx = e.pageX - magnify_offset.left,
my = e.pageY - magnify_offset.top;
// Update backgroud image size.
$large.css('background-size', native_width + "px " + native_height + "px");
/* Gets the large image coordinate by ratio
small.x / small.width = large.x / large.width
small.y / small.height = large.y / large.height
then we need to keep pointer in the centre,
so deduct the half of .large width and height.
*/
var rx = Math.round(mx / $small.width() * native_width - $large.width() / 2) * -1,
ry = Math.round(my / $small.height() * native_height - $large.height() / 2) * -1,
bgp = rx + "px " + ry + "px",
px = mx - $large.width() / 2,
py = my - $large.height() / 2;
$large.css({
left: px,
top: py,
backgroundPosition: bgp
});
});
};
})(jQuery);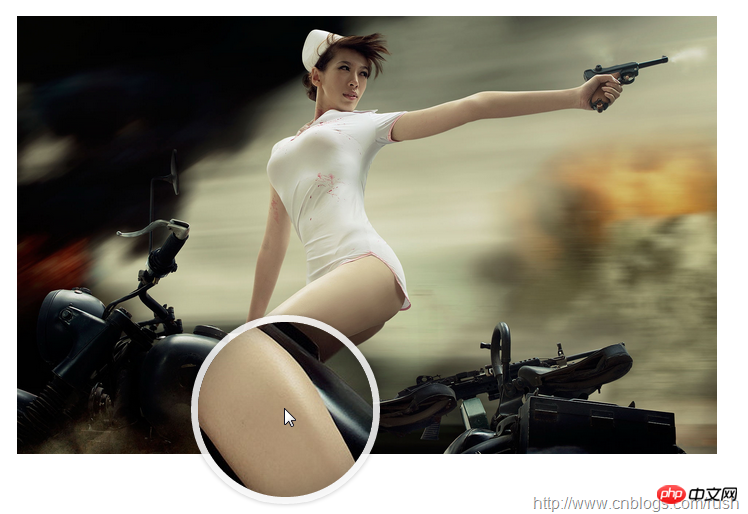

Hot AI Tools

Undresser.AI Undress
AI-powered app for creating realistic nude photos

AI Clothes Remover
Online AI tool for removing clothes from photos.

Undress AI Tool
Undress images for free

Clothoff.io
AI clothes remover

Video Face Swap
Swap faces in any video effortlessly with our completely free AI face swap tool!

Hot Article
Hot Tools

Notepad++7.3.1
Easy-to-use and free code editor

SublimeText3 Chinese version
Chinese version, very easy to use

Zend Studio 13.0.1
Powerful PHP integrated development environment

Dreamweaver CS6
Visual web development tools

SublimeText3 Mac version
God-level code editing software (SublimeText3)
Hot Topics


 Users encounter rare glitches: Samsung Watch smartwatches suddenly experience white screen issues
Apr 03, 2024 am 08:13 AM
Users encounter rare glitches: Samsung Watch smartwatches suddenly experience white screen issues
Apr 03, 2024 am 08:13 AM
You may have encountered the problem of green lines appearing on the screen of your smartphone. Even if you have never seen it, you must have seen related pictures on the Internet. So, have you ever encountered a situation where the smart watch screen turns white? On April 2, CNMO learned from foreign media that a Reddit user shared a picture on the social platform, showing the screen of the Samsung Watch series smart watches turning white. The user wrote: "I was charging when I left, and when I came back, it was like this. I tried to restart, but the screen was still like this during the restart process." Samsung Watch smart watch screen turned white. The Reddit user did not specify the smart watch. Specific model. However, judging from the picture, it should be Samsung Watch5. Previously, another Reddit user also reported
 Kyushu Fengshen Assassin 4S Radiator Review Air-cooled 'Assassin Master' Style
Mar 28, 2024 am 11:11 AM
Kyushu Fengshen Assassin 4S Radiator Review Air-cooled 'Assassin Master' Style
Mar 28, 2024 am 11:11 AM
Speaking of ASSASSIN, I believe players will definitely think of the master assassins in "Assassin's Creed". They are not only skilled, but also have the creed of "devoting themselves to the darkness and serving the light". The ASSASSIN series of flagship air-cooled radiators from the appliance brand DeepCool coincide with each other. Recently, the latest product of this series, ASSASSIN4S, has been launched. "Assassin in Suit, Advanced" brings a new air-cooling experience to advanced players. The appearance is full of details. The Assassin 4S radiator adopts a double tower structure + a single fan built-in design. The outside is covered with a cube-shaped fairing, which has a strong overall sense. It is available in white and black colors to meet different colors. Tie
 Easily understand 4K HD images! This large multi-modal model automatically analyzes the content of web posters, making it very convenient for workers.
Apr 23, 2024 am 08:04 AM
Easily understand 4K HD images! This large multi-modal model automatically analyzes the content of web posters, making it very convenient for workers.
Apr 23, 2024 am 08:04 AM
A large model that can automatically analyze the content of PDFs, web pages, posters, and Excel charts is not too convenient for workers. The InternLM-XComposer2-4KHD (abbreviated as IXC2-4KHD) model proposed by Shanghai AILab, the Chinese University of Hong Kong and other research institutions makes this a reality. Compared with other multi-modal large models that have a resolution limit of no more than 1500x1500, this work increases the maximum input image of multi-modal large models to more than 4K (3840x1600) resolution, and supports any aspect ratio and 336 pixels to 4K Dynamic resolution changes. Three days after its release, the model topped the HuggingFace visual question answering model popularity list. Easy to handle
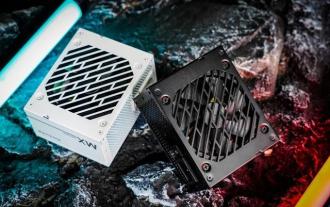 Huntkey MX750P full module power supply review: 750W of concentrated platinum strength
Mar 28, 2024 pm 03:20 PM
Huntkey MX750P full module power supply review: 750W of concentrated platinum strength
Mar 28, 2024 pm 03:20 PM
With its compact size, the ITX platform has attracted many players who pursue the ultimate and unique beauty. With the improvement of manufacturing processes and technological advancements, both Intel's 14th generation Core and RTX40 series graphics cards can exert their strength on the ITX platform, and gamers also There are higher requirements for SFX power supply. Game enthusiast Huntkey has launched a new MX series power supply. In the ITX platform that meets high-performance requirements, the MX750P full-module power supply has a rated power of up to 750W and has passed 80PLUS platinum level certification. Below we bring the evaluation of this power supply. Huntkey MX750P full-module power supply adopts a simple and fashionable design concept. There are two black and white models for players to choose from. Both use matte surface treatment and have a good texture with silver gray and red fonts.
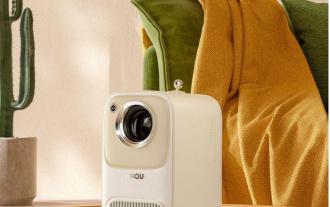 Exquisite light and shadow art in spring, Haqu H2 is the cost-effective choice
Apr 17, 2024 pm 05:07 PM
Exquisite light and shadow art in spring, Haqu H2 is the cost-effective choice
Apr 17, 2024 pm 05:07 PM
With the arrival of spring, everything revives and everything is full of vitality and vitality. In this beautiful season, how to add a touch of color to your home life? Haqu H2 projector, with its exquisite design and super cost-effectiveness, has become an indispensable beauty in this spring. This H2 projector is compact yet stylish. Whether placed on the TV cabinet in the living room or next to the bedside table in the bedroom, it can become a beautiful landscape. Its body is made of milky white matte texture. This design not only makes the projector look more advanced, but also increases the comfort of the touch. The beige leather-like material adds a touch of warmth and elegance to the overall appearance. This combination of colors and materials not only conforms to the aesthetic trend of modern homes, but also can be integrated into
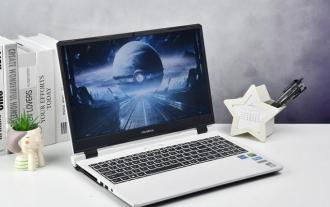 Colorful Hidden Star P15 24 Review: A hard-core all-round gaming laptop with both good looks and performance
Mar 06, 2024 pm 04:40 PM
Colorful Hidden Star P15 24 Review: A hard-core all-round gaming laptop with both good looks and performance
Mar 06, 2024 pm 04:40 PM
In the current era of rapid technological development, laptops have become an indispensable and important tool in people's daily life and work. For those players who have high performance requirements, a laptop with powerful configuration and excellent performance can meet their hard-core needs. With its excellent performance and stunning design, the Colorful Hidden Star P15 notebook computer has become the leader of the future and can be called a model of hard-core notebooks. Colorful Hidden Star P1524 is equipped with a 13th generation Intel Core i7 processor and RTX4060Laptop GPU. It adopts a more fashionable spaceship design style and has excellent performance in details. Let us first take a look at the features of this notebook. Supreme equipped with Intel Core i7-13620H processing
 The screen is good for playing games. Brief analysis of iQOO Neo9S Pro+ screen
Jul 19, 2024 pm 03:53 PM
The screen is good for playing games. Brief analysis of iQOO Neo9S Pro+ screen
Jul 19, 2024 pm 03:53 PM
In today's smartphone market, screen quality has become one of the key indicators to measure the overall performance of a mobile phone. iQOO's Neo series has always been committed to providing users with excellent gaming experience and visual enjoyment. The latest product iQOO Neo9SPro+ uses a "Three Good Eye Protection Gaming Screen". Next, let's take a look at the quality of this screen. How brilliant. iQOO Neo9S Pro+ is equipped with a 1.5 KOLED e-sports direct screen, which supports flagship LTPO adaptive refresh rate from 1Hz to 144Hz, which means that it can achieve ultra-low power standby state when displaying static content, and it can also be intelligent during gaming. Switch to dynamic high from 90Hz to 144Hz
 A true one-lens experience with the NIKKOR Z 28-400mm f/4-8 VR lens
Mar 28, 2024 pm 02:54 PM
A true one-lens experience with the NIKKOR Z 28-400mm f/4-8 VR lens
Mar 28, 2024 pm 02:54 PM
Many photography enthusiasts like to use lenses. Their shooting needs are very changeable, so when it comes to lens selection, they prefer a more versatile product, which is what we commonly call "one lens to conquer the world" lens. It just so happens that Nikon has launched a new product, the NIKKOR Z28-400mmf/4-8VR lens, a true "one lens that can conquer the world" lens. The lens covers from the 28mm wide-angle end to the 400mm telephoto end. Equipped with its Z-mount camera, it can easily shoot a very rich range of photography themes and bring about a rich change of perspective. Today, we will talk to you about this NIKKOR Z28-400mmf/4-8VR lens through our recent use experience. NIKKOR Z28-400mmf/4-8VR is
