

webpack builds react multi-page
This article mainly introduces the detailed explanation of building react multi-page applications with webpack. The editor thinks it is quite good, so I will share it with you now and give it as a reference. Let’s follow the editor and take a look.
The original intention of writing this is that it is difficult to find a concise project scaffolding. Many scaffoldings have many dependencies, and it will take a long time just to look at the dependencies, so I refer to the content on the Internet and make it. Such a simple multi-page scaffolding.
Use creat-react-app to create a new react application
npm install -g create-react-app
Then create a project
create-react-app demo
create-react-app will automatically initialize a scaffolding And install various necessary dependencies of the React project. If there are network problems during the process, please use the cnpm Taobao mirror to install.
Then we enter the project and start it.
cd demo
Then start the project
npm start
You will see the following page

Then enter src/App.js, Replace the code in App.js with the following code (because you don’t want to process images and icons in webpack for the time being)
import React, { Component } from 'react';
import './App.css';

class App extends Component {
 render() {
  return (
   <p className="App">
    <p className="App-header">
     <h2>Welcome to App</h2>
    </p>
    <p className="App-intro">
     To get started, edit <code>src/App.js</code> and save to reload.
    </p>
   </p>
  );
 }
}

export default AppThen replace the content in index.js with the following code (delete registerServiceWorker)
import React from 'react'; import ReactDOM from 'react-dom'; import './index.css'; import App from './App'; ReactDOM.render(<App />, document.getElementById('root'));
Then delete registerServiceWorker.js under src (this file is used to build pwa applications, we can’t use it for the time being) and logo.svg files (you don’t want to process image files) and App.test.js (for testing) .
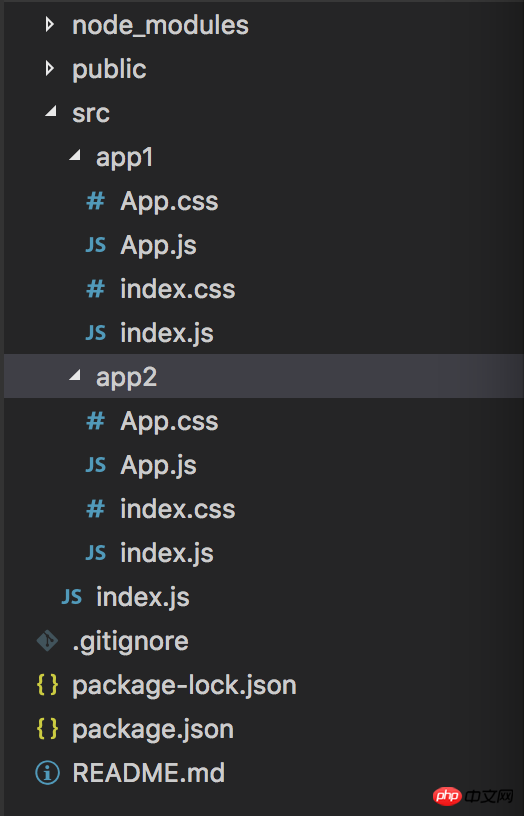
There are four files under src/ now. Next, create two new folders app1 and app2 under src, and copy the original four files into app1 and app2 respectively. The file directory is as follows:
Next, go to the public file, delete favicon.ico (don’t want to deal with it) and manifest.json (used to build pwa), and then Replace the content in index.html with the following content
<!doctype html>
<html lang="en">
 <head>
  <meta charset="utf-8">
  <meta name="viewport" content="width=device-width, initial-scale=1, shrink-to-fit=no">
  <meta name="theme-color" content="#000000">
  <title>React App</title>
 </head>
 <body>
  <noscript>
   You need to enable JavaScript to run this app.
  </noscript>
  <p id="root"></p>
 </body>
</html>
This index.html is our template html.
Get to the point and start installing webpack and configuring webpack
1. Install dependencies. Replace the package.json file with the following file
{
 "name": "demo",
 "version": "0.1.0",
 "private": true,
 "dependencies": {
  "react": "^15.6.1",
  "react-dom": "^15.6.1"
 },
 "devDependencies": {
  "babel-core": "^6.26.0",
  "babel-loader": "^7.1.2",
  "babel-preset-es2015": "^6.24.1",
  "babel-preset-react": "^6.24.1",
  "clean-webpack-plugin": "^0.1.16",
  "css-loader": "^0.28.7",
  "extract-text-webpack-plugin": "^3.0.0",
  "file-loader": "^1.0.0",
  "glob": "^7.1.2",
  "html-webpack-plugin": "^2.30.1",
  "postcss-loader": "^2.0.6",
  "style-loader": "^0.18.2",
  "url-loader": "^0.5.9",
  "webpack": "^3.5.6",
  "webpack-dev-server": "^2.8.1"
 },
 "scripts": {
  "start": "webpack-dev-server --open",
  "build": "webpack"
 }
}2. Delete node_modules in the current directory, and then execute it on the console again
npm i
3. In the root directory, which is /demo Create a new webpack.config.js file and write the following code
const webpack = require('webpack');
const glob = require('glob');
const path = require('path');
const HtmlWebpackPlugin = require('html-webpack-plugin');
const ExtractTextPlugin = require('extract-text-webpack-plugin');
const CleanWebpackPlugin = require('clean-webpack-plugin');

const webpackConfig = {
  entry: {},
  output:{
    path:path.resolve(__dirname, './dist/'),
    filename:'[name].[chunkhash:6].js'
  },
  //设置开发者工具的端口号,不设置则默认为8080端口
  devServer: {
    inline: true,
    port: 8181
  },
  module:{
    rules:[
      {
        test:/\.js?$/,
        exclude:/node_modules/,
        loader:'babel-loader',
        query:{
          presets:['es2015','react']
        }
      },
      {
        test: /\.(scss|sass|css)$/,
        loader: ExtractTextPlugin.extract({fallback: "style-loader", use: "css-loader"})
      },

    ]
  },
  plugins: [
    new ExtractTextPlugin("[name].[chunkhash:6].css"),
    new CleanWebpackPlugin(
      ['dist'],
      {
        root: __dirname,
        verbose: true,
        dry:   false
      }
    )
  ],
};

// 获取指定路径下的入口文件
function getEntries(globPath) {
  const files = glob.sync(globPath),
   entries = {};
  files.forEach(function(filepath) {
    const split = filepath.split('/');
    const name = split[split.length - 2];
    entries[name] = './' + filepath;
  });
  return entries;
}

const entries = getEntries('src/**/index.js');

Object.keys(entries).forEach(function(name) {
  webpackConfig.entry[name] = entries[name];
  const plugin = new HtmlWebpackPlugin({
    filename: name + '.html',
    template: './public/index.html',
    inject: true,
    chunks: [name]
  });
  webpackConfig.plugins.push(plugin);
})

module.exports = webpackConfig;4. Then directly execute the following code
npm run build
to successfully see your two pages app1 and app2 in dist.
If you want to debug by yourself, just enable npm run start, and then view the page for debugging at localhost:8181/app1.html.
The above is the detailed content of webpack builds react multi-page. For more information, please follow other related articles on the PHP Chinese website!

Hot AI Tools

Undresser.AI Undress
AI-powered app for creating realistic nude photos

AI Clothes Remover
Online AI tool for removing clothes from photos.

Undress AI Tool
Undress images for free

Clothoff.io
AI clothes remover

Video Face Swap
Swap faces in any video effortlessly with our completely free AI face swap tool!

Hot Article
Hot Tools

Notepad++7.3.1
Easy-to-use and free code editor

SublimeText3 Chinese version
Chinese version, very easy to use

Zend Studio 13.0.1
Powerful PHP integrated development environment

Dreamweaver CS6
Visual web development tools

SublimeText3 Mac version
God-level code editing software (SublimeText3)
Hot Topics


 PHP, Vue and React: How to choose the most suitable front-end framework?
Mar 15, 2024 pm 05:48 PM
PHP, Vue and React: How to choose the most suitable front-end framework?
Mar 15, 2024 pm 05:48 PM
PHP, Vue and React: How to choose the most suitable front-end framework? With the continuous development of Internet technology, front-end frameworks play a vital role in Web development. PHP, Vue and React are three representative front-end frameworks, each with its own unique characteristics and advantages. When choosing which front-end framework to use, developers need to make an informed decision based on project needs, team skills, and personal preferences. This article will compare the characteristics and uses of the three front-end frameworks PHP, Vue and React.
 Integration of Java framework and front-end React framework
Jun 01, 2024 pm 03:16 PM
Integration of Java framework and front-end React framework
Jun 01, 2024 pm 03:16 PM
Integration of Java framework and React framework: Steps: Set up the back-end Java framework. Create project structure. Configure build tools. Create React applications. Write REST API endpoints. Configure the communication mechanism. Practical case (SpringBoot+React): Java code: Define RESTfulAPI controller. React code: Get and display the data returned by the API.
 How to enable administrative access from the cockpit web UI
Mar 20, 2024 pm 06:56 PM
How to enable administrative access from the cockpit web UI
Mar 20, 2024 pm 06:56 PM
Cockpit is a web-based graphical interface for Linux servers. It is mainly intended to make managing Linux servers easier for new/expert users. In this article, we will discuss Cockpit access modes and how to switch administrative access to Cockpit from CockpitWebUI. Content Topics: Cockpit Entry Modes Finding the Current Cockpit Access Mode Enable Administrative Access for Cockpit from CockpitWebUI Disabling Administrative Access for Cockpit from CockpitWebUI Conclusion Cockpit Entry Modes The cockpit has two access modes: Restricted Access: This is the default for the cockpit access mode. In this access mode you cannot access the web user from the cockpit
 what does web mean
Jan 09, 2024 pm 04:50 PM
what does web mean
Jan 09, 2024 pm 04:50 PM
The web is a global wide area network, also known as the World Wide Web, which is an application form of the Internet. The Web is an information system based on hypertext and hypermedia, which allows users to browse and obtain information by jumping between different web pages through hyperlinks. The basis of the Web is the Internet, which uses unified and standardized protocols and languages to enable data exchange and information sharing between different computers.
 Is PHP front-end or back-end in web development?
Mar 24, 2024 pm 02:18 PM
Is PHP front-end or back-end in web development?
Mar 24, 2024 pm 02:18 PM
PHP belongs to the backend in web development. PHP is a server-side scripting language, mainly used to process server-side logic and generate dynamic web content. Compared with front-end technology, PHP is more used for back-end operations such as interacting with databases, processing user requests, and generating page content. Next, specific code examples will be used to illustrate the application of PHP in back-end development. First, let's look at a simple PHP code example for connecting to a database and querying data:
 How to implement h5 to slide up on the web side to load the next page
Mar 11, 2024 am 10:26 AM
How to implement h5 to slide up on the web side to load the next page
Mar 11, 2024 am 10:26 AM
Implementation steps: 1. Monitor the scroll event of the page; 2. Determine whether the page has scrolled to the bottom; 3. Load the next page of data; 4. Update the page scroll position.
 Vue.js vs. React: Project-Specific Considerations
Apr 09, 2025 am 12:01 AM
Vue.js vs. React: Project-Specific Considerations
Apr 09, 2025 am 12:01 AM
Vue.js is suitable for small and medium-sized projects and fast iterations, while React is suitable for large and complex applications. 1) Vue.js is easy to use and is suitable for situations where the team is insufficient or the project scale is small. 2) React has a richer ecosystem and is suitable for projects with high performance and complex functional needs.
 Golang's browser support: building an interactive web
Apr 07, 2024 pm 04:03 PM
Golang's browser support: building an interactive web
Apr 07, 2024 pm 04:03 PM
Go builds interactive web applications that run in the browser. Steps: Create Go project and main.go file, add HTTP handler to display messages. Add forms using HTML and JavaScript for user input and submission. Add handling of POST requests in your Go application, receive user messages and return responses. Use FetchAPI to send POST requests and handle server responses.
