
 Web Front-end
JS Tutorial
A detailed introduction to developing cross-platform desktop applications with JavaScript (pictures and text)
Web Front-end
JS Tutorial
A detailed introduction to developing cross-platform desktop applications with JavaScript (pictures and text)
A detailed introduction to developing cross-platform desktop applications with JavaScript (pictures and text)

The following editor will bring you a detailed explanation of using JavaScript to develop cross-platform desktop applications. The editor thinks it’s pretty good, so I’ll share it with you now and give it as a reference. Let’s follow the editor and take a look
Any application that can be written using JavaScript will eventually be written in JavaScript. --Atwood's Law
Atwood's Law was proposed by Jeff Atwood in 2007: "any application that can be written in JavaScript, will eventually be written in JavaScript." It is said that this was just a joke at the time. However, the joke seems to be gradually becoming a reality. From various gorgeous web page frameworks to powerful libraries, to today's machine learning and server development, JavaScript is all present. Some languages have also been derived from JavaScript, such as TypeScript. It has also become more convenient to use JavaScript to make games, and you can use CocosCreator. The emergence of Html5 has also elevated the previous auxiliary status of JavaScript in web pages to the main status. The emergence of nodejs has allowed it to achieve so-called "full stack" development. Now JavaScript can even be used as mobile applications. However, there is demand on mobile terminals, browsers, and servers, and there will also be demand on desktop applications. Can you use JavaScript to develop cross-platform applications? The answer is: yes. Use Electron to conveniently use JavaScript for desktop application development. It can be seen that many famous programs are directly or indirectly developed by it, such as Atom, VSCode, etc.
It should be noted that there are currently some restrictions on using Electron to develop desktop applications. First of all, we cannot call complex system APIs (or cannot do it directly), which prevents us from developing more complex enterprise-level applications. Secondly, its performance is still not comparable to native applications. We can think of Electron as a packaging box with a browser shell. This packaging box gives us the ability to read and write files. We develop the web application and use it to encapsulate it after debugging is completed. A browser kernel. In this way, our js code can be separated from the traditional browser mode and run independently. However, it has the same principle as the traditional browser mode, so when there are extremely high performance requirements, you still need to use C++, Java, etc. for development. But most applications don't require such high performance requirements at all, so there is no problem using Electron for development. Next, we try to use Electron step by step to develop Windows desktop applications from scratch. Of course, this method also applies to Mac and Linux.
First of all, after entering, I found that it is all in English. It doesn’t matter. In fact, most of them can be ignored. We go directly to the home page:

As shown in the picture, the official installation method is to use git and npm, but we don’t need to use git. However, npm is necessary. npm is the package management tool for nodejs. The new version of nodejs has integrated npm. After installing nodejs, it comes directly with npm. However, some old versions of nodejs, or unreliable nodejs downloaded from some unofficial sources, may not come with npm, so we must install nodejs and npm before using it. There are many tutorials on the Internet, so I won’t demonstrate them here. It should be noted that in the third command npm install && npm start, we can only enter npm install, because the instructions attached later may cause the console to "crash", which will keep it stuck and fail to install Electron successfully. . So, we only need to enter the directory we specified, and then execute the following commands (these commands are common to all systems):
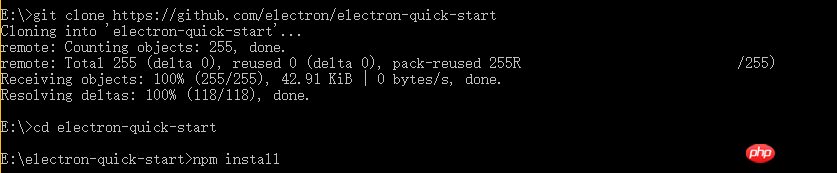
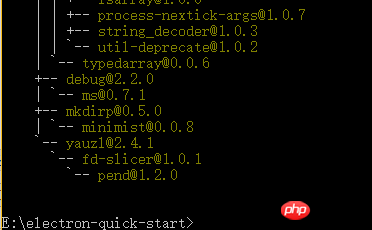
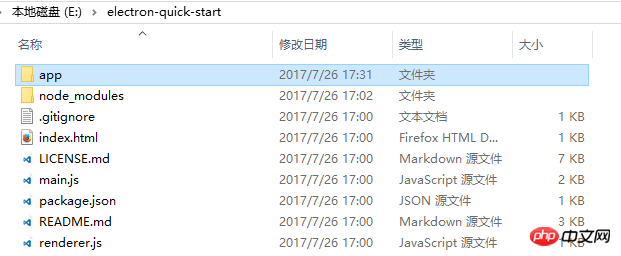
In this way, we have installed Electron. In the folder:

When you open it, the directory structure of the file is as follows:
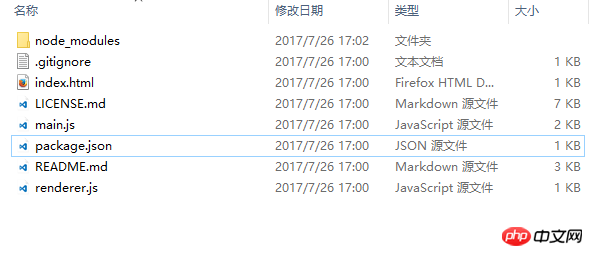
The directory seems complicated. , in fact, we can even ignore these files! main.js can be equivalent to our configuration file, which contains some configuration information. By default, our application will directly open index.html in this directory. We can change the entry file by modifying the parameters in main.js. Of course, package.json is also useful, which will be discussed later.
First, we can use electron.exe to run the application directly. In my directory, electron.exe is in the E:\electron-quick-start\node_modules\electron\dist directory. We can use the command format electron.exe
We enter the command in the console: 
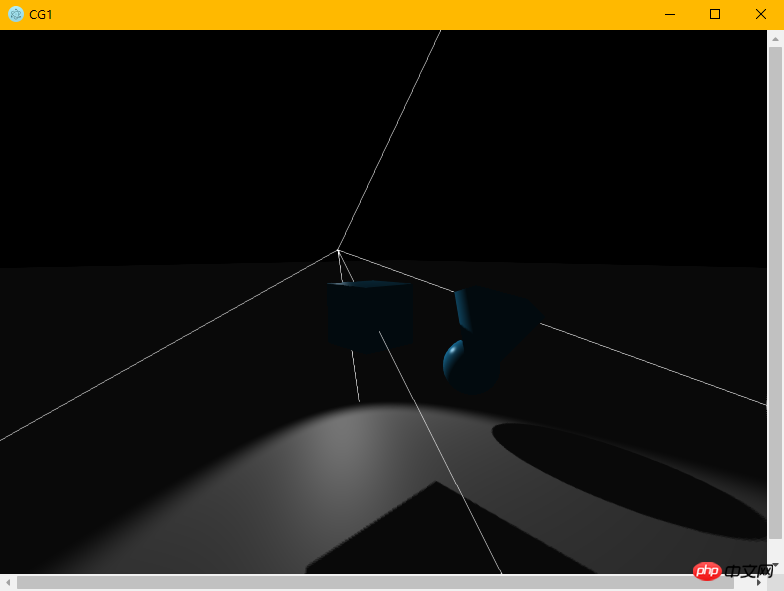
Effect:
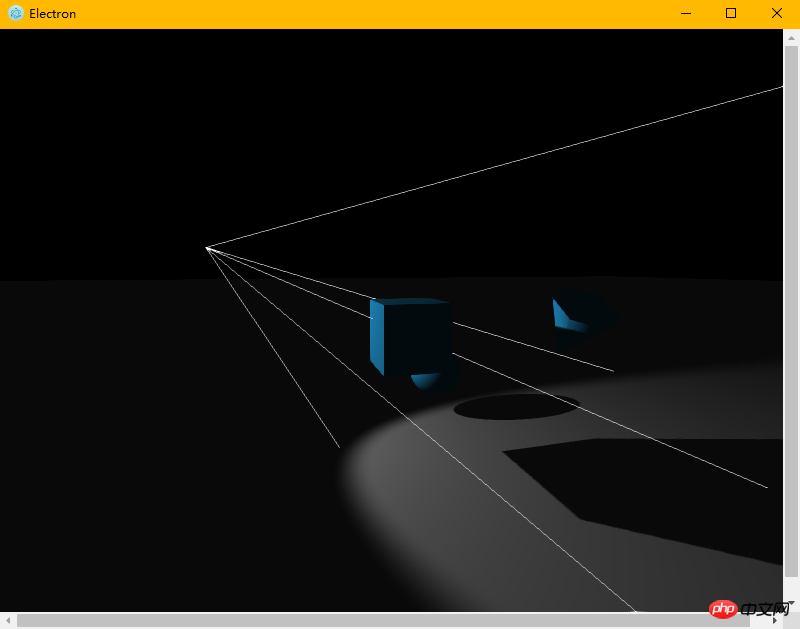
It is indeed a desktop application The program is run. However, we want our application to be packaged directly into .exe, .app form, rather than having our users manually enter commands to start the application. And if you look at the official documents, you will find that the official packaging method still has some pitfalls. If it is not handled well, you will be caught. Therefore, we use the more convenient electron-packager. The github link is here: https://github.com/electron-userland/electron-packager. First, we still follow the tutorial and enter the instructions to install it. Likewise, this command works on Linux, Mac, and Windows.
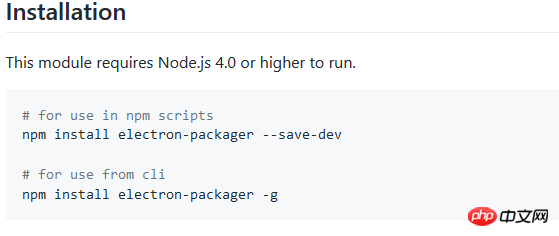
#The installation method is the same as Electron, download it from git and install it. It should be noted that we only need to execute one of the two instructions in the above picture. It is recommended to execute the second one, because the second one is a global installation. After installation, we can directly execute the electron-packager command on the console, which greatly facilitates our efficiency.
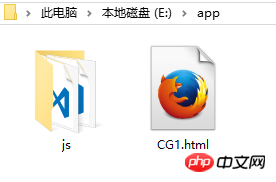
After installation, we start packaging. First, copy our project directory to the electron directory we installed before:
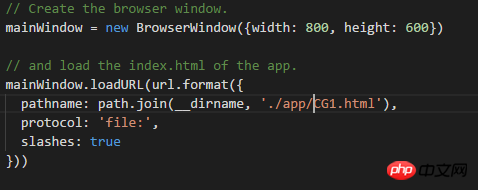
Since our application entry file is CG1.html under the app, we also You need to open main.js and configure the entry file:
Then, open the package.json file and configure the parameters.
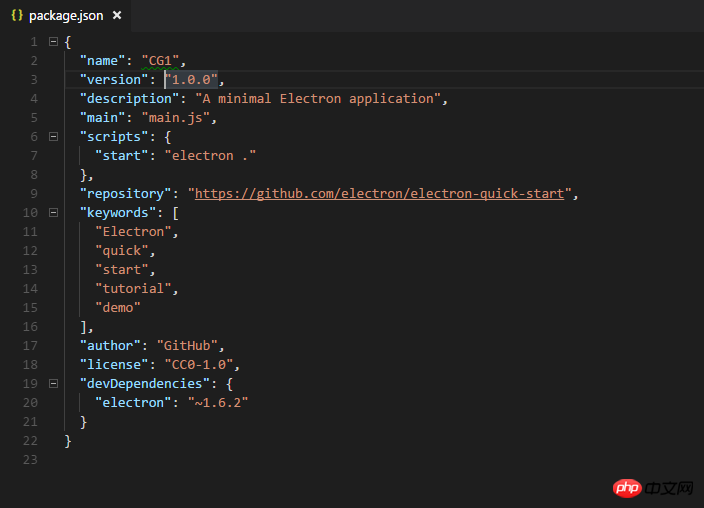
Only the name parameter is configured here, because the name parameter is related to the application name generated after we package it. Next, enter our electron directory through the console (that is, the directory with main.js and package.json),
Execute the following command on the console:

Don’t miss it, there is also ".", this refers to the current directory. In fact, if electron-packager is installed globally, then we can replace . with any path. Since this command can automatically detect the current computer's operating system and whether it is 32-bit or 64-bit, we can omit some parameters. But if you want to generate software with a customizable platform, you need to bring some parameters, and the details are given in the github of the project. I believe that if you have this need, it should be easy to get these parameters. Wait for a while and the packing is completed. We can see an additional folder named CG1-win32-x64 under the folder. After opening, click CG1.exe to open the application. This program is already available to users as a release version!
The above is the detailed content of A detailed introduction to developing cross-platform desktop applications with JavaScript (pictures and text). For more information, please follow other related articles on the PHP Chinese website!

Hot AI Tools

Undresser.AI Undress
AI-powered app for creating realistic nude photos

AI Clothes Remover
Online AI tool for removing clothes from photos.

Undress AI Tool
Undress images for free

Clothoff.io
AI clothes remover

Video Face Swap
Swap faces in any video effortlessly with our completely free AI face swap tool!

Hot Article
Hot Tools

Notepad++7.3.1
Easy-to-use and free code editor

SublimeText3 Chinese version
Chinese version, very easy to use

Zend Studio 13.0.1
Powerful PHP integrated development environment

Dreamweaver CS6
Visual web development tools

SublimeText3 Mac version
God-level code editing software (SublimeText3)
Hot Topics


 Recommended: Excellent JS open source face detection and recognition project
Apr 03, 2024 am 11:55 AM
Recommended: Excellent JS open source face detection and recognition project
Apr 03, 2024 am 11:55 AM
Face detection and recognition technology is already a relatively mature and widely used technology. Currently, the most widely used Internet application language is JS. Implementing face detection and recognition on the Web front-end has advantages and disadvantages compared to back-end face recognition. Advantages include reducing network interaction and real-time recognition, which greatly shortens user waiting time and improves user experience; disadvantages include: being limited by model size, the accuracy is also limited. How to use js to implement face detection on the web? In order to implement face recognition on the Web, you need to be familiar with related programming languages and technologies, such as JavaScript, HTML, CSS, WebRTC, etc. At the same time, you also need to master relevant computer vision and artificial intelligence technologies. It is worth noting that due to the design of the Web side
 Go Language GUI Development Guide: Implementing Cross-Platform Interface Design
Mar 22, 2024 pm 02:00 PM
Go Language GUI Development Guide: Implementing Cross-Platform Interface Design
Mar 22, 2024 pm 02:00 PM
As a fast and efficient programming language, Go language has been widely used in back-end development. However, with the continuous development of Go language, more and more developers are beginning to try to use Go language for GUI interface development in the front-end field. This article will introduce readers to how to use Go language for cross-platform GUI interface design, and provide specific code examples to help readers get started and apply it better. 1. Introduction to Go language GUI development GUI (GraphicalUserInterface, for graphics)
 The relationship between js and vue
Mar 11, 2024 pm 05:21 PM
The relationship between js and vue
Mar 11, 2024 pm 05:21 PM
The relationship between js and vue: 1. JS as the cornerstone of Web development; 2. The rise of Vue.js as a front-end framework; 3. The complementary relationship between JS and Vue; 4. The practical application of JS and Vue.
 Future trends and technology prospects of PHP cross-platform development
Jun 02, 2024 pm 05:29 PM
Future trends and technology prospects of PHP cross-platform development
Jun 02, 2024 pm 05:29 PM
PHP cross-platform development trends: progressive web applications, responsive design, cloud computing integration. Technology outlook: continued development of PHP framework, artificial intelligence integration, and IoT support. Practical case: Laravel builds cross-platform progressive web applications.
 How do C++ functions facilitate cross-platform GUI development?
Apr 26, 2024 pm 12:18 PM
How do C++ functions facilitate cross-platform GUI development?
Apr 26, 2024 pm 12:18 PM
C++ functions play a vital role in cross-platform GUI development, providing cross-platform APIs to create and manage GUIs. These APIs include SFML, Qt, and GLFW, which provide common functions to operate windows, controls, and events. These functions allow developers to build consistent GUI experiences across different operating systems, simplifying multi-platform development and enabling applications that run seamlessly on various platforms.
 Go scripting language: the charm of cross-platform and open source
Apr 07, 2024 pm 01:09 PM
Go scripting language: the charm of cross-platform and open source
Apr 07, 2024 pm 01:09 PM
Go is an open source, cross-platform programming language known for its simplicity, speed, and concurrency. It is used in a wide range of applications ranging from simple scripts to large distributed systems. Its main advantages include cross-platform, open source, simplicity, speed and concurrency. For example, Go makes it easy to build a simple HTTP server or concurrent crawler.
 Best practices for creating cross-platform graphics applications using C++
Jun 02, 2024 pm 10:45 PM
Best practices for creating cross-platform graphics applications using C++
Jun 02, 2024 pm 10:45 PM
Best practices for creating cross-platform graphics applications: Choose a cross-platform framework: Qt, wxWidgets, or GLFW Create portable code: Use portable C++ standards to avoid platform-specific code Optimize performance: Use hardware-accelerated graphics APIs to avoid unnecessary Memory manipulation, optimized layout handling Multi-platform compatibility: use appropriate compiler flags, test applications, provide platform-specific resources
 How does the PHP framework improve development efficiency in cross-platform development?
Jun 02, 2024 pm 09:49 PM
How does the PHP framework improve development efficiency in cross-platform development?
Jun 02, 2024 pm 09:49 PM
Answer: In cross-platform development, the PHP framework improves efficiency by making code reusable, improving productivity, and shortening development time. Details: Code reusable: Provides pre-built components and classes to reduce repetitive code writing. Increase productivity: Automate tedious tasks such as database interactions, allowing developers to focus on core functionality. Faster development time: Pre-built components and automated features speed up development without having to code from scratch.
