How to implement drag and drop of individual elements using HTML5
How to use HTML5 to drag and drop a single element? This article will introduce you to the How to implement drag and drop of individual elements using HTML5 code for dragging and dropping HTML elements. Let’s take a look at the specific implementation content.

By using the drag and drop feature of HTML5, you can drag and drop HTML page elements
Let’s look at a specific example
The code is as follows
SimpleDragDrop.html
<!DOCTYPE html>
<html>
<head>
<meta charset="utf-8" />
<title></title>
<link rel="stylesheet" href="SimpleDragDrop.css" />
<script>
function load() {
var box = document.querySelector('.box');
box.addEventListener('dragstart', onDragStart, false);
var zone = document.querySelector('.dropzone');
zone.addEventListener('dragover', onDragOver, false);
zone.addEventListener('drop', onDrop, false);
}
function onDragStart(e) {
e.dataTransfer.setData('text', this.id);
}
function onDragOver(e) {
e.preventDefault();
this.textContent = 'onDragOver';
}
function onDrop(e) {
e.preventDefault();
this.textContent = 'onDrop';
}
</script>
</head>
<body onload="load();">
<div class="box" draggable="true"></div>
<div id="dropzone" class="dropzone">
</div>
</body>
</html>SimpleDragDrop.css
.box {
  width:32px;
  height:32px;
  border:solid 1px #002f9f;
}
.dropzone {
  margin-top:16px;
  margin-bottom:16px;
  width: 280px;
  height: 64px;
  border: solid 1px #808080;
}Description:
<div class="box" draggable="true"></div>
  <div id="dropzone" class="dropzone"></div>
displays the two above on the page For divs, you can use class="box", id="dropzone". The dragged object is the div where the acceptance area is placed. For draggable objects, you can set draggable="true" to the draggable object.
  function load() {
        var box = document.querySelector('.box');
      box.addEventListener('dragstart', onDragStart, false);
      var zone = document.querySelector('.dropzone');
      zone.addEventListener('dragover', onDragOver, false);
      zone.addEventListener('drop', onDrop, false);
   }
    function onDragStart(e) {
      e.dataTransfer.setData('text', this.id);
    }
    function onDragOver(e) {
      e.preventDefault();
      this.textContent = 'onDragOver';
    }
    function onDrop(e) {
      e.preventDefault();
      this.textContent = 'onDrop';
}The above code assigns drag and drop events to each element.
For the element to be dragged, we set the "dragstart" event. When dragging is started, the onDragStart function will be executed.
For the element to be deleted, set the "dragover" "drop" event. When the dragged element enters the drag and drop area, the onDragOver function is executed, and when the element is dropped, the onDrop function will be executed.
In the case of dragstart, you must write code to set the value of the dataTransfer object. It does not use the values inserted into the dataTransfer, but without this code it will work without the data.
Running results
Use a web browser to display the above HTML file. The effect shown below will be displayed.
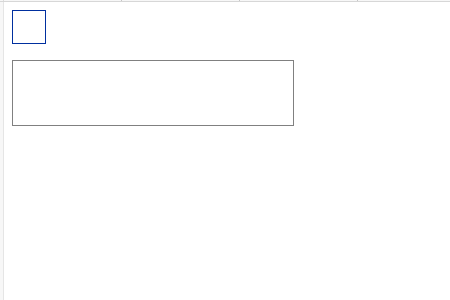
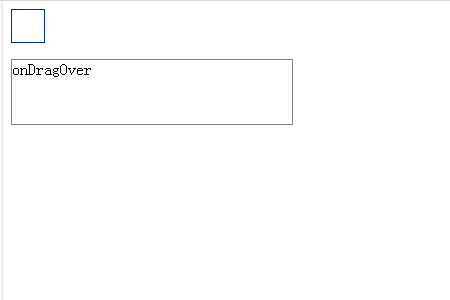
Drag the top box. If you drag it to the bottom frame, "onDragOver" will appear in the frame.
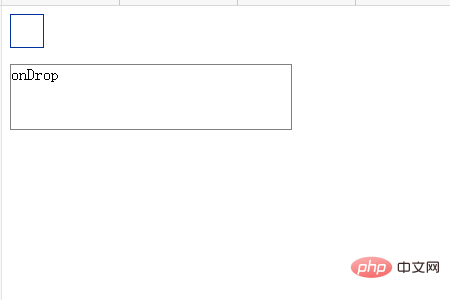
When you place it in the frame, the "onDrop" character will appear in the frame.
Example 2: Method of dragging and dropping elements with added events
The code is as follows
SimpleDragDrop2.html
<!DOCTYPE html>
<html>
<head>
<meta charset="utf-8" />
<title></title>
<link rel="stylesheet" href="SimpleDragDrop2.css" />
<script>
function load() {
var box = document.querySelector('.box');
box.addEventListener('dragstart', onDragStart, false);
box.addEventListener('dragend', onDragEnd, false);
var box = document.querySelector('.dropzone');
box.addEventListener('dragenter', onDragEnter, false);
box.addEventListener('dragover', onDragOver, false);
box.addEventListener('dragleave', onDragLeave, false);
box.addEventListener('drop', onDrop, false);
}
function onDragStart(e) {
e.dataTransfer.setData('Text', this.id);
this.textContent = 'onDragStart';
}
function onDragEnd(e) {
this.textContent = 'onDragEnd';
}
function onDragEnter(e) {
this.textContent = 'onDragEnter';
}
function onDragOver(e) {
e.preventDefault();
this.textContent = 'onDragOver';
}
function onDragLeave(e) {
this.textContent = 'onDragLeave';
}
function onDrop(e) {
e.preventDefault();
this.textContent = 'onDrop';
}
</script>
</head>
<body onload="load();">
<div id="box" class="box" draggable="true"></div>
<div id="dropzone" class="dropzone"></div>
</body>
</html>SimpleDragDrop.css
.box {
  width:32px;
  height:32px;
  border:solid 1px #d01313;
}
.dropzone {
  margin-top:16px;
  margin-bottom:16px;
  width: 280px;
  height: 64px;
  border: solid 1px #808080;
}Description:
 <div class="box" draggable="true"></div>
  <div id="dropzone" class="dropzone"></div>
As shown in the above example, two pages of DIVs are displayed on the page. For draggable objects, set draggable="true" to the draggable object.
function load() {
      var box = document.querySelector('.box');
      box.addEventListener('dragstart', onDragStart, false);
      box.addEventListener('dragend', onDragEnd, false);
      var box = document.querySelector('.dropzone');
      box.addEventListener('dragenter', onDragEnter, false);
      box.addEventListener('dragover', onDragOver, false);
      box.addEventListener('dragleave', onDragLeave, false);
      box.addEventListener('drop', onDrop, false);
    }
function onDragStart(e) {
      e.dataTransfer.setData('Text', this.id);
      this.textContent = 'onDragStart';
    }
function onDragEnd(e) {
            this.textContent = 'onDragEnd';
    }
function onDragEnter(e) {
      this.textContent = 'onDragEnter';
    }
function onDragOver(e) {
      e.preventDefault();
      this.textContent = 'onDragOver';
    }
function onDragLeave(e) {
      this.textContent = 'onDragLeave';
    }
function onDrop(e) {
      e.preventDefault();
      this.textContent = 'onDrop';
}The above code assigns drag and drop events to each element.
The "dragstart" and "dragend" events are assigned to elements on the dragged side. Once dragging starts, the ondstart function is called. After the dragging is completed, the ondos agEs function will be called.
The "dragenter", "dragover", "dragleave" and "drop" events are assigned to the element to be dragged. When the dragged element enters the drag-and-drop area, the onDragEnter function is executed. The onDragOver function is executed while being dragged in the drag-and-drop area. When it comes out of the drag-and-drop area, the OnDragLeave function is executed. When the dragged element is dropped, the onDrop function will be executed.
Running results
Use a web browser to display the above HTML file. The effect shown below will be displayed.
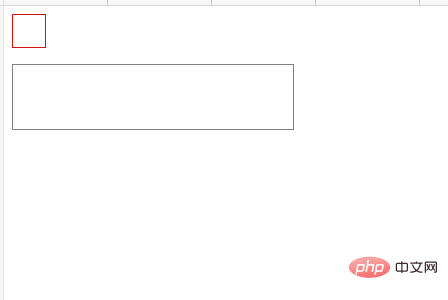
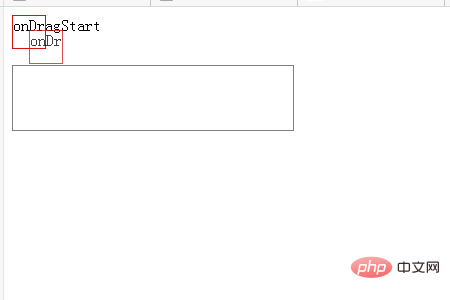
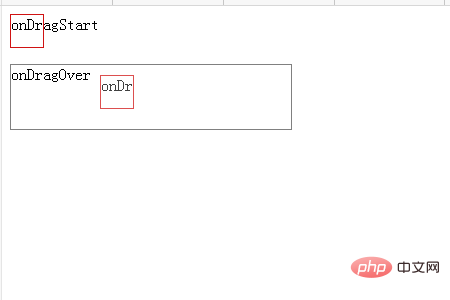
Drag the square area of the red area. The characters "onDragStart" are displayed in this area.
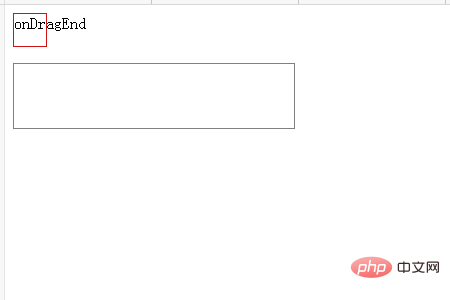
When you release the drag, you will see the area in the red box of the character of "onDragEnd".
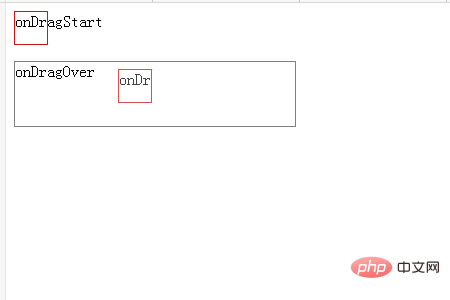
Drag the red box area again. When dragging and dropping into the bottom area, the characters "onDragOver" are displayed in the drop area.
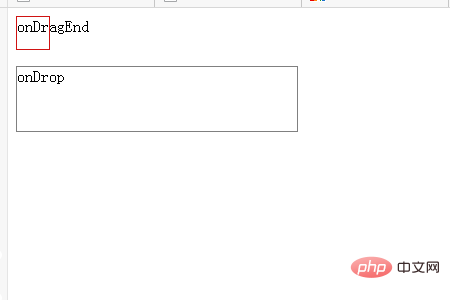
When you release the drag to the red box area of the drag and drop area, you will see the "onDrop" characters in the bottom area.
Drag the red box again to overlap the placement area. The "onDragOver" characters will be displayed.
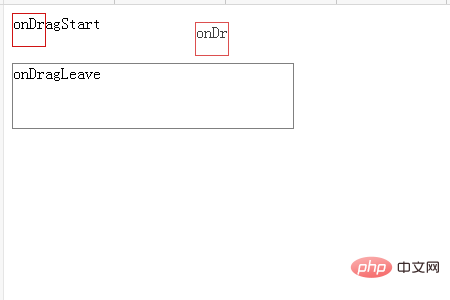
Drag the red box and drag it outside the drag and drop area. The character display in the drop area changes to "onDragLeave".
The above is the detailed content of How to implement drag and drop of individual elements using HTML5. For more information, please follow other related articles on the PHP Chinese website!

Hot AI Tools

Undresser.AI Undress
AI-powered app for creating realistic nude photos

AI Clothes Remover
Online AI tool for removing clothes from photos.

Undress AI Tool
Undress images for free

Clothoff.io
AI clothes remover

Video Face Swap
Swap faces in any video effortlessly with our completely free AI face swap tool!

Hot Article

Hot Tools

Notepad++7.3.1
Easy-to-use and free code editor

SublimeText3 Chinese version
Chinese version, very easy to use

Zend Studio 13.0.1
Powerful PHP integrated development environment

Dreamweaver CS6
Visual web development tools

SublimeText3 Mac version
God-level code editing software (SublimeText3)

Hot Topics
 1666
1666
 14
14
 1425
1425
 52
52
 1325
1325
 25
25
 1273
1273
 29
29
 1252
1252
 24
24
 What Does H5 Refer To? Exploring the Context
Apr 12, 2025 am 12:03 AM
H5referstoHTML5,apivotaltechnologyinwebdevelopment.1)HTML5introducesnewelementsandAPIsforrich,dynamicwebapplications.2)Itsupportsmultimediawithoutplugins,enhancinguserexperienceacrossdevices.3)SemanticelementsimprovecontentstructureandSEO.4)H5'srespo
 H5: The Evolution of Web Standards and Technologies
Apr 15, 2025 am 12:12 AM
Web standards and technologies have evolved from HTML4, CSS2 and simple JavaScript to date and have undergone significant developments. 1) HTML5 introduces APIs such as Canvas and WebStorage, which enhances the complexity and interactivity of web applications. 2) CSS3 adds animation and transition functions to make the page more effective. 3) JavaScript improves development efficiency and code readability through modern syntax of Node.js and ES6, such as arrow functions and classes. These changes have promoted the development of performance optimization and best practices of web applications.
 H5 Code: Best Practices for Web Developers
Apr 16, 2025 am 12:14 AM
Best practices for H5 code include: 1. Use correct DOCTYPE declarations and character encoding; 2. Use semantic tags; 3. Reduce HTTP requests; 4. Use asynchronous loading; 5. Optimize images. These practices can improve the efficiency, maintainability and user experience of web pages.
 Is H5 a Shorthand for HTML5? Exploring the Details
Apr 14, 2025 am 12:05 AM
H5 is not just the abbreviation of HTML5, it represents a wider modern web development technology ecosystem: 1. H5 includes HTML5, CSS3, JavaScript and related APIs and technologies; 2. It provides a richer, interactive and smooth user experience, and can run seamlessly on multiple devices; 3. Using the H5 technology stack, you can create responsive web pages and complex interactive functions.
 H5 and HTML5: Commonly Used Terms in Web Development
Apr 13, 2025 am 12:01 AM
H5 and HTML5 refer to the same thing, namely HTML5. HTML5 is the fifth version of HTML, bringing new features such as semantic tags, multimedia support, canvas and graphics, offline storage and local storage, improving the expressiveness and interactivity of web pages.
 Understanding H5 Code: The Fundamentals of HTML5
Apr 17, 2025 am 12:08 AM
HTML5 is a key technology for building modern web pages, providing many new elements and features. 1. HTML5 introduces semantic elements such as, , etc., which enhances web page structure and SEO. 2. Support multimedia elements and embed media without plug-ins. 3. Forms enhance new input types and verification properties, simplifying the verification process. 4. Offer offline and local storage functions to improve web page performance and user experience.
 Deconstructing H5 Code: Tags, Elements, and Attributes
Apr 18, 2025 am 12:06 AM
HTML5 code consists of tags, elements and attributes: 1. The tag defines the content type and is surrounded by angle brackets, such as. 2. Elements are composed of start tags, contents and end tags, such as contents. 3. Attributes define key-value pairs in the start tag, enhance functions, such as. These are the basic units for building web structure.
 H5: How It Enhances User Experience on the Web
Apr 19, 2025 am 12:08 AM
H5 improves web user experience with multimedia support, offline storage and performance optimization. 1) Multimedia support: H5 and elements simplify development and improve user experience. 2) Offline storage: WebStorage and IndexedDB allow offline use to improve the experience. 3) Performance optimization: WebWorkers and elements optimize performance to reduce bandwidth consumption.


