

PS制作梦幻的文字星空海报

PS制作梦幻的文字星空海报,教程有些复杂,喜欢的朋友可以一起学习
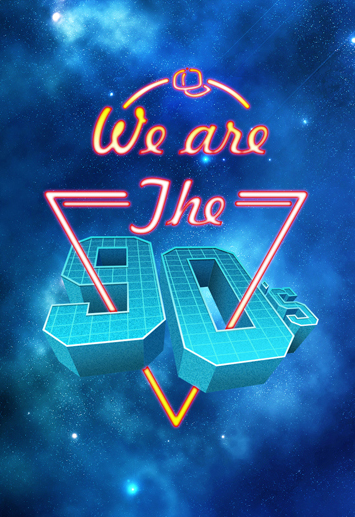
首先我们来看下这个海报的原稿:

想想这个海报有哪些部分组成呢?1、“90’s”字样;2、霓虹灯效果的文字;3、星空背景;4、流星;5、其他文字;恩,就这些了。那么下面我们一样一样的来做,一定要耐心哦!
分解一:星空背景制作
首先我们打开帅气的PhotoshopCS6新建一个1000像素×1455像素,分辨率为72像素/英寸的文档,然后保存下。
选一张美丽的星空高清大图,导入到文档里,调整下大小和位置。比如这样:

看!多美迷人的星空,引人无限遐想……然后我们把这个迷人的星空做成LOMO风格的效果。个人建议用形状工具来做,为了方便以后修改。
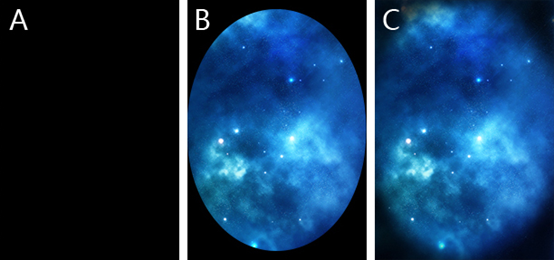
A:用矩形工具拉一个和画布等宽等高的矩形,注意下,这里做出来的是形状而不是路径哦!
B:用椭圆工具,路径操作换成“减去顶层形状”,就是这样:
在矩形的中间减去一个椭圆,调整下位置和大小,只留下四个角落。
C:调出属性面板(窗口-属性),把这个形状图层羽化一下,调整下透明度和羽化值即可。
这样背景算是做完了,我们选中所有的图层,建一个图层组,命名为“背景”。之后我们每做一样就建个图层组。
分解二:“90’s”数字制作
其实做这个效果并不难,就是烦了点。所以大家一定要有耐心哦!
我们先来分解下这个9字,知道了一个数字的制作方式就容易多了,因为其他的都是同样的方法做出来的。
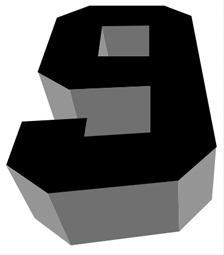
我们把这个9字分成了好几个面(关于这立体效果是怎么出来的,我在这里是抠图的,因为我这个字体。各位可以用各种方式来做,比如PS里的3D滤镜、AI的3D效果等。),我们一个面一个面的来做。每个面都用矩形工具哦!
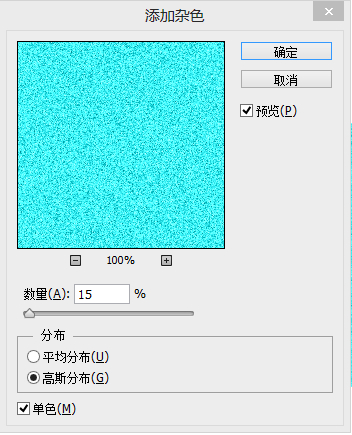
我们先来做最顶上黑色的面。用矩形工具,拉一个矩形出来,颜色为#42f9ff,大小盖住黑色部分即可,然后转成智能对象,执行滤镜-杂色-添加杂色,设置如下:
给这个智能对象添加图层样式,设置如下:
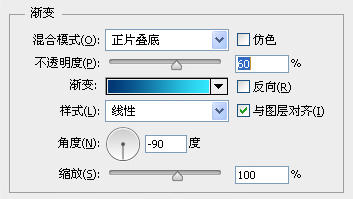
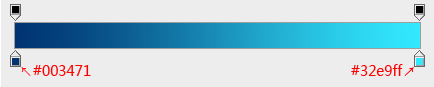
渐变设置如下:
设置完渐变后,我们选中智能对象的图层,建立剪切蒙版,快捷键为:ctrl+alt+g或者alt+鼠标左键,就像这样:
。
效果如下:

就用这样的方法做好数字9 的每个面,不过请注意光影关系哦!大家要注意不断修改每个面的渐变数值,来加强立体感。效果如下:

做完每个面再来添加顶上那个面的边缘突出。我们可以把顶上这个面复制一层,放到最顶上然后设置填充为“无”,描边为1个像素(如果太细了就加粗,呵呵~~)。
描边设置如下,颜色为:#ffffff至#25dae5
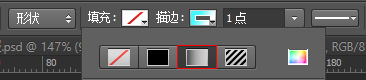
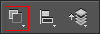
形状的填充和描边设置是一样的,从左到右分别是:“无填充”、“纯色填充”、“渐变填充”、“图案填充”,最右边那个孤零零的……是可怜的拾色器。大家记住了哦!
设置完毕复制下这个图层,把描边的模式改成“纯色填充”,颜色为黑色,调整下不透明度,将该图层置于下一层,调整下节点即可。效果如下:

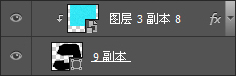
嗯,这样做好之后我们选中和数字9相关的所有图层,新建一个图层组,命名为9。方法有了,我们就这样把其他的也做完吧!记得建图层组哦!
这个分解的最后部分就是网格的制作了。我们新建一个40像素×40像素的文档,图层背景透明,然后画一个和画布等宽等高的矩形,描边为3像素,描边颜色为#55f4ef,填充为无。全选一下,定义为图案,保存后关闭(不保存也无所谓)。
我们回到海报的文档,用矩形工具拉一个大大的矩形,有多大呢,大到能盖住“90’s”的全部就行了。然后把这个图层的填充设置为“0”,图层名称改为“网格”并添加图层样式,设置如下:

盖住之后把这个大大的矩形转成智能对象,再自由变换,透视和数字的顶面一致就行了。
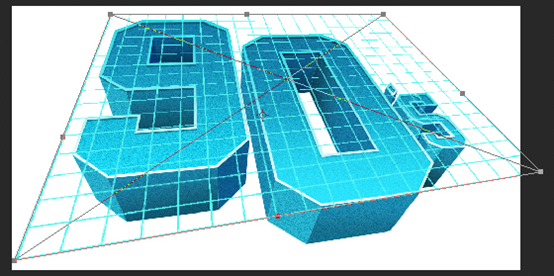
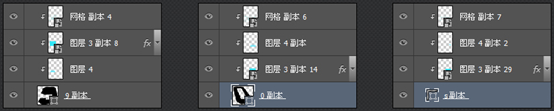
变换好了先别急着做其他的,我们把这个图层复制3次,因为其他地方也会用到。我们先把这4个图层链接起来,就像这样:
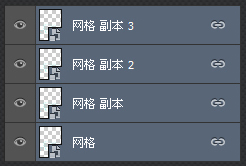
复制完了之后我们分别把这几个图层分配到数字“9”、数字“0”符号“‘ ”、字母“s”的顶面上,就是这几个面:

分配好了之后分别创建剪切蒙版,把网格塞进去,就是这样:
这个步骤做完之后我们再来看看效果:
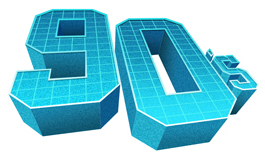
嗯,感觉还挺像模像样的。现在知道为什么要把这4个图层链接起来了吧?啥?还不知道?是为了移动的时候4个一起移动啊,这样透视就不会变了。
分解三:霓虹灯效果
首先我们用钢笔工具在形状模式下画勾勒出这样的一个图形:

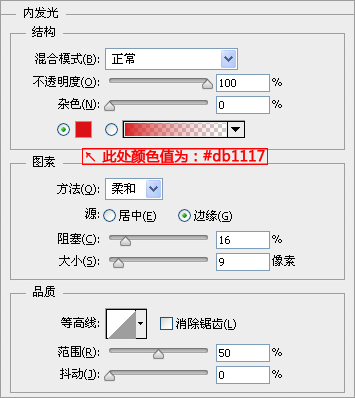
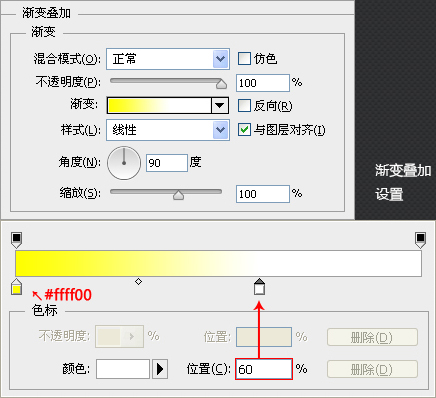
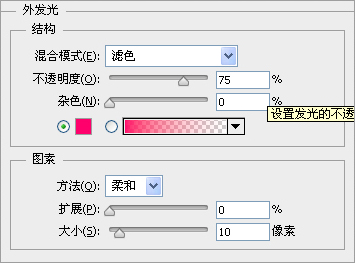
画完后把这个图层命名为“形状V”(其实大家随意啦),再添加一个图层样式,设置如下所示:

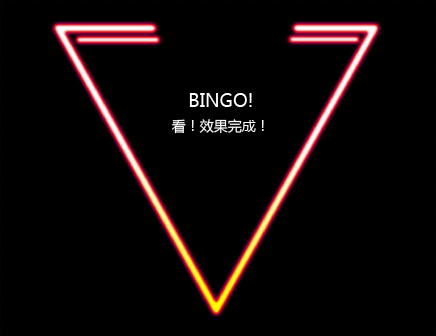
接下来我们做上面的图形和文字部分。由于没有原稿上的字体,我们就用其他好看的字体来替代吧,我这选择了Freehand521 BT这个字体。上面的图形也用钢笔在形状模式下勾勒出来哟!然后调整下位置及图层样式(样式和形状V基本是一样的,稍微调整就行了)让这些和形状V图层对好就OK了。
回到“形状V”图层,添加蒙版,把应该被数字盖住的地方给遮盖掉。
貌似有地方看起来不和谐啊!
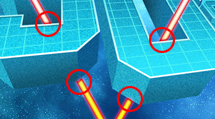
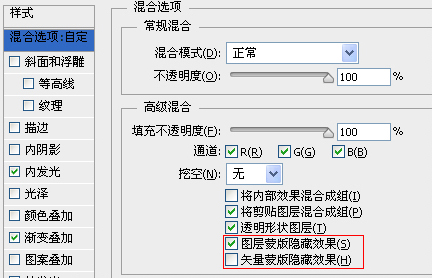
这里我们看到红圈内有不科学不和谐的地方,非常影响美观。不要急,我们再次打开形状V的图层样式,在“混合选项”里勾选“图层蒙版隐藏效果”即可,如图所示:
分解四:天马流星拳
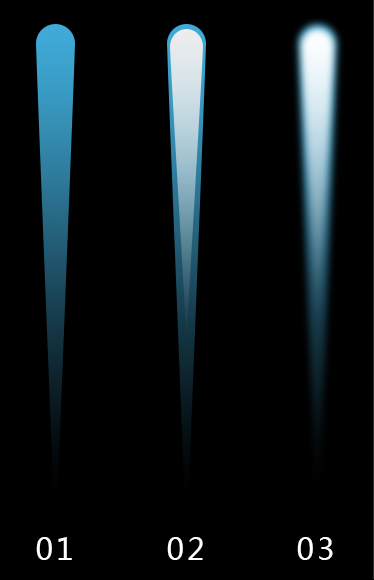
哈哈,这里当然不会是拳法啦,只是流星的绘制而已。用自定义形状工具,选择里面的雨滴形状,按住shift键拉出一个雨滴形状,垂直变化下,把形状的颜色改成渐变填充,渐变从浅蓝色到透明(此处颜色可自定),效果如下:

01:用钢笔工具把下面的节点拉长,做出流星尾巴的样子;
02:复制该图层,颜色填充的渐变由“浅蓝到透明”改成“白色到透明”,然后调整下大小和位置,让该图层看起来小一圈;
03:选中这俩图层,转成智能对象,命名为“流星”,添加外发光的图层样式(稍微发点光就行了)。然后根据近大远小的透视关系,调整下流星的角度和流星组的数量及大小。
最后我们在数字9和数字0与形状V相近的面上添加一个反光,建议数值#ea289b。同样的,用形状哦!然后转成智能对象。大家或许注意到了,本教程里,反复提到用“形状”、“智能对象”的字眼,这样做的目的是为了方便以后修改。之后置于剪切蒙版内,比如这样:
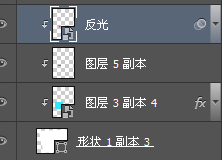
转成智能对象后,调整透明度,高斯模糊下,数值随意,让反光看起来自然点就可以了。
最后的最后,添加文字和签名,还有闪闪的光芒(光芒可以用笔刷来做,怎么喜欢怎么做)。呼~~~OK了,全部完工,效果是不是很棒呢?

Hot AI Tools

Undresser.AI Undress
AI-powered app for creating realistic nude photos

AI Clothes Remover
Online AI tool for removing clothes from photos.

Undress AI Tool
Undress images for free

Clothoff.io
AI clothes remover

Video Face Swap
Swap faces in any video effortlessly with our completely free AI face swap tool!

Hot Article
Hot Tools

Notepad++7.3.1
Easy-to-use and free code editor

SublimeText3 Chinese version
Chinese version, very easy to use

Zend Studio 13.0.1
Powerful PHP integrated development environment

Dreamweaver CS6
Visual web development tools

SublimeText3 Mac version
God-level code editing software (SublimeText3)
Hot Topics
 1666
1666
 14
1425
52
1328
25
1273
29
1253
24
14
1425
52
1328
25
1273
29
1253
24

 8 Ways to Fix Contact Photos and Posters Disabled in iOS 17
Sep 22, 2023 am 10:33 AM
8 Ways to Fix Contact Photos and Posters Disabled in iOS 17
Sep 22, 2023 am 10:33 AM
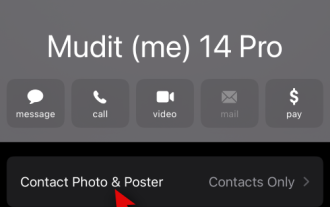
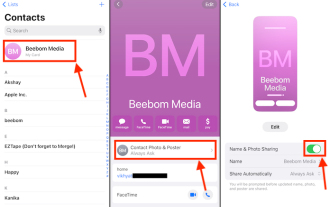
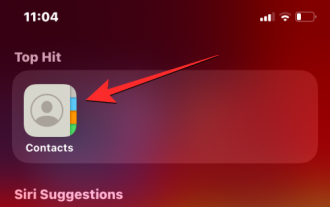
Learn the correct way to set up Contact Photos and Posters Contact Photos and Posters is a new feature that can be set up in iOS 17 for your contact cards and other contacts saved on your iPhone. For those who don’t know, the feature allows you to personalize the look of your call screen with custom posters, which you can design with photos, names, colors, fonts, emojis, and Memoji. Once created, contact posters can be shared with your saved contacts or restricted so that only a few selected people can view them. To learn how to create your own contact poster and how to share it with others, you can check out the guide at the following link: Contact Photos and Contact Posters Disabled: 8 Fixes Explained Despite Setting Contact Photos
 How to make round pictures and text in ppt
Mar 26, 2024 am 10:23 AM
How to make round pictures and text in ppt
Mar 26, 2024 am 10:23 AM
First, draw a circle in PPT, then insert a text box and enter text content. Finally, set the fill and outline of the text box to None to complete the production of circular pictures and text.
 How to add dots to text in word?
Mar 19, 2024 pm 08:04 PM
How to add dots to text in word?
Mar 19, 2024 pm 08:04 PM
When we create Word documents on a daily basis, we sometimes need to add dots under certain words in the document, especially when there are test questions. To highlight this part of the content, the editor will share with you the tips on how to add dots to text in Word. I hope it can help you. 1. Open a blank word document. 2. For example, add dots under the words "How to add dots to text". 3. We first select the words "How to add dots to text" with the left mouse button. Note that if you want to add dots to that word in the future, you must first use the left button of the mouse to select which word. Today we are adding dots to these words, so we have chosen several words. Select these words, right-click, and click Font in the pop-up function box. 4. Then something like this will appear
 How to personalize your iPhone on the latest iOS 17
Sep 21, 2023 am 08:17 AM
How to personalize your iPhone on the latest iOS 17
Sep 21, 2023 am 08:17 AM
How to Personalize Calls on iPhone Apple’s iOS 17 introduces a new feature called Contact Posters that allows you to personalize the look of your call screen on your iPhone. This feature allows you to design a poster using selected photos, colors, fonts, and Memoji as contact cards. So when you make a call, your custom image will appear on the recipient's iPhone exactly as you envisioned. You can choose to share your unique contact poster with all your saved contacts, or choose who can see it. Likewise, during a call exchange, you will also see other people's contact posters. Additionally, Apple lets you set specific contact photos for individual contacts, making calls from those contacts
 6 Fixes: How to solve the problem of contact poster not displaying properly on iPhone?
Sep 17, 2023 pm 12:41 PM
6 Fixes: How to solve the problem of contact poster not displaying properly on iPhone?
Sep 17, 2023 pm 12:41 PM
1. Check if your iPhone supports iOS17 If the contact poster feature does not work on your iPhone, the first thing you should do is check if your iPhone supports iOS17. This new feature is only available on iPhones running iOS 17, so be sure to update your phone to the latest update. Additionally, even if your iPhone is running iOS17, your contacts should have iPhones with iOS17 updates. Here is a list of all iPhones that support iOS17: iPhone15, 15PlusiPhone15Pro, 15ProMaxiPhone14, 14PlusiPhone14Pro, 1
 Golang Image Processing: Learn How to Add Watermarks and Text
Aug 17, 2023 am 08:41 AM
Golang Image Processing: Learn How to Add Watermarks and Text
Aug 17, 2023 am 08:41 AM
Golang Image Processing: Learn How to Add Watermarks and Text Quotes: In the modern era of digitalization and social media, image processing has become an important skill. Whether for personal use or business operations, adding watermarks and text are common needs. In this article, we will explore how to use Golang for image processing and learn how to add watermarks and text. Background: Golang is an open source programming language known for its concise syntax, efficient performance and powerful concurrency capabilities. it has become the subject of many developments
 How to protect the privacy of contact photos and posters on iPhone
Sep 18, 2023 am 10:49 AM
How to protect the privacy of contact photos and posters on iPhone
Sep 18, 2023 am 10:49 AM
Who can view your contact photos and posters on iPhone? Apple offers options for personalizing how you appear on someone's iPhone when they call or send a message. The options include Memoji, simple text, or a custom photo with effects as your contact photo and display image. You are free to change these selections at any time and switch between profiles on the contact card. Additionally, Apple is giving you the ability to control who can view and access photos or display images of your choice on iOS17. You can decide to share these with individuals saved in your contact list, or you can set your iPhone to prompt you every time you interact with a contact. If you wish, you can also disable the name permanently
 How to modify text on pictures
Aug 29, 2023 am 10:29 AM
How to modify text on pictures
Aug 29, 2023 am 10:29 AM
Modifying the text on the image can be done by using image editing software, online tools or screenshot tools. The specific steps are: 1. Open the picture editing software and import the picture that needs to be modified; 2. Select the text tool; 3. Click the text area on the picture to create a text box; 4. Enter the text you want in the text box. 5. If you just want to delete the text on the picture, you can use the eraser tool or the selection tool to select and delete the text area.
