PS路径文字排版制作炫彩文字堆叠效果
这篇教程是向脚本之家的朋友介绍PS路径文字排版制作炫彩文字堆叠效果方法,教程制作出来的文字效果非常地不错,推荐到脚本之家,喜欢的朋友一起来学习吧
文字堆叠效果,使用路径文字排版方式,堆叠出炫彩文字的效果。下面小编就为大家详细介绍PS路径文字排版制作炫彩文字堆叠效果方法,来看看吧!

方法/步骤
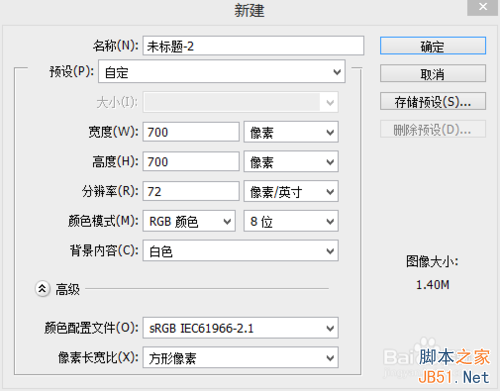
按快捷键“CTRL+N”新建一个 图片大小适应
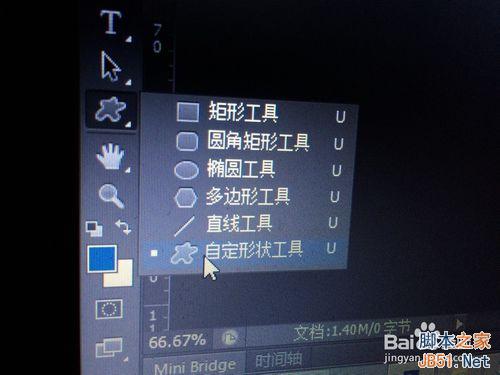
然后我们选择“自定义选择工具” 如果你没有看到这个工具 那么你得鼠标左键长按“矩形工具” 在这里面选择“自定义选择工具”
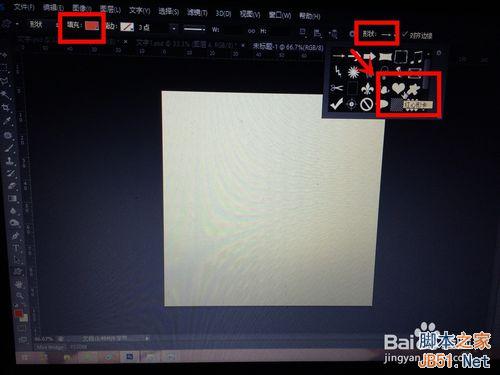
然后我们选择一个形状 在这里小编选择“红心形卡” 把填充色改为红色
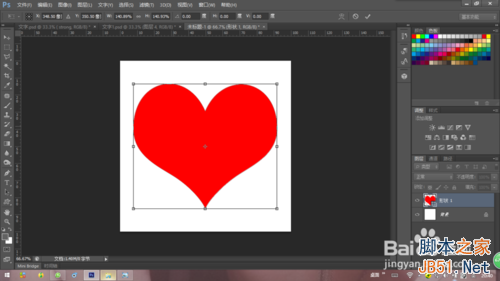
然后我们按着shift键在画面上画出一个心形出来 按着shift是为了保持形状不变 只改变大小
然后我们选择“文字工具” 在心形区域里点击一下 输入“L空格O空格V空格” 这样输入的目的是为了划行可以任意字母划行
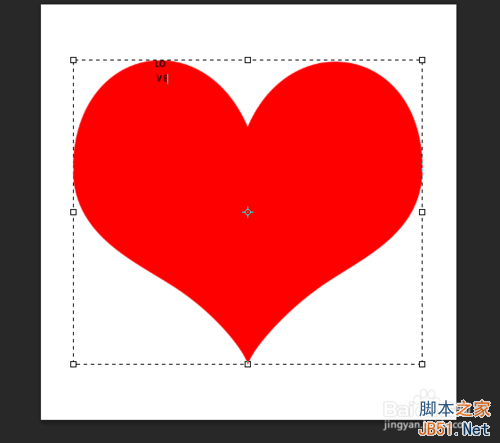
然后我们不断的复制(CTRL+C)粘贴(CTRL+V) 把这个心形填充满
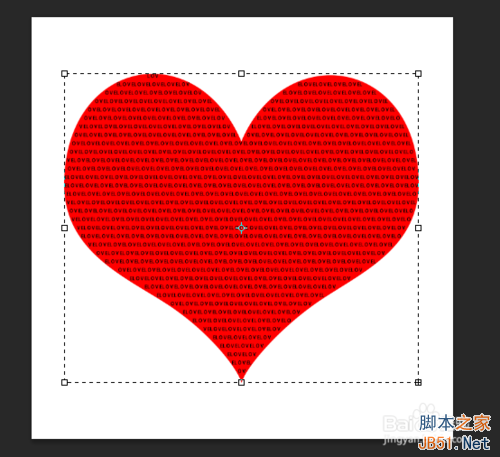
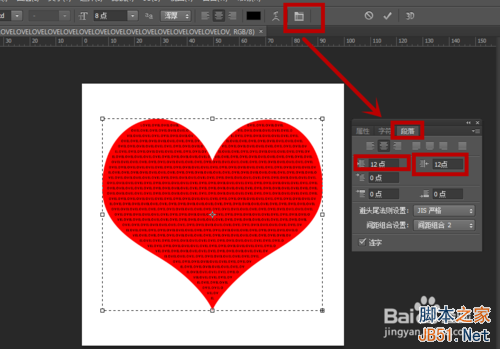
然后我们使用段落调板 在段左和段右都设置一下 如下图
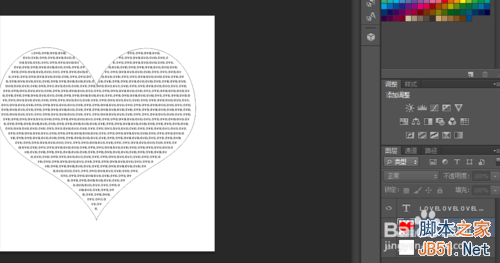
然后我们把心形图层关闭一下 可以看到以下效果
然后我们把心形图层打开 关闭文字图层 在新型边缘用“文字工具”蓝色打字打出“The world is full of love” 这时候 你看到的如下图
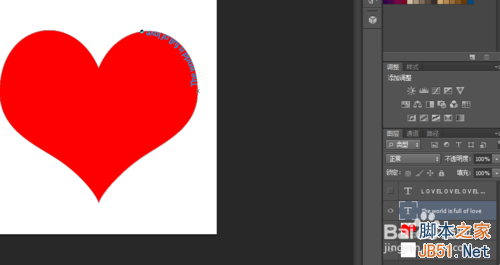
选择“路径选择工具”拉动“The world is full of love”边上的圆点 这时候我们可以移动文字的位置
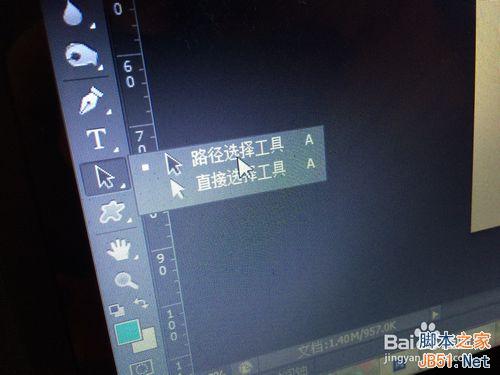
拉动后 我们可以看到 文字边缘不止有原点 还有一个× 这时候我们把×和原点都对调一下 你会发现文字的显示从路径内到路径外

然后我们打开字符调板 使用“基线偏移”
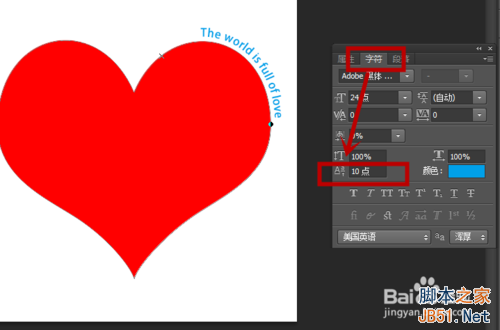
这里小编为了美观,把“The world is full of love”改为“Let the world be full of love can better tomorrow”
注意:如果你改了 还是没有看到效果 或者那段文字没有显示完 那么你就得拉动圆点
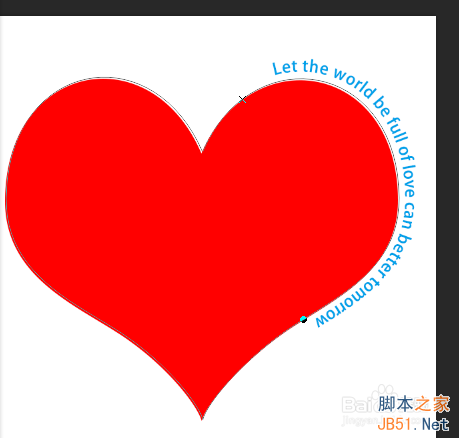
通过相同的原理 我们可以再加入一些 最好 字体和颜色都有改变 这样的效果才好 小编做出来的效果是这样的
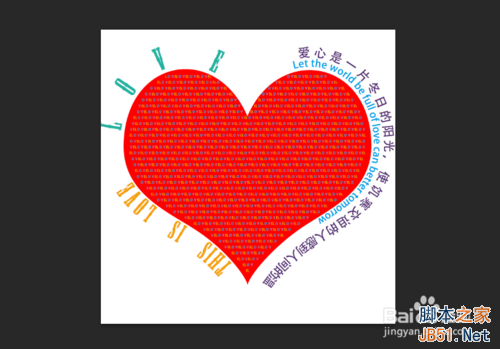
我们可以隐藏心形图层 看到的最终效果就是这样的
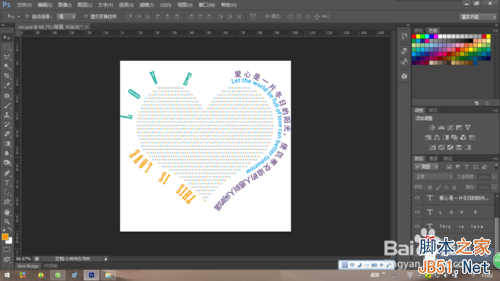
注意字体和颜色 与整体效果的搭配噢
以上就是PS路径文字排版制作炫彩文字堆叠效果方法介绍,希望能对大家有所帮助!

Hot AI Tools

Undresser.AI Undress
AI-powered app for creating realistic nude photos

AI Clothes Remover
Online AI tool for removing clothes from photos.

Undress AI Tool
Undress images for free

Clothoff.io
AI clothes remover

Video Face Swap
Swap faces in any video effortlessly with our completely free AI face swap tool!

Hot Article

Hot Tools

Notepad++7.3.1
Easy-to-use and free code editor

SublimeText3 Chinese version
Chinese version, very easy to use

Zend Studio 13.0.1
Powerful PHP integrated development environment

Dreamweaver CS6
Visual web development tools

SublimeText3 Mac version
God-level code editing software (SublimeText3)

Hot Topics
 ps serial number cs5 permanently free 2020
Jul 13, 2023 am 10:06 AM
PS serial numbers cs5 permanent free 2020 include: 1. 1330-1384-7388-4265-2355-8589 (Chinese); 2. 1330-1409-7892-5799-0412-7680 (Chinese); 3. 1330-1616-1993 -8375-9492-6951 (Chinese); 4. 1330-1971-2669-5043-0398-7801 (Chinese), etc.
 How to make round pictures and text in ppt
Mar 26, 2024 am 10:23 AM
First, draw a circle in PPT, then insert a text box and enter text content. Finally, set the fill and outline of the text box to None to complete the production of circular pictures and text.
 How to add dots to text in word?
Mar 19, 2024 pm 08:04 PM
When we create Word documents on a daily basis, we sometimes need to add dots under certain words in the document, especially when there are test questions. To highlight this part of the content, the editor will share with you the tips on how to add dots to text in Word. I hope it can help you. 1. Open a blank word document. 2. For example, add dots under the words "How to add dots to text". 3. We first select the words "How to add dots to text" with the left mouse button. Note that if you want to add dots to that word in the future, you must first use the left button of the mouse to select which word. Today we are adding dots to these words, so we have chosen several words. Select these words, right-click, and click Font in the pop-up function box. 4. Then something like this will appear
 What to do if ps installation cannot write registry value error 160
Mar 22, 2023 pm 02:33 PM
Solution to error 160 when ps installation cannot write registry value: 1. Check whether there is 2345 software on the computer, and if so, uninstall the software; 2. Press "Win+R" and enter "Regedit" to open the system registry, and then Find "Photoshop.exe" and delete the Photoshop item.
 How to delete selected area in ps
Aug 07, 2023 pm 01:46 PM
Steps to delete the selected area in PS: 1. Open the picture you want to edit; 2. Use the appropriate tool to create a selection; 3. You can use a variety of methods to delete the content in the selection, use the "Delete" key, use the "Healing Brush Tool" , use "Content-Aware Fill", use the "Stamp Tool", etc.; 4. Use tools to repair any obvious traces or defects to make the picture look more natural; 5. After completing editing, click "File" > in the menu bar "Save" to save the editing results.
 What should I do if the PS interface font is too small?
Dec 01, 2022 am 11:31 AM
How to fix the PS interface font that is too small: 1. Open PS, click the "Edit" button on the top menu bar of PS to expand the editing menu; 2. Click the "Preferences" button in the expanded editing menu, and then click "Interface. .." button; 3. In the interface settings, set the user interface font size to "Large", set the UI scaling to "200%" and save the settings, then restart PS to take effect.
 Golang Image Processing: Learn How to Add Watermarks and Text
Aug 17, 2023 am 08:41 AM
Golang Image Processing: Learn How to Add Watermarks and Text Quotes: In the modern era of digitalization and social media, image processing has become an important skill. Whether for personal use or business operations, adding watermarks and text are common needs. In this article, we will explore how to use Golang for image processing and learn how to add watermarks and text. Background: Golang is an open source programming language known for its concise syntax, efficient performance and powerful concurrency capabilities. it has become the subject of many developments
 Introduction to the process of extracting line drawings in PS
Apr 01, 2024 pm 12:51 PM
1. Open the software and import a piece of material, as shown in the picture below. 2. Then ctrl+shift+u to remove color. 3. Then press ctrl+J to copy the layer. 4. Then reverse ctrl+I, and then set the layer blending mode to Color Dodge. 5. Click Filter--Others--Minimum. 6. In the pop-up dialog box, set the radius to 2 and click OK. 7. Finally, you can see the line draft extracted.


