

Apache+Servlet+Jsp环境设置(下)_MySQL

Apacheservlet
(四)Tomcat
1、用WinZIP等解压缩软件把tomcat.zip解压缩到一个目录下,我把它解压缩到C:\,它会自动
创建tomcat子目录,这样在C盘就多了一个目录C:/tomcat,我用$TOMCAT标识;
2、打开$APACHE_ROOT\conf\httpd.conf文件,在该文件最后加上类似这样一句话:
Include $TOMCAT/etc/tomcat.conf
在我这里为Include C:/tomcat/etc/tomcat.conf;
3、修改Tomcat运行的端口号,注意Tomcat自己有一个独立的HTTP服务器,它必须使用一个还未被使用的端口号,我这里的8081还未被占用,我用$TOMCAT_PORT标识,分配给Tomcat:
1)打开$TOMCAT/server.xml;
2)修改ContextManager:
4、双击$TOMCAT目录下的startup.bat来启动Tomcat;
5、在浏览器上输入http://localhost:$TOMCAT_PORT/,能看到Tomcat Version 3.0这一页
就表示Tomcat安装成功了;
6、在浏览器上输入http://localhost:$APACHE_PORT/examples/servlets/,能看到
Servlet Examples with Code这一页就表示Apache+Servlet也成功了;
7、在浏览器上输入http://localhost:$APACHE_PORT/examples/Jsp/,能看到Jsp Samples
这一页就表示Apache+Jsp也成功了。
附:
JDK Download
http://java.sun.com/products/jdk/1.2/
Apache Server Download
http://www.apache.org/dist/binaries/win32/apache_1_3_12_win32.exe
Apache JServ Download
http://jakarta.apache.org/builds/tomcat/release/v3.0/win32/ApacheModuleJServ.dll
Tomcat Download
http://jakarta.apache.org/builds/tomcat/release/v3.0/tomcat.zip
Java(TM) 2 SDK 1.2.2-001 Installation Instructions
http://java.sun.com/products/jdk/1.2/install-windows.html
Tomcat FAQ
http://jakarta.apache.org/cvsweb/index.cgi/jakarta-tomcat/src/doc/faq
Tomcat+Apache-HOWTO
http://jakarta.apache.org/cvsweb/index.cgi/jakarta-tomcat/src/doc/Tomcat%2bApache-HOWT

Hot AI Tools

Undresser.AI Undress
AI-powered app for creating realistic nude photos

AI Clothes Remover
Online AI tool for removing clothes from photos.

Undress AI Tool
Undress images for free

Clothoff.io
AI clothes remover

Video Face Swap
Swap faces in any video effortlessly with our completely free AI face swap tool!

Hot Article
Hot Tools

Notepad++7.3.1
Easy-to-use and free code editor

SublimeText3 Chinese version
Chinese version, very easy to use

Zend Studio 13.0.1
Powerful PHP integrated development environment

Dreamweaver CS6
Visual web development tools

SublimeText3 Mac version
God-level code editing software (SublimeText3)
Hot Topics
 1664
1664
 14
1423
52
1321
25
1269
29
1249
24
14
1423
52
1321
25
1269
29
1249
24

 How to deploy jar project in tomcat
Apr 21, 2024 am 07:27 AM
How to deploy jar project in tomcat
Apr 21, 2024 am 07:27 AM
To deploy a JAR project to Tomcat, follow these steps: Download and unzip Tomcat. Configure the server.xml file, set the port and project deployment path. Copies the JAR file to the specified deployment path. Start Tomcat. Access the deployed project using the provided URL.
 How to allow external network access to tomcat server
Apr 21, 2024 am 07:22 AM
How to allow external network access to tomcat server
Apr 21, 2024 am 07:22 AM
To allow the Tomcat server to access the external network, you need to: modify the Tomcat configuration file to allow external connections. Add a firewall rule to allow access to the Tomcat server port. Create a DNS record pointing the domain name to the Tomcat server public IP. Optional: Use a reverse proxy to improve security and performance. Optional: Set up HTTPS for increased security.
 Where is the tomcat installation directory?
Apr 21, 2024 am 07:48 AM
Where is the tomcat installation directory?
Apr 21, 2024 am 07:48 AM
Tomcat installation directory: Default path: Windows: C:\Program Files\Apache Software Foundation\Tomcat 9.0macOS:/Library/Tomcat/Tomcat 9.0Linux:/opt/tomcat/tomcat9 Custom path: You can specify it during installation. Find the installation directory: use whereis or locate command.
 How to deploy multiple projects in tomcat
Apr 21, 2024 am 09:33 AM
How to deploy multiple projects in tomcat
Apr 21, 2024 am 09:33 AM
To deploy multiple projects through Tomcat, you need to create a webapp directory for each project and then: Automatic deployment: Place the webapp directory in Tomcat's webapps directory. Manual deployment: Manually deploy the project in Tomcat's manager application. Once the project is deployed, it can be accessed by its deployment name, for example: http://localhost:8080/project1.
 How to check the number of concurrent connections in tomcat
Apr 21, 2024 am 08:12 AM
How to check the number of concurrent connections in tomcat
Apr 21, 2024 am 08:12 AM
How to check the number of concurrent Tomcat connections: Visit the Tomcat Manager page (http://localhost:8080/manager/html) and enter your user name and password. Click Status->Sessions in the left navigation bar to see the number of concurrent connections at the top of the page.
 Where is the root directory of the tomcat website?
Apr 21, 2024 am 09:27 AM
Where is the root directory of the tomcat website?
Apr 21, 2024 am 09:27 AM
The Tomcat website root directory is located in Tomcat's webapps subdirectory and is used to store web application files, static resources, and the WEB-INF directory; it can be found by looking for the docBase attribute in the Tomcat configuration file.
 How to check the port number of tomcat
Apr 21, 2024 am 08:00 AM
How to check the port number of tomcat
Apr 21, 2024 am 08:00 AM
The Tomcat port number can be viewed by checking the port attribute of the <Connector> element in the server.xml file. Visit the Tomcat management interface (http://localhost:8080/manager/html) and view the "Status" tab. Run "catalina.sh version" from the command line and look at the "Port:" line.
 Do Not Disturb Mode Not Working in iPhone: Fix
Apr 24, 2024 pm 04:50 PM
Do Not Disturb Mode Not Working in iPhone: Fix
Apr 24, 2024 pm 04:50 PM
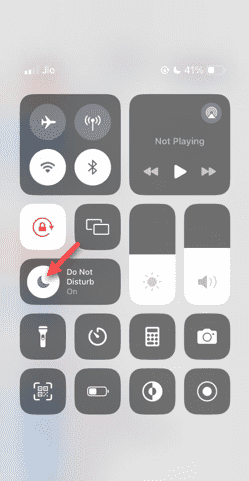
Even answering calls in Do Not Disturb mode can be a very annoying experience. As the name suggests, Do Not Disturb mode turns off all incoming call notifications and alerts from emails, messages, etc. You can follow these solution sets to fix it. Fix 1 – Enable Focus Mode Enable focus mode on your phone. Step 1 – Swipe down from the top to access Control Center. Step 2 – Next, enable “Focus Mode” on your phone. Focus Mode enables Do Not Disturb mode on your phone. It won't cause any incoming call alerts to appear on your phone. Fix 2 – Change Focus Mode Settings If there are some issues in the focus mode settings, you should fix them. Step 1 – Open your iPhone settings window. Step 2 – Next, turn on the Focus mode settings
