

How to unbind NetEase Cloud Music intimacy relationship

php editor Apple introduces: How to dissolve the intimate relationship of NetEase Cloud Music? Recently, NetEase Cloud Music users reported that they found that they could not unbind when viewing the intimacy page. In this regard, we will provide you with a detailed analysis of the methods of dissolving intimate relationships to help users solve this problem.

How to dissolve the intimate relationship in NetEase Cloud Music
1. First, we open NetEase Cloud, click on the vinyl icon and select [Double] space】.
2. Then we click the three dots in the upper right corner to open the relationship setting interface for [Relationship Management]
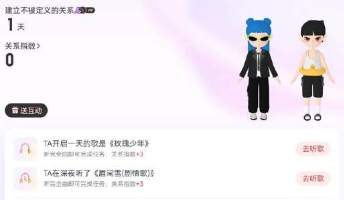
3. Then you can choose to change the relationship, Modify the image or terminate the relationship.
4. Each of our accounts can add up to two relationships, which can be selected and set according to your own needs.
The above is the detailed content of How to unbind NetEase Cloud Music intimacy relationship. For more information, please follow other related articles on the PHP Chinese website!

Hot AI Tools

Undresser.AI Undress
AI-powered app for creating realistic nude photos

AI Clothes Remover
Online AI tool for removing clothes from photos.

Undress AI Tool
Undress images for free

Clothoff.io
AI clothes remover

Video Face Swap
Swap faces in any video effortlessly with our completely free AI face swap tool!

Hot Article
Hot Tools

Notepad++7.3.1
Easy-to-use and free code editor

SublimeText3 Chinese version
Chinese version, very easy to use

Zend Studio 13.0.1
Powerful PHP integrated development environment

Dreamweaver CS6
Visual web development tools

SublimeText3 Mac version
God-level code editing software (SublimeText3)
Hot Topics
 1664
1664
 14
1421
52
1315
25
1266
29
1239
24
14
1421
52
1315
25
1266
29
1239
24

 How to display English songs in NetEase Cloud Music in Chinese_How to translate Chinese and English lyrics in NetEase Cloud Music
Mar 26, 2024 am 10:00 AM
How to display English songs in NetEase Cloud Music in Chinese_How to translate Chinese and English lyrics in NetEase Cloud Music
Mar 26, 2024 am 10:00 AM
1. In the opened NetEase Cloud Music interface, click the three horizontal bars icon in the upper left corner. 2. After clicking, in the menu that pops up on the left, click [Settings] below. 3. After entering the settings interface, scroll down until you see [Show lyrics translation]. 4. Turn on the [Show Lyrics Translation] switch. Then when we listen to English songs, we will see subtitles with Chinese translations.
 How to turn off NetEase Cloud automatic renewal
Mar 25, 2024 pm 05:15 PM
How to turn off NetEase Cloud automatic renewal
Mar 25, 2024 pm 05:15 PM
First, open the NetEase Cloud Music app, click the menu icon in the upper left corner, and select "Member Center". Next, scroll down to the bottom, select the "VIP Help Center" option, and click "Manage Auto-Renewal." Finally, click "VIP Continuous Monthly Subscription", select "Turn off automatic renewal", and confirm the shutdown operation.
 How to change account and log in to NetEase Cloud Music_Tutorial on changing account and login to NetEase Cloud Music
Mar 25, 2024 pm 10:16 PM
How to change account and log in to NetEase Cloud Music_Tutorial on changing account and login to NetEase Cloud Music
Mar 25, 2024 pm 10:16 PM
1. First, in the home page interface of the software, we need to click [three] on the upper left. 2. Then in the pop-up interface, swipe up to find the [Exit] button at the bottom, and click to exit. 3. After launch, we will be in the login interface. At that time, we can choose another account to log in.
 Where to turn off MV barrage in NetEase Cloud Music_How to turn off MV barrage in NetEase Cloud Music
Mar 25, 2024 pm 03:01 PM
Where to turn off MV barrage in NetEase Cloud Music_How to turn off MV barrage in NetEase Cloud Music
Mar 25, 2024 pm 03:01 PM
1. First open NetEase Cloud Music, select the video icon on the right side of the song, and click to enter the MV. 2. Then find the three dots in the upper right corner. 3. Then click to close the barrage.
 How to use NetEase Cloud Music Playlist Assistant_Tutorial on automatically generating playlists based on NetEase Cloud Music filter conditions
Mar 25, 2024 pm 07:11 PM
How to use NetEase Cloud Music Playlist Assistant_Tutorial on automatically generating playlists based on NetEase Cloud Music filter conditions
Mar 25, 2024 pm 07:11 PM
1. Open NetEase Cloud Music, click My, scroll down to the playlist, and click Playlist Assistant on the far right. 2. Click to try it. 3. Click to filter. 4. Select some attributes you need to filter out and click Generate Now. 5. We can find that the playlist assistant has brought you songs that meet your required attributes and generated a playlist for you.
 How to recharge NetEase Cloud Music_NetEase Cloud Music recharge steps
Mar 25, 2024 pm 09:20 PM
How to recharge NetEase Cloud Music_NetEase Cloud Music recharge steps
Mar 25, 2024 pm 09:20 PM
1. Select and open the [NetEase Cloud Music] application on the mobile phone desktop, as shown in the figure. 2. Click the [Menu] button in the upper left corner to bring up the side navigation bar, as shown in the figure. 3. Click and open [My Members], as shown in the picture. 4. Select the method you need to recharge (vinyl VIP or music package), as shown in the picture. 5. Select Pay Now to complete the recharge, as shown in the picture.
 How to transfer from Kugou Music playlist to NetEase Cloud Music
Mar 25, 2024 pm 07:00 PM
How to transfer from Kugou Music playlist to NetEase Cloud Music
Mar 25, 2024 pm 07:00 PM
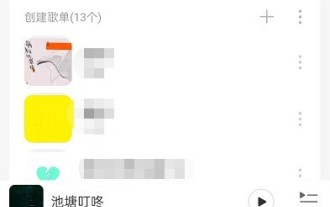
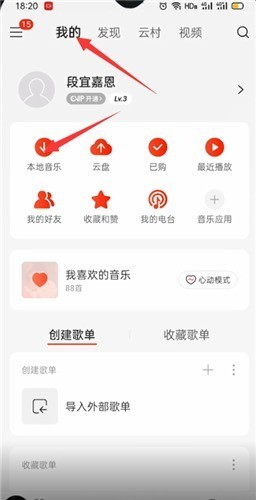
1. First, we take a screenshot of the Kugou playlist, and then open NetEase Cloud Music. 2. Click on My and click on the three dots next to the playlist. 3. Click to import the external playlist. 4. Upload the Kugou playlist you just screenshot and you can import it.
 How does NetEase Cloud Music scan local music_NetEase Cloud Music scans local music tutorial
Mar 25, 2024 pm 10:21 PM
How does NetEase Cloud Music scan local music_NetEase Cloud Music scans local music tutorial
Mar 25, 2024 pm 10:21 PM
1. Open NetEase Cloud Music, click My, then click Local Music. 2. Click the three dots in the upper right corner. 3. Click Scan local music. 4. Click Scan Settings below. 5. Swipe left to filter audio files shorter than 60 seconds. 6. Go back and click Full Scan to scan all local music.
