

ppt introductory tutorial sharing

phpXinyi, the editor of php, will share the ppt introductory tutorial, which will introduce you in detail how to use PowerPoint to create beautiful slides, allowing you to easily master the production skills. From basic operations to advanced functions, whether you are a beginner or an experienced user, this tutorial will provide you with comprehensive guidance, allowing you to quickly get started and create professional-level presentations. Let's explore the infinite possibilities of PPT together and show your creativity and ideas!
In this lesson, we will introduce the basic operations of PowerPoint. First, open PowerPoint and create a new PPT file. Please pay attention to the menu bar at the top. When you select a different ribbon, the options below will change accordingly. This will help you better understand how to use PowerPoint to create slideshows.
#2, then we look at the slide pane on the left, where you can create new slides, the workspace on the right, and the lower left corner is called the status bar.
#3. We click on [File]. These are our more commonly used function options.
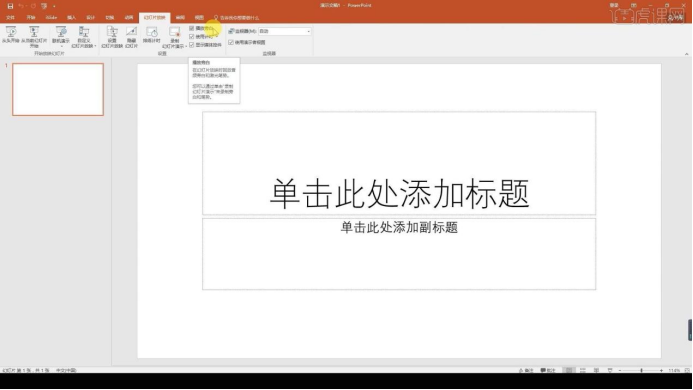
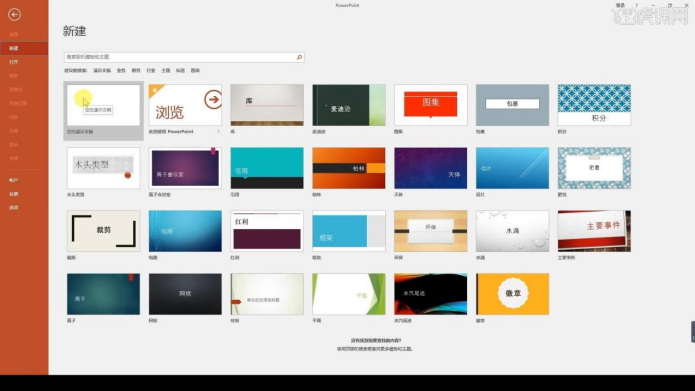
#4. What is the operation when creating a new one? We click [File], select [New] on the left, and then click to select a blank document to create a new document.
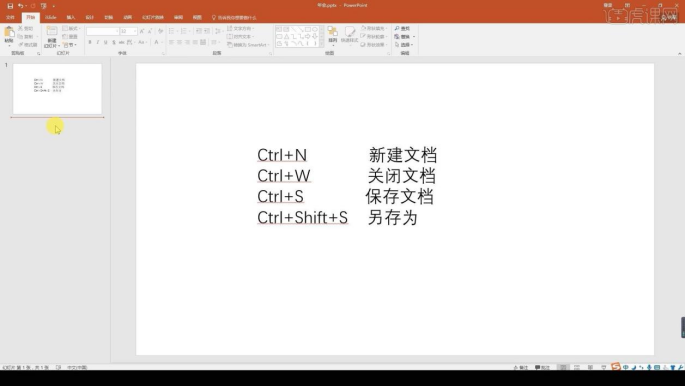
#5, we can also directly press the shortcut keys to create a new document [Ctrl N] to create a new document [Ctrl W] to close the document.
6. There is also the shortcut key for saving the document [Ctrl S]. We also want to save the file in another file so that the file will not be modified and saved on this basis. You can press [Ctrl Shift S].
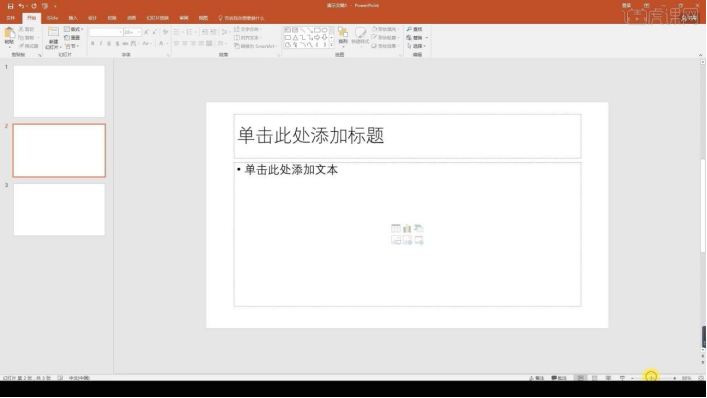
7. For copying slides, we can create a new blank slide, then [Ctrl C] to copy a [Ctrl V] to paste the slide.

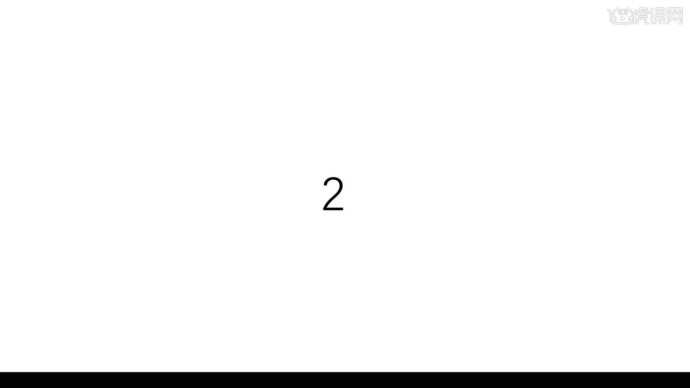
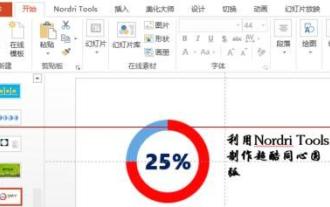
8, we insert a number into each slide of the page, modify the number size, double-click the first slide and start the show, and then press space or Click the left mouse button to proceed to the next page.
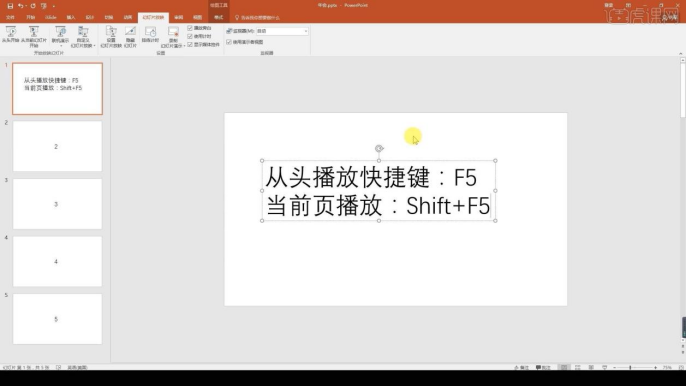
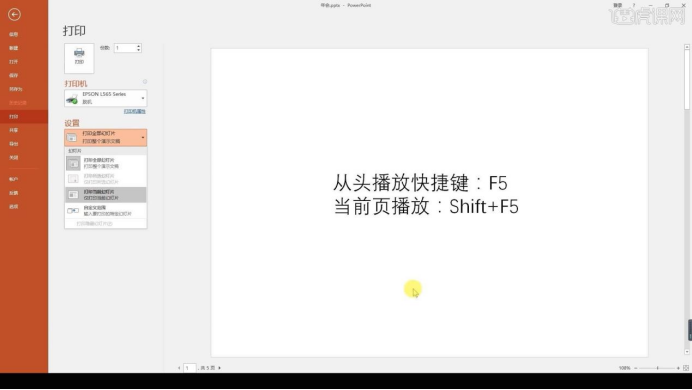
9. The shortcut key for playing from the beginning is [F5], and the shortcut key for playing from the current page is [Shift F5].
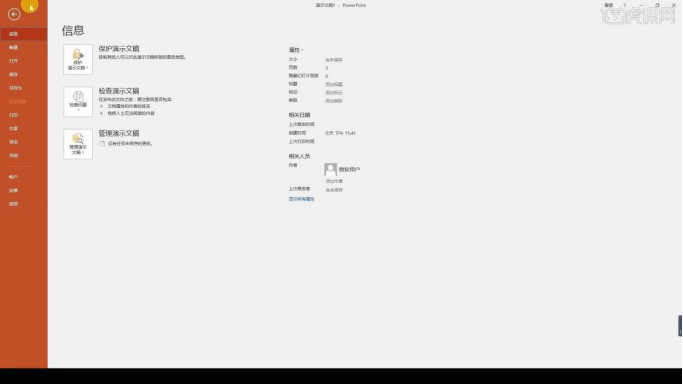
#10. Let’s take a look at the [Print] shortcut key that we need to master in the file menu is [Ctrl P] to select printing in the settings.
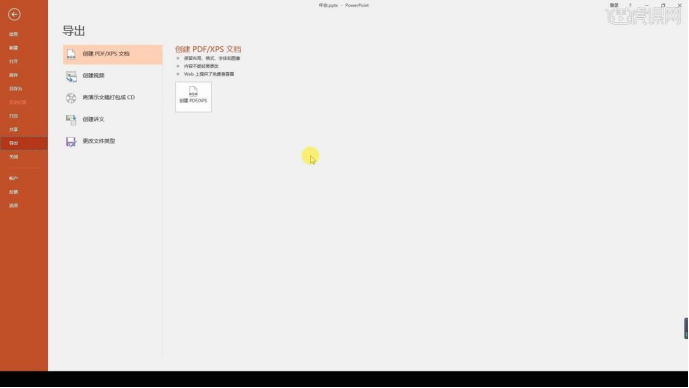
#11. Use the [Export] option to create PDF files, create videos, and package presentation documents into CDs. Create handouts, change file types.
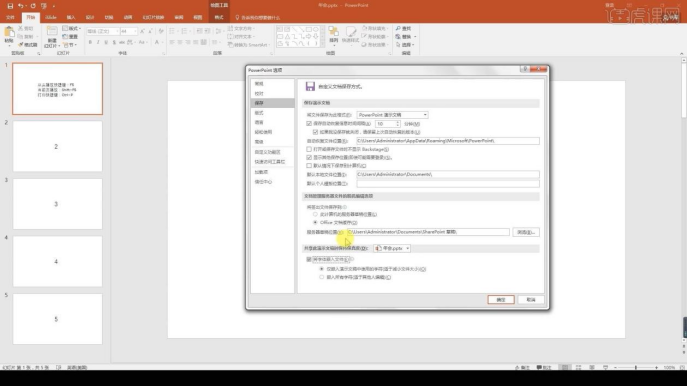
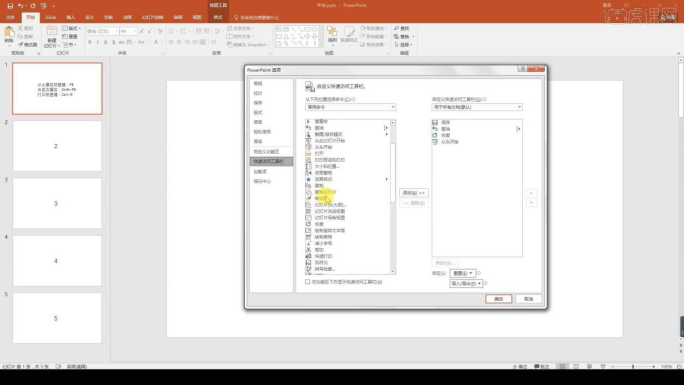
12. [Options] is a setting panel. You can set up Power Point. For example, you can embed fonts so that they will not be missing when opened on other computers. 13. You can also adjust the quick access toolbar to add and delete.
14, this lesson is over.
As the saying goes, steel is made by a hundred attempts. For friends who have just started learning introductory ppt, you must be serious and serious, practice and practice again, so that you can practice in practice. As time goes by, you will become more and more proficient, and you will make rapid progress. What are you waiting for? Come and start operating it with the editor!
The above is the detailed content of ppt introductory tutorial sharing. For more information, please follow other related articles on the PHP Chinese website!

Hot AI Tools

Undresser.AI Undress
AI-powered app for creating realistic nude photos

AI Clothes Remover
Online AI tool for removing clothes from photos.

Undress AI Tool
Undress images for free

Clothoff.io
AI clothes remover

Video Face Swap
Swap faces in any video effortlessly with our completely free AI face swap tool!

Hot Article
Hot Tools

Notepad++7.3.1
Easy-to-use and free code editor

SublimeText3 Chinese version
Chinese version, very easy to use

Zend Studio 13.0.1
Powerful PHP integrated development environment

Dreamweaver CS6
Visual web development tools

SublimeText3 Mac version
God-level code editing software (SublimeText3)
Hot Topics
 1666
1666
 14
1425
52
1323
25
1272
29
1251
24
14
1425
52
1323
25
1272
29
1251
24

 A Diffusion Model Tutorial Worth Your Time, from Purdue University
Apr 07, 2024 am 09:01 AM
A Diffusion Model Tutorial Worth Your Time, from Purdue University
Apr 07, 2024 am 09:01 AM
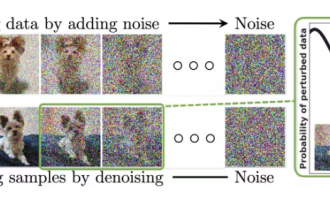
Diffusion can not only imitate better, but also "create". The diffusion model (DiffusionModel) is an image generation model. Compared with the well-known algorithms such as GAN and VAE in the field of AI, the diffusion model takes a different approach. Its main idea is a process of first adding noise to the image and then gradually denoising it. How to denoise and restore the original image is the core part of the algorithm. The final algorithm is able to generate an image from a random noisy image. In recent years, the phenomenal growth of generative AI has enabled many exciting applications in text-to-image generation, video generation, and more. The basic principle behind these generative tools is the concept of diffusion, a special sampling mechanism that overcomes the limitations of previous methods.
 Generate PPT with one click! Kimi: Let the 'PPT migrant workers' become popular first
Aug 01, 2024 pm 03:28 PM
Generate PPT with one click! Kimi: Let the 'PPT migrant workers' become popular first
Aug 01, 2024 pm 03:28 PM
Kimi: In just one sentence, in just ten seconds, a PPT will be ready. PPT is so annoying! To hold a meeting, you need to have a PPT; to write a weekly report, you need to have a PPT; to make an investment, you need to show a PPT; even when you accuse someone of cheating, you have to send a PPT. College is more like studying a PPT major. You watch PPT in class and do PPT after class. Perhaps, when Dennis Austin invented PPT 37 years ago, he did not expect that one day PPT would become so widespread. Talking about our hard experience of making PPT brings tears to our eyes. "It took three months to make a PPT of more than 20 pages, and I revised it dozens of times. I felt like vomiting when I saw the PPT." "At my peak, I did five PPTs a day, and even my breathing was PPT." If you have an impromptu meeting, you should do it
 Introduction to the method of inserting heptagons into PPT slides
Mar 26, 2024 pm 07:46 PM
Introduction to the method of inserting heptagons into PPT slides
Mar 26, 2024 pm 07:46 PM
1. Open the PPT slide document, and in the [Outline, Slide] column on the left side of the PPT, click to select the slide where you want to insert the basic [shape]. 2. After selecting, select the [Insert] menu in the function menu bar above the PPT and click. 3. After clicking the [Insert] menu, the [Insert] submenu bar pops up below the function menu bar. Select the [Shape] menu in the [Insert] submenu bar. 4. Click the [Shape] menu to pop up the preset shape type selection page. 5. In the shape type selection page, select the [Heptagon] shape and click. 6. After clicking, move the mouse to the slide editing interface, press the mouse to draw, and release the mouse after the drawing is completed. Complete the insertion of the [heptagon] shape.
 How to remove the date that appears automatically when printing from PPT handouts
Mar 26, 2024 pm 08:16 PM
How to remove the date that appears automatically when printing from PPT handouts
Mar 26, 2024 pm 08:16 PM
1. Let me first talk about the method I used at the beginning, maybe everyone is using it too. First, open [View]——]Remarks Template[. 2. A place where you can actually see the date after opening it. 3. Select it first and delete it. 4. After deleting, click [Close Master View]. 5. Open the print preview again and find that the date is still there. 6. In fact, this date was not deleted here. It should be in the [Handout Master]. Look at the picture below. 7. Delete the date after you find it. 8. Now when you open the preview and take a look, the date is no longer there. Note: In fact, this method is also very easy to remember, because the printed handouts are handouts, so you should look for the [Handout Master].
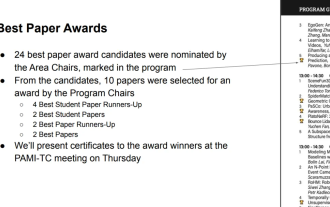 All CVPR 2024 awards announced! Nearly 10,000 people attended the conference offline, and a Chinese researcher from Google won the best paper award
Jun 20, 2024 pm 05:43 PM
All CVPR 2024 awards announced! Nearly 10,000 people attended the conference offline, and a Chinese researcher from Google won the best paper award
Jun 20, 2024 pm 05:43 PM
In the early morning of June 20th, Beijing time, CVPR2024, the top international computer vision conference held in Seattle, officially announced the best paper and other awards. This year, a total of 10 papers won awards, including 2 best papers and 2 best student papers. In addition, there were 2 best paper nominations and 4 best student paper nominations. The top conference in the field of computer vision (CV) is CVPR, which attracts a large number of research institutions and universities every year. According to statistics, a total of 11,532 papers were submitted this year, and 2,719 were accepted, with an acceptance rate of 23.6%. According to Georgia Institute of Technology’s statistical analysis of CVPR2024 data, from the perspective of research topics, the largest number of papers is image and video synthesis and generation (Imageandvideosyn
 How to deal with blanks when playing PPT slides
Mar 26, 2024 pm 07:51 PM
How to deal with blanks when playing PPT slides
Mar 26, 2024 pm 07:51 PM
1. Open the PPT file you created and select the second slide. 2. On the second slide, select one of the pictures, and then select [Animation] to add any animation effect. 3. In the start column of the animation bar, change [While Standalone] to [After Previous Animation], and you will see that the picture animation label [1] will change to [0]. Do the same for subsequent slides, and you can see the effect by playing the slide at the end.
 Restricted processing operation method is prompted when embedding fonts in PPT
Mar 26, 2024 pm 08:41 PM
Restricted processing operation method is prompted when embedding fonts in PPT
Mar 26, 2024 pm 08:41 PM
1. Open PowerPoint and edit the PPT document. 2. Find the font that cannot be embedded, select the text box, right-click - Cut/Copy. 3. Right-click the blank space of the slide and select [Paste] - Paste as picture. 4. It is simple and convenient to save the font as a picture, but the font cannot be modified. Method 2: Software FontCreatorProgram 1. Download the FontCreatorProgram software from the Internet, unzip the file, and select the [FCP.EXE] file to install. 2. Open the installed software, click [File] - Open - Installed Fonts in the window menu bar, and select PPT. For fonts that cannot be embedded, click [OK]. 3. Select [
 From bare metal to a large model with 70 billion parameters, here is a tutorial and ready-to-use scripts
Jul 24, 2024 pm 08:13 PM
From bare metal to a large model with 70 billion parameters, here is a tutorial and ready-to-use scripts
Jul 24, 2024 pm 08:13 PM
We know that LLM is trained on large-scale computer clusters using massive data. This site has introduced many methods and technologies used to assist and improve the LLM training process. Today, what we want to share is an article that goes deep into the underlying technology and introduces how to turn a bunch of "bare metals" without even an operating system into a computer cluster for training LLM. This article comes from Imbue, an AI startup that strives to achieve general intelligence by understanding how machines think. Of course, turning a bunch of "bare metal" without an operating system into a computer cluster for training LLM is not an easy process, full of exploration and trial and error, but Imbue finally successfully trained an LLM with 70 billion parameters. and in the process accumulate
