
 System Tutorial
LINUX
Detailed guide to installing Debian 8.10 and installing Debian with Termux
System Tutorial
LINUX
Detailed guide to installing Debian 8.10 and installing Debian with Termux
Detailed guide to installing Debian 8.10 and installing Debian with Termux

php editor Strawberry brings you a detailed guide on installing Debian 8.10 and installing Debian with Termux. Debian is a popular Linux operating system, and Termux is a terminal emulator that runs a Linux environment on Android devices. This article will introduce in detail how to install Debian 8.10 and run it on Termux, so that you can enjoy the convenience of a complete Linux operating system on your mobile device. Whether you are a beginner or an experienced user, this guide will help you install and configure Debian easily.
Install Debian 8.10
1. Download the Debian 8.10 image file
You need to download the Debian 8.10 image file from the Debian official website. You can choose the version that suits your hardware architecture, such as 32-bit or 64-bit.
2. Make a bootable USB flash drive
Use a third-party tool, such as Rufus or Etcher, to write the downloaded Debian image file to the USB bootable USB flash drive. Make sure to select the correct target device and follow the steps Prompt to complete the production process.
3. Set the BIOS startup sequence
Insert the prepared boot USB disk into the computer, restart the computer and enter the BIOS settings, set the USB startup item as the priority startup item, save the settings and exit the BIOS .
4. Install Debian 8.10
Restart the computer and select boot from USB. After entering the Debian installation interface, follow the instructions on the screen. You need to select the language, keyboard layout, time zone, etc. Settings, select the installation method, you can choose automatic installation or manual installation. During the manual installation process, you can choose the partition scheme, set the user password, etc.
5. Complete the installation
After completing the installation process, restart the computer and enter the newly installed Debian system. You can log in to the system by entering your username and password through the login interface.
Termux installation Debian
Termux is a terminal emulator and Linux environment application on the Android platform. Through Termux, you can run the Debian environment on your Android device. The following is to install Termux and install it in Termux Steps to install Debian in:
1. Download and install the Termux app
On your Android device, download and install the Termux app through app stores such as Google Play Store or F-Droid.
2. Update Termux and install necessary software packages
Open the Termux application and execute the following command to update the software package list:
```sql
pkg update
```
Install necessary software packages, including `termux-tools`, `coreutils` and `wget`, etc.:
```go
pkg install termux-tools coreutils wget
3. Download the Debian image file and mount it in Termux
Download the Debian image file (`.iso` format) on your computer , then connect the Android device via USB, and execute the following command in Termux to mount the image file to the Android device:
```bash
termux-setup-storage -m /sdcard/ Download/debian.iso -d /data/data/com.termux/files/home/.termux/storage/app/termux-storage -t /sdcard/Download/debian.iso.sig -k /sdcard/Download/debian .iso.key -p /sdcard/Download/debian.iso.pub -u /sdcard/Download/debian.iso -w /sdcard/Download/debian.iso -r /sdcard/Download/debian.iso -f /sdcard /Download/debian.iso -c /sdcard/Download/debian.iso -b /sdcard/Download/debian.iso -g /sdcard/Download/debian.iso -i /sdcard/Download/debian.iso -o /sdcard /Download/debian.iso -l /sdcard/Download/debian.iso -k /sdcard/Download/debian.iso -p /sdcard/Download/debian.iso -u /sdcard/Download/debian.iso -w /sdcard /Download/debian.iso -r /sdcard/Download/debian.iso -f /sdcard/Download/debian.iso -c /sdcard/Download/debian.iso -b /sdcard/Download/debian.iso -g /sdcard /Download/debian.iso -i /sdcard/Download/debian.iso -o /sdcard/Download/debian.iso -l /sdcard/Download/debian.iso -k /sdcard/Download/debian.iso -p /sdcard /Download/debian.iso -u /sdcard/Download/debian.iso -w /sdcard/Download
The above is the detailed content of Detailed guide to installing Debian 8.10 and installing Debian with Termux. For more information, please follow other related articles on the PHP Chinese website!

Hot AI Tools

Undresser.AI Undress
AI-powered app for creating realistic nude photos

AI Clothes Remover
Online AI tool for removing clothes from photos.

Undress AI Tool
Undress images for free

Clothoff.io
AI clothes remover

Video Face Swap
Swap faces in any video effortlessly with our completely free AI face swap tool!

Hot Article
Hot Tools

Notepad++7.3.1
Easy-to-use and free code editor

SublimeText3 Chinese version
Chinese version, very easy to use

Zend Studio 13.0.1
Powerful PHP integrated development environment

Dreamweaver CS6
Visual web development tools

SublimeText3 Mac version
God-level code editing software (SublimeText3)
Hot Topics


 Introduction to how to use the joiplay simulator
May 04, 2024 pm 06:40 PM
Introduction to how to use the joiplay simulator
May 04, 2024 pm 06:40 PM
The jojplay simulator is a very easy-to-use mobile phone simulator. It supports computer games to run on mobile phones and has very good compatibility. Some players don’t know how to use it. The editor below will introduce how to use it. How to use joiplay simulator 1. First, you need to download the Joiplay body and RPGM plug-in. It is best to install them in the order of body-plug-in. The apk package can be obtained in the Joiplay bar (click to get >>>). 2. After Android is completed, you can add games in the lower left corner. 3. Fill in the name casually, and press CHOOSE on executablefile to select the game.exe file of the game. 4. Icon can be left blank or you can choose your favorite picture.
 How to enter bios on hp motherboard
May 04, 2024 pm 09:01 PM
How to enter bios on hp motherboard
May 04, 2024 pm 09:01 PM
How to set up the U disk boot in the HP notebook bios (how to enter the HP computer bios) and then insert the U disk to be booted first into the USB port of the notebook. If you want to install the system, the system program must have been prepared in the U disk. First, open the laptop. Make sure the laptop is turned off. Setting the bios must be done with the computer turned off. Then insert the U disk that you want to boot first into the USB port of the notebook. If you want to install the system, the prerequisite is that the system program has been prepared in the U disk. Take the HP ProDesk400G5SFF desktop computer as an example. Set the BIOS disk startup method: First, restart the computer and wait for the startup screen to appear. There are two ways to set up USB disk startup on HP notebooks. One is to directly press the shortcut key to select
 MSI motherboard boot logo
May 08, 2024 pm 02:20 PM
MSI motherboard boot logo
May 08, 2024 pm 02:20 PM
How to cancel the MSI motherboard icon when booting 1. Press the DEL key when booting to enter the BIOS. Generally, in the "Advanced Features" item, you can find the words MSI motherboard LOGO screen. Select DISABLED, save and exit. There will no longer be this MSI motherboard LOGO screen when you turn on the computer in the future. MSI motherboard refers to the motherboard brand developed by MSI (MSI Technology Company). 2. The logo displayed when the computer is turned on is basically that of the motherboard manufacturer. You can set QUICKPOST to DISENABLE in the BIOS, so that the logo will generally no longer be displayed. It will display computer configuration-related information and give you more details. 3. First, teach you how to flash the BIOS in Windows environment. First: Go online
 How to enter bios after assembling a computer? How to enter bios when assembling a computer?
May 07, 2024 am 09:13 AM
How to enter bios after assembling a computer? How to enter bios when assembling a computer?
May 07, 2024 am 09:13 AM
How to enter bios after assembling a computer? Before entering the BIOS, you need to make sure that the computer is completely shut down and powered off. Here are several common ways to enter the BIOS: 1. Use shortcut keys: Most computer manufacturers will display a prompt message at startup telling you which key to press to enter the BIOS settings. Usually the F2, F10, F12 or Delete key. After pressing the appropriate keys, you should be able to see a screen with information about your computer's hardware and BIOS settings. 2. Use the button on the motherboard: Some computer motherboards have a dedicated button for entering BIOS settings. This button is usually labeled "BIOS" or "UEFI". After pressing the button you should be able to see
 Introduction to joiplay simulator font setting method
May 09, 2024 am 08:31 AM
Introduction to joiplay simulator font setting method
May 09, 2024 am 08:31 AM
The jojplay simulator can actually customize the game fonts, and can solve the problem of missing characters and boxed characters in the text. I guess many players still don’t know how to operate it. The following editor will bring you the method of setting the font of the jojplay simulator. introduce. How to set the joiplay simulator font 1. First open the joiplay simulator, click on the settings (three dots) in the upper right corner, and find it. 2. In the RPGMSettings column, click to select the CustomFont custom font in the third row. 3. Select the font file and click OK. Be careful not to click the "Save" icon in the lower right corner, otherwise the default settings will be restored. 4. Recommended Founder and Quasi-Yuan Simplified Chinese (already in the folders of the games Fuxing and Rebirth). joi
 How to delete the thunder and lightning simulator application? -How to delete applications in Thunderbolt Simulator?
May 08, 2024 pm 02:40 PM
How to delete the thunder and lightning simulator application? -How to delete applications in Thunderbolt Simulator?
May 08, 2024 pm 02:40 PM
The official version of Thunderbolt Simulator is a very professional Android emulator tool. So how to delete the thunder and lightning simulator application? How to delete applications in Thunderbolt Simulator? Let the editor give you the answer below! How to delete the thunder and lightning simulator application? 1. Click and hold the icon of the app you want to delete. 2. Wait for a while until the option to uninstall or delete the app appears. 3. Drag the app to the uninstall option. 4. In the confirmation window that pops up, click OK to complete the deletion of the application.
 Life Restart Simulator Guide
May 07, 2024 pm 05:28 PM
Life Restart Simulator Guide
May 07, 2024 pm 05:28 PM
Life Restart Simulator is a very interesting simulation game. This game has become very popular recently. There are many ways to play in the game. Below, the editor has brought you a complete guide to Life Restart Simulator. Come and take a look. What strategies are there? Life Restart Simulator Guide Guide Features of Life Restart Simulator This is a very creative game in which players can play according to their own ideas. There are many tasks to complete every day, and you can enjoy a new life in this virtual world. There are many songs in the game, and all kinds of different lives are waiting for you to experience. Life Restart Simulator Game Contents Talent Card Drawing: Talent: You must choose the mysterious small box to become an immortal. A variety of small capsules are available to avoid dying midway. Cthulhu may choose
 How to upgrade Gigabyte motherboard to Win11_How to upgrade Gigabyte motherboard to Win11
May 06, 2024 pm 12:04 PM
How to upgrade Gigabyte motherboard to Win11_How to upgrade Gigabyte motherboard to Win11
May 06, 2024 pm 12:04 PM
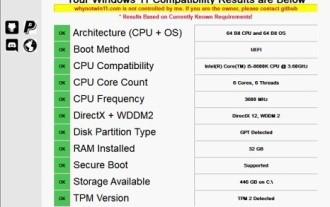
1. Win11 does not have very high requirements for the motherboard. You can first download healthcheck or whynotwin11 to check whether your other hardware devices support it (you can download it from this site). 2. If other conditions are met and only tpm does not meet the requirements, you can enable tpm in the bios settings. 3. Restart the system, and then press [DEL] on the keyboard to enter the BIOS settings when the logo pops up. 4. Enter the [Settings] option and [Miscellaneous] option in sequence. 5. Find [Intel Platform Trust Technology (PTT)] below and set it to [Start]. 6. If it is an AMD platform, then
