
 System Tutorial
Windows Series
How to delete 32-bit Office? Tutorial on uninstalling 32-bit Office in Win7
System Tutorial
Windows Series
How to delete 32-bit Office? Tutorial on uninstalling 32-bit Office in Win7
How to delete 32-bit Office? Tutorial on uninstalling 32-bit Office in Win7

php editor Xinyi brings you a detailed tutorial on uninstalling 32-bit Office in Win7. In some cases, we may need to remove 32-bit Office software, but the uninstallation process may not be intuitive. This tutorial will provide you with step-by-step instructions to help you successfully delete 32-bit Office and solve related problems that may arise. Whether you want to uninstall Office 2010, Office 2013 or Office 2016, we will provide you with applicable solutions to make it easy for you to complete the uninstallation process. Next, let’s take a look at the specific steps!
Method 1: The system comes with method
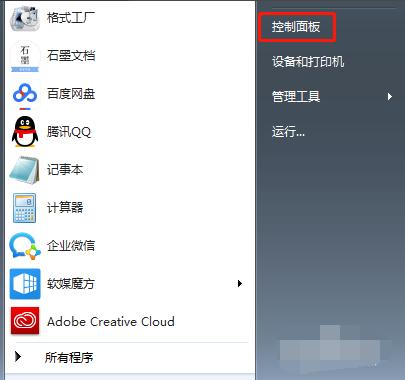
1. Click the Start button and select the Control Panel button on the right.
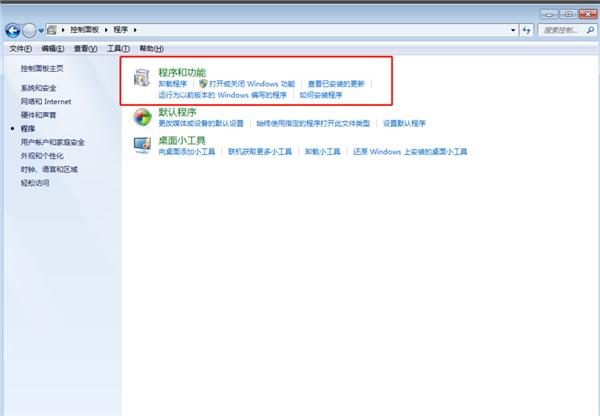
#2. Select the "Programs" button in the control panel window, and select the "Programs" - "Programs and Features" option in the pop-up dialog box.

Click "Programs and Features".
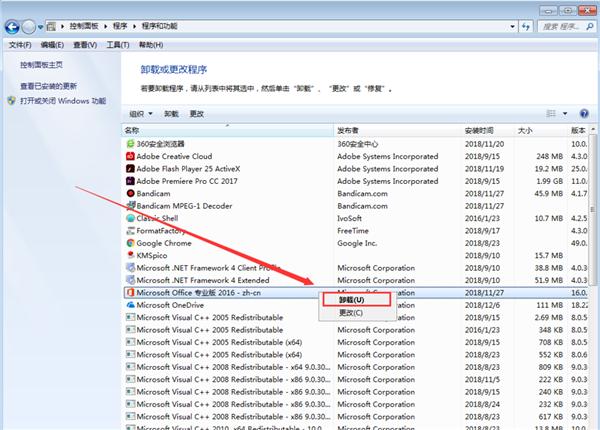
3. Find the 32-bit office software, select it, right-click it, and select the "Uninstall" command in the pop-up dialog box. Select "Yes" in the pop-up prompt box to continue uninstalling.
#4. After the uninstallation is completed, there is actually a large amount of office information remaining in the registry, which needs to be deleted.
If we do not delete these office contents in the registry, our installation of another office version will conflict with these contents, resulting in an error message.
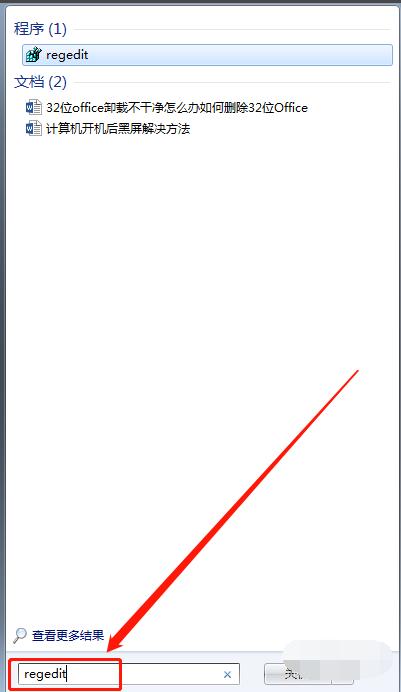
Select Start-Run, enter regedit in the input area and click the OK button.
#5. Delete the following registry information and select the "Yes" button in the pop-up confirmation item deletion dialog box.
HKEY_CURRENT_USER\Software\Microsoft\Office\15.0
HKEY_LOCAL_MACHINE\SOFTWARE\Microsoft\Office\15.0
HKEY_LOCAL_MACHINE\SOFTWARE\Microsoft\Office\Delivery\SourceEngine\Downloads\ 0FF1CE}-
HKEY_LOCAL_MACHINE\SOFTWARE\Microsoft\Windows\CurrentVersion\Uninstall\ *0FF1CE *
HKEY_LOCAL_MACHINE\SOFTWARE\Microsoft\Windows\CurrentVersion\Installer\UpgradeCodes\ * F01FEC
HKEY_LOCAL_MACHINE\SOFTWARE\Microsoft\Windows\CurrentVersion\Installer\UserData\S-1-5-18\Products\* F01FEC
HKEY_LOCAL_MACHINE\SYSTEM\CurrentControlSet\Services\ose
HKEY_CLASSES_ROOT \Installer\Features\ * F01FEC
HKEY_CLASSES_ROOT\Installer\Products\ * F01FEC
HKEY_CLASSES_ROOT\Installer\UpgradeCodes\ * F01FEC
HKEY_CLASSES_ROOT\Installer\Win32Assemblies\ * Office15 *
After restarting the computer, the error will not be prompted when installing 64-bit Office.
Method 2: Directly use 360 software or other third-party tools to uninstall and clean up the remaining garbage.

The above is the detailed content of How to delete 32-bit Office? Tutorial on uninstalling 32-bit Office in Win7. For more information, please follow other related articles on the PHP Chinese website!

Hot AI Tools

Undresser.AI Undress
AI-powered app for creating realistic nude photos

AI Clothes Remover
Online AI tool for removing clothes from photos.

Undress AI Tool
Undress images for free

Clothoff.io
AI clothes remover

Video Face Swap
Swap faces in any video effortlessly with our completely free AI face swap tool!

Hot Article
Hot Tools

Notepad++7.3.1
Easy-to-use and free code editor

SublimeText3 Chinese version
Chinese version, very easy to use

Zend Studio 13.0.1
Powerful PHP integrated development environment

Dreamweaver CS6
Visual web development tools

SublimeText3 Mac version
God-level code editing software (SublimeText3)
Hot Topics


 How to view word documents in vscode How to view word documents in vscode
May 09, 2024 am 09:37 AM
How to view word documents in vscode How to view word documents in vscode
May 09, 2024 am 09:37 AM
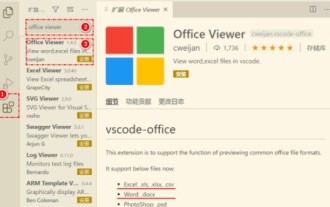
First, open the vscode software on the computer, click the [Extension] icon on the left, as shown in ① in the figure. Then, enter [officeviewer] in the search box of the extension interface, as shown in ② in the figure. Then, from the search Select [officeviewer] to install in the results, as shown in ③ in the figure. Finally, open the file, such as docx, pdf, etc., as shown below
 What to do if the xlsx file cannot be opened on mobile phone
Apr 25, 2024 am 08:28 AM
What to do if the xlsx file cannot be opened on mobile phone
Apr 25, 2024 am 08:28 AM
Why can’t WPS and Excel documents be opened on Apple’s mobile phone? It shows that the file cannot be previewed. 1. The reason why WPS and Excel documents cannot be previewed on Apple’s mobile phone is because there are no applications that support these file formats installed on the mobile phone. The solution is to install an application that supports the document format. Application to convert documents to PDF format and send documents to computers or other devices for opening. 2. First check what the suffix of the file is. If it is an excel file but cannot be opened, it means that the file type is not registered in the computer's folder options. 3. First, open the QQ browser on your mobile phone; click the button in the middle below; click "File Download"; click "Document" to select the excel file you want to open. Summary Open QQ browsing
 Xiaomi Mi Pad 6 series launches PC-level WPS Office in full quantity
Apr 25, 2024 pm 09:10 PM
Xiaomi Mi Pad 6 series launches PC-level WPS Office in full quantity
Apr 25, 2024 pm 09:10 PM
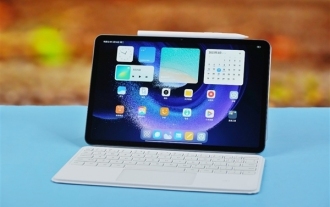
According to news from this site on April 25, Xiaomi officially announced today that Xiaomi Mi Pad 6, Mi Pad 6 Pro, Mi Pad 6 Max 14, and Mi Pad 6 S Pro now fully support PC-level WPSOffice. Among them, Xiaomi Mi Pad 6 Pro and Xiaomi Mi Pad 6 need to upgrade the system version to V816.0.4.0 and above before they can download WPSOfficePC from the Xiaomi App Store. WPSOfficePC adopts the same operation and layout as a computer, and paired with tablet keyboard accessories, it can improve office efficiency. According to the previous evaluation experience of this site, WPSOfficePC is significantly more efficient when editing documents, forms, presentations and other files. Moreover, various functions that are inconvenient to use on mobile terminals, such as text layout, picture insertion,
 Xiaomi Mi Pad 6 series launches PC-level WPS in full volume! Same layout and operation as computer
Apr 25, 2024 pm 06:40 PM
Xiaomi Mi Pad 6 series launches PC-level WPS in full volume! Same layout and operation as computer
Apr 25, 2024 pm 06:40 PM
According to news on April 25, today, Xiaomi Tablet officially announced that Xiaomi Tablet 6, Xiaomi Tablet 6 Pro, Xiaomi Tablet 6 Max 14, and Xiaomi Tablet 6 S Pro now fully support PC-level WPSOffice. It is understood that Xiaomi Mi Pad 6 and Mi Pad 6 Pro need to upgrade the system version to V816.0.4.0 and above before they can download WPSOffice from the Xiaomi App Store. WPSOfficePCforPad has the same operation and page layout as the computer version, and is officially said to "achieve high efficiency on the tablet that is comparable to the computer version of WPS." In addition, in Xiaomi ThePaper OS, Xiaomi has also brought a new multi-tasking system to the Xiaomi tablet. , the interaction is similar to PC window mode, officially called self-
 WPS and Office do not have Chinese fonts, and Chinese font names are displayed in English.
Jun 19, 2024 am 06:56 AM
WPS and Office do not have Chinese fonts, and Chinese font names are displayed in English.
Jun 19, 2024 am 06:56 AM
My friend's computer, all Chinese fonts such as imitation Song, Kai style, Xing Kai, Microsoft Yahei, etc. cannot be found in WPS and OFFICE. The editor below will tell you how to solve this problem. The fonts in the system are normal, but all fonts in the WPS font options are not available, only cloud fonts. OFFICE only has English fonts, not any Chinese fonts. After installing different versions of WPS, English fonts are available, but there is also no Chinese font. Solution: Control Panel → Categories → Clock, Language, and Region → Change Display Language → (Region and Language) Management → (Language for Non-Unicode Programs) Change System Regional Settings → Chinese (Simplified, China) → Restart. Control Panel, change the view mode in the upper right corner to "Category", Clock, Language and Region, change
 What should I do if the Win7 taskbar does not display the icon? How to solve the problem of the computer taskbar icon disappearing
Jun 09, 2024 pm 01:49 PM
What should I do if the Win7 taskbar does not display the icon? How to solve the problem of the computer taskbar icon disappearing
Jun 09, 2024 pm 01:49 PM
Recently, many users using Win7 system have found that the icons in the taskbar suddenly disappeared, which makes the operation very inconvenient and they do not know how to solve the problem. This article will introduce to you how to solve the problem of disappearing taskbar icons in Win7 system. Bar! Cause Analysis When encountering such a situation, there are generally two situations: one is that the taskbar on the computer does not really disappear, but is just hidden, and the other is that the taskbar does disappear. Method 1: 1. There is a situation that you need to confirm first, that is, when the mouse is placed at the bottom of the screen, the taskbar will be displayed. You can directly click the mouse on the taskbar and select "Properties". 2. In the dialog box that opens, click & on the "Hide taskbar" option.
 How to clear all desktop background images in Win7? Tips for deleting personalized background images in Win7
Jun 02, 2024 am 09:01 AM
How to clear all desktop background images in Win7? Tips for deleting personalized background images in Win7
Jun 02, 2024 am 09:01 AM
In Win7 system, many users want to delete personalized desktop background images, but do not know how to delete them. This article will show you how to delete personalized background images in Win7 system. 1. First, open the control panel interface of the Win7 system and click to enter the "Appearance and Personalization" settings; 2. Then, in the opened interface, click the "Change Desktop Background" setting; 3. Then, click below "Desktop background" option; 4. Then, select Select all, and then click Clear all. Of course, you can also use it under "Customize", right-click the theme you want to delete, and then click &q on the shortcut menu
 Where is the network discovery in Win7? Tips for enabling the network discovery function in Win7
Jun 04, 2024 am 09:02 AM
Where is the network discovery in Win7? Tips for enabling the network discovery function in Win7
Jun 04, 2024 am 09:02 AM
Many computer users know that network discovery is a network setting. This setting will affect whether the computer can find other computers and devices on the network and whether it can find the computer when other computers on the network are found. So how to enable network discovery in win7? The following computer System Home U Disk Installation will introduce you to the tutorial on how to enable network discovery in win7 system. 1. First, click the "Start Menu" icon on the desktop taskbar and choose to open the "Control Panel" interface. 2. Then, in the interface that opens, set "View by" to "Category", and then choose to enter "Network and Internet"
