How to make a linux iso image from scratch (graphic tutorial)
I. Introduction
For a very simplified Linux system, it only requires three parts, which are a Linux kernel, a root file system and boot. The following are the systems and software used in this article to create linux iso images:
OS: ubuntu 20
Software: xorriso
2. Making linux kernel
1. First, you need to go to the official website to select a required version and download it. The official website download address: https://www.php.cn/link/293835c2cc75b585649498ee74b395f5
2. Use tar to decompress it, then enter its directory, and then configure the kernel. Common configurations include the following:
a.make defconfig - default configuration
b. make allyesconfig - Create a configuration that allows you to select yes
c. make allnoconfig - Create a configuration that allows you to select no.
d. make menuconfig - ncurser-based graphical interface configuration
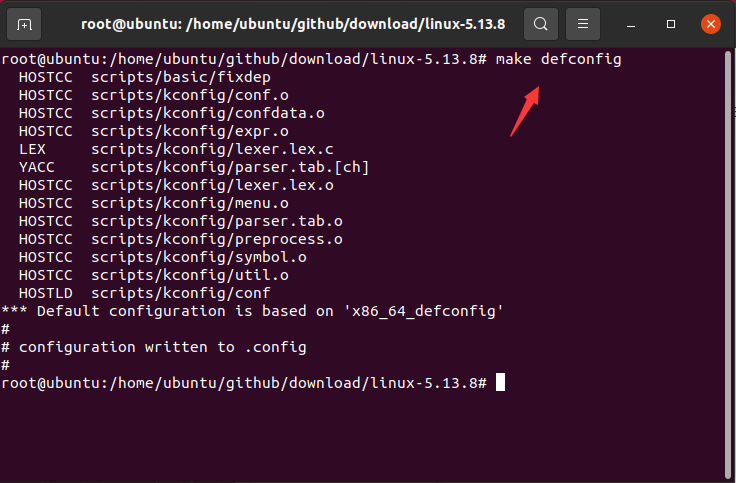
Here you can use the command make defconfig to use the default one, as shown in the figure below:
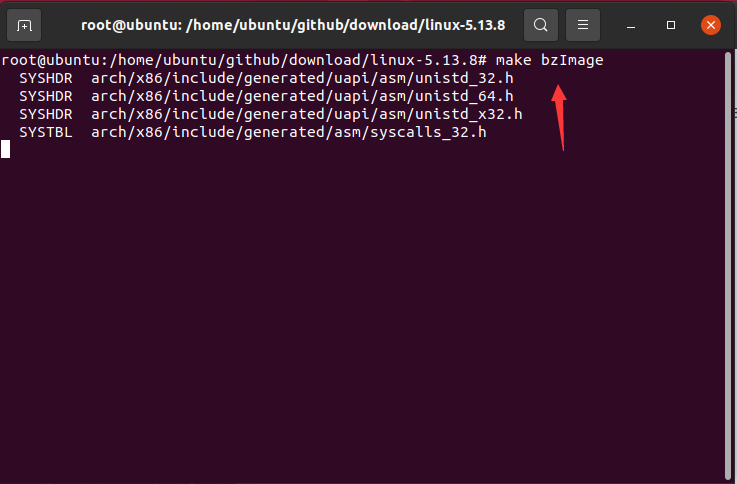
3. Then use the make bzImage command to compile the kernel, as shown in the figure below:
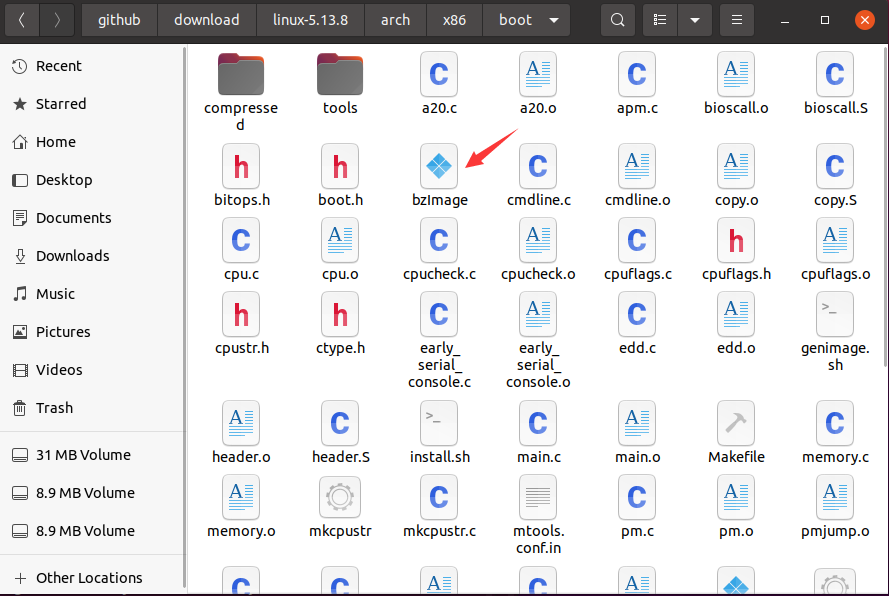
The compiled kernel file is under the corresponding architecture folder of the arch folder, as shown in the following figure:
3. Create root file system
1. We use busybox to create a root file system. busybox can be simply understood as a collection of Linux tools. First, download busybox, official website download address: https://www.php.cn/link/890ff058169b5a1d1a7f07d467f1f57b
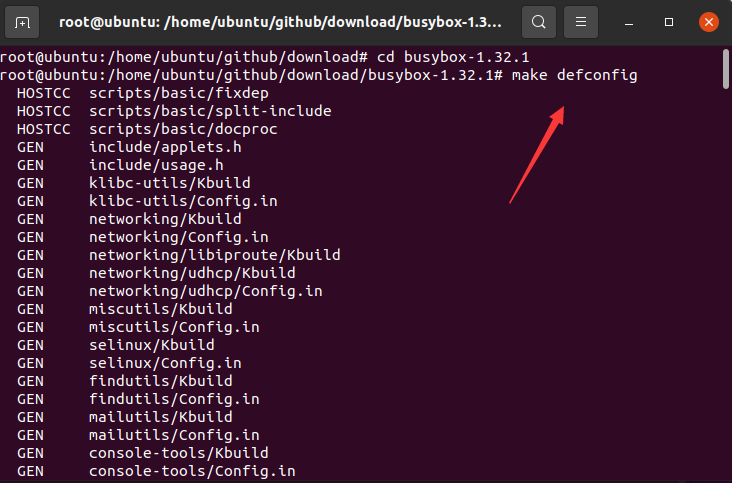
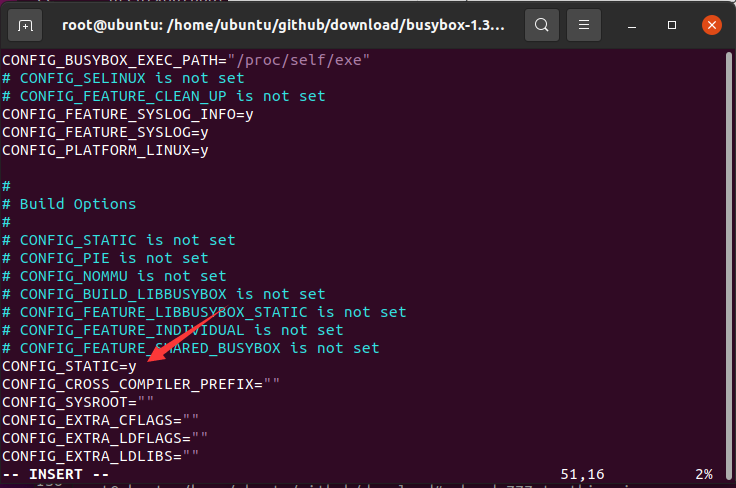
2. The steps for compiling busybox are basically the same as compiling the kernel. Unzip the downloaded compressed package, then enter the folder and use make defconfig to configure the default compilation options. What needs to be noted here is that in the generated . configIn the configuration file, you need to set CONFIG_STATIC=y. If not, just add it, as shown in the figure below:
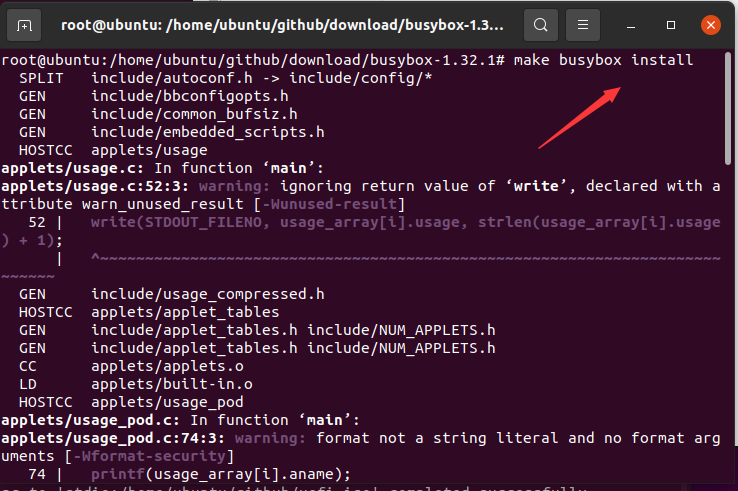
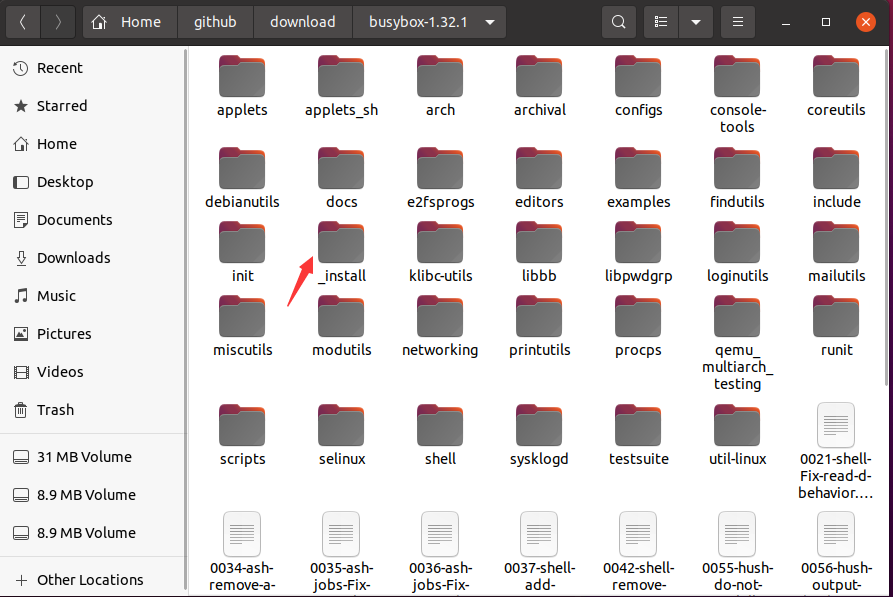
3. Then use the make busybox install command to compile busybox. After compilation, a _install folder will be generated under the current directory, as shown in the following figure:
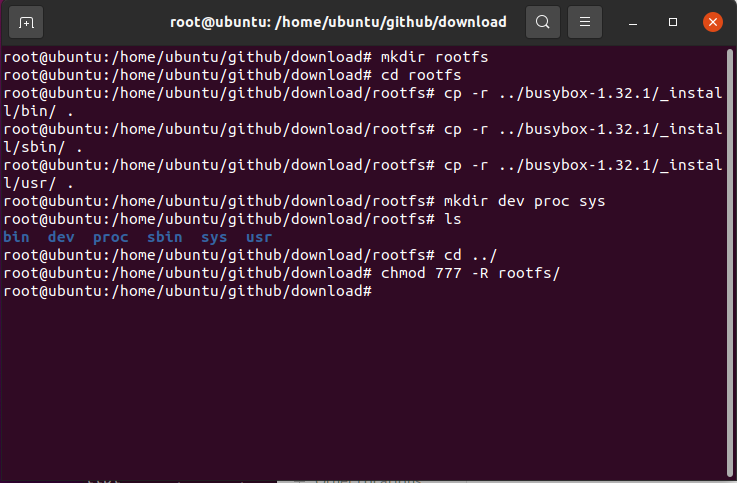
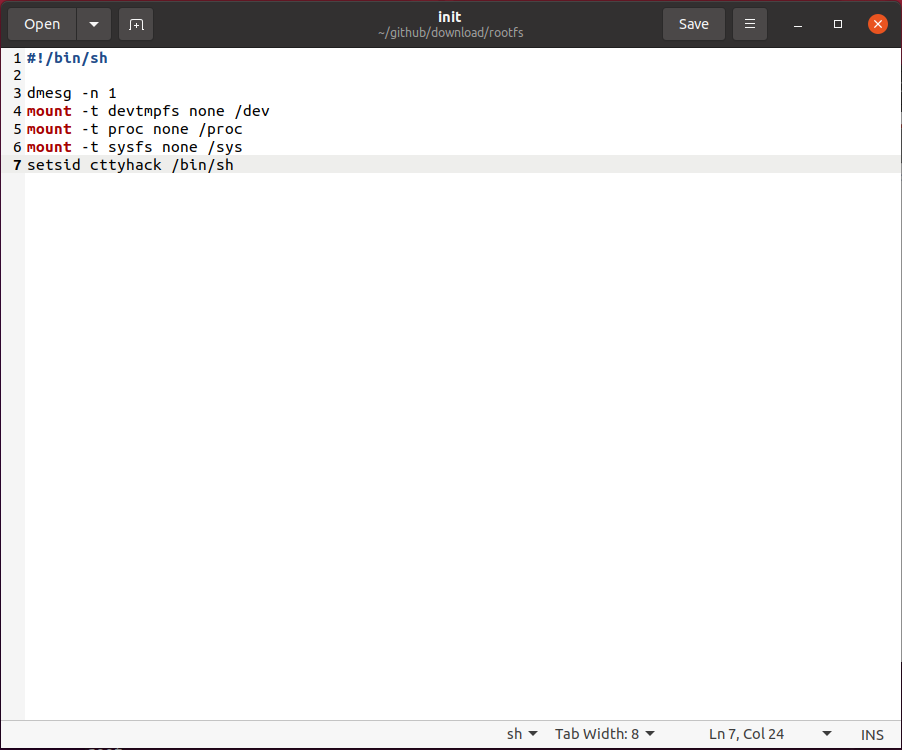
4. Then create a rootfs folder and copy all files and folders under the _install folder except linuxxrc to ## Under the #rootfs folder, finally create folders such as dev, and finally create the init file under the root directory. The file content is as shown below:
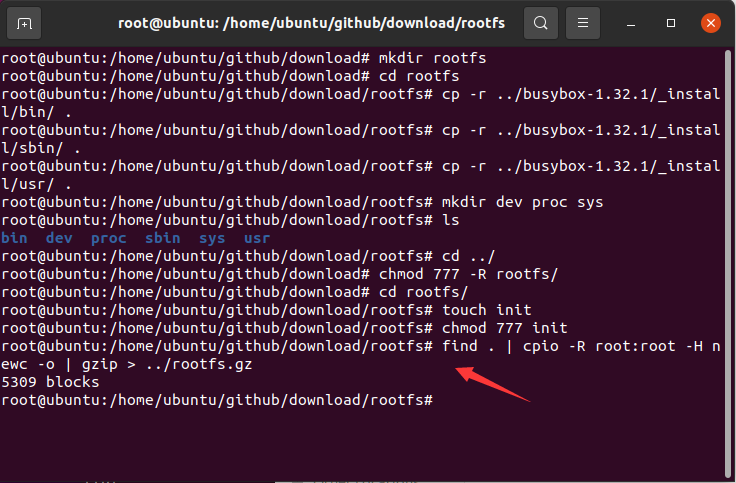
find . | cpio -R root:root -H newc -o | gzip > ../rootfs.gz to package the file system. At this point, a file system is created Completed, as shown below:
4. BIOS
1. Here we use syslinux to create a linux iso image guided by bios. The official download address of syslinux is as follows: https:// www.php.cn/link/364c32263dd3f0df5095b65321f3cd79
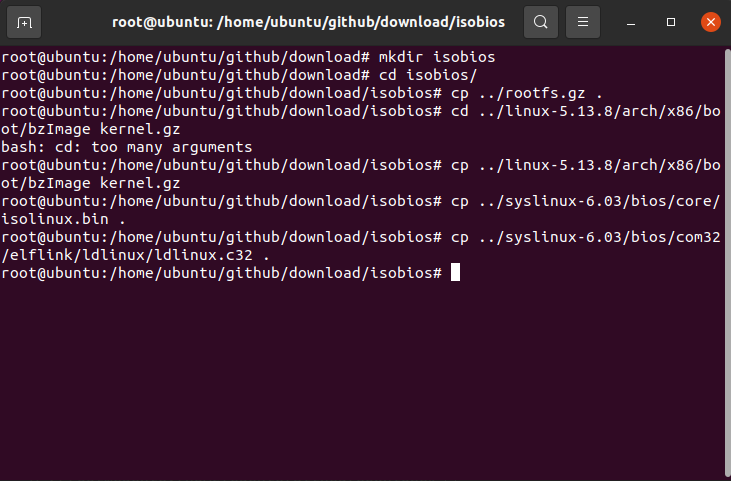
2. Unzip the downloaded syslinux, then create the folder isobios, and put the bios/ under the unzipped syslinux folder core/isolinux.bin, bios/com32/elflink/ldlinux/ldlinux.c32 are copied to the isobios folder, as shown below:
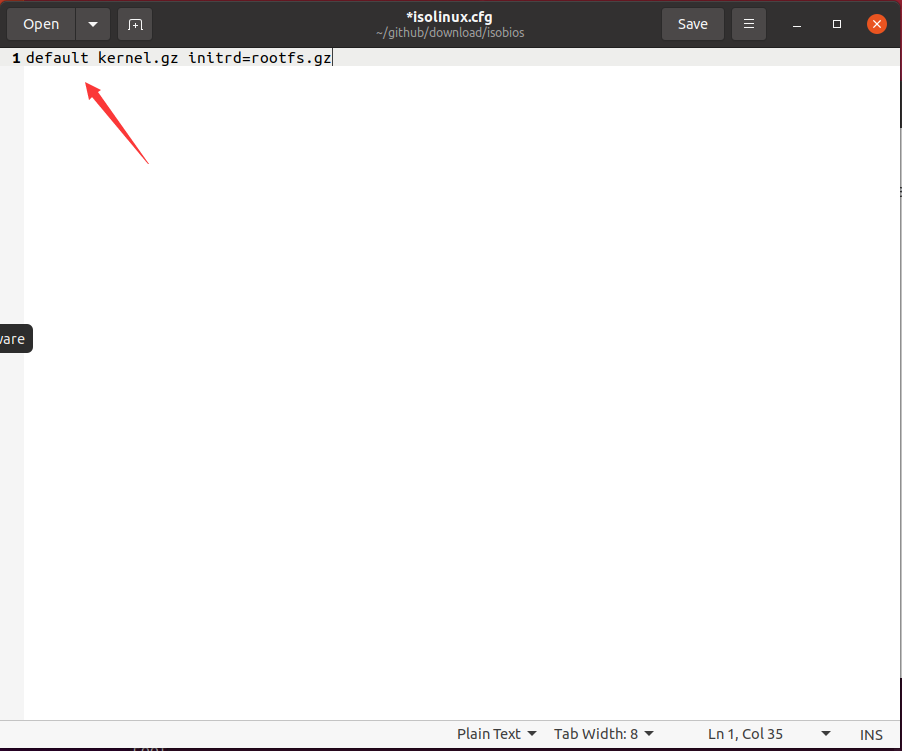
3. Create the configuration file isolinux.cfg under the isobios folder. The file content is as follows:
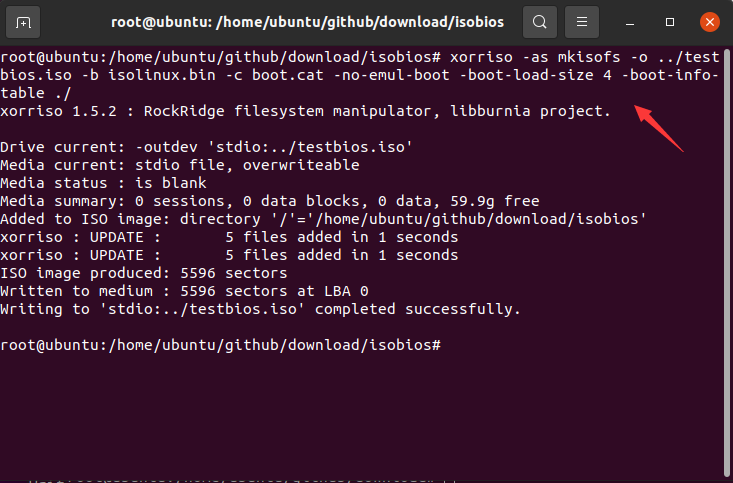
4. Finally, use the command xorriso -as mkisofs -o ../testbios.iso -b isolinux.bin -c boot.cat -no-emul- under the isobios folder boot -boot-load-size 4 -boot-info-table ./Generate iso image file, as shown below:
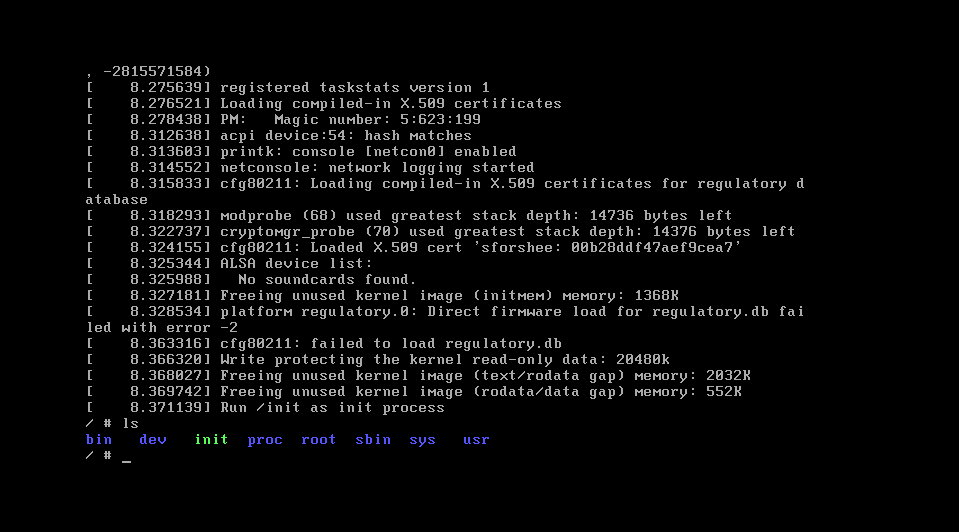
5. Use virtual machine vmware to create a virtual machine. As shown in the figure below, this is how the Linux iso image we created looks like when it is running.
5. UEFI
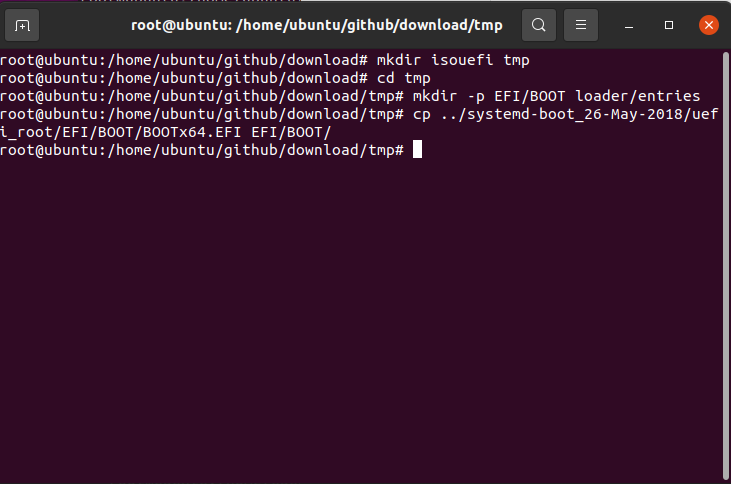
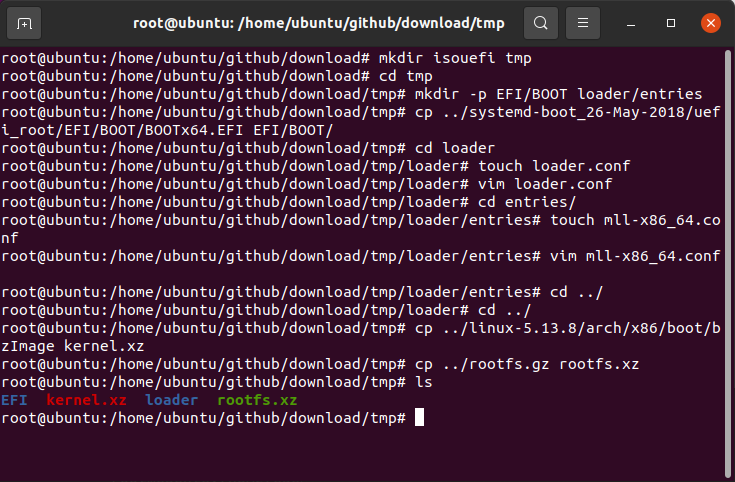
1. uefi is made here using system-boot and syslinux. First, create two folders isouefi and tmp, among them, isouefi is used to mount the device, the tmp folder is used to temporarily store files to calculate the size, and then create ## under the tmp folder #EFI/BOOT and loader/entries directories, then, unzip the systemboot file below uefi_boot/EFI/BOOT/BOOTx64.EFI Copy to the tmp/EFI/BOOT directory, as shown in the figure below:
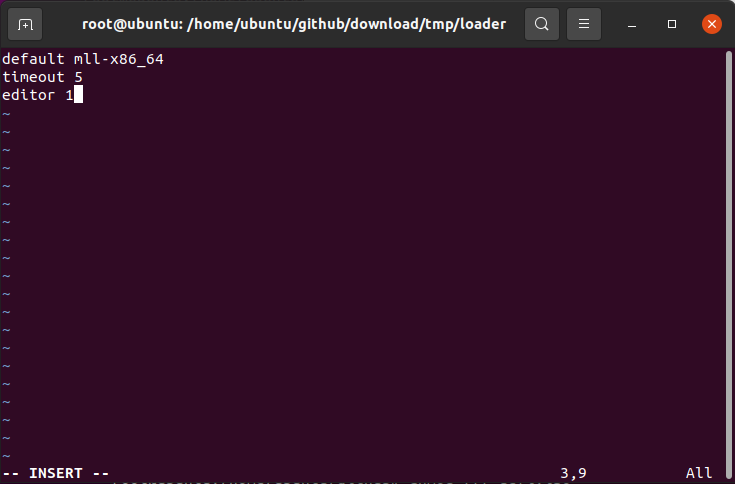
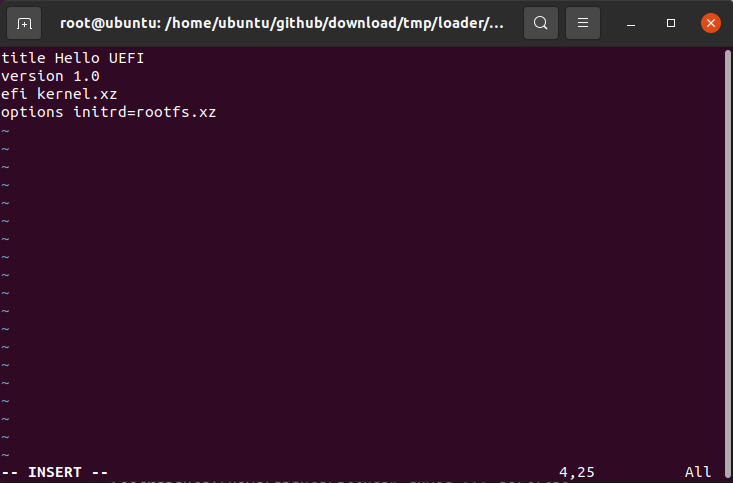
loader.conf configuration file under the tmp/loader directory. The first line indicates that the default configuration is under the entries directory. In that file, the second line sets the default timeout; then create the corresponding configuration file under the entries folder, here is mll-x86_64.conf, the file content and bios is almost the same, so I won’t go into details separately. Finally, copy the kernel and file system prepared previously to the tmp directory, as shown in the following figure:
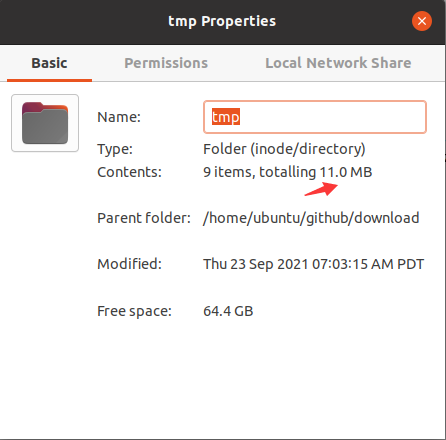
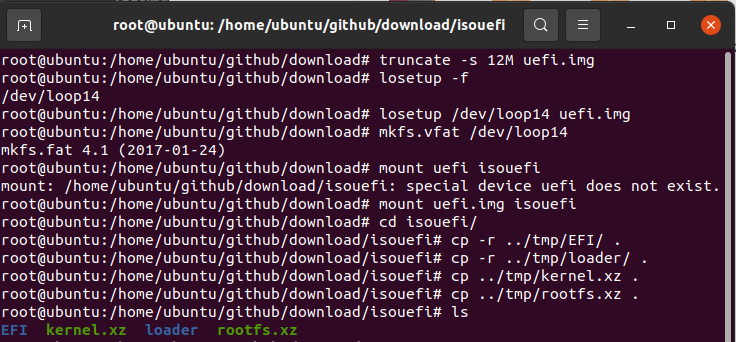
img file of the same size based on the total size of the tmp folder, where tmp is 11M, for the sake of safety, create a img file of 12M, the command is truncate -s 12M uefi.img, and then use The losetup -f command finds a currently unused logical device, then uses the losetup command to virtualize the img file we created earlier into a logical device, and then uses mkfs .vfatFormat the device into the vfat system, then use the mount command to mount it under the isouefi folder, and finally Copy all files and folders under the tmp folder to the isouefi directory, as shown in the following figure:
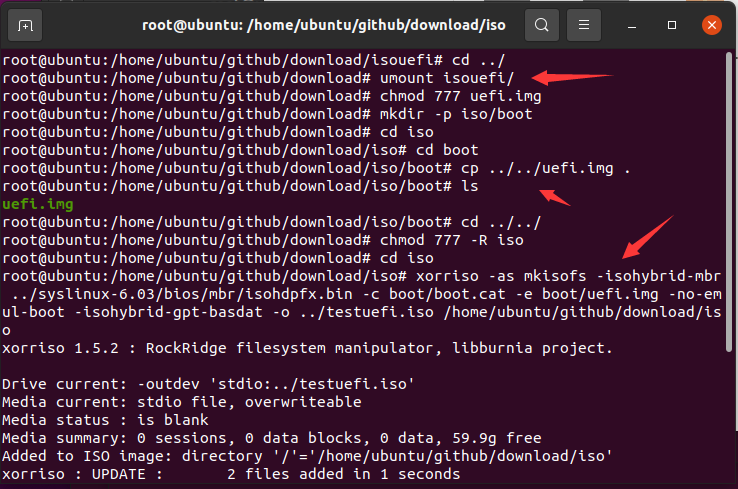
4. Then use the umount command to cancel the mount, so that we get an img containing kernel, file system, etc. file, then create a iso folder, and a boot folder will be created under the folder, and then copy img to iso/ Under boot, finally use the xorriso tool to generate the iso file, as shown in the figure below:
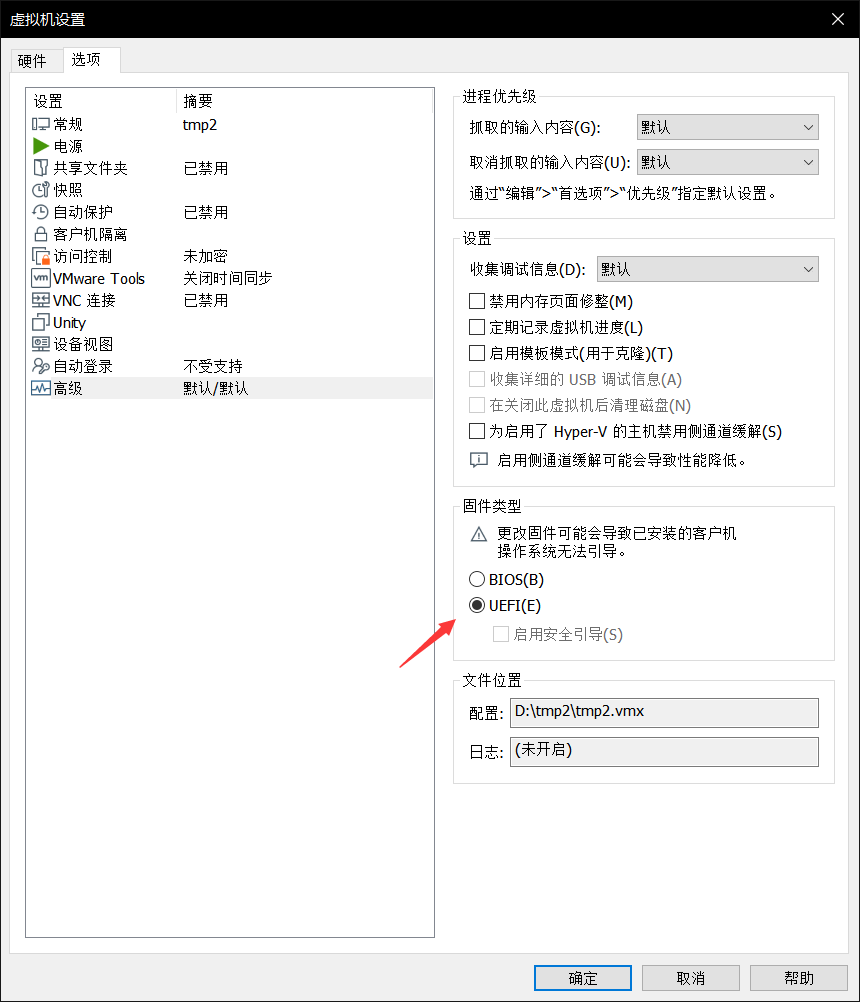
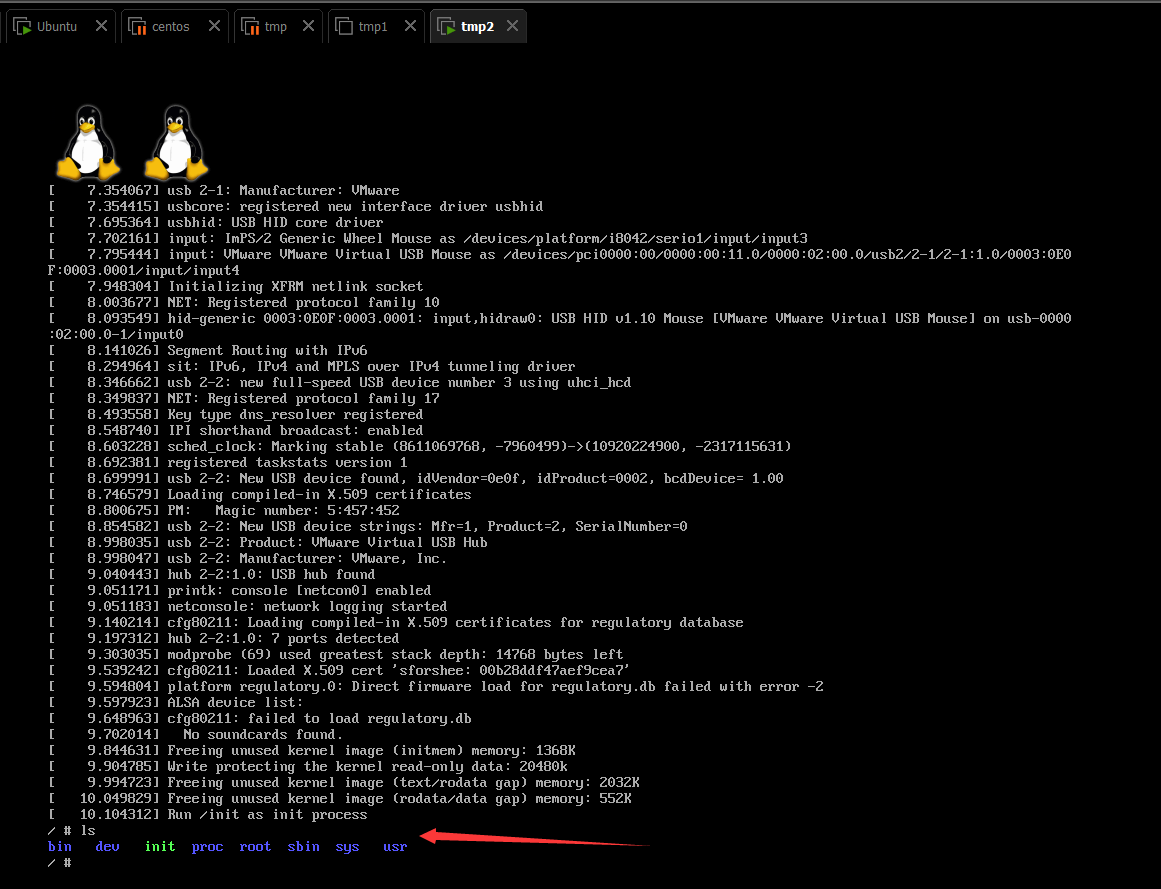
5. Finally, create a new virtual machine, select uefi for boot, and start it, as shown in the figure below:
6. Related links
github link: https://www.php.cn/link/e32c6c0d76c602ec48a1ec030982eb85
The above is the detailed content of How to make a linux iso image from scratch (graphic tutorial). For more information, please follow other related articles on the PHP Chinese website!

Hot AI Tools

Undresser.AI Undress
AI-powered app for creating realistic nude photos

AI Clothes Remover
Online AI tool for removing clothes from photos.

Undress AI Tool
Undress images for free

Clothoff.io
AI clothes remover

Video Face Swap
Swap faces in any video effortlessly with our completely free AI face swap tool!

Hot Article

Hot Tools

Notepad++7.3.1
Easy-to-use and free code editor

SublimeText3 Chinese version
Chinese version, very easy to use

Zend Studio 13.0.1
Powerful PHP integrated development environment

Dreamweaver CS6
Visual web development tools

SublimeText3 Mac version
God-level code editing software (SublimeText3)

Hot Topics
 1663
1663
 14
14
 1419
1419
 52
52
 1313
1313
 25
25
 1264
1264
 29
29
 1237
1237
 24
24
 Linux Architecture: Unveiling the 5 Basic Components
Apr 20, 2025 am 12:04 AM
The five basic components of the Linux system are: 1. Kernel, 2. System library, 3. System utilities, 4. Graphical user interface, 5. Applications. The kernel manages hardware resources, the system library provides precompiled functions, system utilities are used for system management, the GUI provides visual interaction, and applications use these components to implement functions.
 How to check the warehouse address of git
Apr 17, 2025 pm 01:54 PM
To view the Git repository address, perform the following steps: 1. Open the command line and navigate to the repository directory; 2. Run the "git remote -v" command; 3. View the repository name in the output and its corresponding address.
 vscode Previous Next Shortcut Key
Apr 15, 2025 pm 10:51 PM
VS Code One-step/Next step shortcut key usage: One-step (backward): Windows/Linux: Ctrl ←; macOS: Cmd ←Next step (forward): Windows/Linux: Ctrl →; macOS: Cmd →
 What is the main purpose of Linux?
Apr 16, 2025 am 12:19 AM
The main uses of Linux include: 1. Server operating system, 2. Embedded system, 3. Desktop operating system, 4. Development and testing environment. Linux excels in these areas, providing stability, security and efficient development tools.
 How to run java code in notepad
Apr 16, 2025 pm 07:39 PM
Although Notepad cannot run Java code directly, it can be achieved by using other tools: using the command line compiler (javac) to generate a bytecode file (filename.class). Use the Java interpreter (java) to interpret bytecode, execute the code, and output the result.
 How to run sublime after writing the code
Apr 16, 2025 am 08:51 AM
There are six ways to run code in Sublime: through hotkeys, menus, build systems, command lines, set default build systems, and custom build commands, and run individual files/projects by right-clicking on projects/files. The build system availability depends on the installation of Sublime Text.
 laravel installation code
Apr 18, 2025 pm 12:30 PM
To install Laravel, follow these steps in sequence: Install Composer (for macOS/Linux and Windows) Install Laravel Installer Create a new project Start Service Access Application (URL: http://127.0.0.1:8000) Set up the database connection (if required)
 How to use VSCode
Apr 15, 2025 pm 11:21 PM
Visual Studio Code (VSCode) is a cross-platform, open source and free code editor developed by Microsoft. It is known for its lightweight, scalability and support for a wide range of programming languages. To install VSCode, please visit the official website to download and run the installer. When using VSCode, you can create new projects, edit code, debug code, navigate projects, expand VSCode, and manage settings. VSCode is available for Windows, macOS, and Linux, supports multiple programming languages and provides various extensions through Marketplace. Its advantages include lightweight, scalability, extensive language support, rich features and version


