

Black screen problem occurs after Windows 10 starts

Computers are now an electrical appliance that is basically equipped in every household. With the continuous use of computers, some strange problems have slowly emerged. Recently, many friends have responded. My computer always goes into a black screen after I turn it on. What's going on? In fact, it is very simple to solve this problem. Today, the editor will bring you the solution to the black screen after the welcome screen in win10. Friends who need it, please come and take a look.

Solution to black screen after win10 starts with logo:
Operation steps:
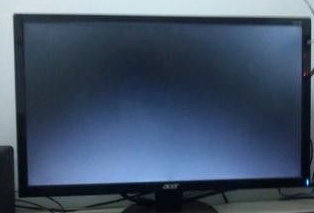
1. First check whether the power cable is connected properly and detect Whether the monitor is damaged, the detection method only requires turning off the computer, and only turning on the monitor will show no information. If no signal is displayed, it proves that the monitor is OK
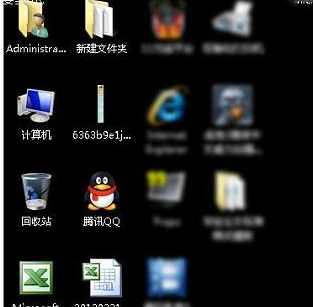
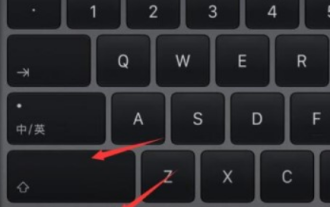
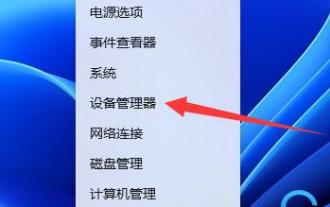
2. Incompatible graphics card drivers will also cause a black screen. Restart the computer, and then keep clicking the F8 key to enter safe mode. Enter safe mode (some methods of entering safe mode are different, restart the computer and force shutdown on the logo interface, repeat it three times to enter), then check for viruses and uninstall recently installed programs and software.
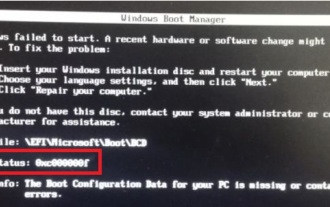
3. If you cannot enter safe mode or the screen is still black after entering, check the hardware problem and reinstall the system decisively

4. The most common hardware problem is the memory stick. Disassemble the machine and pull out the memory stick to check if there is any oxidation. Use an eraser to wipe the gold finger or replace the memory stick and reinsert it;

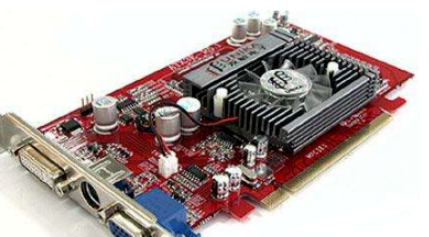
5. The graphics card is also a big killer of a black screen when the computer starts up. If the graphics card is loose and damaged, you can also unplug it, wipe the metal part and put it back to try to boot
The above is the detailed content of Black screen problem occurs after Windows 10 starts. For more information, please follow other related articles on the PHP Chinese website!

Hot AI Tools

Undresser.AI Undress
AI-powered app for creating realistic nude photos

AI Clothes Remover
Online AI tool for removing clothes from photos.

Undress AI Tool
Undress images for free

Clothoff.io
AI clothes remover

Video Face Swap
Swap faces in any video effortlessly with our completely free AI face swap tool!

Hot Article
Hot Tools

Notepad++7.3.1
Easy-to-use and free code editor

SublimeText3 Chinese version
Chinese version, very easy to use

Zend Studio 13.0.1
Powerful PHP integrated development environment

Dreamweaver CS6
Visual web development tools

SublimeText3 Mac version
God-level code editing software (SublimeText3)
Hot Topics
 1655
1655
 14
1414
52
1307
25
1254
29
1228
24
14
1414
52
1307
25
1254
29
1228
24

 Black screen after changing refresh rate on Windows PC
Feb 20, 2024 am 09:27 AM
Black screen after changing refresh rate on Windows PC
Feb 20, 2024 am 09:27 AM
If you encounter black screen issues after changing the refresh rate on Windows 11/10 PC, this article will help you. We will share some effective troubleshooting steps to help you resolve this issue. By default, desktop monitors have a refresh rate of 60 Hz. You can increase the refresh rate for better game or app performance, but going beyond what your monitor supports can cause display issues or screen flickering. Windows itself limits setting refresh rates that your monitor doesn't support, but third-party apps may bypass this limit. If the system's graphics settings are adjusted, the screen may go black after startup and the desktop environment cannot be entered. This article will guide you on how to handle accidentally changing your monitor's refresh rate to an unsupported one. Why is my screen
 Teach you how to restore win7 boot error 0xc000000f with one click
Jan 05, 2024 pm 08:07 PM
Teach you how to restore win7 boot error 0xc000000f with one click
Jan 05, 2024 pm 08:07 PM
Some users encountered a black screen or blue screen when booting up the Win7 system, and the error code 0xc000000f was prompted, and they were unable to enter the system. This may be because our boot file is damaged and must be repaired through system boot. Let’s take a look below. How to recover win7 boot 0xc000000f: Method 1: 1. If we have a system CD, insert it into the CD-ROM drive and select the CD to start the system. 2. Then you will enter the Windows 7 installation interface, click "Repair Computer" in the lower left corner. 3. Then select "Command Prompt" in the system recovery options as shown in the figure. 4. Then enter "BOOTREC/FIXMBR" and "BOOTREC/F
 Fix no sound, lag or black screen when streaming VLC on Discord
Feb 19, 2024 pm 08:27 PM
Fix no sound, lag or black screen when streaming VLC on Discord
Feb 19, 2024 pm 08:27 PM
Although VLC is an established player, it is constantly updated and improved to maintain its relevance. Some users may experience issues such as sound, lag, and black screen when streaming VLC, which is what we will focus on in this article. Therefore, if you also encounter missing sound, lag or black screen when playing VLC, this article will provide you with a solution. How to stream VLC on Discord? Configuring VLC streaming is not complicated, but special problems can still arise. Before trying to solve these problems, make sure you fully understand the potential solutions mentioned below. Follow the steps mentioned below to configure VLC on the inconsistency. First, download and install the Discorde client on your computer, as the web version does not support streaming. Open VLC media
 How to deal with the black screen problem after entering Win11 BIOS
Jan 03, 2024 pm 01:05 PM
How to deal with the black screen problem after entering Win11 BIOS
Jan 03, 2024 pm 01:05 PM
Bios setting is a very important function in the computer. If the user finds that he cannot enter the BIOS setting page and the computer has a black screen, then the editor strongly recommends that you read this article. What to do if win11 enters BIOS black screen 1. First, check whether the monitor is fully functional and operating normally. Please confirm whether the monitor's power cord is firmly connected. 2. In addition, you need to carefully check the power switch of the monitor to see if it can start up and shut down normally. 3. Also make sure that the monitor's interface is fastened and not loose, and that the monitor's settings should also remain correct in their default state. 4. If the above steps prove that the monitor is running well, then we can start troubleshooting other problems! 5. It is recommended to scan and
 What to do if a black screen appears when taking a screenshot on a win10 computer_How to deal with a black screen when taking a screenshot on a win10 computer
Mar 27, 2024 pm 01:01 PM
What to do if a black screen appears when taking a screenshot on a win10 computer_How to deal with a black screen when taking a screenshot on a win10 computer
Mar 27, 2024 pm 01:01 PM
1. Press the win key + r key, enter regedit, and click OK. 2. In the opened registry editor window, expand: HKEY_LOCAL_MACHINESYSTEMCurrentControlSetControlGraphicsDriversDCI, select Timeout on the right and double-click. 3. Then change 7 in [Numeric Data] to 0, and confirm to exit.
 Effective solutions and techniques for Ubuntu startup black screen problem
Dec 29, 2023 am 10:30 AM
Effective solutions and techniques for Ubuntu startup black screen problem
Dec 29, 2023 am 10:30 AM
Practical tips and methods to solve the black screen on Ubuntu startup Introduction: Ubuntu is a popular Linux operating system, but sometimes you may encounter a black screen problem during the startup process. This problem can be caused by a variety of reasons, such as graphics card driver issues, software conflicts, or system errors. This article will introduce some practical tips and methods to help solve the black screen problem at Ubuntu startup to ensure the stable operation of the system. 1. Update and reinstall the graphics card driver to enter recovery mode: press the Shift key during startup to enter
 Reasons and solutions for why the screen of Windows 11 computer is black but the mouse can still be moved
Jan 30, 2024 am 09:06 AM
Reasons and solutions for why the screen of Windows 11 computer is black but the mouse can still be moved
Jan 30, 2024 am 09:06 AM
When we use the win11 system, we will encounter a situation where only the mouse can move when the computer is turned on, and the computer has a black screen. So what is going on when the win11 computer screen is black but the mouse can move? For details, users can use the ctrl+alt+del shortcut keys to open the task manager to set up. If it still doesn’t work, they can directly reinstall the system. Let this site introduce to users in detail the win11 computer screen black screen. The solution is to make the mouse move. Solution to the problem that the win11 computer screen is black but the mouse can move. Solution 1: 1. Use the ctrl+alt+del shortcut key combination and click to open the task manager. 4. Find the uninstaller and click to view installed updates. Solution 2: 1. If
 Solve the black screen problem caused by the inability to wake up from sleep in win11
Jan 04, 2024 pm 04:54 PM
Solve the black screen problem caused by the inability to wake up from sleep in win11
Jan 04, 2024 pm 04:54 PM
Win11 will turn on sleep by default, and it will automatically enter if you don't touch the computer for a period of time. As a result, some friends found that win11 sleep cannot wake up and the screen is black. This may be because the device has not been awakened, and sleep can also be canceled directly. Solution to the black screen that cannot be woken up from sleep in win11. Method 1: Force restart with the power button 1. First use the power button to force restart the computer, and then enter the win11 system. . 2. Right-click on the start menu door to open the options page of "Device Manager". 3. Then, double-click to open the keyboard or mouse device options. 4. After entering the device, click "Power Management" and check the "Allow this device to wake the computer" option. 5. Click OK to save the operation just now, and then use the selected settings.
