

Master-slave DNS deployment--super detailed experimental operation

At the request of readers, today I will add some knowledge about DNS master and slave.
Regarding master-slave DNS deployment, it is rarely used in work, but in order to allow everyone to quickly set up an environment when encountering it, here is a practice.
Install dns software:
[root@slave1 ~]# yum -y install bind*
Configuration file analysis
/etc/named.conf This configuration file is mainly divided into three sections. Options is the global configuration, logging is the log configuration, and finally the regional parsing library configuration and the included regional parsing library file configuration.
[root@slave1 ~]# vim /etc/named.conf
options {
        listen-on port 53 { 10.0.0.62; };
        listen-on-v6 port 53 { ::1; };
        directory "/var/named";
        dump-file "/var/named/data/cache_dump.db";
        statistics-file "/var/named/data/named_stats.txt";
        memstatistics-file "/var/named/data/named_mem_stats.txt";
        recursing-file "/var/named/data/named.recursing";
        secroots-file "/var/named/data/named.secroots";
        allow-query { any; };

        /*
         - If you are building an AUTHORITATIVE DNS server, do NOT enable recursion.
         - If you are building a RECURSIVE (caching) DNS server, you need to enable
           recursion.
         - If your recursive DNS server has a public IP address, you MUST enable access
           control to limit queries to your legitimate users. Failing to do so will
           cause your server to become part of large scale DNS amplification
           attacks. Implementing BCP38 within your network would greatly
           reduce such attack surface
        */
        recursion yes;

        dnssec-enable yes;
        dnssec-validation yes;

        /* Path to ISC DLV key */
        bindkeys-file "/etc/named.root.key";

        managed-keys-directory "/var/named/dynamic";

        pid-file "/run/named/named.pid";
        session-keyfile "/run/named/session.key";
};

logging {
        channel default_debug {
                file "data/named.run";
                severity dynamic;
        };
};

//.表示根区域,这个区域是必须要有的
zone "." IN {
        type hint; //指定根区域类型。
        file "named.ca"; //指定根区域解析库文件名称所在位置,相对于/var/named
};

//指定区域文件名称,所有的区域定义都可以写在named.rfc1912.zones文件中
include "/etc/named.rfc1912.zones";
include "/etc/named.root.key";配置文件详解:
listen-on port 53 { 10.0.0.62; };表示监听的端口和IP地址,其中{}内部两端都要有空格,IP地址要以;号结尾。
directory指定named的工作目录,后面的域配置文件、日志文件都存放在这里。例如上面示例中的named.ca就是保存在/var/named中
allow-query表示允许哪些主机可以访问当前dns服务,改成any表示任何主机都可以访问当前的dns服务
recursion如果你打算构建一个递归(缓存)DNS服务器,那这里就要设置为yes;如果是构建权威服务器,那这里就应该设置为off。
zone用于定义DNS服务器所服务的区域,其中包括区域名、区域类型和区域文件名等信息。
DNS zones are divided into two categories: forward lookup zone and reverse lookup zone.
The forward lookup area is used for the mapping of FQDN (host name domain name) to IP address. When the DNS client requests to resolve a certain FQDN, the DNS server performs it in the forward lookup area. Search and return the corresponding IP address to the DNS client;
The reverse lookup area is used for mapping IP addresses to FQDN. When the DNS client requests to resolve an IP address, The DNS server performs a lookup in the reverse lookup zone and returns the corresponding FQDN to the DNS client.
#file: Specify the name of the zone database file. Double quotes should be used around the file name. Only the file name is written here. Where is the corresponding file saved? In fact, its saving location is specified by the directory option in the options section. This option defaults to /var/named.
type: Specify the area type. There are types such as hint, master, slave and forward, which respectively represent the root zone, primary zone, auxiliary zone and forward zone. Hint means to hand it over to the root, indicating that the root zone type is a buffer server.
Recursive DNS server, authoritative DNS server
1. Recursive server
When the client initiates an Internet request and does not obtain the corresponding resolution record after querying various local caches, it will initiate a query request to the local DNS server. In addition, search the top technology background of the public account and reply "API interface" to get a surprise gift package.
The local DNS server will first query its own local cache. If there is a result, it will be returned directly to the client. If there is no result, it will replace the client and send it to the root DNS server, top-level domain name server, secondary domain name server, etc. Level-level domain name servers and other level-level recursive queries continue, and finally the authoritative server corresponding to the domain name is found to obtain the result and return it to the client, while saving the record to the local cache.
Summary: During the entire DNS query process, except for the client initiating requests to the local domain name server (or local DNS server) at the beginning, the rest of the time is sent by the local domain name server. Instead of doing a recursive query. The local domain name server here is the recursive DNS server.
2. Authoritative server
The server responsible for the final resolution of the domain name is the authoritative server. The authoritative server is different from the recursive server. It is not responsible for helping the client perform recursive queries and return resolution records. Its purpose is to resolve domain names.
10T technology limited time resources are on sale! Including but not limited to: Linux, virtualization, containers, cloud computing, networking, Python, Go, etc. Reply "10T" in the open source Linux official account to get it for free!
每个特定的域名,权威DNS服务器可能并不相同。这种权威DNS服务器只对自己所拥有的域名进行域名解析,对于自己不负责域名则无法进行解析。比如递归DNS去taobao.com的权威DNS服务器查询baidu.com的域名肯定会查询失败。
因此递归解析服务器是运营商搭建,帮助所属网络用户去响应的权威DNS服务器查询解析结果。而权威解析服务器一般是企业自建或域名服务商建设,给购买域名的企业和个人使用,方便其对域名进行解析管理。
配置主服务器
[root@slave1 ~]# vim /etc/named.conf
options {
        listen-on port 53 { 10.0.0.62; }; //主服务器的地址
        listen-on-v6 port 53 { ::1; };
        directory "/var/named";
        dump-file "/var/named/data/cache_dump.db";
        statistics-file "/var/named/data/named_stats.txt";
        memstatistics-file "/var/named/data/named_mem_stats.txt";
        recursing-file "/var/named/data/named.recursing";
        secroots-file "/var/named/data/named.secroots";
        allow-query { any; }; //允许任何主机可以访问本DNS服务

        /*
         - If you are building an AUTHORITATIVE DNS server, do NOT enable recursion.
         - If you are building a RECURSIVE (caching) DNS server, you need to enable
           recursion.
         - If your recursive DNS server has a public IP address, you MUST enable access
           control to limit queries to your legitimate users. Failing to do so will
           cause your server to become part of large scale DNS amplification
           attacks. Implementing BCP38 within your network would greatly
           reduce such attack surface
        */
        recursion yes; //配置成递归DNS服务器

        dnssec-enable yes;
        dnssec-validation yes;

        /* Path to ISC DLV key */
        bindkeys-file "/etc/named.root.key";

        managed-keys-directory "/var/named/dynamic";

        pid-file "/run/named/named.pid";
        session-keyfile "/run/named/session.key";
};

logging {
        channel default_debug {
                file "data/named.run";
                severity dynamic;
        };
};

zone "." IN {
        type hint;
        file "named.ca";
};

include "/etc/named.rfc1912.zones";
include "/etc/named.root.key";


# 在/etc/named.rfc1912.zones文件末尾添加正向解析区域和反向解析区域
[root@slave1 ~]# vim /etc/named.rfc1912.zones
......
// 在文件最后添加一个正向解析区域,并定义为主服务器
zone "test1.com" IN {
    type master; //master表示主服务器
    file "test1.com.zone"; //指明区域解析库文件,相对于/var/named/
};

//在文件最后添加一个反向解析区域,并定义为主服务器
zone "0.0.10.in-addr.arpa" IN {
    type master;
    file "test1.com.local";
};创建test1.com.zone解析库文件
# 复制模板来创建区域文件
[root@slave1 ~]# cd /var/named/

# 注意:复制的时候要用-a选项,以便保持用户拥有者等属性信息,否则named程序无法解析。当然你也可以手动修改属性,使复制后的文件的拥有者和所属组都是named
[root@slave1 named]# cp -a named.localhost test1.com.zone
[root@slave1 named]# cp -a named.loopback test1.com.local

# 设置正向解析
[root@slave1 named]# cat test1.com.zone
$TTL 1D
@ IN SOA @ rname.invalid. (
          0  ; serial
          1D ; refresh
          1H ; retry
          1W ; expire
          3H ) ; minimum
  NS @
  A 10.0.0.62
www IN A 10.0.0.62
ftp IN A 10.0.0.62
mail IN CNAME www

# 设置反向解析
[root@slave1 named]# cat test1.com.local
$TTL 1D
@ IN SOA test1.com. rname.invalid. (
          0  ; serial
          1D ; refresh
          1H ; retry
          1W ; expire
          3H ) ; minimum
  NS test1.com.
  A 10.0.0.62
10 IN PTR www.test1.com.
11 IN PTR ftp.test1.com.

# 重新配置本机的DNS:
[root@slave2 ~]# cat /etc/sysconfig/network-scripts/ifcfg-ens33
......
IPADDR=10.0.0.62
PREFIX=24
GATEWAY=10.0.0.2
DNS1=10.0.0.62启动named服务:
牛逼啊!接私活必备的 N 个开源项目!赶快收藏
[root@slave1 ~]# systemctl start named

# 测试一下
[root@slave1 ~]# nslookup www.test1.com
Server: 10.0.0.62
Address: 10.0.0.62#53

Name: www.test1.com
Address: 10.0.0.62
[root@slave1 named]# nslookup ftp.test1.com
Server: 10.0.0.62
Address: 10.0.0.62#53

Name: ftp.test1.com
Address: 10.0.0.62
配置从服务器
# 修改主配置文件,只改两行,其余保持默认即可
[root@slave2 ~]# cat /etc/named.conf
......
options {
  listen-on port 53 { 10.0.0.63; }; # ip地址改成本地地址
  listen-on-v6 port 53 { ::1; };
  directory "/var/named";
  dump-file "/var/named/data/cache_dump.db";
  statistics-file "/var/named/data/named_stats.txt";
  memstatistics-file "/var/named/data/named_mem_stats.txt";
  recursing-file "/var/named/data/named.recursing";
  secroots-file "/var/named/data/named.secroots";
  allow-query { any; }; # 任何主机都可以访问本地dns服务
......


# 在/etc/named.rfc1912.zones文件末尾添加正向解析区域和反向解析区域
[root@slave2 ~]# vim /etc/named.rfc1912.zones
......
zone "test1.com" IN {
        type slave;
        masters { 10.0.0.62; };
        allow-notify { 10.0.0.62; };
        file "slaves/test1.com.zone";
};

zone "0.0.10.in-addr.arpa" IN {
        type slave;
        masters { 10.0.0.62; };
        allow-notify { 10.0.0.62; };
        file "slaves/test1.com.local";
};注意事项:从服务器的区域解析库文件应当是从主服务器加载过来的,所以无需创建区域解析库文件。
启动named服务:
[root@slave2 ~]# systemctl start named

# 重新配置本机的DNS:
[root@slave2 ~]# cat /etc/sysconfig/network-scripts/ifcfg-ens33
......
IPADDR=10.0.0.63
PREFIX=24
GATEWAY=10.0.0.2
DNS1=10.0.0.63

# 启动以后,会自动生成区域解析库文件,这两个文件来源于主服务器
[root@slave2 ~]# ll /var/named/slaves/
total 8
-rw-r--r-- 1 named named 336 Sep 5 20:02 test1.com.local
-rw-r--r-- 1 named named 319 Sep 5 20:02 test1.com.zone

# 测试验证
[root@slave2 ~]# nslookup www.test1.com
Server: 10.0.0.63
Address: 10.0.0.63#53

Name: www.test1.com
Address: 10.0.0.62

[root@slave2 ~]# nslookup ftp.test1.com
Server: 10.0.0.63
Address: 10.0.0.63#53

Name: ftp.test1.com
Address: 10.0.0.62
客户端验证
# 配置DNS:客户端需要配置多个dns,我们这里配置主从dns的地址
[root@master ~]# cat /etc/sysconfig/network-scripts/ifcfg-ens33
......
IPADDR=10.0.0.61
PREFIX=24
GATEWAY=10.0.0.2
DNS1=10.0.0.62
DNS2=10.0.0.63

# 重启网络使配置生效
[root@master ~]# systemctl restart network

[root@master ~]# nslookup www.test1.com
Server: 10.0.0.62
Address: 10.0.0.62#53

Name: www.test1.com
Address: 10.0.0.62

[root@master ~]# nslookup ftp.test1.com
Server: 10.0.0.62
Address: 10.0.0.62#53

Name: ftp.test1.com
Address: 10.0.0.62
主从一同工作,在客户端会配有多个DNS地址,如果第一个DNS地址无法解析,那么第二DNS地址也是无法解析的,当第一个DNS地址联系不上时(宕机)才会联系第二个DNS地址并寻求解析。
故障测试
# 停止master DNS
[root@slave1 ~]# systemctl stop named

# 到客户端上去验证
[root@master ~]# nslookup www.test1.com
Server: 10.0.0.63
Address: 10.0.0.63#53

Name: www.test1.com
Address: 10.0.0.62
通过上面的实验我们可以发现,停掉master DNS服务以后,客户端还是可以继续解析到域名, 即从DNS已经开始启用了。
The above is the detailed content of Master-slave DNS deployment--super detailed experimental operation. For more information, please follow other related articles on the PHP Chinese website!

Hot AI Tools

Undresser.AI Undress
AI-powered app for creating realistic nude photos

AI Clothes Remover
Online AI tool for removing clothes from photos.

Undress AI Tool
Undress images for free

Clothoff.io
AI clothes remover

Video Face Swap
Swap faces in any video effortlessly with our completely free AI face swap tool!

Hot Article
Hot Tools

Notepad++7.3.1
Easy-to-use and free code editor

SublimeText3 Chinese version
Chinese version, very easy to use

Zend Studio 13.0.1
Powerful PHP integrated development environment

Dreamweaver CS6
Visual web development tools

SublimeText3 Mac version
God-level code editing software (SublimeText3)
Hot Topics


 How to solve win11 DNS server error
Jan 10, 2024 pm 09:02 PM
How to solve win11 DNS server error
Jan 10, 2024 pm 09:02 PM
We need to use the correct DNS when connecting to the Internet to access the Internet. In the same way, if we use the wrong dns settings, it will prompt a dns server error. At this time, we can try to solve the problem by selecting to automatically obtain dns in the network settings. Let’s take a look at the specific solutions. How to solve win11 network dns server error. Method 1: Reset DNS 1. First, click Start in the taskbar to enter, find and click the "Settings" icon button. 2. Then click the "Network & Internet" option command in the left column. 3. Then find the "Ethernet" option on the right and click to enter. 4. After that, click "Edit" in the DNS server assignment, and finally set DNS to "Automatic (D
 Fix: Windows 11 update error 0x80072ee7
Apr 14, 2023 pm 01:31 PM
Fix: Windows 11 update error 0x80072ee7
Apr 14, 2023 pm 01:31 PM
Certain Windows 11 updates may cause issues and larger builds that cause performance errors. For example, if you don’t fix update error 0x80072ee7, it might make your machine behave erratically. It triggers in different situations and fixing it depends on the reason behind the glitch. Sometimes, users report that this issue occurs when installing certain Windows updates. Browse without random security notifications and system errors. If this happens, your computer may have unwanted programs or malware. The reasons behind the errors vary, ranging from antivirus issues to other software interfering with Windows updates. How do Windows update errors occur? If 0x appears while browsing
 How to fix Xbox Series S/X download speeds, reduced ping and lag
Apr 16, 2023 pm 04:49 PM
How to fix Xbox Series S/X download speeds, reduced ping and lag
Apr 16, 2023 pm 04:49 PM
Xbox consoles have improved dramatically over the years. Over the years, games have evolved with life-like features that gamers can't seem to get enough of. Playing your favorite games on Xbox can be a completely engrossing experience. However, sometimes using these advanced features, we end up with lag or ping issues if the internet speed is not that good. Sometimes we want games to download faster. Today, games like Forza Horizon 5 and Mortal Kombat require over 100GB of RAM. Downloading such games can take a long time if we don't have the right internet settings to help us. Method 1: Pass
 How to solve Steam error code 105 Unable to connect to server?
Apr 22, 2023 pm 10:16 PM
How to solve Steam error code 105 Unable to connect to server?
Apr 22, 2023 pm 10:16 PM
Steam is a popular game library. It allows its users to play games and download games to their Steam accounts. Since it is a cloud-based library, it allows users to use any computer and allows them to store many games within the limited computer memory. These features make it very popular among the gamer community. However, many gamers have reported seeing the following error code in their systems. Error code 105 - Unable to connect to server. Server may be offline error This error mainly occurs due to some issues in the connection. When you see this issue in your system, try the following general fixes and check if the issue is resolved. Restart your router. Restart your system. Still see a problem? Don't worry
 How to assign multiple IP addresses in one LAN card on Windows 10/11
May 30, 2023 am 11:25 AM
How to assign multiple IP addresses in one LAN card on Windows 10/11
May 30, 2023 am 11:25 AM
Sometimes it is necessary to assign multiple addresses to a single LAN card. For example, if you need to run multiple websites with unique IP addresses or bind applications to different IP addresses, etc. If you are thinking about how to assign multiple addresses to a single network interface card or LAN card, this article will help you achieve it. Follow the steps below till the end and it will be done. So let’s get started! Assign multiple IP addresses to one LAN card Step 1: Use the Windows+R keys together to open the run prompt and type ncpa.cpl, then press the Enter key to open the Network Connection window. Step 2: Right click on your network adapter Ethernet or WiFi option and click Properties. Step 3: From the Properties Window
 How to change DNS settings on Windows 11
May 01, 2023 pm 06:58 PM
How to change DNS settings on Windows 11
May 01, 2023 pm 06:58 PM
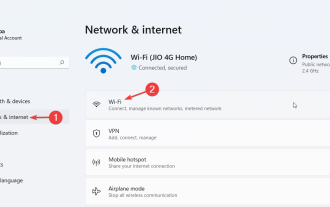
Your ISP is configured to provide a default Domain Name System (DNS) when setting up your Internet connection. This poses various security threats and slows down the internet, so DNS servers must be assigned manually. Browse this detailed guide to learn how to change DNS settings on your Windows 11 computer and protect your online presence. How to change DNS settings on Windows 11? 1. Using the Settings app Use the + shortcut to go to the Settings app. WindowsI select Network & Internet from the left sidebar, then Wi-Fi or Ethernet from the right, depending on your internet connection. Scroll down and select Hardware Properties. Find the DNS server assignment setting and click on it
 Fix: DNS server not responding issue in Windows 11
Jun 01, 2023 pm 04:52 PM
Fix: DNS server not responding issue in Windows 11
Jun 01, 2023 pm 04:52 PM
When Windows users are unable to browse or load web pages on the browser on their system, they happen to think of all the factors that can cause this issue. Although many Windows users resolve this issue on their systems, it throws an error message stating “DNS server is not responding” and users don’t know how to resolve this issue to use a stable internet connection. We have come up with a solution in this article that will surely solve this problem. However, try these solutions beforehand – try restarting your router and check if this is causing the problem. Change browser applications. That said, if you're using the Microsoft Edge browser, close it and open Google
 Why NameResolutionError(self.host, self, e) from e and how to solve it
Mar 01, 2024 pm 01:20 PM
Why NameResolutionError(self.host, self, e) from e and how to solve it
Mar 01, 2024 pm 01:20 PM
The reason for the error is NameResolutionError(self.host,self,e)frome, which is an exception type in the urllib3 library. The reason for this error is that DNS resolution failed, that is, the host name or IP address attempted to be resolved cannot be found. This may be caused by the entered URL address being incorrect or the DNS server being temporarily unavailable. How to solve this error There may be several ways to solve this error: Check whether the entered URL address is correct and make sure it is accessible Make sure the DNS server is available, you can try using the "ping" command on the command line to test whether the DNS server is available Try accessing the website using the IP address instead of the hostname if behind a proxy