

Example tutorial for setting eye protection mode on win10 computer

Eye protection mode is a function of the win10 system software. It can help us reduce the damage to the eyes caused by long-term viewing of the screen. Many friends do not know how to set the win10 eye protection mode. Below, I will I will teach you how to set up the eye protection mode of win10 computer with an example tutorial.
Win10 computer eye protection mode setting tutorial:
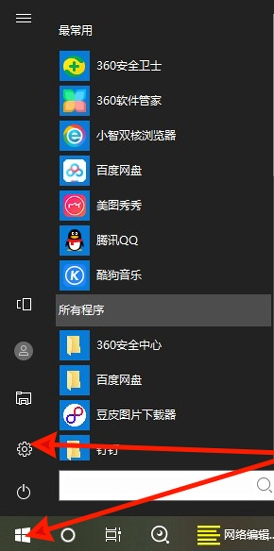
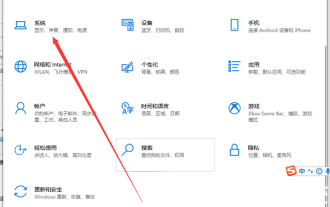
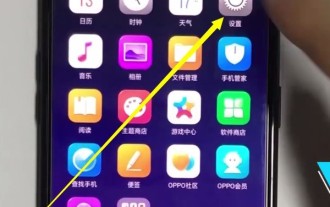
1. First, we open the win10 desktop, click the lower left menu bar, and select "Settings".
#2. After entering the settings page, we are looking for the "System Software" option.

#3. Open the system page, turn on the eye protection mode under the "Display" option on the left, and click "Eye Protection Mode Settings".

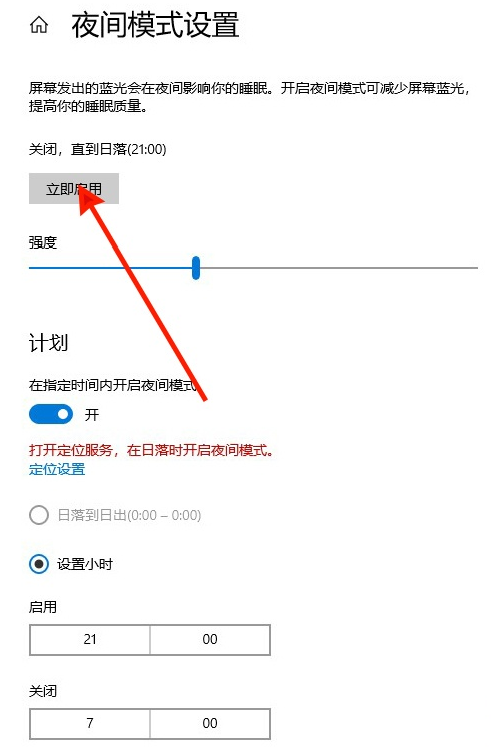
#4. Then we will set the intensity and time as needed, and click "Run Now" to take effect.
Method 2
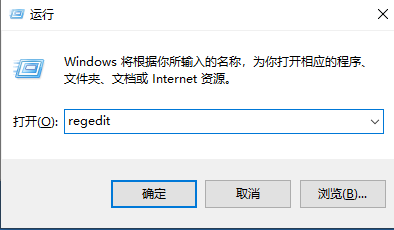
1. Press "win r" to bring up the operating menu bar. Open the online editor of the registry file by right-clicking and selecting Run, enter the command "regedit" and press Enter.
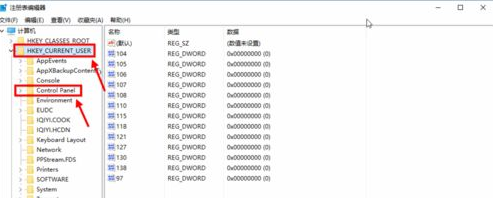
After entering the registry file online editor, select the second item of HKEY_CURRENT_USER to enter. After entering, click ControlPanel to enter.
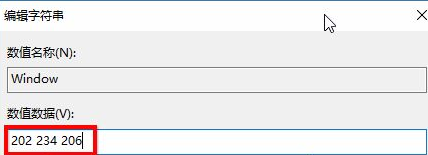
3. We look for the Colors folder in the ControlPanel folder name and click on it. Look for the window in Colors and click on it. Fill it out and make it clear.
#4. Then you can restart the computer to file.
The above is how to set the eye protection mode in win10. Have you mastered it?
The above is the detailed content of Example tutorial for setting eye protection mode on win10 computer. For more information, please follow other related articles on the PHP Chinese website!

Hot AI Tools

Undresser.AI Undress
AI-powered app for creating realistic nude photos

AI Clothes Remover
Online AI tool for removing clothes from photos.

Undress AI Tool
Undress images for free

Clothoff.io
AI clothes remover

Video Face Swap
Swap faces in any video effortlessly with our completely free AI face swap tool!

Hot Article
Hot Tools

Notepad++7.3.1
Easy-to-use and free code editor

SublimeText3 Chinese version
Chinese version, very easy to use

Zend Studio 13.0.1
Powerful PHP integrated development environment

Dreamweaver CS6
Visual web development tools

SublimeText3 Mac version
God-level code editing software (SublimeText3)
Hot Topics


 Shortcut keys for notebook brightness adjustment
Dec 29, 2023 pm 08:15 PM
Shortcut keys for notebook brightness adjustment
Dec 29, 2023 pm 08:15 PM
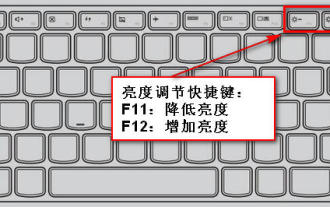
Nowadays, friends spend more and more time using computers. Using computers for a long time is very harmful to our eyes. It is recommended that everyone should stop and rest for 10 minutes after using the computer for one or two hours and look into the distance. In addition, it is also necessary to control the brightness of the computer screen, and laptops are easy to operate and can be operated through shortcut keys. The most complete shortcut key method for notebook brightness adjustment: Shortcut key adjustment 1. Currently, mainstream Lenovo notebooks generally adjust screen brightness through the F11 and F12 shortcut keys. If you need to increase the brightness, press F12, and to reduce the brightness, press F11, as shown in the figure: 2. In addition, some laptops adjust the brightness through the up and down arrow keys on the keyboard, and must be adjusted through the Fn shortcut key. How to use: If you need to increase the brightness
 How to solve the problem of brightness adjuster disappearing in win11
Jan 30, 2024 am 11:45 AM
How to solve the problem of brightness adjuster disappearing in win11
Jan 30, 2024 am 11:45 AM
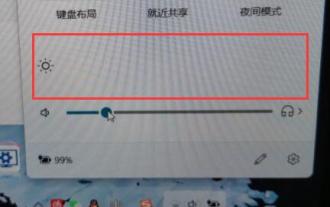
When we use win11 system, the volume and brightness can be adjusted in the taskbar. Some friends open it and find that there is no adjuster for the brightness, making it impossible to adjust the brightness. So how to solve this problem? Today, the editor of this website is here to answer the questions for the majority of users. Let’s take a look at the detailed steps. 3. Then enter regedit and press Enter to run. 5. Double-click to open KMD_EnableBrightnessInterface2 in the 0000 and 0001 folders in turn. 6. Change their numerical data to 0, click OK, and then restart the computer to retrieve the brightness adjustment button.
 How to set up windows 10 eye protection mode. Example tutorial of setting windows 10 eye protection mode.
Jul 15, 2023 pm 01:01 PM
How to set up windows 10 eye protection mode. Example tutorial of setting windows 10 eye protection mode.
Jul 15, 2023 pm 01:01 PM
Some Windows 10 users often use the computer at night, but long-term use is not good for their eyes, so they need to set the eye protection mode for the computer. So how should they do this? In fact, you can turn on the dark mode, which also has the function of protecting eyesight. The specific steps are: open the settings control panel, click the system software to enter, and then select the display on the left, and then you can see the dark mode on the right interface. Just turn on its power switch. How to set the eye protection mode in Windows 10: 1. "Win+i" opens the settings and clicks the first "System" to set the channel mark and enter the system settings interface; 2. In the detailed settings area on the right side of the dialog box, there is a night light power switch, the default setting remains on
 What to do if the brightness adjustment is missing in Windows 7
Jul 10, 2023 pm 12:41 PM
What to do if the brightness adjustment is missing in Windows 7
Jul 10, 2023 pm 12:41 PM
Sometimes the screen brightness is too bright for a long time and can damage the eyes. Then we can adjust the screen brightness through the system brightness adjustment function, but what happens if we find that our win7 system cannot adjust the brightness? Today, the editor is here to tell you how to solve the problem of missing brightness adjustment in Windows 7. Let’s take a look together. Method 1. 1. If it is a desktop computer, there is usually a button to adjust the screen brightness in the lower right corner of the monitor, which can be adjusted by adding and minus signs. 2. If it is a notebook, you can adjust it through shortcut keys. Generally, the F key above will be marked with a brightness adjustment icon. The shortcut keys for adjusting the brightness of the editor's notebook are Fn (function key) + F2 (weak), Fn (function key) + F3 (strong). Method 2: Modify the value of win7 registry
 A simple way to set eye protection mode on Oppo mobile phone
Mar 30, 2024 pm 05:21 PM
A simple way to set eye protection mode on Oppo mobile phone
Mar 30, 2024 pm 05:21 PM
1. Click to open [Settings] on your phone. 2. Pull down and click to open [Display and Brightness]. 3. Click to open [Night Eye Protection] to turn it on. Method 2. 1. Slide down from the top of the screen. 2. Stay for 1 second, call out the control center, click [Night Eye Protection] to turn on the eye protection mode, long press the [Night Eye Protection] icon to set the eye protection mode, as shown below, you will enter the night eye protection setting interface , you can set the opening time, color temperature and display effect.
 Detailed explanation of Win11 brightness shortcut keys
Dec 29, 2023 pm 07:04 PM
Detailed explanation of Win11 brightness shortcut keys
Dec 29, 2023 pm 07:04 PM
Some friends want to quickly change the brightness of their computer screen, so they want to know what the brightness shortcut keys are in Win11. However, only laptops generally have brightness adjustment shortcut keys. If you have a desktop computer, you cannot use the shortcut keys. Let’s take a look. Let’s introduce it in detail. Win11 brightness shortcut keys: 1. Notebook 1. Notebook You can press and hold "Fn" on the keyboard, and then press the key with the brightness icon above to adjust the brightness with shortcut keys. 2. Desktop Computer 1. Generally, there are buttons on the monitor of a desktop computer to adjust the brightness, usually at the bottom or on the frame. 2. After pressing, you need to enter the brightness option similar to the icon first. 3. Then use the left and right buttons on the screen to adjust the brightness.
 Where to turn on eye protection mode in win11excel
Jan 07, 2024 pm 06:41 PM
Where to turn on eye protection mode in win11excel
Jan 07, 2024 pm 06:41 PM
If we need to use Excel tables for a long time, it may affect our vision. At this time, the software provides us with an eye protection mode to use. So where can we turn on the eye protection mode in win11excel? You can actually find it by entering the view. How to turn on the eye protection mode in win11excel: 1. First open win11Excel and enter the "View" option above. 2. After entering, you can find "Eye Protection Mode" and click on it. 3. In addition, there is also an "eye icon" on the bottom toolbar. Clicking it can also turn on the eye protection mode. 4. After opening, the Excel interface color will automatically change to green for eye protection mode.
 Win7 computer screen brightness setting guide
Jan 09, 2024 pm 02:33 PM
Win7 computer screen brightness setting guide
Jan 09, 2024 pm 02:33 PM
Using computers for long periods of time is very harmful to our eyes. It is recommended that everyone should stop and rest for 10 minutes after using the computer for one or two hours and look into the distance. In addition, it is also necessary to control the brightness of the computer screen. Let’s take a look at the specific methods. How to set screen brightness on win7 computer 1. Open the "Control Panel" in the menu bar. 2. Change "View by" to "Large Icons" or "Small Icons", find "Intel Graphics Settings" and open it. 3. Open the "Display" option. 4. Select "Color Settings" and then you can set the brightness, as well as adjust the hue, contrast, saturation, etc.