

Printer Status Aborted Repair Example Tutorial

When we use the printer to print documents, we sometimes find that the printer has stopped and cannot print. How to recover at this time? In fact, we only need to cancel the printing stop.
How to restore the printer status that has been suspended:
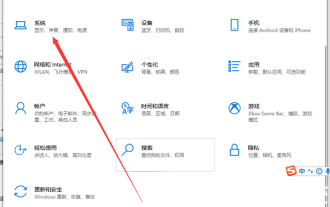
1. First open the printer settings through the small icon on the lower right.
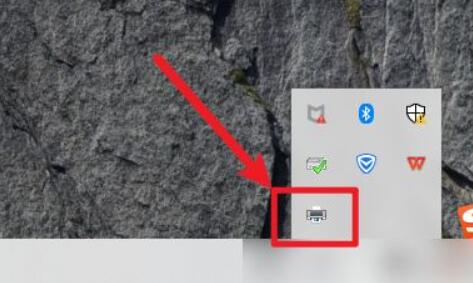
#2. After opening, you can see the message "Aborted"
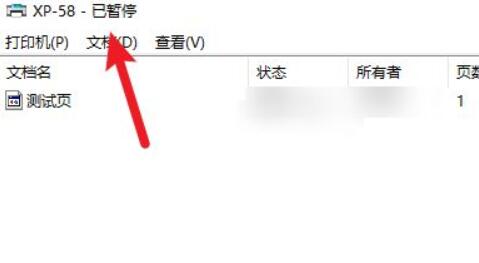
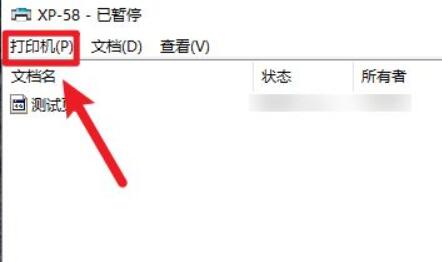
3. Now, click on the upper right corner Click "Printer" in the corner
4. If "Stop Printing" is checked, click again to uncheck it.
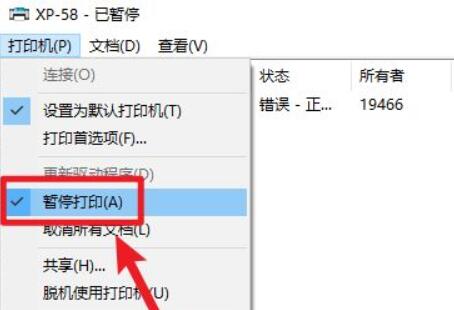
#5. After unchecking, you will find that it has stopped and you can print again.

The above is the detailed content of Printer Status Aborted Repair Example Tutorial. For more information, please follow other related articles on the PHP Chinese website!

Hot AI Tools

Undresser.AI Undress
AI-powered app for creating realistic nude photos

AI Clothes Remover
Online AI tool for removing clothes from photos.

Undress AI Tool
Undress images for free

Clothoff.io
AI clothes remover

Video Face Swap
Swap faces in any video effortlessly with our completely free AI face swap tool!

Hot Article
Hot Tools

Notepad++7.3.1
Easy-to-use and free code editor

SublimeText3 Chinese version
Chinese version, very easy to use

Zend Studio 13.0.1
Powerful PHP integrated development environment

Dreamweaver CS6
Visual web development tools

SublimeText3 Mac version
God-level code editing software (SublimeText3)
Hot Topics


 How to set up windows 10 eye protection mode. Example tutorial of setting windows 10 eye protection mode.
Jul 15, 2023 pm 01:01 PM
How to set up windows 10 eye protection mode. Example tutorial of setting windows 10 eye protection mode.
Jul 15, 2023 pm 01:01 PM
Some Windows 10 users often use the computer at night, but long-term use is not good for their eyes, so they need to set the eye protection mode for the computer. So how should they do this? In fact, you can turn on the dark mode, which also has the function of protecting eyesight. The specific steps are: open the settings control panel, click the system software to enter, and then select the display on the left, and then you can see the dark mode on the right interface. Just turn on its power switch. How to set the eye protection mode in Windows 10: 1. "Win+i" opens the settings and clicks the first "System" to set the channel mark and enter the system settings interface; 2. In the detailed settings area on the right side of the dialog box, there is a night light power switch, the default setting remains on
 Methods and Operation Guide to Solve Printer Status Suspension
Dec 26, 2023 pm 03:07 PM
Methods and Operation Guide to Solve Printer Status Suspension
Dec 26, 2023 pm 03:07 PM
When we use a printer to print files, we sometimes find that the printer status has been paused and printing cannot continue. How to restore it at this time? In fact, we only need to cancel the printing pause. How to restore the printer status when it has been paused: 1. First, open the printer settings through the corner icon in the lower right corner. 2. After opening, you can see "Paused" displayed. 3. At this time, we click "Printer" in the upper left corner. 4. If "Pause Printing" is checked, click again to uncheck it. 5. After unchecking, you will find that it is no longer paused and you can continue printing.
 How to turn off hibernation mode in windows7. Tutorial on how to turn off hibernation state in windows7.
Jul 10, 2023 pm 09:37 PM
How to turn off hibernation mode in windows7. Tutorial on how to turn off hibernation state in windows7.
Jul 10, 2023 pm 09:37 PM
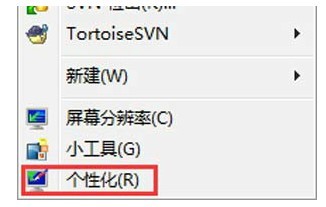
Hibernation is a unique method of the Windows 7 system. It can put the computer into a low-power state when the user is away temporarily. However, some Windows 7 users feel that they do not need this method. If they want to turn it off, what should they do? Go to the personalized control panel, click the screen saver, change the power settings, change the computer sleep time, and then set "Put the computer to sleep" to Never. How to turn off hibernation mode in windows 7: 1. First, click the mouse on a blank space on the desktop and select the "Personalization" option, as shown in the figure below: 2. In the personalization dialog box, please click the "Screen Saver" logo, as shown in the figure below Display: 3. Click in the screen saver settings dialog box
 What to do if the printer cannot connect
Sep 04, 2023 pm 03:20 PM
What to do if the printer cannot connect
Sep 04, 2023 pm 03:20 PM
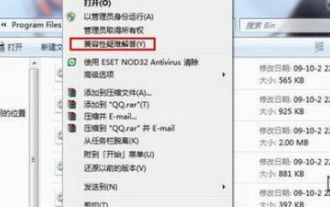
Common solutions to printer failure include: 1. Make sure the printer is properly connected to the computer or network; 2. Turn off and reopen the printer, computer and related network devices; 3. Install the appropriate printer driver on the computer; 4. Clear Print queue and try to reconnect the printer; 5. Remove the existing printer device from the computer and reinstall the printer; 6. Make sure the printer's network settings are correct and have the appropriate IP address and subnet mask; 7. Check the printer user manual.
 Detailed example tutorial on how to adjust mouse sensitivity in Windows 7
Jul 09, 2023 am 08:33 AM
Detailed example tutorial on how to adjust mouse sensitivity in Windows 7
Jul 09, 2023 am 08:33 AM
Many users of win7 mouse sensitivity do not know how to set it, where to set it, etc. If they want to adjust the mouse speed as they like, but cannot find the setting place, what should they do? You can see the following detailed examples. Tutorial. How to adjust mouse sensitivity in win7: 1. Right-click the mouse on a blank space on the desktop and select "Personalize (R)" in the pop-up menu. 2. In the personalized web page, select "Change mouse pointer". 3. After opening the dialog box, search for "Pointer Options" on the top of the page and perform settings. After the settings are completed, click Apply.
 Where is the Win7 compatibility setting? Win7 compatibility setting example tutorial
Jul 12, 2023 pm 09:25 PM
Where is the Win7 compatibility setting? Win7 compatibility setting example tutorial
Jul 12, 2023 pm 09:25 PM
The Windows 7 system is a very stable system, and many consumers are now using the Win7 system. Nowadays, many customers don’t know how to set the compatibility mode. Let’s take a look at the specific setting method below. Compatibility setting method: 1. Right-click the mobile software with any problem. 2. Select the [Compatibility Mode Troubleshooting] option. 3. The system automatically recognizes it, please wait a moment. 4. When a prompt box appears, select [Try proposed settings]. 5. Click [Run Program Flow] to test whether the tool is operating normally, and click [Next]. 6. If there is no problem, select [Yes, so the program saves these settings]. 7. If there is any problem, select [No, try again using other settings]. 8. Choose
 Windows 7 desktop background how to set windows 7 desktop background setting example tutorial
Jul 18, 2023 am 10:45 AM
Windows 7 desktop background how to set windows 7 desktop background setting example tutorial
Jul 18, 2023 am 10:45 AM
Windows 7 supports many custom settings. For example, customers can set their own desktop background and create an exclusive personalized theme. So how to set the desktop background of Windows 7? The method is relatively simple. First, right-click on an empty space on the desktop, select Humanization, then click on the desktop background below, click to access in the open interface, select a picture that you like, and then save the settings to make your desktop The background is set successfully. Windows 7 desktop background setting example tutorial: 1. Enter the win7 desktop software, click on the blank space on the desktop, select Humanization to turn on, and go to the next step. 2. Click "Desktop Background" on the humanized page that opens and go to the next step. 3. Then click the access button and choose your favorite
 Example tutorial on turning off the sound when booting up a win7 computer
Jul 14, 2023 am 10:01 AM
Example tutorial on turning off the sound when booting up a win7 computer
Jul 14, 2023 am 10:01 AM
By default, win7 will have a startup sound when it is turned on. If it is too loud, it may harm the people around you. So how do you turn off the startup sound of your win7 computer? In fact, you can turn off the startup sound in the sound settings. How to turn off the startup sound of win7 computer: 1. First, click the lower left menu bar and open "Control Panel" 2. Then enter the "Hardware and Sound" settings above. 3. Then click "Change System Sound" in the sound. 4. Finally cancel "Play Windows Startup Sound" and "OK" to save.