

How to add a network to the top menu of Win11 system

How to add a network to the top menu of Win11 system? With the launch of the Win11 system, many friends have already upgraded their experience. However, since Win11 has new functions and interfaces compared to previous systems, many users will inevitably have problems when they first use the system. Some operations may not work. For example, how to add a network to the top menu of Win11? Many friends don’t know how to operate in detail. The editor has compiled the method of adding a network to the top menu of Win11 system. If you are interested, follow the editor to take a look below!
Sharing how to add a network to the top menu of Win11 system
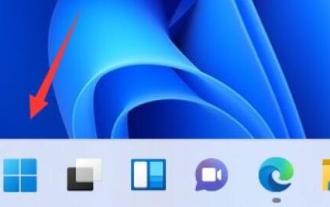
The first step is to find the top menu bar of this computer in Windows 11.
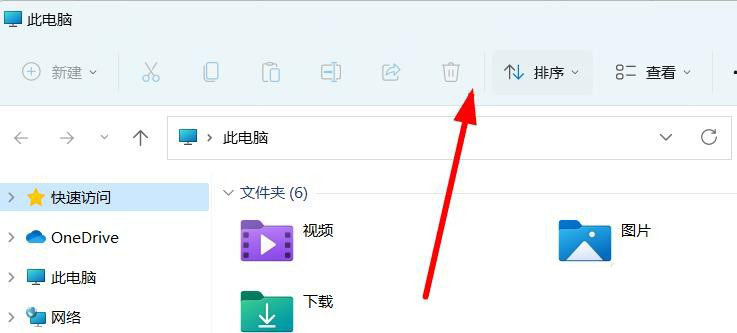
In the second step, we can click this button in the top menu bar here.

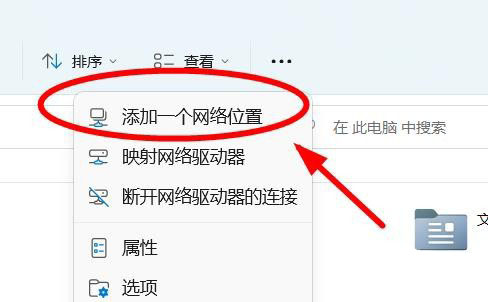
The third step is to add a network here.
The above is the detailed content of How to add a network to the top menu of Win11 system. For more information, please follow other related articles on the PHP Chinese website!

Hot AI Tools

Undresser.AI Undress
AI-powered app for creating realistic nude photos

AI Clothes Remover
Online AI tool for removing clothes from photos.

Undress AI Tool
Undress images for free

Clothoff.io
AI clothes remover

Video Face Swap
Swap faces in any video effortlessly with our completely free AI face swap tool!

Hot Article
Hot Tools

Notepad++7.3.1
Easy-to-use and free code editor

SublimeText3 Chinese version
Chinese version, very easy to use

Zend Studio 13.0.1
Powerful PHP integrated development environment

Dreamweaver CS6
Visual web development tools

SublimeText3 Mac version
God-level code editing software (SublimeText3)
Hot Topics
 1655
1655
 14
1414
52
1307
25
1253
29
1227
24
14
1414
52
1307
25
1253
29
1227
24

 How to reset win7 network settings
Dec 26, 2023 pm 06:51 PM
How to reset win7 network settings
Dec 26, 2023 pm 06:51 PM
The win7 system is a very excellent high-performance system. Recently, many friends of the win7 system are looking for how to initialize the network settings in win7. Today, the editor will bring you the details of win7 computer network initialization. Let’s take a look at the tutorial. Detailed tutorial on how to initialize network settings in win7: Graphical steps: 1. Click the "Start" menu, find and open the "Control Panel", and then click "Network and Sharing Center". 2. Then find and click "Change Adapter Device". 3. Next, in the window that opens, right-click "Local Area Connection" and then click "Properties". 4. After opening it, find "Internet Protocol Version (TCP/IPv4)" and double
 How to Troubleshoot WiFi Issues in Win11 Network and Internet Settings
Dec 22, 2023 pm 12:33 PM
How to Troubleshoot WiFi Issues in Win11 Network and Internet Settings
Dec 22, 2023 pm 12:33 PM
In the previous system, we could find and connect to the wifi network in the network and internet settings, but after updating the system, we found that there was no wifi in the win11 network and internet settings. This may be due to a device or driver problem. There is no wifi in win11 network and internet settings: 1. Device 1. First, make sure you have a wireless network card. 2. Laptops basically come with it, but many desktop computers don’t. 3. We can right-click "This Computer" and open "Management" 4. Then enter "Device Manager" on the left 5. Then right-click "Network Adapter" and click "Scan for hardware changes" 6. After the scan is completed, expand the network adapter , check if there is a "WLAN" setting below.
 Finding the MAC address location of Win11
Jan 11, 2024 pm 01:36 PM
Finding the MAC address location of Win11
Jan 11, 2024 pm 01:36 PM
If we want to check the mac address of win11, we need to find Ethernet in the internet option in the settings, and then we can scroll down to check the mac address of this computer, which is very convenient. Where is the win11mac address: 1. First, we find the start button, then right-click and select "Settings". 2. Then find "Network and Internet" on the left. 3. Then click to enter "Ethernet". 4. Finally, you can check the address. Extended reading: What to do if you can’t log in
 Guide to optimizing Win7 network settings
Dec 28, 2023 pm 12:09 PM
Guide to optimizing Win7 network settings
Dec 28, 2023 pm 12:09 PM
When we use win7 system, we may encounter poor network conditions and insufficient network speed. At this time, we can alleviate this problem by optimizing network settings. You only need to make relevant edits in the registry. Let’s take a look below. Win7 network settings optimization tutorial 1. First, we use "win+r" to open the run, enter "regedit" and press Enter to confirm. 2. Go to this path location: "HKEY_LOCAL_MACHINE\SYSTEM\CurrentControlSet\services\Tcpip\Parameters" and double-click to open the "DefaultTTL" file on the right. 3. Change its value to "80
 How to set up and connect the network on Kirin OS?
Aug 06, 2023 pm 03:06 PM
How to set up and connect the network on Kirin OS?
Aug 06, 2023 pm 03:06 PM
How to set up and connect the network on Kirin OS? Abstract: Kirin operating system is a domestic operating system based on Linux and is widely used in Chinese government agencies, enterprises and institutions. Network connection is one of the basic functions of Kirin operating system. This article will introduce how to set up and connect the network in Kirin operating system, with code examples. 1. Network settings In Kirin operating system, network settings can be performed through the graphical interface or the command line. The following is a detailed introduction in command line mode. Open the terminal in Kirin OS, we can
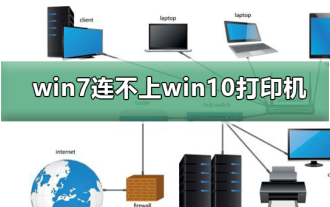 Win10 printer cannot connect with Win7
Dec 31, 2023 pm 10:53 PM
Win10 printer cannot connect with Win7
Dec 31, 2023 pm 10:53 PM
A printer is one of the computer's output devices, used to print computer processing results on relevant media. Nowadays, e-commerce families are increasingly inseparable from printers. If you want to print something, you have to connect it to a computer. So how does the computer connect to the printer? Below, the editor brings you a solution to the problem that Win7 cannot connect to the Win10 printer. Let’s take a look at the details below. Solution to the problem that win7 cannot connect to win10 printer 1. First use + to open on Win10 and enter in the input box; 2. After opening, enter at the cursor and click the enter key, a series of similar IP addresses will appear. The numbers and symbols, the numbers after the IP4 address line are the IP address of this computer; 3. Then return to the win7 system
 How to restore network settings in win11
Dec 25, 2023 pm 11:01 PM
How to restore network settings in win11
Dec 25, 2023 pm 11:01 PM
If we encounter some problems on the network, we can restore the network settings through network reset. The settings can be completed in the advanced network settings. It is very convenient. You can try it. How to restore network settings in win11: 1. First, we can click "Start". 2. Then click "Settings". 3. Then click "Network and Internet". 4. Then click “Advanced Network Settings”. 5. Click and select "Network Reset". 6. Finally, click "Reset Now".
 How to change public network to private network in Win11
Jul 05, 2023 pm 08:13 PM
How to change public network to private network in Win11
Jul 05, 2023 pm 08:13 PM
How to change the public network to a private network in Win11? We all know that professional networks are more secure than public networks. Recently, some Win11 users want to change the public network to a private network, so how should they do it? The operation method is still relatively difficult for novices. Many friends do not know how to operate in detail. The editor below has compiled the method of changing the public network to a private network in Win11. If you are interested, follow the editor to read below. ! How to change the Win11 public network to a private network 1. Right-click the [Network] icon on the taskbar and click the pop-up [Network and Internet Settings]. 2. Enter the network and internet settings interface and select the network to be set.