

Create a news website using Yii framework

With the popularity of online media, the demand for news websites is also growing. If you plan to create a news website, consider using the Yii framework to build your website. Yii is a popular PHP framework designed to make web application development simpler and more efficient.
Yii framework has many advantages, including:
- Efficient performance
Yii framework is a fast framework that is able to handle large amounts of Concurrent requests. This is because the Yii framework adopts some of the latest PHP technologies and uses a variety of caching mechanisms to improve website performance. This feature is very important for news websites as it needs to be able to handle high traffic situations.
- Flexible and easy to extend
The Yii framework is very flexible and can be easily extended and customized. If you need to add new functionality or modify existing functionality, the Yii framework provides very clear extension interfaces and class libraries. This means you can easily write new modules or plugins and integrate them into your website.
- High security
The Yii framework takes security as its design principle and provides a series of security protection mechanisms. These mechanisms include input filtering, data encryption, authentication, and authorization functions. These mechanisms are necessary to ensure that your news website is not vulnerable to hackers or other security threats.
Now, let’s take a look at how to create a news website using the Yii framework.
The first step is to install the Yii framework
Before you start, you need to install the Yii framework. There are two ways to install the Yii framework: through Composer or manual download. Here, I choose the Composer installation method. If you don't have Composer installed yet, please install Composer first and add it to your system path.
In the terminal, go to your project directory and run the following command to install the Yii framework:
composer require yiisoft/yii2-app-basic
This command will install the Yii Basic application template and Yii core library. After the installation is complete, you can execute the following command to run the Yii application:
./yii serve
This command will start a local web server and run your Yii application. You can open http://localhost:8080 in your browser to view your website homepage.
Second step, design your news website database
Before creating any web application, you need to design your database. Assume that our news website requires the following database table:
- news: stores the title, content, date, author and other information of the news
- category: stores the classification information of the news
- user: Store user information for news websites
In the Yii framework, you can use the Migrations tool to create, update and manage your database. You can use the following command to create a new Migration:
./yii migrate/create create_news_table
This command will create a Migration class named create_news_table, which will be used to create the news table and other related tables (for example, category and user tables).
In the create_news_table class, you need to use the database API of the Yii framework to create your database table. For example, here is the sample code to create a news table:
<?php

use yiidbMigration;

class m210816_100000_create_news_table extends Migration
{
    public function safeUp()
    {
        $this->createTable('news', [
            'id' => $this->primaryKey(),
            'title' => $this->string()->notNull(),
            'content' => $this->text(),
            'category_id' => $this->integer(),
            'user_id' => $this->integer(),
            'created_at' => $this->timestamp()->defaultExpression('CURRENT_TIMESTAMP'),
        ]);

        $this->addForeignKey('fk_news_category', 'news', 'category_id', 'category', 'id', 'CASCADE', 'CASCADE');
        $this->addForeignKey('fk_news_user', 'news', 'user_id', 'user', 'id', 'CASCADE', 'CASCADE');
    }

    public function safeDown()
    {
        $this->dropForeignKey('fk_news_category', 'news');
        $this->dropForeignKey('fk_news_user', 'news');

        $this->dropTable('news');
    }
} In this code, we use the createTable method of the Yii framework to create newsTable, then use the addForeignKey method to define foreign key constraints to ensure data consistency.
With the Migration class, you can use the following command to run Migration to create a new database table:
./yii migrate/up
This command will create a new database table and other related tables.
The third step is to create the Yii model
In the Yii framework, the model is the core part used to represent business logic and data, and is also part of the MVC architecture pattern. In the Yii framework, models are the simplest and most powerful way to process data.
To create a model, you can use the following command:
./yii generate/model News --tableName=news
This command will create a model named News and associate it to newssheet. Next, you need to customize your model using the following code:
<?php

namespace appmodels;

use Yii;

class News extends yiidbActiveRecord
{
    public static function tableName()
    {
        return 'news';
    }

    public function rules()
    {
        return [
            [['title'], 'required'],
            [['content'], 'string'],
            [['category_id', 'user_id'], 'integer'],
            [['created_at'], 'safe'],
            [['title'], 'string', 'max' => 255],
        ];
    }

    public function attributeLabels()
    {
        return [
            'id' => 'ID',
            'title' => 'Title',
            'content' => 'Content',
            'category_id' => 'Category ID',
            'user_id' => 'User ID',
            'created_at' => 'Created At',
        ];
    }
}In this code, we define the table name and validation rules for the News model, and also define the Label (text used to display to the user). You can access and modify data tables through this model, for example:
$news = new News();
$news->title = 'Hello, World!';
$news->content = 'Welcome to my news website.';
$news->category_id = 1;
$news->user_id = 1;
$news->save();
This will add a news item to the news table.
The fourth step is to create Yii controllers and views
In the Yii framework, the controller is the part used to process user requests and render responses. The controller routes user requests to the correct action and uses a specific view file to render the response.
To create a controller, you can use the following command:
./yii generate/controller News
This will create a controller named NewsController. Next, you need to add some operations to the controller, for example:
<?php

namespace appcontrollers;

use Yii;
use appmodelsNews;
use yiiwebController;

class NewsController extends Controller
{
    public function actionIndex()
    {
        $news = News::find()->all();
        return $this->render('index', [
            'news' => $news,
        ]);
    }

    public function actionView($id)
    {
        $news = News::findOne($id);
        return $this->render('view', [
            'news' => $news,
        ]);
    }

    public function actionCreate()
    {
        $news = new News();
        if ($news->load(Yii::$app->request->post()) && $news->save()) {
            return $this->redirect(['view', 'id' => $news->id]);
        }
        return $this->render('create', [
            'news' => $news,
        ]);
    }

    public function actionUpdate($id)
    {
        $news = News::findOne($id);
        if ($news->load(Yii::$app->request->post()) && $news->save()) {
            return $this->redirect(['view', 'id' => $news->id]);
        }
        return $this->render('update', [
            'news' => $news,
        ]);
    }

    public function actionDelete($id)
    {
        $news = News::findOne($id);
        $news->delete();
        return $this->redirect(['index']);
    }
}In this code, we define five operations: Index, View, Create, Update and Delete. This presents the view file to the user and returns a response based on the user's request.
In order to create view files for these operations, for example:
app/views/news/index.phpapp/views/news/view.phpapp/views/news/create.phpapp/views/news/update.php
你需要添加如下代码:
<?php foreach ($news as $item): ?>
    <div>
        <h2><?= $item->title ?></h2>
        <p><?= $item->content ?></p>
        <p><?= $item->created_at ?></p>
        <p>Author: <?= $item->user_id ?></p>
        <p>Category: <?= $item->category_id ?></p>
        <a href="<?= Yii::$app->urlManager->createUrl(['news/view', 'id' => $item->id]) ?>">View</a>
        <a href="<?= Yii::$app->urlManager->createUrl(['news/update', 'id' => $item->id]) ?>">Update</a>
        <a href="<?= Yii::$app->urlManager->createUrl(['news/delete', 'id' => $item->id]) ?>">Delete</a>
    </div>
<?php endforeach; ?>在这个代码中,我们用循环遍历新闻,然后为每个新闻输出标题、内容、日期、作者和分类,以及三个按钮View、Update和Delete。
第五步,定义Yii路由和URL规则
在Yii框架中,路由和URL规则告诉Yii框架如何将用户请求路由到正确的控制器和操作。
默认情况下,Yii框架使用/controller/action格式的URL,例如/news/index。但是你可以自定义路由和URL规则,例如将/news路由到NewsController的Index操作。
要定义路由和URL规则,你可以使用如下代码:
'urlManager' => [
    'enablePrettyUrl' => true,
    'enableStrictParsing' => true,
    'showScriptName' => false,
    'rules' => [
        // NewsController
        ['class' => 'yiiestUrlRule', 'controller' => 'news'],
        'news' => 'news/index',
        'news/create' => 'news/create',
        'news/<id:d+>' => 'news/view',
        'news/<id:d+>/update' => 'news/update',
        'news/<id:d+>/delete' => 'news/delete',
    ],
],在这个代码中,我们使用规则数组来自定义路由和URL规则。例如,我们将news路由到NewsController的Index操作,而将news/create路由到NewsController的Create操作。
第六步,测试Yii应用程序
现在,你已经创建了一个新闻网站,并使用Yii框架构建了它。要测试你的新闻网站,你可以在终端中运行如下命令启动本地Web服务器:
./yii serve
然后在浏览器中打开http://localhost:8080,查看你的新闻网站。
最后,当你为你的新闻网站添加更多功能时,你可以根据你的业务需要扩展Yii框架的功能。Yii框架提供了许多工具和类库,可以帮助你尽可能快地开发出高效、安全和易于扩展的Web应用程序。
The above is the detailed content of Create a news website using Yii framework. For more information, please follow other related articles on the PHP Chinese website!

Hot AI Tools

Undresser.AI Undress
AI-powered app for creating realistic nude photos

AI Clothes Remover
Online AI tool for removing clothes from photos.

Undress AI Tool
Undress images for free

Clothoff.io
AI clothes remover

Video Face Swap
Swap faces in any video effortlessly with our completely free AI face swap tool!

Hot Article
Hot Tools

Notepad++7.3.1
Easy-to-use and free code editor

SublimeText3 Chinese version
Chinese version, very easy to use

Zend Studio 13.0.1
Powerful PHP integrated development environment

Dreamweaver CS6
Visual web development tools

SublimeText3 Mac version
God-level code editing software (SublimeText3)
Hot Topics


 How to personalize your iPhone on the latest iOS 17
Sep 21, 2023 am 08:17 AM
How to personalize your iPhone on the latest iOS 17
Sep 21, 2023 am 08:17 AM
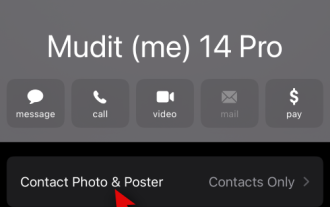
How to Personalize Calls on iPhone Apple’s iOS 17 introduces a new feature called Contact Posters that allows you to personalize the look of your call screen on your iPhone. This feature allows you to design a poster using selected photos, colors, fonts, and Memoji as contact cards. So when you make a call, your custom image will appear on the recipient's iPhone exactly as you envisioned. You can choose to share your unique contact poster with all your saved contacts, or choose who can see it. Likewise, during a call exchange, you will also see other people's contact posters. Additionally, Apple lets you set specific contact photos for individual contacts, making calls from those contacts
 How to create a folder on Realme Phone?
Mar 23, 2024 pm 02:30 PM
How to create a folder on Realme Phone?
Mar 23, 2024 pm 02:30 PM
Title: Realme Phone Beginner’s Guide: How to Create Folders on Realme Phone? In today's society, mobile phones have become an indispensable tool in people's lives. As a popular smartphone brand, Realme Phone is loved by users for its simple and practical operating system. In the process of using Realme phones, many people may encounter situations where they need to organize files and applications on their phones, and creating folders is an effective way. This article will introduce how to create folders on Realme phones to help users better manage their phone content. No.
 How to create pixel art in GIMP
Feb 19, 2024 pm 03:24 PM
How to create pixel art in GIMP
Feb 19, 2024 pm 03:24 PM
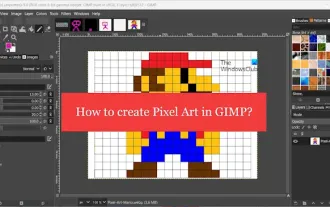
This article will interest you if you are interested in using GIMP for pixel art creation on Windows. GIMP is a well-known graphics editing software that is not only free and open source, but also helps users create beautiful images and designs easily. In addition to being suitable for beginners and professional designers alike, GIMP can also be used to create pixel art, a form of digital art that utilizes pixels as the only building blocks for drawing and creating. How to Create Pixel Art in GIMP Here are the main steps to create pixel pictures using GIMP on a Windows PC: Download and install GIMP, then launch the application. Create a new image. Resize width and height. Select the pencil tool. Set the brush type to pixels. set up
 How to create a family with Gree+
Mar 01, 2024 pm 12:40 PM
How to create a family with Gree+
Mar 01, 2024 pm 12:40 PM
Many friends expressed that they want to know how to create a family in Gree+ software. Here is the operation method for you. Friends who want to know more, come and take a look with me. First, open the Gree+ software on your mobile phone and log in. Then, in the options bar at the bottom of the page, click the "My" option on the far right to enter the personal account page. 2. After coming to my page, there is a "Create Family" option under "Family". After finding it, click on it to enter. 3. Next jump to the page to create a family, enter the family name to be set in the input box according to the prompts, and click the "Save" button in the upper right corner after entering it. 4. Finally, a "save successfully" prompt will pop up at the bottom of the page, indicating that the family has been successfully created.
 How to create a Gantt chart using Highcharts
Dec 17, 2023 pm 07:23 PM
How to create a Gantt chart using Highcharts
Dec 17, 2023 pm 07:23 PM
How to use Highcharts to create a Gantt chart requires specific code examples. Introduction: The Gantt chart is a chart form commonly used to display project progress and time management. It can visually display the start time, end time and progress of the task. Highcharts is a powerful JavaScript chart library that provides rich chart types and flexible configuration options. This article will introduce how to use Highcharts to create a Gantt chart and give specific code examples. 1. Highchart
 How to Create a Contact Poster for Your iPhone
Mar 02, 2024 am 11:30 AM
How to Create a Contact Poster for Your iPhone
Mar 02, 2024 am 11:30 AM
In iOS17, Apple has added a contact poster feature to its commonly used Phone and Contacts apps. This feature allows users to set personalized posters for each contact, making the address book more visual and personal. Contact posters can help users identify and locate specific contacts more quickly, improving user experience. Through this feature, users can add specific pictures or logos to each contact according to their preferences and needs, making the address book interface more vivid. Apple in iOS17 provides iPhone users with a novel way to express themselves, and added a personalizable contact poster. The Contact Poster feature allows you to display unique, personalized content when calling other iPhone users. you
 A first look at Django: Create your first Django project using the command line
Feb 19, 2024 am 09:56 AM
A first look at Django: Create your first Django project using the command line
Feb 19, 2024 am 09:56 AM
Start the journey of Django project: start from the command line and create your first Django project. Django is a powerful and flexible web application framework. It is based on Python and provides many tools and functions needed to develop web applications. This article will lead you to create your first Django project starting from the command line. Before starting, make sure you have Python and Django installed. Step 1: Create the project directory First, open the command line window and create a new directory
 How to create a verification code image using PHP?
Sep 13, 2023 am 11:40 AM
How to create a verification code image using PHP?
Sep 13, 2023 am 11:40 AM
How to create a verification code image using PHP? CAPTCHA is a commonly used method to verify whether the user is a human and not a machine. On websites, we often see verification code images, which require users to enter random characters or numbers displayed on the image to complete operations such as login, registration, and commenting. This article will introduce how to use PHP to create a verification code image and provide specific code examples. 1. PHPGD library To create a verification code image, we need to use PHP's GD library. The GD library is an extension for processing images.
