

How to install, deploy and use nginx on linux

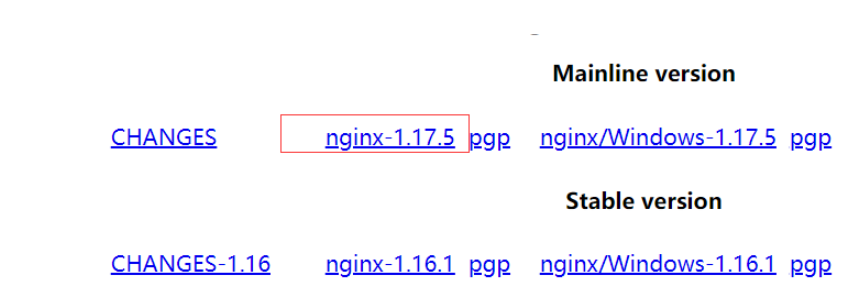
1. Download
2. Deployment
2.1 Installation prerequisites
Installation under linux requires the installation of some components
1. gcc && g++
yum install gcc-c++
2. pcre
yum install -y pcre pcre-devel
3. zlib
yum install -y zlib zlib-devel
4. openssl
yum install -y openssl openssl-devel
2.2 Installation
1. 解压nginx文件
tar -zxvf nginx-1.17.5.tar.gz
2. 安装
## 创建一个nginx安装目录
mkdir nginx
cd nginx-1.12.2
## 指定文件安装路径
./configure --prefix=/home/lege/nginx
make
make install
#安装完成后内容会安装到指定的路径 /home/lege/nginx下,否则会在默认目录/usr/local/nginx
2.3 Start nginx
## 修改配置文件
cd /home/lege/nginx/conf
vim nginx.conf
## 设置端口为8080,也可设置成其他
listen    8080;
## 进入到启动目录
cd /home/lege/nginx/sbin
## 检查配置文件是否有问题
./nginx -t
##没有问题的结果如下所示:
[soa@testsoa04 sbin]$ ./nginx -t
nginx: the configuration file /home/lege/nginx/conf/nginx.conf syntax is ok
nginx: configuration file /home/lege/nginx/conf/nginx.conf test is successful
[soa@testsoa04 sbin]$

## 查询配置参数
./nginx -v
## 对于已安装的nginx需要修改配置参数
./configure --prefix=/home/lege/nginx ...配置参数
make
make install
然后重新启动nginx即可
## 启动
./nginx
## 停止
./nginx -s stop
## 重启
./nginx -s reload
## 输入网址验证是否启动成功
http://ip:port/
3. nginx log related configuration
日志定义的格式:
语法格式:  access_log path [format [buffer=size] [gzip[=level]] [flush=time] [if=condition]];
           access_log off;
默认值  : access_log logs/access.log combined;
作用域  : http, server, location, if in location, limit_except

1. 定义日志格式
语法格式:  log_format name [escape=default|json] string ...;
默认值  :  log_format combined "...";
作用域  :  http

常见的日志变量
$remote_addr, $http_x_forwarded_for 记录客户端ip地址
$remote_user记录客户端用户名称
$request记录请求的url和http协议(get,post,del,等)
$status记录请求状态
$body_bytes_sent发送给客户端的字节数,不包括响应头的大小; 该变量与apache模块mod_log_config里的“%b”参数兼容。
$bytes_sent发送给客户端的总字节数。
$connection连接的序列号。
$connection_requests 当前通过一个连接获得的请求数量。
$msec 日志写入时间。单位为秒,精度是毫秒。
$pipe如果请求是通过http流水线(pipelined)发送,pipe值为“p”,否则为“.”。
$http_referer 记录从哪个页面链接访问过来的
$http_user_agent记录客户端浏览器相关信息
$request_length请求的长度(包括请求行,请求头和请求正文)。
$request_time 请求处理时间,单位为秒,精度毫秒; 从读入客户端的第一个字节开始,直到把最后一个字符发送给客户端后进行日志写入为止。
$time_iso8601 iso8601标准格式下的本地时间。
$time_local通用日志格式下的本地时间。

示例:
log_format main '$remote_addr - $remote_user [$time_local] "$request" '
           '$status $body_bytes_sent "$http_referer" "$request_time" '
'"$http_user_agent" "$http_x_forwarded_for"For logs Related cleanup can be handled using Linux scheduled tasks. The example is as follows:
clear.sh script is as follows:
#!/bin/bash
#logs_path为日志存放路径
logs_path=/home/lege/data/nginx/logs
yesterday=$(date -d "yesterday" +%y-%m-%d)
keeptime=$(date -d "-3 days" +%y-%m-%d)
#切分日志文件
mv ${logs_path}/access.log ${logs_path}/access_${yesterday}.log
mv ${logs_path}/error.log ${logs_path}/error_${yesterday}.log
#通过nginx信号量控制重读日志,/web/nginx/为nginx安装目录
kill -usr1 $(cat /home/lege/data/nginx/logs/nginx.pid)
#删除3天前的日志文件
rm -f ${logs_path}/access_{keeptime}.log
rm -f ${logs_path}/error_{keeptime}.log
echo 0

crontab -e 添加如下:
0 0 * * * /bin/sh /home/lege/data/nginx/logs/clear.sh

crontab -l 查看是否添加成功4. nginx uses it as a file downloader
http {
  server_tokens off;
  client_header_buffer_size 8k;
  client_max_body_size 130m;
  proxy_buffer_size  64k;
  proxy_buffers  8 64k;
  log_format access '$remote_addr $host $remote_user [$time_local] $status $request_length $body_bytes_sent $request_time 0 0 0 - "-" "$request" "$http_referer" "$http_user_agent" $http_cookie $bytes_sent';
  access_log logs/access.log access;
  keepalive_requests 16;
  keepalive_timeout 5;
  server {
    listen 8080;
    server_name localhost;
    charset utf-8;
    location / {
      default_type 'application/octet-stream';
      add_header content-disposition "attachment";
      ## 配置可以下载的文件路径,下面是在windows下测试使用的路径,linux也可换成对应的路径
      root  d://tools//nginx-1.17.4//conf;
     }
   }
} After the configuration is completed, restart nginx, then enter the file name entered in the browser to download the corresponding file. ps: Directories cannot be downloaded, only files can be downloaded.
The above is the detailed content of How to install, deploy and use nginx on linux. For more information, please follow other related articles on the PHP Chinese website!

Hot AI Tools

Undresser.AI Undress
AI-powered app for creating realistic nude photos

AI Clothes Remover
Online AI tool for removing clothes from photos.

Undress AI Tool
Undress images for free

Clothoff.io
AI clothes remover

Video Face Swap
Swap faces in any video effortlessly with our completely free AI face swap tool!

Hot Article
Hot Tools

Notepad++7.3.1
Easy-to-use and free code editor

SublimeText3 Chinese version
Chinese version, very easy to use

Zend Studio 13.0.1
Powerful PHP integrated development environment

Dreamweaver CS6
Visual web development tools

SublimeText3 Mac version
God-level code editing software (SublimeText3)
Hot Topics
 1655
1655
 14
1413
52
1306
25
1252
29
1226
24
14
1413
52
1306
25
1252
29
1226
24

 Linux Architecture: Unveiling the 5 Basic Components
Apr 20, 2025 am 12:04 AM
Linux Architecture: Unveiling the 5 Basic Components
Apr 20, 2025 am 12:04 AM
The five basic components of the Linux system are: 1. Kernel, 2. System library, 3. System utilities, 4. Graphical user interface, 5. Applications. The kernel manages hardware resources, the system library provides precompiled functions, system utilities are used for system management, the GUI provides visual interaction, and applications use these components to implement functions.
 How to check the warehouse address of git
Apr 17, 2025 pm 01:54 PM
How to check the warehouse address of git
Apr 17, 2025 pm 01:54 PM
To view the Git repository address, perform the following steps: 1. Open the command line and navigate to the repository directory; 2. Run the "git remote -v" command; 3. View the repository name in the output and its corresponding address.
 How to run java code in notepad
Apr 16, 2025 pm 07:39 PM
How to run java code in notepad
Apr 16, 2025 pm 07:39 PM
Although Notepad cannot run Java code directly, it can be achieved by using other tools: using the command line compiler (javac) to generate a bytecode file (filename.class). Use the Java interpreter (java) to interpret bytecode, execute the code, and output the result.
 What is the main purpose of Linux?
Apr 16, 2025 am 12:19 AM
What is the main purpose of Linux?
Apr 16, 2025 am 12:19 AM
The main uses of Linux include: 1. Server operating system, 2. Embedded system, 3. Desktop operating system, 4. Development and testing environment. Linux excels in these areas, providing stability, security and efficient development tools.
 How to run sublime after writing the code
Apr 16, 2025 am 08:51 AM
How to run sublime after writing the code
Apr 16, 2025 am 08:51 AM
There are six ways to run code in Sublime: through hotkeys, menus, build systems, command lines, set default build systems, and custom build commands, and run individual files/projects by right-clicking on projects/files. The build system availability depends on the installation of Sublime Text.
 laravel installation code
Apr 18, 2025 pm 12:30 PM
laravel installation code
Apr 18, 2025 pm 12:30 PM
To install Laravel, follow these steps in sequence: Install Composer (for macOS/Linux and Windows) Install Laravel Installer Create a new project Start Service Access Application (URL: http://127.0.0.1:8000) Set up the database connection (if required)
 git software installation
Apr 17, 2025 am 11:57 AM
git software installation
Apr 17, 2025 am 11:57 AM
Installing Git software includes the following steps: Download the installation package and run the installation package to verify the installation configuration Git installation Git Bash (Windows only)
 How to set important Git configuration global properties
Apr 17, 2025 pm 12:21 PM
How to set important Git configuration global properties
Apr 17, 2025 pm 12:21 PM
There are many ways to customize a development environment, but the global Git configuration file is one that is most likely to be used for custom settings such as usernames, emails, preferred text editors, and remote branches. Here are the key things you need to know about global Git configuration files.
