

How to use nginx+tomcat to separate static and dynamic pages

Experimental environment: windows
Experimental tools: nginx, tomcat
It is very simple to install nginx under windows. Go to the official website to download the compressed package and decompress it and double-click the nginx.exe program in the decompressed directory. Can. Then enter localhost in the browser and the following picture will appear, which means nginx is already working.
The workflow of nginx is: Externally, nginx is a server. All requests are first requested to nginx, and then nginx distributes the requests to the intranet to tomcat. , and then after tomcat processes the request, it sends the data to nginx, and then nginx sends it to the user. The whole process feels to the user that nginx is processing the user request. In this case, nginx definitely needs to be configured. The main configuration file is nginx.conf in the conf folder. Because I mainly separated static and dynamic, I did not cache static files or configure load balancing.
#user nobody;
worker_processes 2;

#error_log logs/error.log;
#error_log logs/error.log notice;
#error_log logs/error.log info;

#pid    logs/nginx.pid;


events {
  #nginx默认最大并发数是1024个用户线程
  worker_connections 1024;
}


http {
  include    mime.types;
  default_type application/octet-stream;

  #log_format main '$remote_addr - $remote_user [$time_local] "$request" '
  #         '$status $body_bytes_sent "$http_referer" '
  #         '"$http_user_agent" "$http_x_forwarded_for"';

  #access_log logs/access.log main;

  sendfile    on;
  #tcp_nopush   on;

  #keepalive_timeout 0;
  #http1.1在请求完之后还会保留一段时间的连接,所以这里的timeout时长不能太大,也不能太小,
  #太小每次都要建立连接,太大会浪费系统资源(用户不再请求服务器)
  keepalive_timeout 65;

  #gzip on;

  server {
  #nginx监听80端口
    listen    80;
    server_name localhost;

    #charset koi8-r;

    #access_log logs/host.access.log main;
  #这里的/表示所有的请求
    #location / {
    #将80端口的所有请求都转发到8080端口去处理,proxy_pass代表的是代理路径
   #  proxy_pass http://localhost:8080;
     # root  html;
      # index index.html index.htm;
    #}

  #对项目名进行访问就去访问tomcat服务
  location /student_vote {
      proxy_pass http://localhost:8080;
  }

  #对jsp和do结尾的url也去访问tomcat服务
  location ~ \.(jsp|do)$ {
      proxy_pass http://localhost:8080;
  }

  #对js、css、png、gif结尾的都去访问根目录下查找
  location ~ \.(js|css|png|gif)$ {
      root f:/javaweb;
  }


    #error_page 404       /404.html;

    # redirect server error pages to the static page /50x.html
    #
    error_page  500 502 503 504 /50x.html;
    location = /50x.html {
      root  html;
    }

    # proxy the php scripts to apache listening on 127.0.0.1:80
    #
    #location ~ \.php$ {
    #  proxy_pass  http://127.0.0.1;
    #}

    # pass the php scripts to fastcgi server listening on 127.0.0.1:9000
    #
    #location ~ \.php$ {
    #  root      html;
    #  fastcgi_pass  127.0.0.1:9000;
    #  fastcgi_index index.php;
    #  fastcgi_param script_filename /scripts$fastcgi_script_name;
    #  include    fastcgi_params;
    #}

    # deny access to .htaccess files, if apache's document root
    # concurs with nginx's one
    #
    #location ~ /\.ht {
    #  deny all;
    #}
  }


  # another virtual host using mix of ip-, name-, and port-based configuration
  #
  #server {
  #  listen    8000;
  #  listen    somename:8080;
  #  server_name somename alias another.alias;

  #  location / {
  #    root  html;
  #    index index.html index.htm;
  #  }
  #}


  # https server
  #
  #server {
  #  listen    443 ssl;
  #  server_name localhost;

  #  ssl_certificate   cert.pem;
  #  ssl_certificate_key cert.key;

  #  ssl_session_cache  shared:ssl:1m;
  #  ssl_session_timeout 5m;

  #  ssl_ciphers high:!anull:!md5;
  #  ssl_prefer_server_ciphers on;

  #  location / {
  #    root  html;
  #    index index.html index.htm;
  #  }
  #}

}In the above configuration, I commented out the default location /, because it will intercept all requests, whether dynamic or static, and the other one is the configuration of static files. It has become the workspace of javaweb, and I will explain why next.
Because the projects I wrote before have always used jsp built-in objects for directory file access, but using nginx everything needs to change. When I use nginx and the project does not modify the path, , always unable to load static files, check the log and find this error: 2016/05/20 18:27:30 [error] 6748#6936: *225 createfile() "f:/javaweb/student_vote/lib/images/username .png" failed (3: the system cannot find the path specified), client: 127.0.0.1, server: localhost, request: "get /student_vote/lib/images/username.png http/1.1", host: "localhost" , referrer: "http://localhost/student_vote/index.jsp", the general information is that according to the configuration of the file in jsp, nginx will search for static files from the /stdent_vote (this is my project name)/lib/images package , and I don’t want to make too many changes to the project file. In fact, there is another way to not use the built-in object of jsp, but to directly use http://localhost/username.png to access the static file instead of the built-in object. However, this change requires modification. There are many places, so I directly copied the lib folder under the web-inf folder to the previous folder, that is, the folder and the web-inf folder are sibling folders.
Through the above operations, the separation of dynamic and static is achieved. There is no truth without pictures. The renderings are shown below.

You can see in the picture above that the server is "apache-coyote/1.1". This is the connector for tomcat.
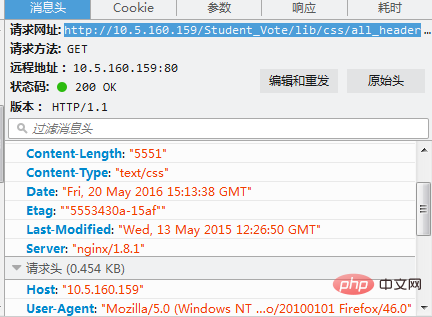
The server above can be seen as nginx, which means that the external server receiving the request is nginx.
The above is the detailed content of How to use nginx+tomcat to separate static and dynamic pages. For more information, please follow other related articles on the PHP Chinese website!

Hot AI Tools

Undresser.AI Undress
AI-powered app for creating realistic nude photos

AI Clothes Remover
Online AI tool for removing clothes from photos.

Undress AI Tool
Undress images for free

Clothoff.io
AI clothes remover

Video Face Swap
Swap faces in any video effortlessly with our completely free AI face swap tool!

Hot Article
Hot Tools

Notepad++7.3.1
Easy-to-use and free code editor

SublimeText3 Chinese version
Chinese version, very easy to use

Zend Studio 13.0.1
Powerful PHP integrated development environment

Dreamweaver CS6
Visual web development tools

SublimeText3 Mac version
God-level code editing software (SublimeText3)
Hot Topics


 How to configure nginx in Windows
Apr 14, 2025 pm 12:57 PM
How to configure nginx in Windows
Apr 14, 2025 pm 12:57 PM
How to configure Nginx in Windows? Install Nginx and create a virtual host configuration. Modify the main configuration file and include the virtual host configuration. Start or reload Nginx. Test the configuration and view the website. Selectively enable SSL and configure SSL certificates. Selectively set the firewall to allow port 80 and 443 traffic.
 How to check the name of the docker container
Apr 15, 2025 pm 12:21 PM
How to check the name of the docker container
Apr 15, 2025 pm 12:21 PM
You can query the Docker container name by following the steps: List all containers (docker ps). Filter the container list (using the grep command). Gets the container name (located in the "NAMES" column).
 How to start containers by docker
Apr 15, 2025 pm 12:27 PM
How to start containers by docker
Apr 15, 2025 pm 12:27 PM
Docker container startup steps: Pull the container image: Run "docker pull [mirror name]". Create a container: Use "docker create [options] [mirror name] [commands and parameters]". Start the container: Execute "docker start [Container name or ID]". Check container status: Verify that the container is running with "docker ps".
 How to check whether nginx is started
Apr 14, 2025 pm 01:03 PM
How to check whether nginx is started
Apr 14, 2025 pm 01:03 PM
How to confirm whether Nginx is started: 1. Use the command line: systemctl status nginx (Linux/Unix), netstat -ano | findstr 80 (Windows); 2. Check whether port 80 is open; 3. Check the Nginx startup message in the system log; 4. Use third-party tools, such as Nagios, Zabbix, and Icinga.
 How to check nginx version
Apr 14, 2025 am 11:57 AM
How to check nginx version
Apr 14, 2025 am 11:57 AM
The methods that can query the Nginx version are: use the nginx -v command; view the version directive in the nginx.conf file; open the Nginx error page and view the page title.
 How to create containers for docker
Apr 15, 2025 pm 12:18 PM
How to create containers for docker
Apr 15, 2025 pm 12:18 PM
Create a container in Docker: 1. Pull the image: docker pull [mirror name] 2. Create a container: docker run [Options] [mirror name] [Command] 3. Start the container: docker start [Container name]
 How to configure cloud server domain name in nginx
Apr 14, 2025 pm 12:18 PM
How to configure cloud server domain name in nginx
Apr 14, 2025 pm 12:18 PM
How to configure an Nginx domain name on a cloud server: Create an A record pointing to the public IP address of the cloud server. Add virtual host blocks in the Nginx configuration file, specifying the listening port, domain name, and website root directory. Restart Nginx to apply the changes. Access the domain name test configuration. Other notes: Install the SSL certificate to enable HTTPS, ensure that the firewall allows port 80 traffic, and wait for DNS resolution to take effect.
 How to start nginx server
Apr 14, 2025 pm 12:27 PM
How to start nginx server
Apr 14, 2025 pm 12:27 PM
Starting an Nginx server requires different steps according to different operating systems: Linux/Unix system: Install the Nginx package (for example, using apt-get or yum). Use systemctl to start an Nginx service (for example, sudo systemctl start nginx). Windows system: Download and install Windows binary files. Start Nginx using the nginx.exe executable (for example, nginx.exe -c conf\nginx.conf). No matter which operating system you use, you can access the server IP
