
 Operation and Maintenance
Nginx
How to configure nginx gzip dynamic compression and static compression
Operation and Maintenance
Nginx
How to configure nginx gzip dynamic compression and static compression
How to configure nginx gzip dynamic compression and static compression

Dynamic compression
Dynamic compression actually means that the nginx server compresses the compiled creation. You need to enable the following configuration in the http and https modules of nginx.conf:
    gzip  on; # 开启gizo压缩
    gzip_min_length 1k; # gizp压缩起点,文件大于1k才进行压缩
    gzip_comp_level 6; # 压缩级别 数字越大压缩得越小 但是越耗性能 根据实际情况而定
    gzip_proxied any; # nginx做为反向代理时启用, 详细见官方文档:http://nginx.org/en/docs/http/ngx_http_gzip_module.html#gzip_proxied
    gzip_vary on; # 是否在http header中添加Vary: Accept-Encoding
    gzip_buffers 16 8k; # 设置压缩所需要的缓冲区大小,以8k为单位,案例中则申请16*4k的缓冲区
    gzip_http_version 1.1; # http的版本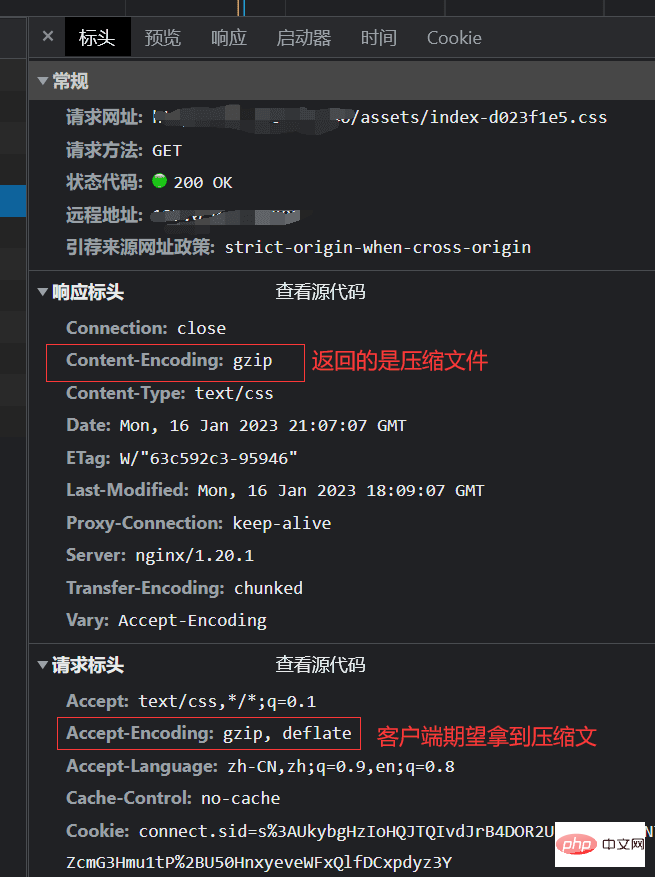
gzip_types text/plain application/javascript text/css application/json application/x-javascript text/xml application/xml application/xml+rss text/javascript; # 文件类型Change completed Configure, restart the nginx server, check the static resource response header, if Content-Encoding: gzip **** appears, it means the startup is successful;
static compression
Dynamic compression is performed on the server. The higher the compression level, the more performance is consumed. Static compression is born to solve this problem. After turning on static compression, nginx will automatically look for files with the .gz suffix, and if not, return the source file; Ever since, we can perform gzip compression when building the front end;
Taking vite as an example, we need to introduce the vite-plugin-compression plug-in and configure it in vite.config.js as follows;
    import viteCompression from 'vite-plugin-compression'; // gzip
plugins: [ viteCompression() ]The plug-in supports customization. The main configuration is as follows
    verbose: true, // 是否在控制台输出压缩结果 这里我们打开查看压缩的效果
    disable: false, // 是否禁用
    threshold: 10240, // 大于这个值才进行压缩 单位为b
    algorithm: 'gzip', // 算法 除了gzip还有 ['brotliCompress' ,'deflate','deflateRaw']
ext: '.gz', // 输出的后缀After introducing the plug-in and compiling, we can see that there will be some more files ending in .gz in the compiled file. These are the products of compression. , looking at the compilation output, we can see that
dist/D:/code/vue/mine/waylon-blog/packages/waylon-blog-pages/assets/index-d023f1e5.css.gz 598.32kb / gzip: 67.81kb
The size of a 598.32kb css file becomes 67.81kb after compression;
Deploy static resources to the server, in nginx.conf If you enable the following configuration in nginx, nginx will automatically look for files ending in .gz and return them directly to the client. This is the so-called static compression;
gzip_static on
pitfalls! ! !
1, nginx has higher requirements for statically compressed files, which must be generated at the same time as the original files. If they are not generated at the same time, nginx will not be able to match (for this point, the author has not included the source code after introducing the plug-in). Changes, causing the time of the gz file to be inconsistent with the original file, causing static compression to not take effect);
Official website original words:
The files can be compressed using the gzip command, or any other compatible one. It is recommended that the modification date and time of original and compressed files be the same.
2. nginx does not install the ngx_http_gzip_static_module static compression module by default. It needs to be turned on manually. How to turn it on here Without going into details, just go to the command:
After finding the configure file of the installation path, execute the following command in this folder
./configure --with-http_gzip_static_module
After the execution is completed, execute the make command
make
combination of static and dynamic
In actual applications, we usually use a combination of static compression and dynamic compression to process our static resources. The priority of static compression will be higher than dynamic compression, which does not mean that the compression is more The smaller the better. If the file has been statically compressed, there is no need to perform dynamic compression, because this wastes performance and the gain outweighs the gain. Therefore, the configuration of dynamic compression gzip_min_length is particularly important, which allows us to avoid some unnecessary operations;
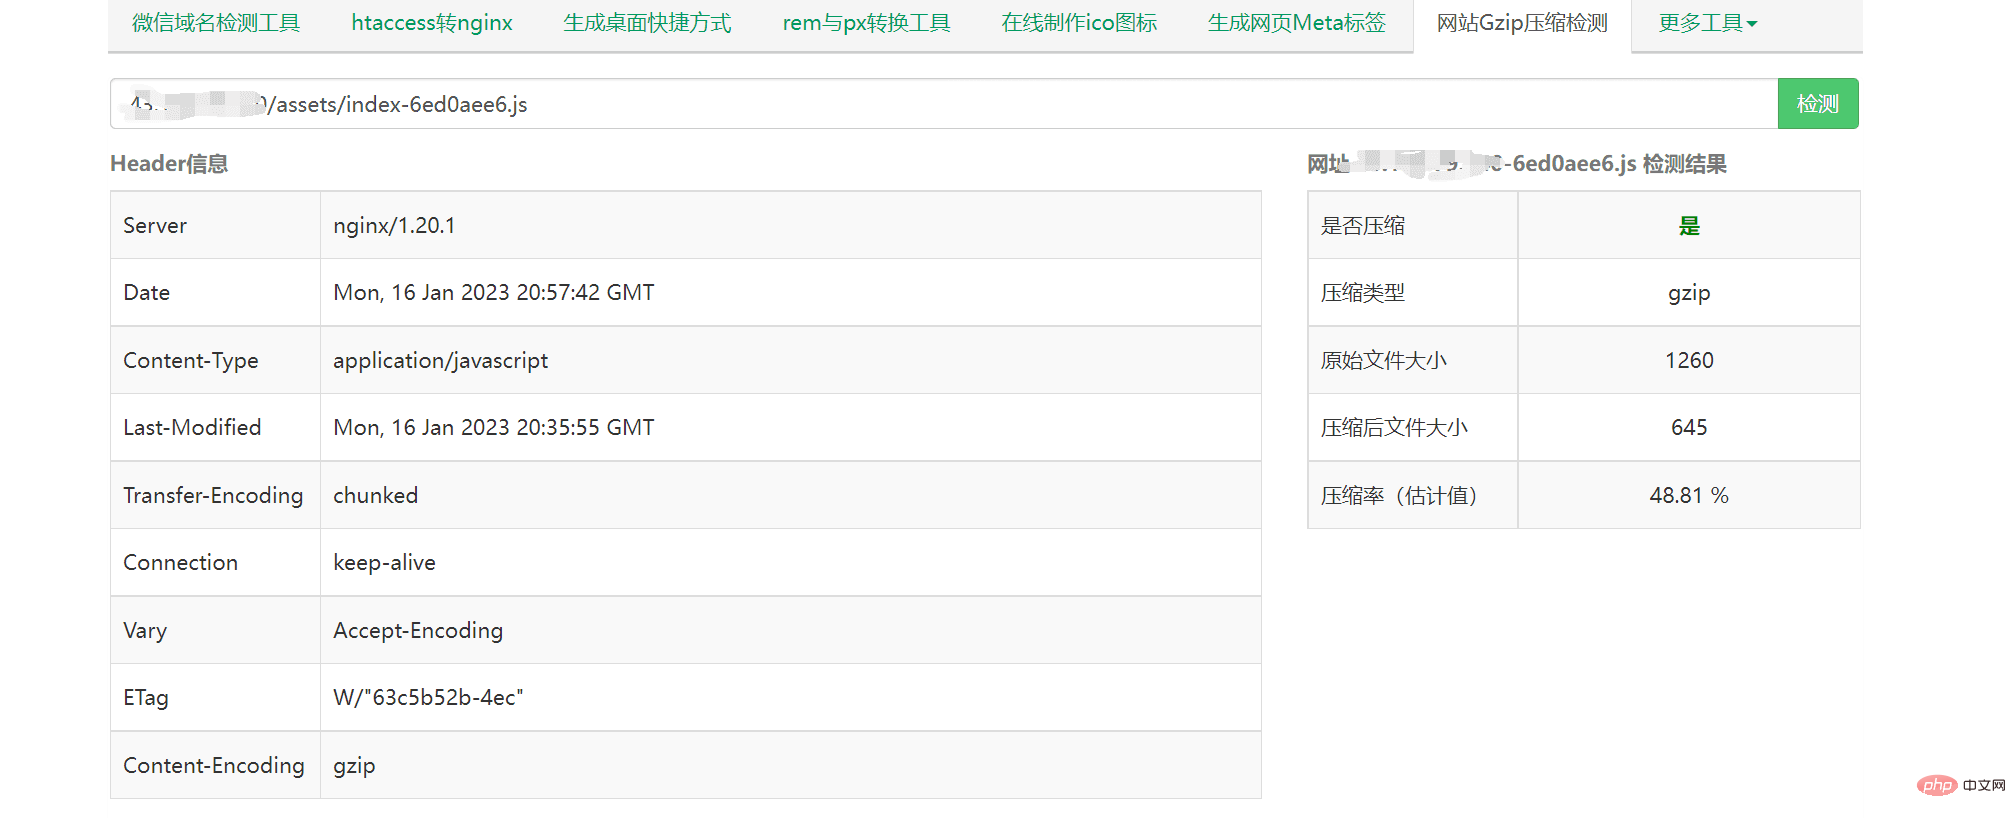
After the above series of operations, you can use the webmaster tool to test the compression effect and directly copy the connection of the static resource: https://tool.chinaz.com/Gzips/?q=c.nxw .so
As shown in the picture
The above is the detailed content of How to configure nginx gzip dynamic compression and static compression. For more information, please follow other related articles on the PHP Chinese website!

Hot AI Tools

Undresser.AI Undress
AI-powered app for creating realistic nude photos

AI Clothes Remover
Online AI tool for removing clothes from photos.

Undress AI Tool
Undress images for free

Clothoff.io
AI clothes remover

Video Face Swap
Swap faces in any video effortlessly with our completely free AI face swap tool!

Hot Article
Hot Tools

Notepad++7.3.1
Easy-to-use and free code editor

SublimeText3 Chinese version
Chinese version, very easy to use

Zend Studio 13.0.1
Powerful PHP integrated development environment

Dreamweaver CS6
Visual web development tools

SublimeText3 Mac version
God-level code editing software (SublimeText3)
Hot Topics


 How to configure nginx in Windows
Apr 14, 2025 pm 12:57 PM
How to configure nginx in Windows
Apr 14, 2025 pm 12:57 PM
How to configure Nginx in Windows? Install Nginx and create a virtual host configuration. Modify the main configuration file and include the virtual host configuration. Start or reload Nginx. Test the configuration and view the website. Selectively enable SSL and configure SSL certificates. Selectively set the firewall to allow port 80 and 443 traffic.
 How to check the name of the docker container
Apr 15, 2025 pm 12:21 PM
How to check the name of the docker container
Apr 15, 2025 pm 12:21 PM
You can query the Docker container name by following the steps: List all containers (docker ps). Filter the container list (using the grep command). Gets the container name (located in the "NAMES" column).
 How to start containers by docker
Apr 15, 2025 pm 12:27 PM
How to start containers by docker
Apr 15, 2025 pm 12:27 PM
Docker container startup steps: Pull the container image: Run "docker pull [mirror name]". Create a container: Use "docker create [options] [mirror name] [commands and parameters]". Start the container: Execute "docker start [Container name or ID]". Check container status: Verify that the container is running with "docker ps".
 How to check whether nginx is started
Apr 14, 2025 pm 01:03 PM
How to check whether nginx is started
Apr 14, 2025 pm 01:03 PM
How to confirm whether Nginx is started: 1. Use the command line: systemctl status nginx (Linux/Unix), netstat -ano | findstr 80 (Windows); 2. Check whether port 80 is open; 3. Check the Nginx startup message in the system log; 4. Use third-party tools, such as Nagios, Zabbix, and Icinga.
 How to create containers for docker
Apr 15, 2025 pm 12:18 PM
How to create containers for docker
Apr 15, 2025 pm 12:18 PM
Create a container in Docker: 1. Pull the image: docker pull [mirror name] 2. Create a container: docker run [Options] [mirror name] [Command] 3. Start the container: docker start [Container name]
 How to check nginx version
Apr 14, 2025 am 11:57 AM
How to check nginx version
Apr 14, 2025 am 11:57 AM
The methods that can query the Nginx version are: use the nginx -v command; view the version directive in the nginx.conf file; open the Nginx error page and view the page title.
 How to configure cloud server domain name in nginx
Apr 14, 2025 pm 12:18 PM
How to configure cloud server domain name in nginx
Apr 14, 2025 pm 12:18 PM
How to configure an Nginx domain name on a cloud server: Create an A record pointing to the public IP address of the cloud server. Add virtual host blocks in the Nginx configuration file, specifying the listening port, domain name, and website root directory. Restart Nginx to apply the changes. Access the domain name test configuration. Other notes: Install the SSL certificate to enable HTTPS, ensure that the firewall allows port 80 traffic, and wait for DNS resolution to take effect.
 How to start nginx server
Apr 14, 2025 pm 12:27 PM
How to start nginx server
Apr 14, 2025 pm 12:27 PM
Starting an Nginx server requires different steps according to different operating systems: Linux/Unix system: Install the Nginx package (for example, using apt-get or yum). Use systemctl to start an Nginx service (for example, sudo systemctl start nginx). Windows system: Download and install Windows binary files. Start Nginx using the nginx.exe executable (for example, nginx.exe -c conf\nginx.conf). No matter which operating system you use, you can access the server IP
