

How to fix Steam error 1 file cannot be verified issue on Windows 11/10?

Steam is one of the most popular digital gaming platforms, allowing gamers to use any system to play the games they purchased/downloaded into their Steam account. Recently, users have reported that they are unable to open/play their favorite games in Steam due to verification issues with game files. When they try to verify their game files from the Steam library, they will see the following error message:
1 files failed verification and will be re-fetched.
Normally, if you have installed mods for any game in Steam, you will see this game file verification error. These mods conflict with the Steam client and trigger errors. Sometimes, previous incorrect game file updates can trigger this error.
If you encounter this error and can't launch your favorite game in Steam, keep reading. In this article, we have curated some troubleshooting solutions that you can use to fix this error with Steam game files on Windows PC.
Workaround
1.Disable any 3rd party antivirus software on the system and check if this helps resolve the issue.
2. If you have any mods installed, pleaseuninstall/disable any mods.
3. If you are using any game controllers, please disconnect them.
Fix 1 – Terminate all steam processes
1. Hold down the Ctrl, Shift and Esckey combination to open the Task Manager.
2. If Task Manager is in minimized view, click More details at the bottom.

#3. Select the Process tab.
4. Find the Steam process in the list of running processes. These processes include Steam, Steam Client WebHelper, and Steam Client Service.
5.Select each of the above Steam-related processes and click the "End Task" button to terminate these processes.

#6. Make sure there are no Steam processes running.
7. Now open Steam and check if you can access the game files.
Fix 2 – Perform a Windows Clean Boot
1. Use the Windows and R keys to open Run.
2. Type msconfig and press Enter to open the system configuration.

#3. Here, go to the Services tab.
4.Check the box next to Hide all Microsoft services in the lower left corner.
5. Click theAllDisable button.

Launch tab.
7. Here, click theOpen Task Manager link.

Task Manager's Startup tab, disable all running applications. To do this, right-click each application one at a time and select Disable.

Apply, and then click OK in the system Configuration window.
11. The system configuration will prompt for a reboot to apply the changes. At this point clickRestart to restart the computer.

Install Service.
13. LaunchSteam and verify the game files. Check if the issue has been resolved with the game.
Note: Use the following steps to restore normal startup
- Use Steps 1 and 2Open the system configuration.
- Select the "Normal startup" option in the "General" tab.

- In the Services tab, uncheck Hide all Microsoft services## box next to #.

- Go to the
- Startup tab and click on the link to open Task Manager.
- Right click Task Manager Start each program in the tab , and then select Enable. This will enable all previously disabled applications.

- Perform
- Steps 9 – 11 againRestart the computer in normal startup mode.
Steam application. Go to the Library tab.
2. Here,right-click on the game that has this verification issue and select Properties.

Local Files tab in the left pane.
4. Then, clickon the right to verify the integrity of the game files. Wait for verification to complete.

Step 4.
6. Press and holdWindows R to open the "Run" dialog box.
7. Typecmd and press Ctrl Shift Enter to open Command Prompt as administrator.
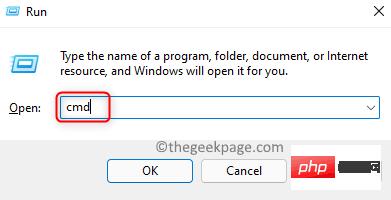
press Enter to execute it.
chkdsk C: /r
Note: The C: here refers to the system drive. If your drive uses another letter, such as D or E, etc., change this setting.
9. When prompted to schedule a check at the next system restart, typeY or Yes because the volume is in use by another process.

Restart your computer.
12. The scan will start during system restart. Wait for this scan to complete. Check if the Steam game file verification error has been fixed. Fix 4 – Remove Steam Profile1. Launch theSteam application.
2. Click theSteam menu at the top and select Exit.

Windows R key combination to open Run.
4. Type the following location and pressEnter to navigate to the Steam directory.
C:\Program 文件 (x86)\Steam

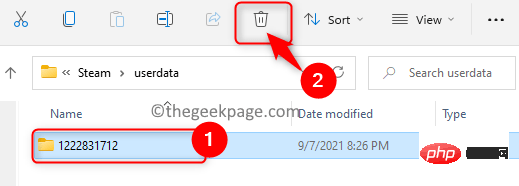
userdata folder and open it.

Steam ID.
Note: If you only have one Steam user account, there is only one folder.
7.Select your Steam ID folder and click the Delete (bin) icon at the top of File Explorer.
8. Now open Steam. Steam detects that the configuration file does not exist and automatically downloads a new one.
Check if this helps you resolve the issue.
Fix 5 – Turn off Windows Defender Firewall
Note: This is a temporary solution as this can leave your system vulnerable to malware attacks and threats.
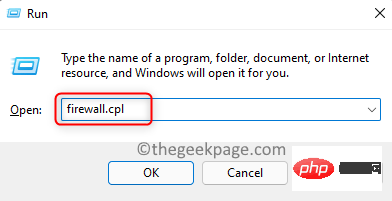
1. Press and hold the Windows and R keys to open Run.
2. Enter firewall.cpl to open Windows Defender Firewall settings.
3. In the left pane, select Turn Windows Defender Firewall on or off.

4. Select to turn off Windows Defender for Private network settings and Public network settings Firewalloptions.
5. Then, click OK to save these changes.

#6. Check if this helps you fix game file errors in Steam.
NOTE: To turn on Windows Defender Firewall, select the Turn on Windows Defender Firewall option for Private and Public network settings .

The above is the detailed content of How to fix Steam error 1 file cannot be verified issue on Windows 11/10?. For more information, please follow other related articles on the PHP Chinese website!

Hot AI Tools

Undresser.AI Undress
AI-powered app for creating realistic nude photos

AI Clothes Remover
Online AI tool for removing clothes from photos.

Undress AI Tool
Undress images for free

Clothoff.io
AI clothes remover

Video Face Swap
Swap faces in any video effortlessly with our completely free AI face swap tool!

Hot Article
Hot Tools

Notepad++7.3.1
Easy-to-use and free code editor

SublimeText3 Chinese version
Chinese version, very easy to use

Zend Studio 13.0.1
Powerful PHP integrated development environment

Dreamweaver CS6
Visual web development tools

SublimeText3 Mac version
God-level code editing software (SublimeText3)
Hot Topics
 1657
1657
 14
1415
52
1309
25
1257
29
1229
24
14
1415
52
1309
25
1257
29
1229
24

 Win11 firewall advanced settings gray solution
Dec 24, 2023 pm 07:53 PM
Win11 firewall advanced settings gray solution
Dec 24, 2023 pm 07:53 PM
When setting up the firewall, many friends found that their win11 firewall advanced settings were grayed out and unable to be clicked. This may be caused by not adding a control unit, or by not opening the advanced settings in the correct way. Let’s take a look at how to solve it. Win11 firewall advanced settings gray method one: 1. First, click the start menu below, search and open "Control Panel" at the top 2. Then open "Windows Defender Firewall" 3. After entering, you can open "Advanced Settings" in the left column . Method 2: 1. If the above method cannot be opened, you can right-click "Start Menu" and open "Run" 2. Then enter "mmc" and press Enter to confirm opening. 3. After opening, click on the upper left
 How to enable or disable firewall on Alpine Linux?
Feb 21, 2024 pm 12:45 PM
How to enable or disable firewall on Alpine Linux?
Feb 21, 2024 pm 12:45 PM
On AlpineLinux, you can use the iptables tool to configure and manage firewall rules. Here are the basic steps to enable or disable the firewall on AlpineLinux: Check the firewall status: sudoiptables -L If the output shows rules (for example, there are some INPUT, OUTPUT, or FORWARD rules), the firewall is enabled. If the output is empty, the firewall is currently disabled. Enable firewall: sudoiptables-PINPUTACCEPTsudoiptables-POUTPUTACCEPTsudoiptables-PFORWARDAC
 How to remove the firewall logo on the Win10 desktop icon?
Jan 01, 2024 pm 12:21 PM
How to remove the firewall logo on the Win10 desktop icon?
Jan 01, 2024 pm 12:21 PM
Many friends who use win10 system find that there is a firewall logo on the icon on the computer desktop. What is going on? This makes many friends with obsessive-compulsive disorder particularly uncomfortable. In fact, we only need to open the control panel and click " It can be solved by changing "Change User Account Control Settings". Let's take a look at the specific tutorial. How to cancel the firewall logo on the desktop icon in Windows 10 1. First, right-click the Start menu button next to the computer startup screen, and then select the Control Panel function from the pop-up menu. 2. Then select the "User Account" option and select the "Change User Account Control Settings" item from the new interface that appears. 3. After adjusting the slider in the window to the bottom, click Confirm to exit.
 How to fix UFW status showing as inactive in Linux
Mar 20, 2024 pm 01:50 PM
How to fix UFW status showing as inactive in Linux
Mar 20, 2024 pm 01:50 PM
UFW, also known as Uncomplex Firewall, is adopted by many Linux distributions as their firewall system. UFW is designed to make it easy for novice users to manage firewall settings through both the command line interface and the graphical user interface. A UFW firewall is a system that monitors network traffic according to set rules to protect the network from network sniffing and other attacks. If you have UFW installed on your Linux system but its status shows as inactive, there could be several reasons. In this guide, I will share how to resolve the UFW firewall inactive issue on Linux systems. Why UFW Shows Inactive Status on Linux Why UFW Is Inactive by Default on Linux How to Inactive on Linux
 VUE3 quick start: using Vue.js instructions to switch tabs
Jun 15, 2023 pm 11:45 PM
VUE3 quick start: using Vue.js instructions to switch tabs
Jun 15, 2023 pm 11:45 PM
This article aims to help beginners quickly get started with Vue.js3 and achieve a simple tab switching effect. Vue.js is a popular JavaScript framework that can be used to build reusable components, easily manage the state of your application, and handle user interface interactions. Vue.js3 is the latest version of the framework. Compared with previous versions, it has undergone major changes, but the basic principles have not changed. In this article, we will use Vue.js instructions to implement the tab switching effect, with the purpose of making readers familiar with Vue.js
 How to solve if Edge browser is blocked by firewall?
Mar 13, 2024 pm 07:10 PM
How to solve if Edge browser is blocked by firewall?
Mar 13, 2024 pm 07:10 PM
How to solve the problem that the Edge browser is blocked by the firewall? Edge browser is Microsoft's own browser. Some users found that this browser was blocked by the firewall during use. So what's going on? Let this site give users a detailed introduction on how to recover the Edge browser if it is blocked by the firewall. How to restore the Edge browser if it is blocked by the firewall? 1. Check the firewall settings: - Click the "Start" button on the Windows taskbar, and then open "Settings". -In the Settings window, select Update & Security. -exist
 Fix: Recording video in Snipping Tool does not work
Sep 17, 2023 pm 08:09 PM
Fix: Recording video in Snipping Tool does not work
Sep 17, 2023 pm 08:09 PM
While the concept behind the Snipping Tool in Windows 11 is great, one of its main features, recording video, is really disappointing. The screen recording feature is still relatively new, so it can be hard to get by with glitches. Nonetheless, let's take a look at the problem and try to find a solution. So why doesn’t the screenshot tool’s video recording function work? You may not have the latest version of Windows 11 installed. The snipping tool may be corrupted or corrupted. Third-party software such as antivirus software may prevent it from recording your screen. Your computer does not have enough RAM or hard drive space to store the screen recording. Viruses or malware on your computer interfere with the way programs work. How to get Snipping Tool to record my screen in Windows 11
 How to use split screen in Edge browser
Sep 18, 2023 am 09:37 AM
How to use split screen in Edge browser
Sep 18, 2023 am 09:37 AM
Access Split Screen on Microsoft Edge Split screen feature has been enabled on all latest versions of the Edge web browser by Microsoft. So, just click on the Split Screen icon next to the bookmark icon to use it. Here is a screenshot so you can understand it easier. The keyboard shortcut for split screen using the Edge browser is "Ctrl+Shift+2". The current tab should immediately be aligned on the left, and you'll get thumbnails of other open tabs on the right. Select the tab you want to open on the right or open a new tab. Ideally Microsoft Edge would look like using the split screen feature. You can resize each window by hovering the mouse pointer in the middle of the two windows, clicking and dragging to the right or left