
 Common Problem
How do I enable two-step verification and add a Microsoft account in the Outlook desktop app?
Common Problem
How do I enable two-step verification and add a Microsoft account in the Outlook desktop app?
How do I enable two-step verification and add a Microsoft account in the Outlook desktop app?

As security threats become increasingly common, it is critical to provide an extra layer of protection for everything related to the Internet. It could be a laptop, an email account, or even a pen drive.
Have you ever questioned why some of your emails have disappeared, or why your account is sending some unfamiliar emails? This could be due to a hacked account. At this point, users must enable the two-step verification method for their email account.
If you have trouble doing this, we have this tutorial for you which will teach you how to enable two-step verification for your Microsoft account and add it to Outlook on your Windows 11 system Desktop application.
How to set up two-step verification and add a Microsoft account in the Outlook desktop app
The following steps explain how to set up the two-step verification process for your Microsoft account and how to add it to the Outlook desktop application.
Enable the two-step verification process for your Microsoft account
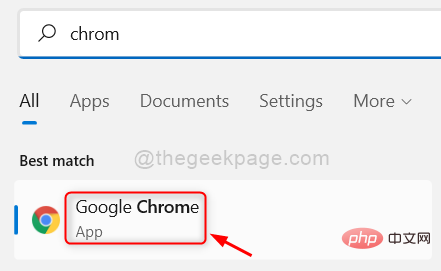
Step 1: Open Google Chrome by pressing the windows key and typing google chrome.
Step 2: Select Google Chrome from the search results as shown below.
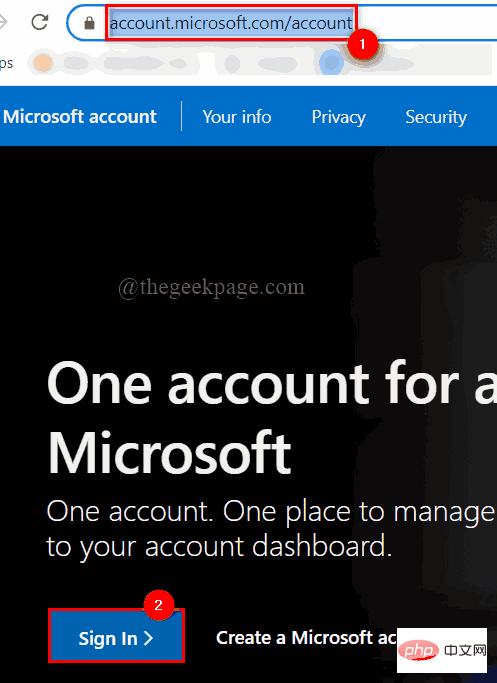
Step 3: In the new tab, copy and paste the following URL into the address bar and press the Enter key, as shown in the image below .
https://account.microsoft.com/account
Step 4: After the login page appears, click the Login button as shown below.
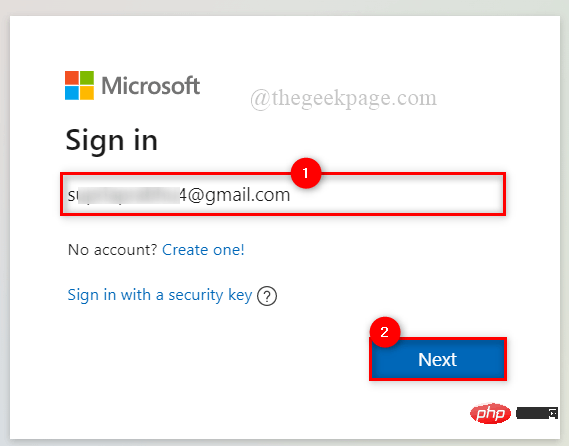
Step 5: Then, enter the Microsoft account email address and press the Enter key.
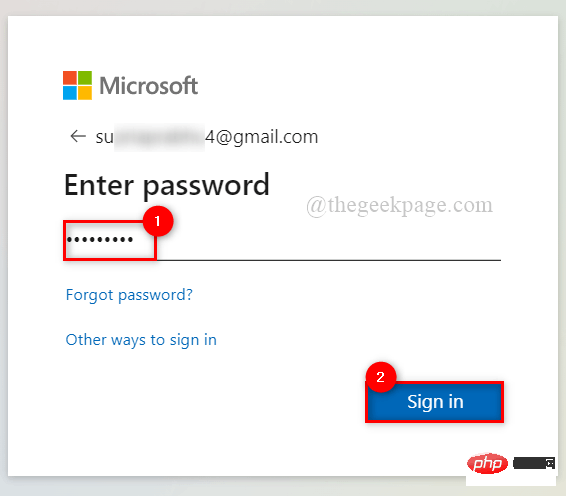
Step 6: Now enter Password and press Enter key.
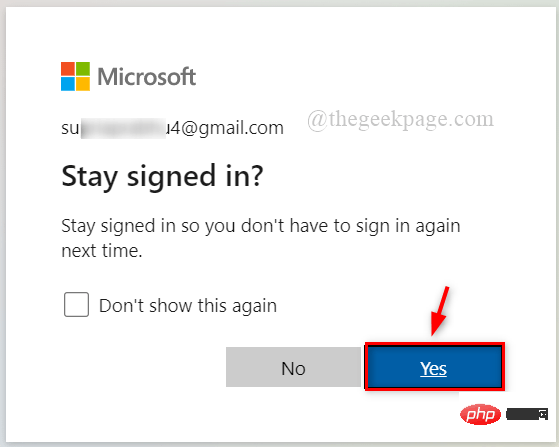
Step 7: If you are using your own system and don't mind saving your credentials, click Yes. Otherwise click No as shown below.
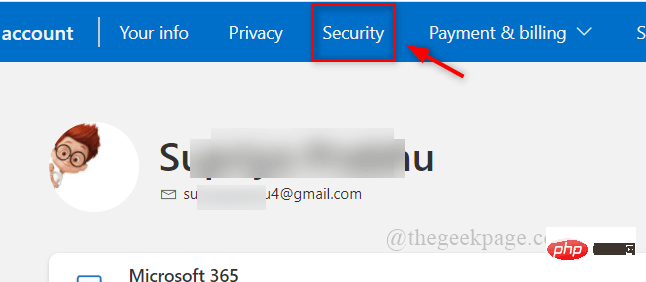
Step 8: After successfully logging in, click the Security option on the top bar, as shown in the picture.
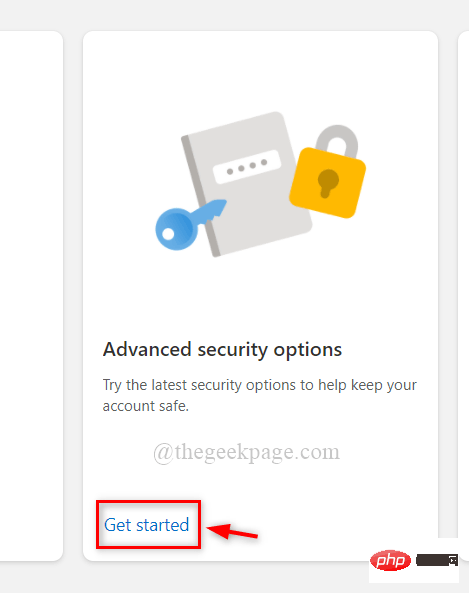
Step 9: Then, click on Get Started under Advanced Security Options as shown below.
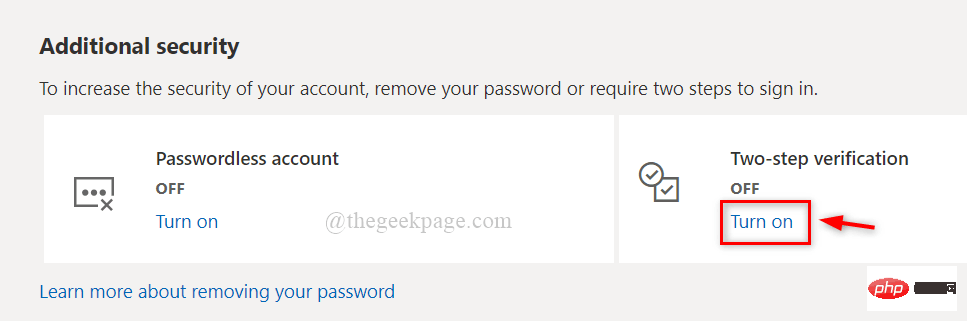
Step 10: Scroll down the page and click Open to activate two-step verification for under Additional Security.
Step 11: After clicking on the open button, it will ask the user to verify your identity, so click on the email ID to send the verification code as shown in the image below.
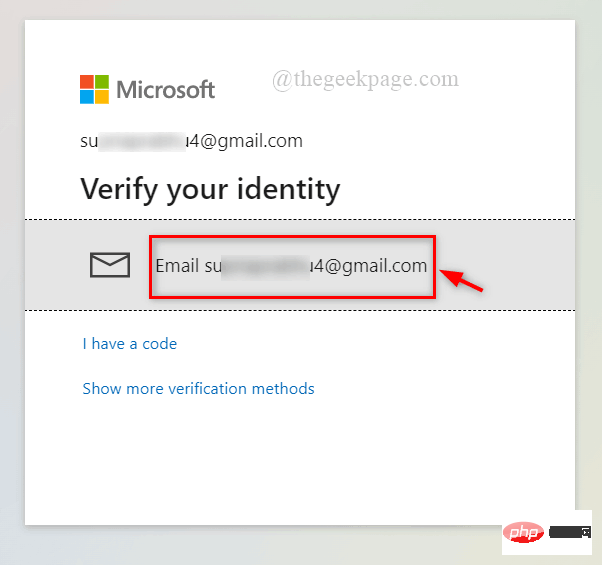
Step 12: To get the verification code, go to your email inbox and open the Microsoft Account Security Code## sent by Microsoft #s mail. Copy the verification code by selecting it and pressing CTRL C.
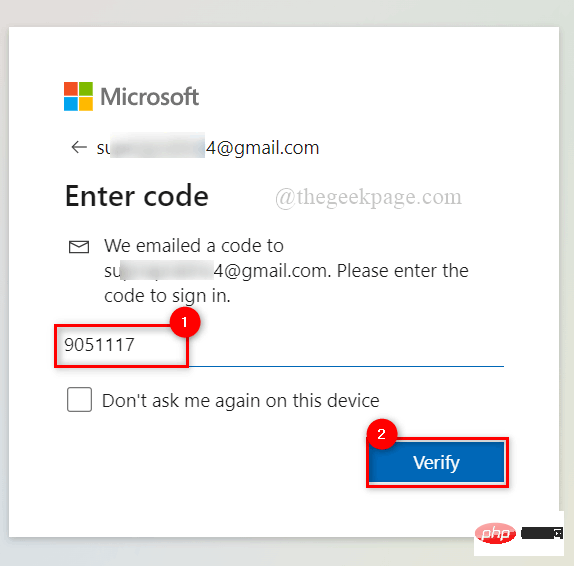
Step 13: Now paste the code by placing your cursor in the text box and pressCTRL V and click Validate.
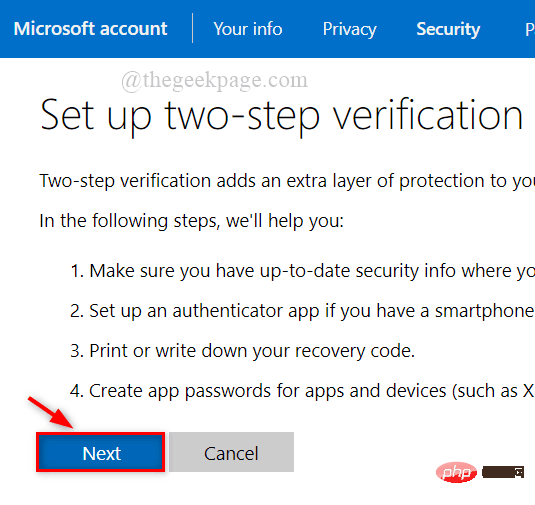
Next to continue.
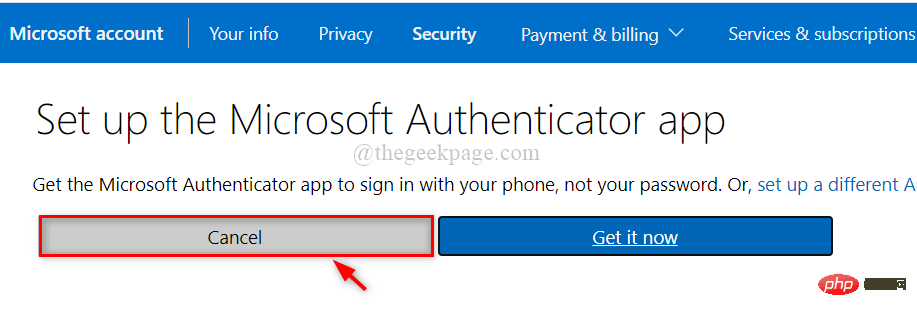
Cancel to avoid installing the Microsoft Authenticator application on your system.
Step 16: Copy the new code and paste it into Notepad or any other editor by selecting the new code and pressing CTRL C For future use when logging in when needed.
Note: Don’t forget to save it. This is crucial data.
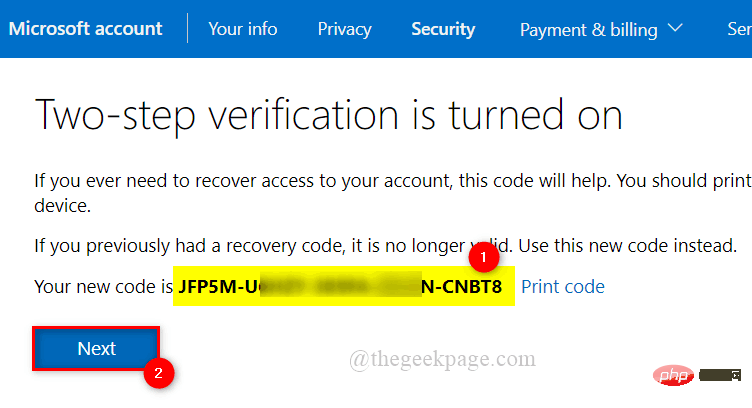
Step 17: Click Next to continue.

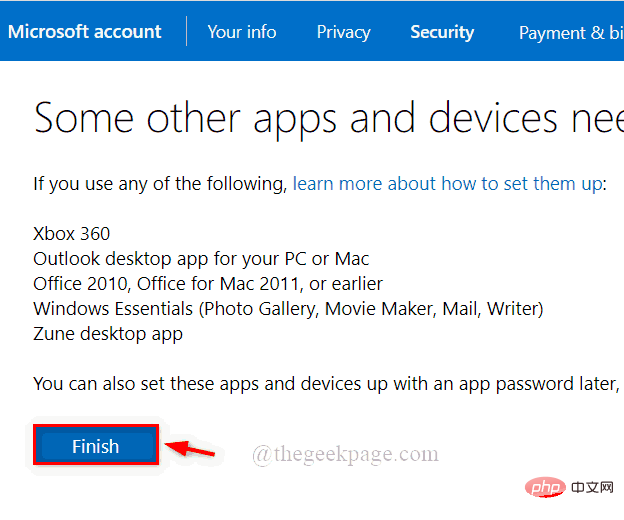
Step 18: Finally, click on the Complete button to complete the two-step verification process for your Microsoft account.
Step 19: Close your browser if necessary.
The two-step verification process under Advanced Security is now enabled for Microsoft accounts.
How to add Microsoft account with application password in Outlook desktop application
We will give you a brief introduction on how users can get application password and add Microsoft account in Outlook desktop application Account Steps.
Note: This method is required to create an application password if the user is running a Microsoft product earlier than Office 16.
Step 1: Click here to go to your Microsoft account login page. It opens in a new tab.
Step 2: After the login page appears, click the Login button, as shown below.
Step 3: Then, enter the Microsoft account email address and press the Enter key.
Step 4: Now enter Password and press Enter key.
Step 5: If you are using your own system and don't mind saving your credentials, click Yes. Otherwise click No as shown below.
Step 6: After logging in, click Security at the top, as shown in the picture below.
Step 7: Then, click Get Started under Advanced Security Options to increase security.
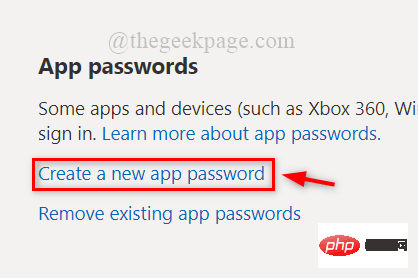
Step 8: Scroll down the page and click Create a new application password to create a new application password, as shown below shown.
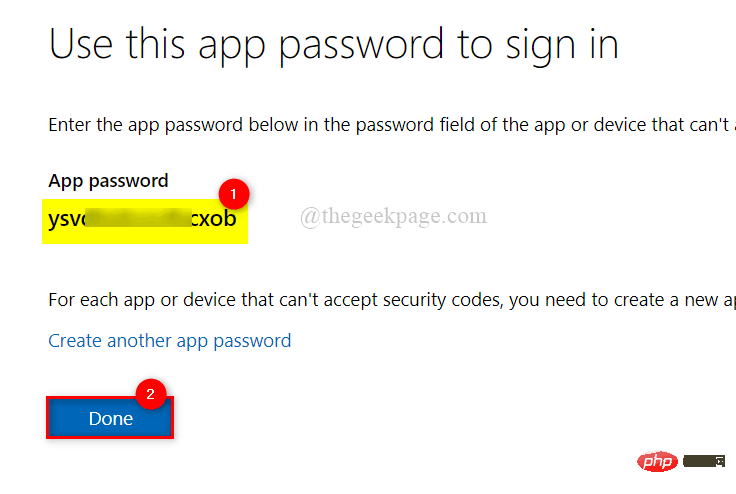
Step 9: Select the App password as shown in the picture below and copy and save it. After that, click Finish to close it.
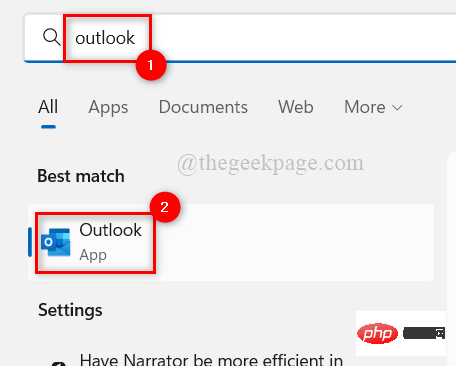
Step 10: Next, open the Outlook application## on your system by pressing the Windows key and typing Outlook #.
Step 11: Select theOutlook application from the search results as shown below.
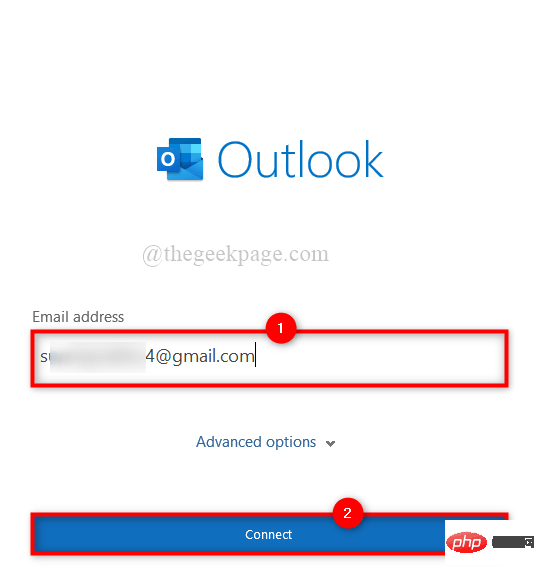
Connect as shown below.
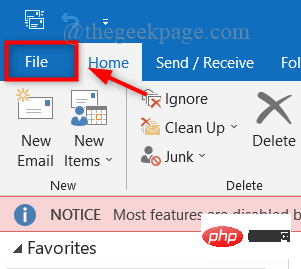
Note: If the Outlook application does not open the login page because the account has already been added to Outlook, go to File, As follows.
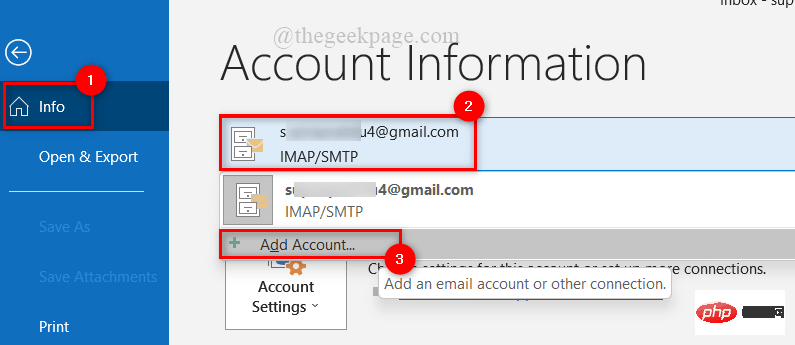
Then, click Information on the left panel and click Dropdown Account List and selectAdd Account option to open the login window to add another account in Outlook application as shown below.
Step 13: Next, when prompted to add a password, enter the newly created app password you copied and saved in step 9 and follow the on-screen Follow the instructions.
Step 14: After setting up the Outlook application, you can continue using it or close it.
The above is the detailed content of How do I enable two-step verification and add a Microsoft account in the Outlook desktop app?. For more information, please follow other related articles on the PHP Chinese website!

Hot AI Tools

Undresser.AI Undress
AI-powered app for creating realistic nude photos

AI Clothes Remover
Online AI tool for removing clothes from photos.

Undress AI Tool
Undress images for free

Clothoff.io
AI clothes remover

Video Face Swap
Swap faces in any video effortlessly with our completely free AI face swap tool!

Hot Article
Hot Tools

Notepad++7.3.1
Easy-to-use and free code editor

SublimeText3 Chinese version
Chinese version, very easy to use

Zend Studio 13.0.1
Powerful PHP integrated development environment

Dreamweaver CS6
Visual web development tools

SublimeText3 Mac version
God-level code editing software (SublimeText3)
Hot Topics


 How to change the font in Outlook on Apple mobile phone
Mar 08, 2024 pm 04:46 PM
How to change the font in Outlook on Apple mobile phone
Mar 08, 2024 pm 04:46 PM
How to change the font in Outlook on Apple mobile phone? First open the Outlook software and click on the file in the upper left corner of the interface. You can set the font according to your own preferences. After the settings are completed, click the OK button. Let’s take a look! How to change the font in Outlook on Apple mobile phone 1. Open the Outlook software and click the "File" option in the upper left corner of the interface. 2. In the list that appears, find "Options" and click to enter. 3. On the left side of the option list, click "Mail". 4. Next, select “Letter and Fonts”. 5. If you want to set the font for new emails, reply emails, or composing, click the corresponding option to enter the settings. 6. Set the font according to personal preference. After the setting is completed, click OK
 Outlook emails lost from control panel in Windows 11
Feb 29, 2024 pm 03:16 PM
Outlook emails lost from control panel in Windows 11
Feb 29, 2024 pm 03:16 PM
Is the Outlook mail icon missing from Windows 11's Control Panel? This unexpected situation has caused confusion and concern among some individuals who rely on OutlookMail for their communication needs. Why don't my Outlook emails show up in Control Panel? There may be several possible reasons why there are no Outlook mail icons in Control Panel: Outlook is not installed correctly. Installing Office applications from the Microsoft Store does not add the Mail applet to Control Panel. The location of the mlcfg32.cpl file in Control Panel is missing. The path to the mlcfg32.cpl file in the registry is incorrect. The operating system is not currently configured to run this application
 How to fix error 0x80040115 in Outlook?
Apr 14, 2023 pm 04:58 PM
How to fix error 0x80040115 in Outlook?
Apr 14, 2023 pm 04:58 PM
While using Outlook, users sometimes encounter various errors that interrupt email communication. A frequently encountered error is Outlook error 0x80040115. Outlook error 0x80040115 occurs when a user sends an email but Outlook is unable to synchronize the changes to the Mailbox server or send the email due to issues with the Outlook application or OST file. The complete error message is as follows: Task "youremailaccount
 How to fix missing Microsoft Teams add-in in Outlook
May 11, 2023 am 11:01 AM
How to fix missing Microsoft Teams add-in in Outlook
May 11, 2023 am 11:01 AM
Teams has a very useful add-in in Outlook that installs automatically when you install a previous application while using Outlook 2013 or later. After installing these two applications, just open Outlook and you will find the preinstalled add-ins. However, some users have reported exceptions where the Team plug-in cannot be found in Outlook. Fix 1 – Re-register DLL files Sometimes it is necessary to re-register specific Teams add-in dll files. Step 1 - Locate MICROSOFT.TEAMS.ADDINLOADER.DLL File 1. First, you must make sure
 How to Fix Desktop Window Manager High GPU Usage in Windows 10/11
May 02, 2023 pm 03:37 PM
How to Fix Desktop Window Manager High GPU Usage in Windows 10/11
May 02, 2023 pm 03:37 PM
1. The most convenient fix for getting the latest Windows updates is to perform Windows Update, which ensures you are running the latest version, which includes bug fixes, brand-new features, and compatible drivers for your hardware components. To do this, open the Settings app by pressing the Windows 11 keyboard shortcut "Windows+I". Then, go to "Windows Update" from the left sidebar and click on "Check for Updates" in the right pane. Windows will automatically download the update and ask you to restart your PC to complete the installation process. 2. Update your GPU driver as Windows updates are not always obtained for your GPU
 How to sort emails by sender, subject, date, category, size in Outlook
Feb 19, 2024 am 10:48 AM
How to sort emails by sender, subject, date, category, size in Outlook
Feb 19, 2024 am 10:48 AM
Outlook offers many settings and features to help you manage your work more efficiently. One of them is the sorting option that allows you to categorize your emails according to your needs. In this tutorial, we will learn how to use Outlook's sorting feature to organize emails based on criteria such as sender, subject, date, category, or size. This will make it easier for you to process and find important information, making you more productive. Microsoft Outlook is a powerful application that makes it easy to centrally manage your email and calendar schedules. You can easily send, receive, and organize email, while built-in calendar functionality makes it easy to keep track of your upcoming events and appointments. How to be in Outloo
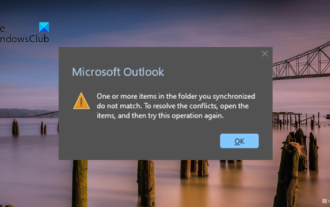 One or more items in the folder you synced do not match Outlook error
Mar 18, 2024 am 09:46 AM
One or more items in the folder you synced do not match Outlook error
Mar 18, 2024 am 09:46 AM
When you find that one or more items in your sync folder do not match the error message in Outlook, it may be because you updated or canceled meeting items. In this case, you will see an error message saying that your local version of the data conflicts with the remote copy. This situation usually happens in Outlook desktop application. One or more items in the folder you synced do not match. To resolve the conflict, open the projects and try the operation again. Fix One or more items in synced folders do not match Outlook error In Outlook desktop version, you may encounter issues when local calendar items conflict with the server copy. Fortunately, though, there are some simple ways to help
 Outlook not sending or receiving any emails issue fixed
Apr 15, 2023 pm 10:40 PM
Outlook not sending or receiving any emails issue fixed
Apr 15, 2023 pm 10:40 PM
Outlook is one of the most commonly used Office365 applications. But just like any other application, sometimes it crashes and stops receiving or sending emails altogether! In this article, we have listed some very simple but quick fixes for you to fix Outlook on your own. Just follow our step-by-step instructions and you'll have an email in your inbox in no time. Solution - 1. Close and restart Outlook. You may also consider restarting your device. 2. The first thing you should do is check whether your system is connected to the Internet and whether the network is working properly. There may be some network connection issues affecting the Outlook server. Fix 1 – Make sure Ou