Simple analysis of the role of vue component scoped
This article brings you relevant knowledge about vue, which mainly introduces issues related to the scoped attribute. If you add the scoped attribute to the style, you will add it to the label of this component. Let’s take a look at the attributes starting with the last randomly generated data-v. I hope it will be helpful to everyone.

[Related recommendations: javascript video tutorial, vue.js tutorial】
vue component-scoped Function
Purpose: Solve the conflict problem of multiple components with the same style name
Requirements: p tag name selector, set background color
Problem: It is found that both the p in the component and the p outside are effective
Solution: Add the scoped attribute to the style tag in the Panel.vue component
<style></style>
// style 添加 scoped 属性后,可以实现样式独立作用域<style>p{
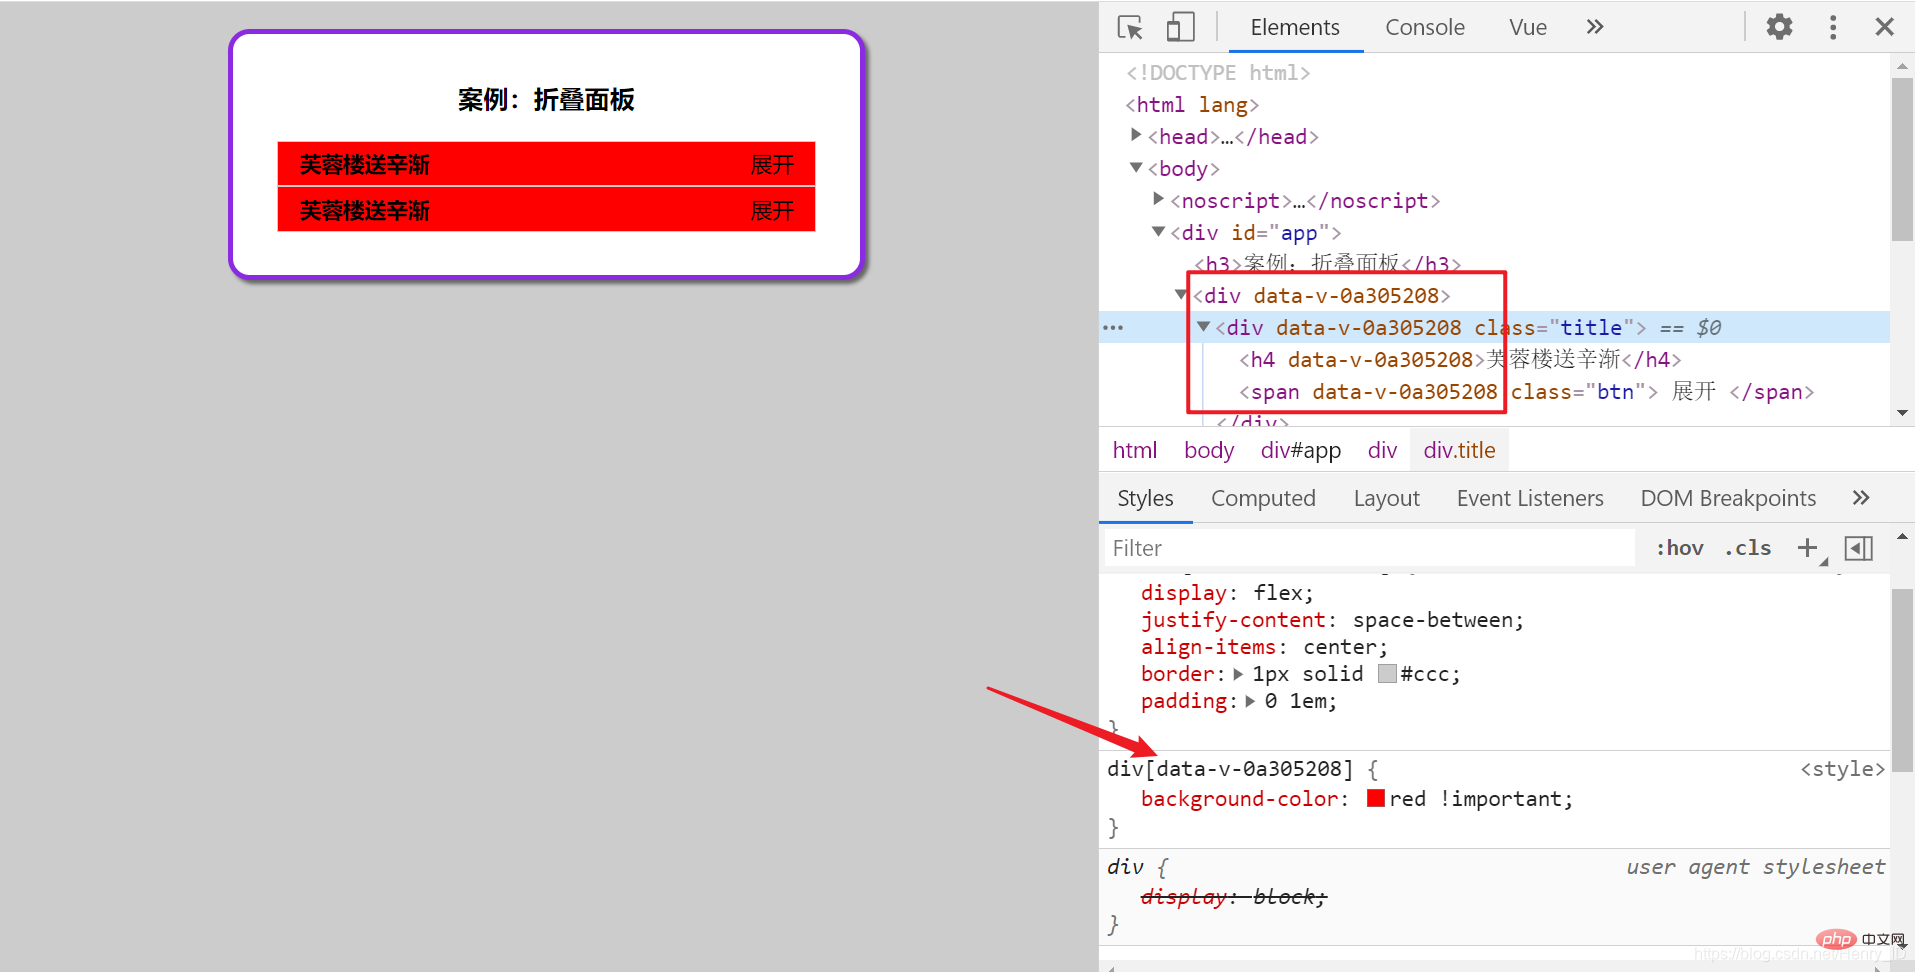
background-color: pink;}</style>Add the scoped attribute to the style, and it will Add a randomly generated attribute starting with data-v to the label of this component
and it must be an element of the current component to have this custom attribute and be affected by this style

Summary: Add scoped to style, and the style in the component only takes effect in the current vue component
The mission and role of scoped
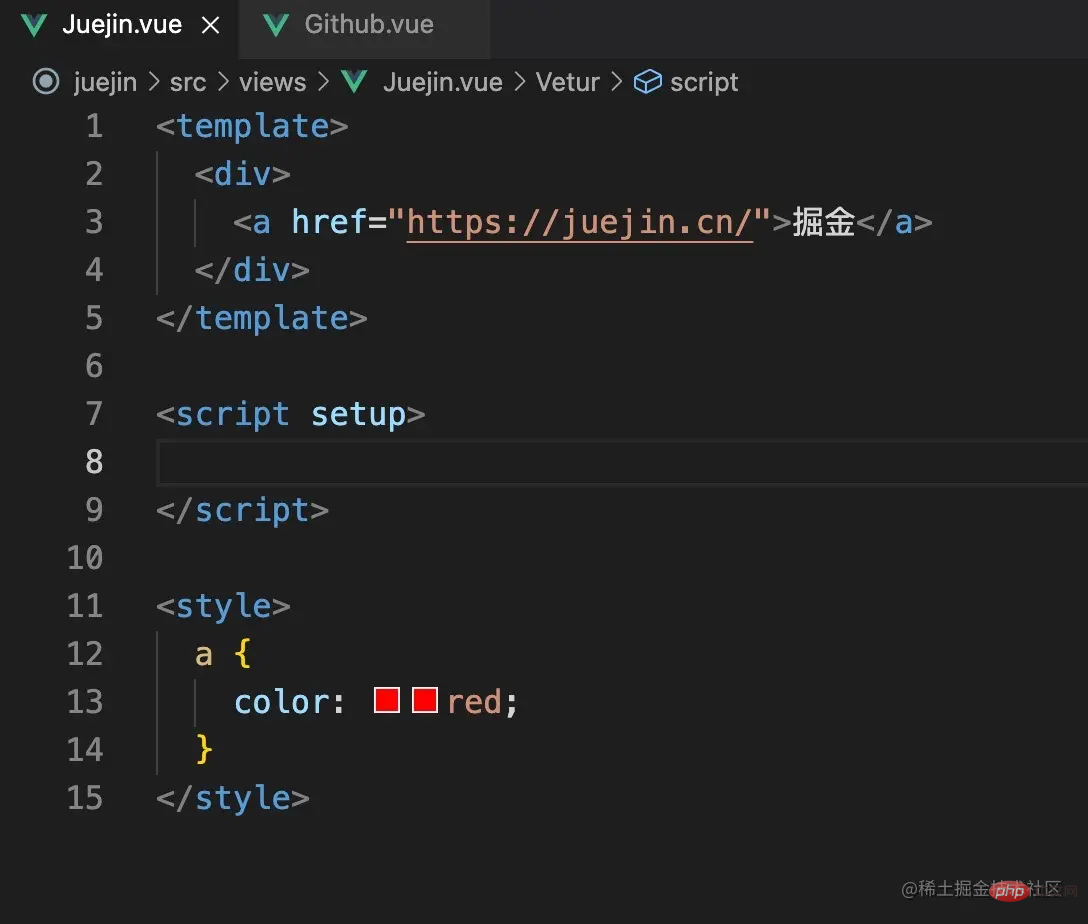
Here is a demo made with vue. There are two pages. One page is the a tag of the Nuggets, and the other page is the a tag of vue. Let’s take a look at the role of scoped and give the a tag to one of the pages. Add red, and the other one does not add any style, and does not use scoped in the style, as shown below

Everyone should know the answer, yes! The link text in both pages turns red. When we click on the juejin page, the browser will automatically introduce the style of the current page. When we click on github again, the browser will reuse this style, so the color of the link a will all turn red, because Vue is a single-page application, so the styles of every page we open will be sandwiched into global styles. The solution is to add scoped. At this time, the color of the a tag will be different. Let’s open the page to see Next a tag (picture below)

At this time, the a tag has an extra data-v-xxxxxxx, which Vue adds for us As above, when Vue builds this project, it will remind us to use component units. All elements under different components will be added with the same component ID, and at the same time, attribute selectors will be used in the styles we write. After splicing this unique identifier, let’s verify it, (picture below)

Yes, after we add scoped, Vue will be in this style Add this attribute to the last paragraph, and then select the element through the attribute selector to isolate the element style. Next, let’s take a look at the side effects of scoped
The side effects of scoped
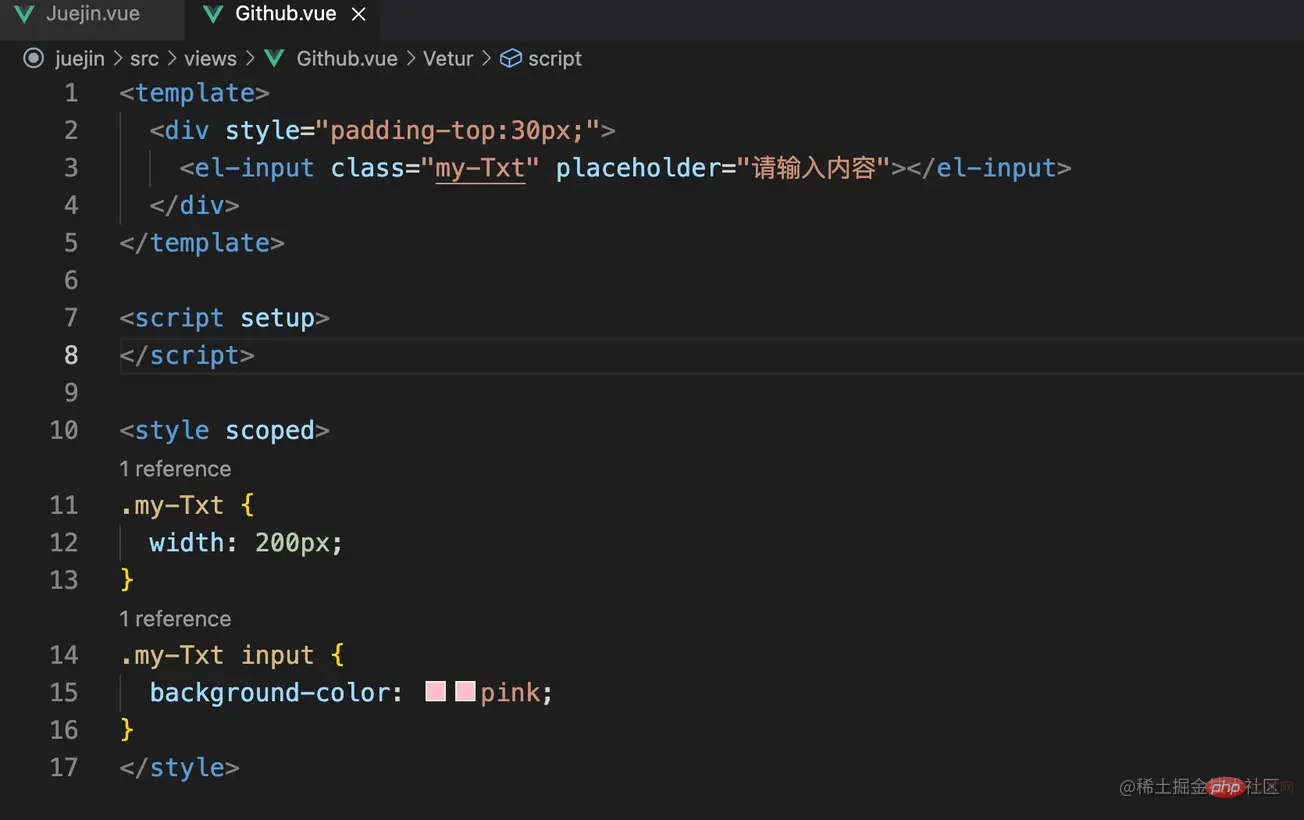
At this time We introduce element-ui to verify the side effects of scoped. Here is a demo (picture below). Scoped is also used here

Note that there is no input element here. For example, data-v- The unique identifier of xxxxxx is
. But what does the style we wrote ourselves (my-Txt input) look like after it is constructed? (Picture below)

#As shown in the picture above, the style we wrote ourselves has been spliced with this unique identifier, so no matter how we operate, we cannot hit this element. , that is to say, Vue did not add this logo to this input, but added this logo to our style. However, if we remove scoped, we can hit the target, but we do not recommend this. Style Will be packaged into a unified style. This is a side effect of scoped. So how do we solve it? Style penetration
<style>
.my-Txt {
  width: 200px;
}
.my-Txt ::v-deep input {
  background-color: pink;
}
</style>
##
We can see that this unique identifier runs from the back of the input to the back of my-Txt, which means that if we don’t add this::v-deep, Vue will always splice this unique identifier into the style we wrote. In the last paragraph, if we want to change the position of this unique identifier, we need to specify it with style penetration. Then the above picture means that the my-Txt element with this unique identifier will be applied to the input in its child elements. This style, and the my-Txt we wrote also has this unique identifier, as you can see from the picture above.
【Related recommendations: javascript video tutorial, vue.js tutorial】
The above is the detailed content of Simple analysis of the role of vue component scoped. For more information, please follow other related articles on the PHP Chinese website!

Hot AI Tools

Undresser.AI Undress
AI-powered app for creating realistic nude photos

AI Clothes Remover
Online AI tool for removing clothes from photos.

Undress AI Tool
Undress images for free

Clothoff.io
AI clothes remover

Video Face Swap
Swap faces in any video effortlessly with our completely free AI face swap tool!

Hot Article

Hot Tools

Notepad++7.3.1
Easy-to-use and free code editor

SublimeText3 Chinese version
Chinese version, very easy to use

Zend Studio 13.0.1
Powerful PHP integrated development environment

Dreamweaver CS6
Visual web development tools

SublimeText3 Mac version
God-level code editing software (SublimeText3)

Hot Topics
 How to use bootstrap in vue
Apr 07, 2025 pm 11:33 PM
Using Bootstrap in Vue.js is divided into five steps: Install Bootstrap. Import Bootstrap in main.js. Use the Bootstrap component directly in the template. Optional: Custom style. Optional: Use plug-ins.
 How to add functions to buttons for vue
Apr 08, 2025 am 08:51 AM
You can add a function to the Vue button by binding the button in the HTML template to a method. Define the method and write function logic in the Vue instance.
 How to use watch in vue
Apr 07, 2025 pm 11:36 PM
The watch option in Vue.js allows developers to listen for changes in specific data. When the data changes, watch triggers a callback function to perform update views or other tasks. Its configuration options include immediate, which specifies whether to execute a callback immediately, and deep, which specifies whether to recursively listen to changes to objects or arrays.
 What does vue multi-page development mean?
Apr 07, 2025 pm 11:57 PM
Vue multi-page development is a way to build applications using the Vue.js framework, where the application is divided into separate pages: Code Maintenance: Splitting the application into multiple pages can make the code easier to manage and maintain. Modularity: Each page can be used as a separate module for easy reuse and replacement. Simple routing: Navigation between pages can be managed through simple routing configuration. SEO Optimization: Each page has its own URL, which helps SEO.
 How to reference js file with vue.js
Apr 07, 2025 pm 11:27 PM
There are three ways to refer to JS files in Vue.js: directly specify the path using the <script> tag;; dynamic import using the mounted() lifecycle hook; and importing through the Vuex state management library.
 How to return to previous page by vue
Apr 07, 2025 pm 11:30 PM
Vue.js has four methods to return to the previous page: $router.go(-1)$router.back() uses <router-link to="/" component window.history.back(), and the method selection depends on the scene.
 How to use vue traversal
Apr 07, 2025 pm 11:48 PM
There are three common methods for Vue.js to traverse arrays and objects: the v-for directive is used to traverse each element and render templates; the v-bind directive can be used with v-for to dynamically set attribute values for each element; and the .map method can convert array elements into new arrays.
 How to jump to the div of vue
Apr 08, 2025 am 09:18 AM
There are two ways to jump div elements in Vue: use Vue Router and add router-link component. Add the @click event listener and call this.$router.push() method to jump.


