

Summarize and organize the basic knowledge of Laravel

This article brings you relevant knowledge about laravel, which mainly introduces some basic knowledge, including how to install Laravel, routing, validators, views, etc., the following is Let's take a look, hope it helps everyone.

[Related recommendations: laravel video tutorial]
1. Install laravle
1. Install composer
2. Execute the command:
##composer create-project laravel/laravel project folder name-- prefer-dist
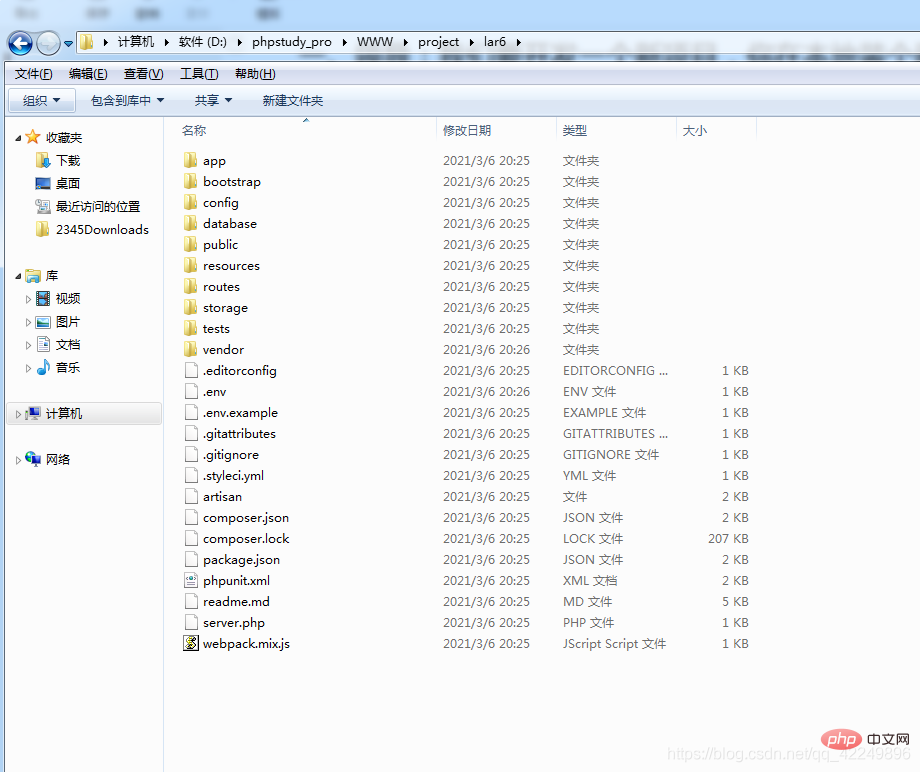
app
: The core code of the applicationbootstrap
: An app.php file that guides the framework, a cache directory (including routing and cache files), and the framework startup file. Generally, it does not move.config
: All configuration filesdatabase
: The migrations directory can generate data tables .public
: Entry file storage location, and static resources (similar to tp)resources
:routes
: All route definitions appliedtests
: Available for Unit testvendor
: All composer dependency packages
3. First introduction to routing
1. Several common requests
- Route::get( u r l , , url, url,callback);
- Route::post( u r l , , url, url,callback);
- Route::put( u r l , , url, url,callback);
- Route::delete( u r l , , url, url,callback);
2. Match the specified request method
Route::match(['get','post'],'/',function(){});3. Configure any request method
Route::any('/home', function () {
});4. Add must to the route Fill in the parameters
Route::get('/home/{id}', function ($id) {
echo 'id为:'.$id;});5. Add optional parameters to the route
Route::get('/home/{id?}', function ($id = '') {
echo 'id为:'.$id;});6. Pass the get parameter in the form of ?
Route::get('/home', function () {
echo 'id为:'.$_GET['id'];});7. Add an alias to the route
Route::any('/home/index', function () {
echo '测试';})->name('hh');8. Set routing group
For example, the following route:
- /admin/login
- /admin/index
- /admin /logout
- /admin/add
If adding them one by one is more troublesome, they have a common difference, they all have the /admin/ prefix, and you can set up a routing group Add the group:
Route::group(['prefix'=>'admin'], function () {
    Route::get('test1', function () {
        echo 'test1';
    });
    Route::get('test2', function () {
        echo 'test2';
});});You can now access it through /admin/test1.
9. Routing configuration controller
The controller can build a front desk and a back desk:
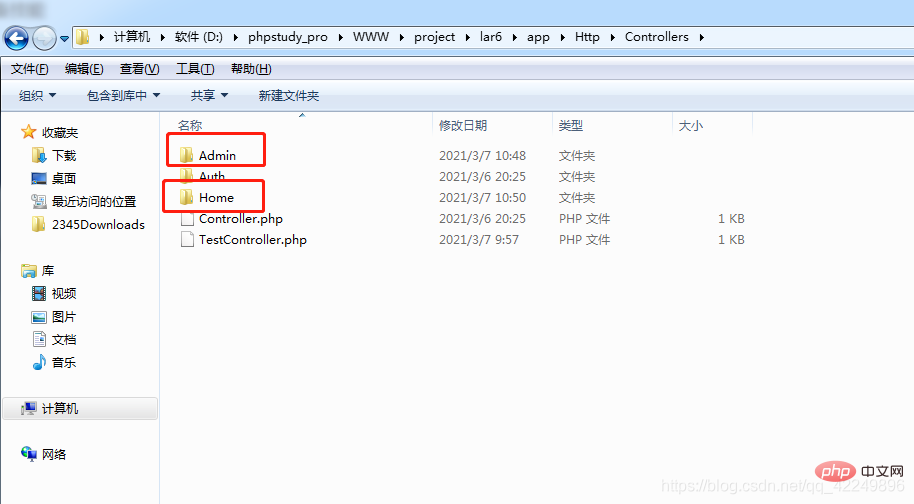
命令行创建路由:
php artisan make:controller Admin/IndexController
基本路由建立:
Route::get('test/index','TestController@index');分目录路由建立:
Route::get('/admin/index/index','Admin\IndexController@index');四、laravel验证器
引入:use Illuminate\Support\Facades\Validator
$param = $request->all();$rule = [
    'name'=>'required|max:2',];$message = [
    'required'  => ':attribute不能为空',
    'max' => ':attribute长度最大为2'];$replace = [
    'name' => '姓名',];$validator = Validator::make($param, $rule, $message,$replace);if ($validator->fails()){
return response()->json(['status'=>0,'msg'=>$validator->errors()->first()]);}五、控制器获取用户输入的值
在控制器中如果要使用一个类,例如use Illuminate\Http\Request,就可以简写为use Request。
但是需要在config目录下的app.php配置文件中加入:
'aliases' => [

        'App' => Illuminate\Support\Facades\App::class,
        'Arr' => Illuminate\Support\Arr::class,
        'Artisan' => Illuminate\Support\Facades\Artisan::class,
        'Auth' => Illuminate\Support\Facades\Auth::class,
        'Blade' => Illuminate\Support\Facades\Blade::class,

        'Request' => Illuminate\Support\Facades\Request::class,

    ],
1、获取用户单个输入值:
Input::get('id')2、获取用户输入的所有值:
Input::all()
打印出来的是数组
关于dd(dump+die)
3、获取用户输入指定的值:
Input::only(['id','name'] //只接收id,其余不接受
4、获取用户输入指定值之外的值:
Input::except(['name'] //不接收name,其余都接收
5、判断某个值是否存在
Input::has('name') //存在返回true 不存在返回false 其中0返回true六、视图的创建与使用
1、视图的创建
视图也可分目录管理:
控制器语法:
return view('home/test');也可写为:
return view('home.test');2、变量映射
控制器中:
return view('home/test',['day'=>time()]);视图中:
{{$day}}其中控制器中变量映射有三种:
- view(模板文件,数组)
- view(模板文件)->with(数组)
- view(模板文件)->with(数组)->with(数组)
了解一下compact数组。
3、视图渲染
3.1 foreach的使用
控制器中:
public function index(){

        $arr = [
            0 => [
                'name' => 'tom',
                'age' => '12',
            ],
            1 => [
                'name' => 'bby',
                'age' => '13',
            ]
        ];
        return view('home/test',['data'=>$arr]);
}视图中:
@foreach($data as $k=>$v)
    键:{{$k}}
值:{{$v['name']}} <br>@endforeach3.2 if的使用
@if(1==2)
    是的
@else
    不是的
@endif
4、视图之间的引用
@include('welcome')七、模型的创建与使用
1、创建模型的命令
php artisan make:model Model/Admin/Member
此时,就会在app目录内创建: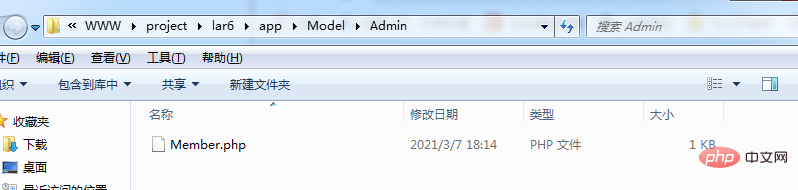
2、模型基本设置
<?phpnamespace App\Model\Admin;use Illuminate\Database\Eloquent\Model;class Member extends Model{
//定义表名
protected $table = 'student';
//定义主键
protected $primaryKey = 'id';
//定义禁止操作时间
public $timestamps = false;
//设置允许写入的字段
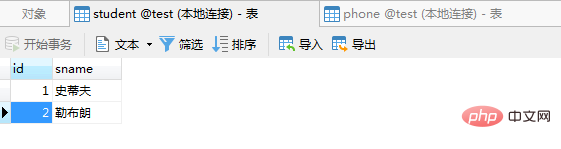
protected $fillable = ['id','sname'];}3、模型数据添加
方式一:
	 $model = new Member();
	 $model->sname = '勒布朗';
	 $res = $model->save();
	 dd($res);
方式二:
     $model = new Member();
     $res = $model->create($request->all());
     dd($res);
4、模型的表连接
//查询客户与销售顾问的客资列表$data = Custinfo::select(['custinfo.*', 'customers.name'])
    ->join('customers', 'customers.id', '=', 'custinfo.cust_id')
    ->where($where)
    ->get()
->toArray();5、简单模型关联一对一
<?phpnamespace App\Model\Admin;use Illuminate\Database\Eloquent\Model;class Phone extends Model{
//定义表名
protected $table = 'phone';
//定义主键
protected $primaryKey = 'id';
//定义禁止操作时间
public $timestamps = false;
//设置允许写入的字段
protected $fillable = ['id','uid','phone'];}<?phpnamespace App\Model\Admin;use Illuminate\Database\Eloquent\Model;class Member extends Model{
//定义表名
protected $table = 'student';
//定义主键
protected $primaryKey = 'id';
//定义禁止操作时间
public $timestamps = false;
//设置允许写入的字段
protected $fillable = ['id','sname'];
/**
* 获取与用户关联的电话号码记录。
*/
public function getPhone()
{
return $this->hasOne('App\Model\Admin\Phone', 'uid', 'id');
}} //对象转数组
public function Arr($obj)
{
return json_decode(json_encode($obj), true);
}
public function index(){
$infoObj = Member::with('getPhone')->get();
$infoArr = $this->Arr($infoObj);
print_r($infoArr);
}

八、日志
1、自定义日志目录
在config目录下的logging.php中的channels配置:
 'custom' => [
     'driver' => 'single',
     'path' => storage_path('logs/1laravel.log'),
     'level' => 'debug',
]控制器中:
$message = ['joytom','rocker'];Log::channel('custom')->info($message);九、迁移文件
建立一个迁移文件:php artisan make:migration create_shcool_table
会在database\migrations下创建一个文件: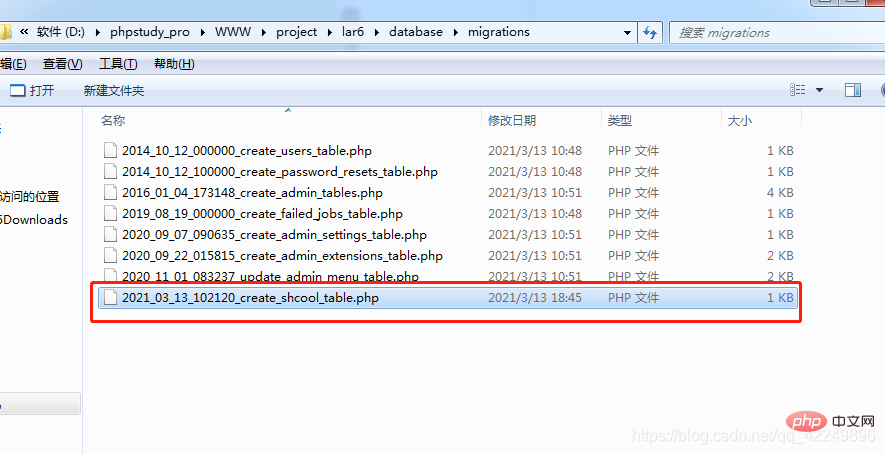
在up方法中增加如下代码:
<?phpuse Illuminate\Database\Migrations\Migration;use Illuminate\Database\Schema\Blueprint;use Illuminate\Support\Facades\Schema;class CreateShcoolTable extends Migration{
/**
* Run the migrations.
*
* @return void
*/
public function up()
{
Schema::create('shcool', function (Blueprint $table) {
$table->bigIncrements('id');
$table->string('school_name','20')->notNull()->unique();
$table->tinyInteger('status')->default(1);
$table->timestamps();
});
}
/**
* Reverse the migrations.
*
* @return void
*/
public function down()
{
Schema::dropIfExists('shcool');
}}更详细的生成SQL方法请参考:数据迁移文件常用方法速查表
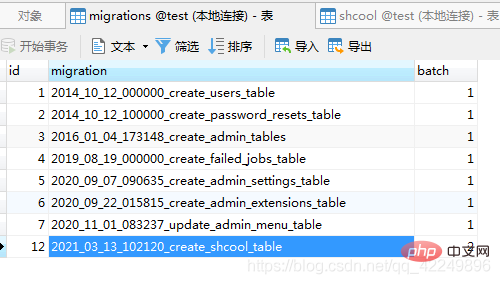
写好SQL文件以后,执行:php artisan migrate
将会生成数据表,其中操作日志将记录在这个表中:
php artisan migrate:rollback:回滚最后一次的迁移操作, 删除(回滚)之后会删除迁移记录,并且数据表也会删除,但是迁移文件依旧存在,方便后期继续迁移(创建数据表)。
【相关推荐:laravel视频教程】
The above is the detailed content of Summarize and organize the basic knowledge of Laravel. For more information, please follow other related articles on the PHP Chinese website!

Hot AI Tools

Undresser.AI Undress
AI-powered app for creating realistic nude photos

AI Clothes Remover
Online AI tool for removing clothes from photos.

Undress AI Tool
Undress images for free

Clothoff.io
AI clothes remover

Video Face Swap
Swap faces in any video effortlessly with our completely free AI face swap tool!

Hot Article
Hot Tools

Notepad++7.3.1
Easy-to-use and free code editor

SublimeText3 Chinese version
Chinese version, very easy to use

Zend Studio 13.0.1
Powerful PHP integrated development environment

Dreamweaver CS6
Visual web development tools

SublimeText3 Mac version
God-level code editing software (SublimeText3)
Hot Topics


 How to get the return code when email sending fails in Laravel?
Apr 01, 2025 pm 02:45 PM
How to get the return code when email sending fails in Laravel?
Apr 01, 2025 pm 02:45 PM
Method for obtaining the return code when Laravel email sending fails. When using Laravel to develop applications, you often encounter situations where you need to send verification codes. And in reality...
 Laravel Eloquent ORM in Bangla partial model search)
Apr 08, 2025 pm 02:06 PM
Laravel Eloquent ORM in Bangla partial model search)
Apr 08, 2025 pm 02:06 PM
LaravelEloquent Model Retrieval: Easily obtaining database data EloquentORM provides a concise and easy-to-understand way to operate the database. This article will introduce various Eloquent model search techniques in detail to help you obtain data from the database efficiently. 1. Get all records. Use the all() method to get all records in the database table: useApp\Models\Post;$posts=Post::all(); This will return a collection. You can access data using foreach loop or other collection methods: foreach($postsas$post){echo$post->
 Laravel Introduction Example
Apr 18, 2025 pm 12:45 PM
Laravel Introduction Example
Apr 18, 2025 pm 12:45 PM
Laravel is a PHP framework for easy building of web applications. It provides a range of powerful features including: Installation: Install the Laravel CLI globally with Composer and create applications in the project directory. Routing: Define the relationship between the URL and the handler in routes/web.php. View: Create a view in resources/views to render the application's interface. Database Integration: Provides out-of-the-box integration with databases such as MySQL and uses migration to create and modify tables. Model and Controller: The model represents the database entity and the controller processes HTTP requests.
 Laravel's geospatial: Optimization of interactive maps and large amounts of data
Apr 08, 2025 pm 12:24 PM
Laravel's geospatial: Optimization of interactive maps and large amounts of data
Apr 08, 2025 pm 12:24 PM
Efficiently process 7 million records and create interactive maps with geospatial technology. This article explores how to efficiently process over 7 million records using Laravel and MySQL and convert them into interactive map visualizations. Initial challenge project requirements: Extract valuable insights using 7 million records in MySQL database. Many people first consider programming languages, but ignore the database itself: Can it meet the needs? Is data migration or structural adjustment required? Can MySQL withstand such a large data load? Preliminary analysis: Key filters and properties need to be identified. After analysis, it was found that only a few attributes were related to the solution. We verified the feasibility of the filter and set some restrictions to optimize the search. Map search based on city
 Laravel and the Backend: Powering Web Application Logic
Apr 11, 2025 am 11:29 AM
Laravel and the Backend: Powering Web Application Logic
Apr 11, 2025 am 11:29 AM
How does Laravel play a role in backend logic? It simplifies and enhances backend development through routing systems, EloquentORM, authentication and authorization, event and listeners, and performance optimization. 1. The routing system allows the definition of URL structure and request processing logic. 2.EloquentORM simplifies database interaction. 3. The authentication and authorization system is convenient for user management. 4. The event and listener implement loosely coupled code structure. 5. Performance optimization improves application efficiency through caching and queueing.
 Solve caching issues in Craft CMS: Using wiejeben/craft-laravel-mix plug-in
Apr 18, 2025 am 09:24 AM
Solve caching issues in Craft CMS: Using wiejeben/craft-laravel-mix plug-in
Apr 18, 2025 am 09:24 AM
When developing websites using CraftCMS, you often encounter resource file caching problems, especially when you frequently update CSS and JavaScript files, old versions of files may still be cached by the browser, causing users to not see the latest changes in time. This problem not only affects the user experience, but also increases the difficulty of development and debugging. Recently, I encountered similar troubles in my project, and after some exploration, I found the plugin wiejeben/craft-laravel-mix, which perfectly solved my caching problem.
 Laravel user login function
Apr 18, 2025 pm 12:48 PM
Laravel user login function
Apr 18, 2025 pm 12:48 PM
Laravel provides a comprehensive Auth framework for implementing user login functions, including: Defining user models (Eloquent model), creating login forms (Blade template engine), writing login controllers (inheriting Auth\LoginController), verifying login requests (Auth::attempt) Redirecting after login is successful (redirect) considering security factors: hash passwords, anti-CSRF protection, rate limiting and security headers. In addition, the Auth framework also provides functions such as resetting passwords, registering and verifying emails. For details, please refer to the Laravel documentation: https://laravel.com/doc
 What versions of laravel are there? How to choose the version of laravel for beginners
Apr 18, 2025 pm 01:03 PM
What versions of laravel are there? How to choose the version of laravel for beginners
Apr 18, 2025 pm 01:03 PM
In the Laravel framework version selection guide for beginners, this article dives into the version differences of Laravel, designed to assist beginners in making informed choices among many versions. We will focus on the key features of each release, compare their pros and cons, and provide useful advice to help beginners choose the most suitable version of Laravel based on their skill level and project requirements. For beginners, choosing a suitable version of Laravel is crucial because it can significantly impact their learning curve and overall development experience.
