
 CMS Tutorial
WordPress
How to build a blog with Docker and wordpress (steps with pictures and text)
CMS Tutorial
WordPress
How to build a blog with Docker and wordpress (steps with pictures and text)
How to build a blog with Docker and wordpress (steps with pictures and text)

The following column WordPresstutorial will introduce to you how to use Docker and wordpress to build a personal blog. I hope it will be helpful to friends in need!
Use Docker and wordpress to build a personal blog
1. Come first Explain two concepts
Docker is an open source application container engine that allows developers to package their applications and dependency packages into a portable image, and then publish it to any popular Linux or Windows machine , virtualization can also be achieved. Containers completely use the sandbox mechanism and will not have any interfaces with each other
Docker-Compose is an orchestration service of Docker. It is a tool for defining and running complex applications on Docker, which allows Users deploy distributed applications in clusters.
- Service (
service): An application container can actually include several container instances running the same image. - Project (
project): A complete business unit consisting of a set of associated application containers, defined in thedocker-compose.ymlfile.
Compose's default management object is the project, and subcommands are used to conveniently manage the life cycle of a group of containers in the project.
2. Install Docker
The specific installation method can be installed according to your own system.
For window system installation, please refer to the novice tutorial: https://www.runoob.com/docker/windows-docker-install.html
MacOC installation:
Use Homebrew to install
macOS We can use Homebrew to install Docker.
Homebrew Cask already supports Docker for Mac, so you can easily use Homebrew Cask for installation.
The command is:
$ brew cask install docke
The specific screenshot of the installation is as follows:
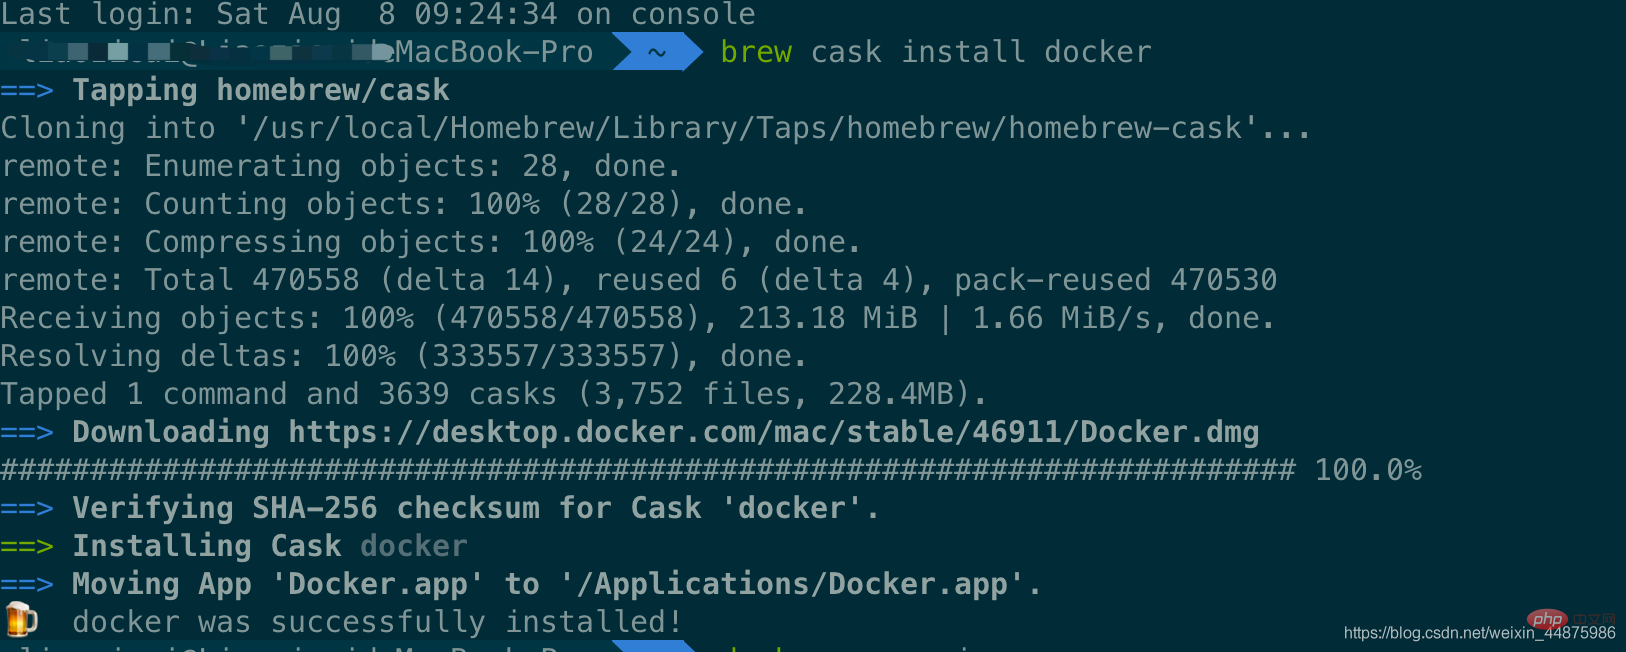
After loading the Docker app, click Next, you may be asked You can enter the macOS login password. Afterwards, a prompt window for Docker running will pop up, and there is also a small whale icon on the status bar 
After starting the terminal, you can check the installed Docker version through the command.
$ docker --version
Docker version 19.03.12, build 48a66213fe
3. Image acceleration
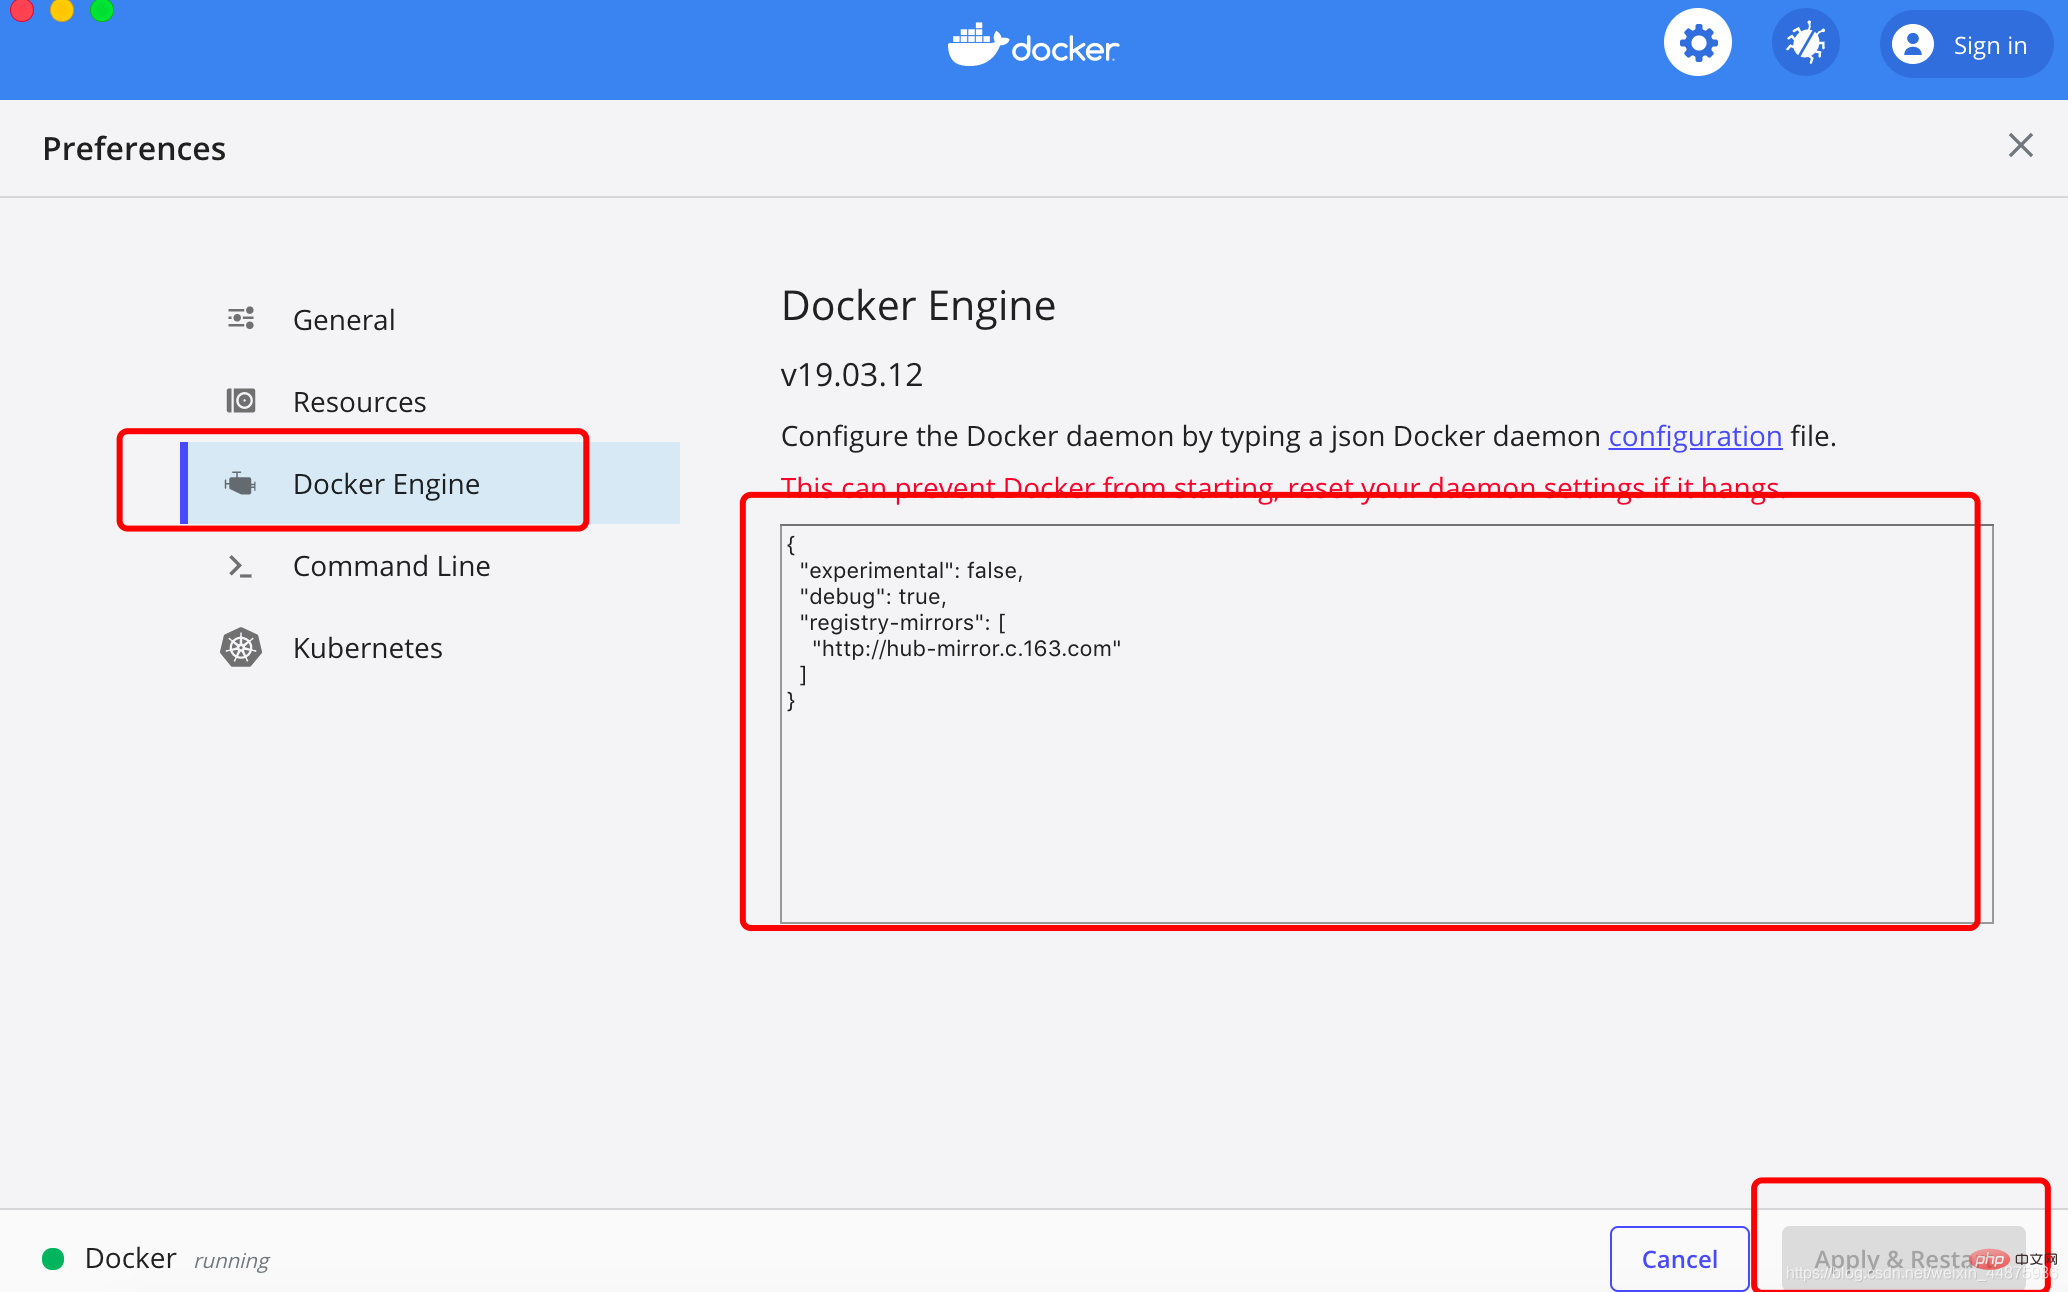
In view of domestic network problems, subsequent pulling of Docker images is very slow. We may need to configure an accelerator to solve the problem. I use NetEase’s image address: http://hub-mirror.c.163.com.
Click the Docker for mac application icon on the taskbar -> Perferences… -> Docker Engine. Just fill in the accelerator address in the list. After the modification is completed, click the Apply & Restart button, and Docker will restart and apply the configured image address.
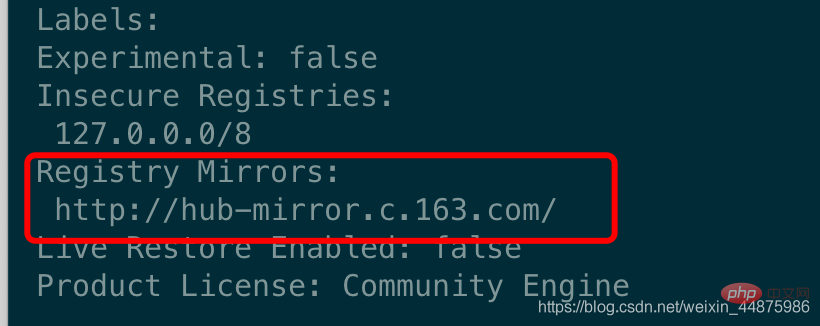
Then enter in the terminal:
$ docker info
4. Install WordPress
Create a new folder , you can name it as you wish.
Then create the docker-compose.yml file and put it in the folder just now.
The content of docker-compose.yml is as follows:
version: '3.3'services:
   db:
     image: mysql:5.7
     volumes:
       - db_data:/var/lib/mysql     restart: always     environment:
       MYSQL_ROOT_PASSWORD: somewordpress       MYSQL_DATABASE: wordpress       MYSQL_USER: wordpress       MYSQL_PASSWORD: wordpress   wordpress:
     depends_on:
       - db     image: wordpress:latest     ports:
       - "8000:80"
     restart: always     environment:
       WORDPRESS_DB_HOST: db:3306
       WORDPRESS_DB_USER: wordpress       WORDPRESS_DB_PASSWORD: wordpress       WORDPRESS_DB_NAME: wordpressvolumes:
db_data: {}Then enter the newly created folder directory in the terminal and use one line of commands to set up the blog:
$ docker-compose up -d
Problems may occur here, as shown below:
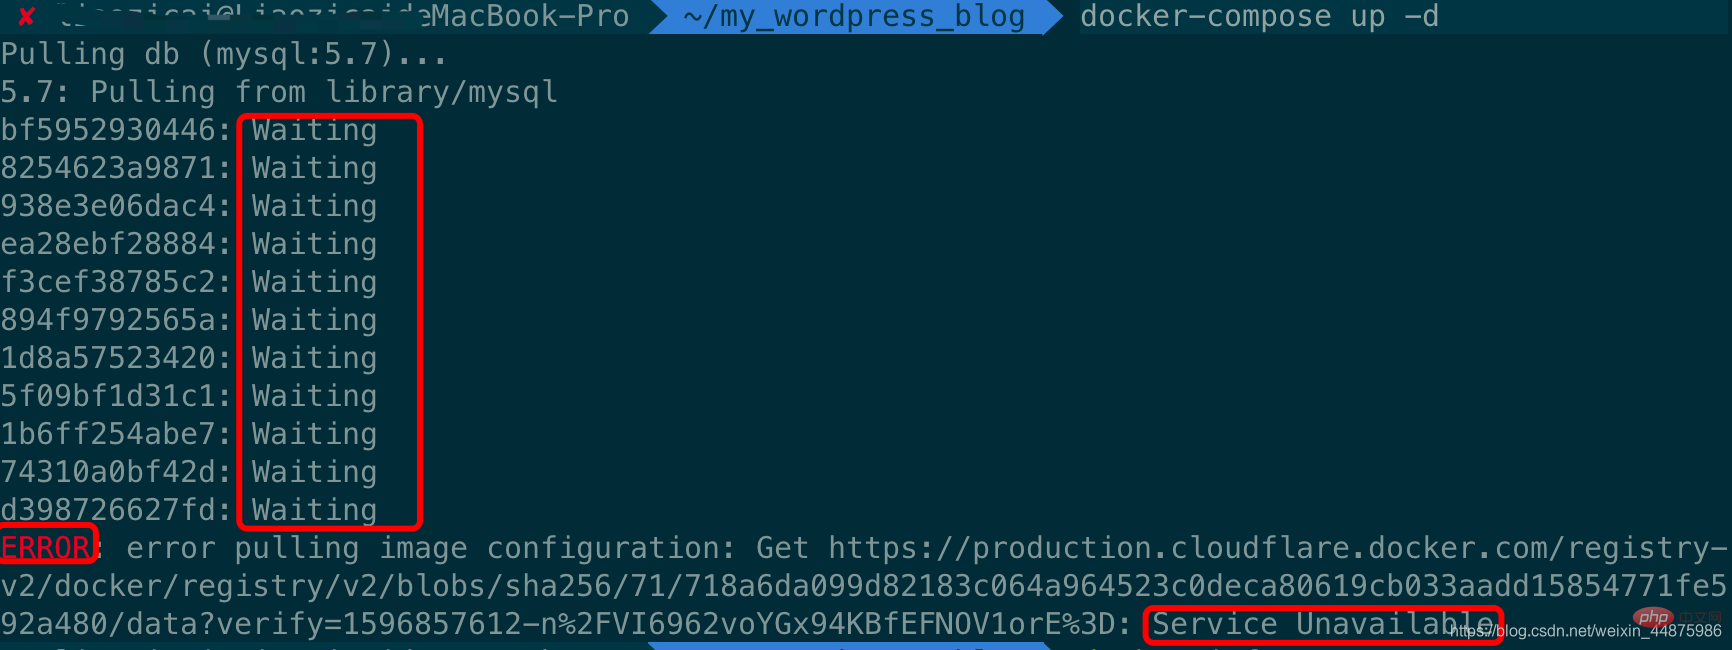
The reason for this problem is that image acceleration is not configured, because docker uses foreign images by default. Download The resource is relatively slow, so it needs to be modified to a domestic image for acceleration. For specific methods, please see the previous point 3, image acceleration.
The screenshot of the successful effect is as follows: 
5. Front-end management page
Front-end access address: IP:8000/: Because I have just set up a blog, the IP is localhost
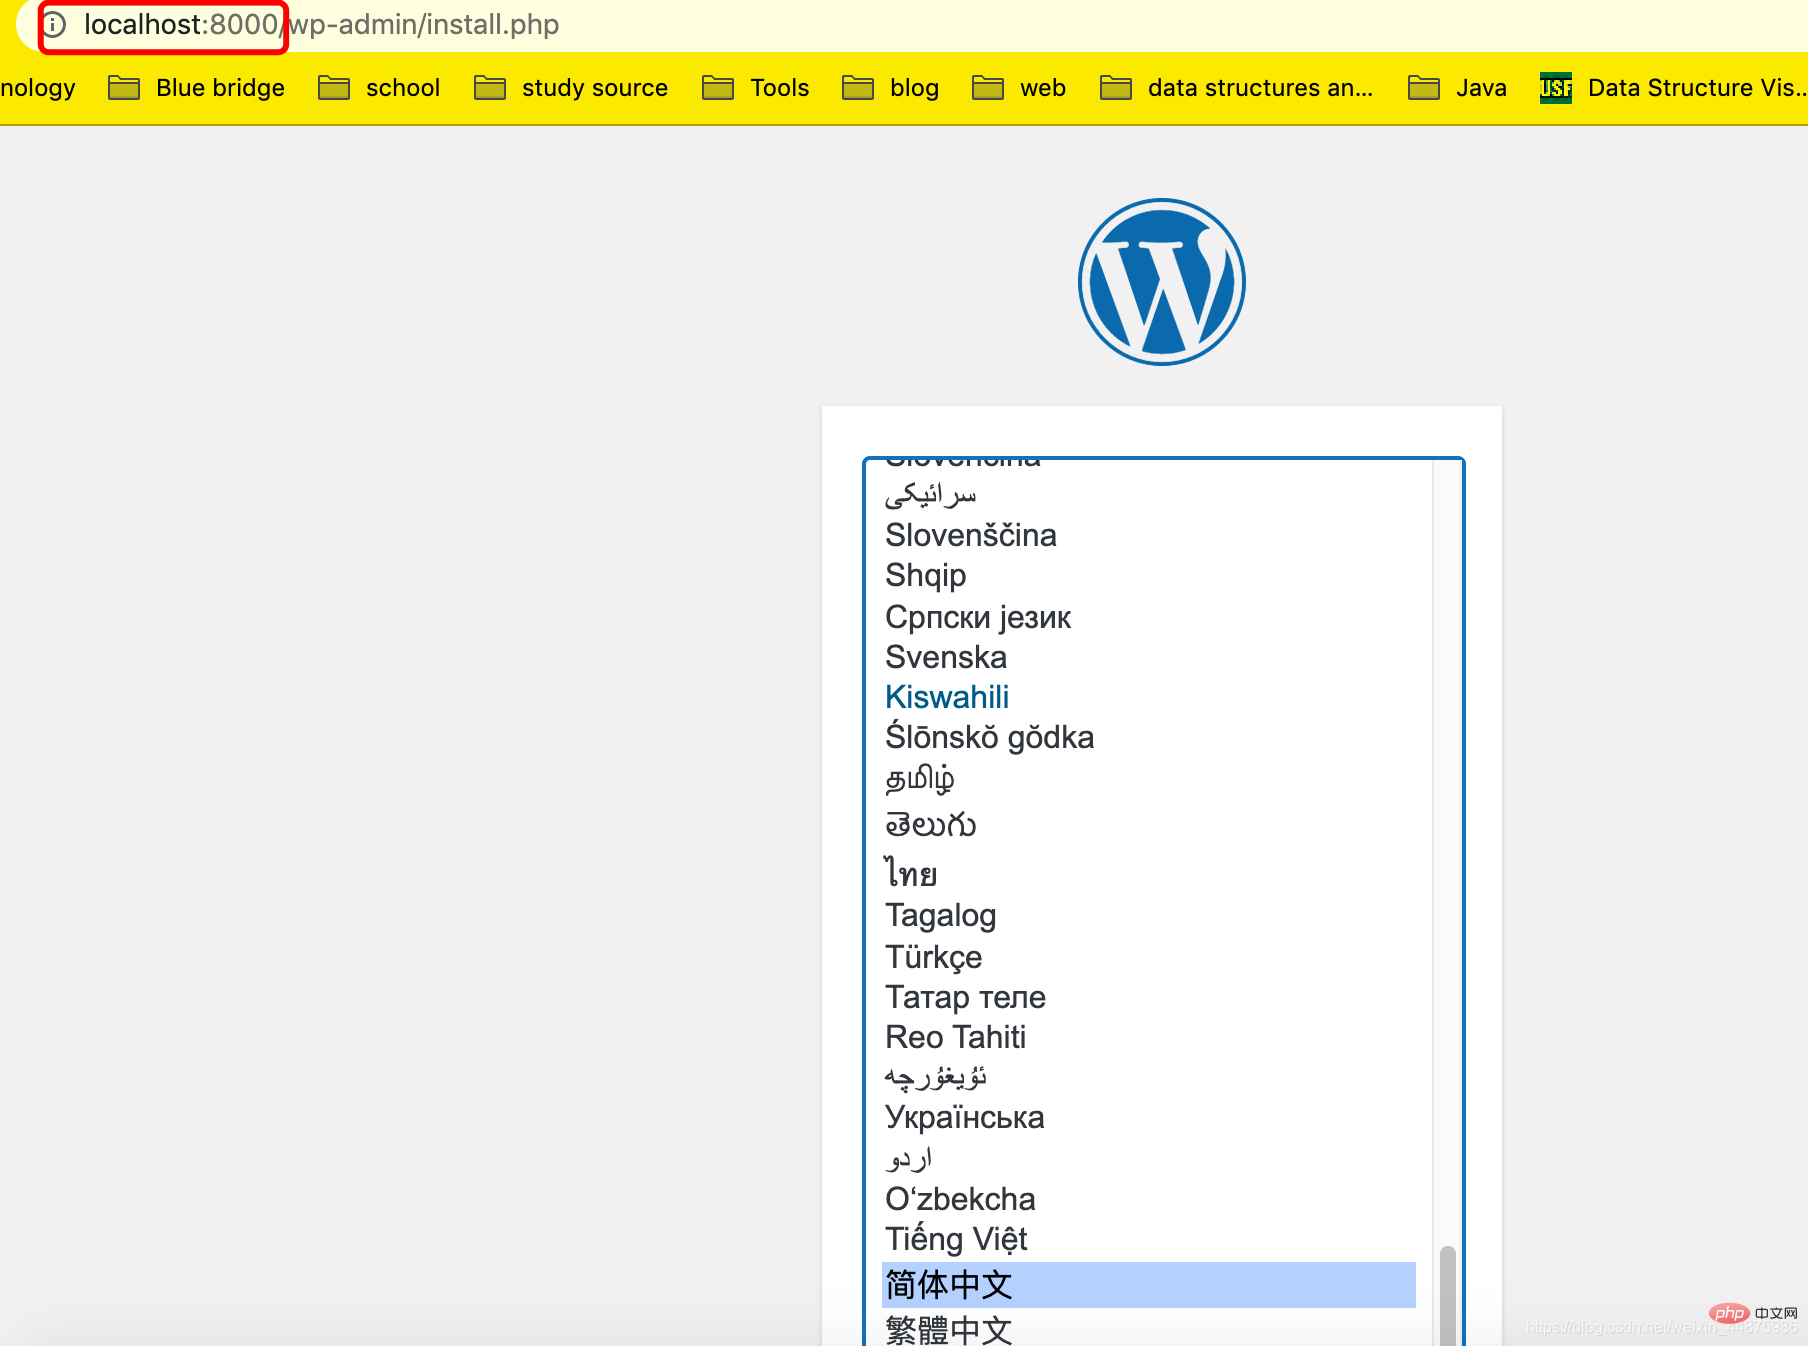
. Enter this page. You can choose the specific language according to your preference. Here I chose Chinese, click to continue.
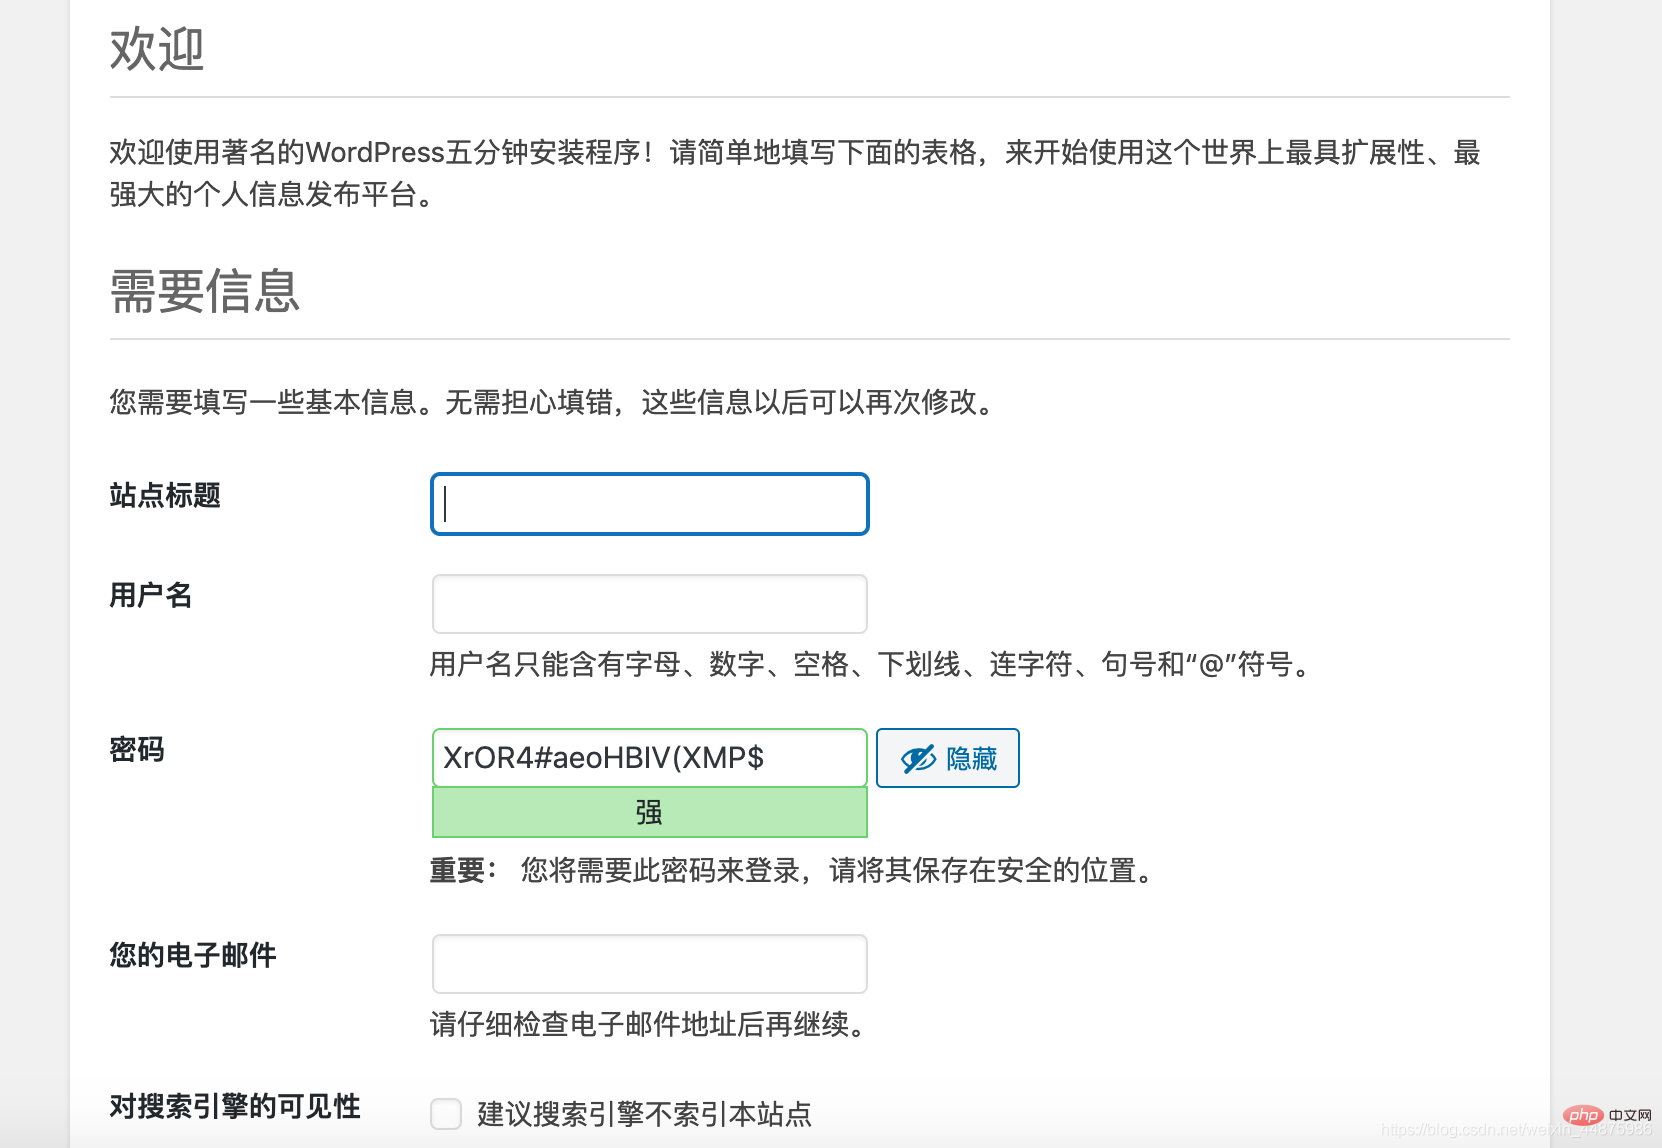
You can fill in this information according to your personal preference.
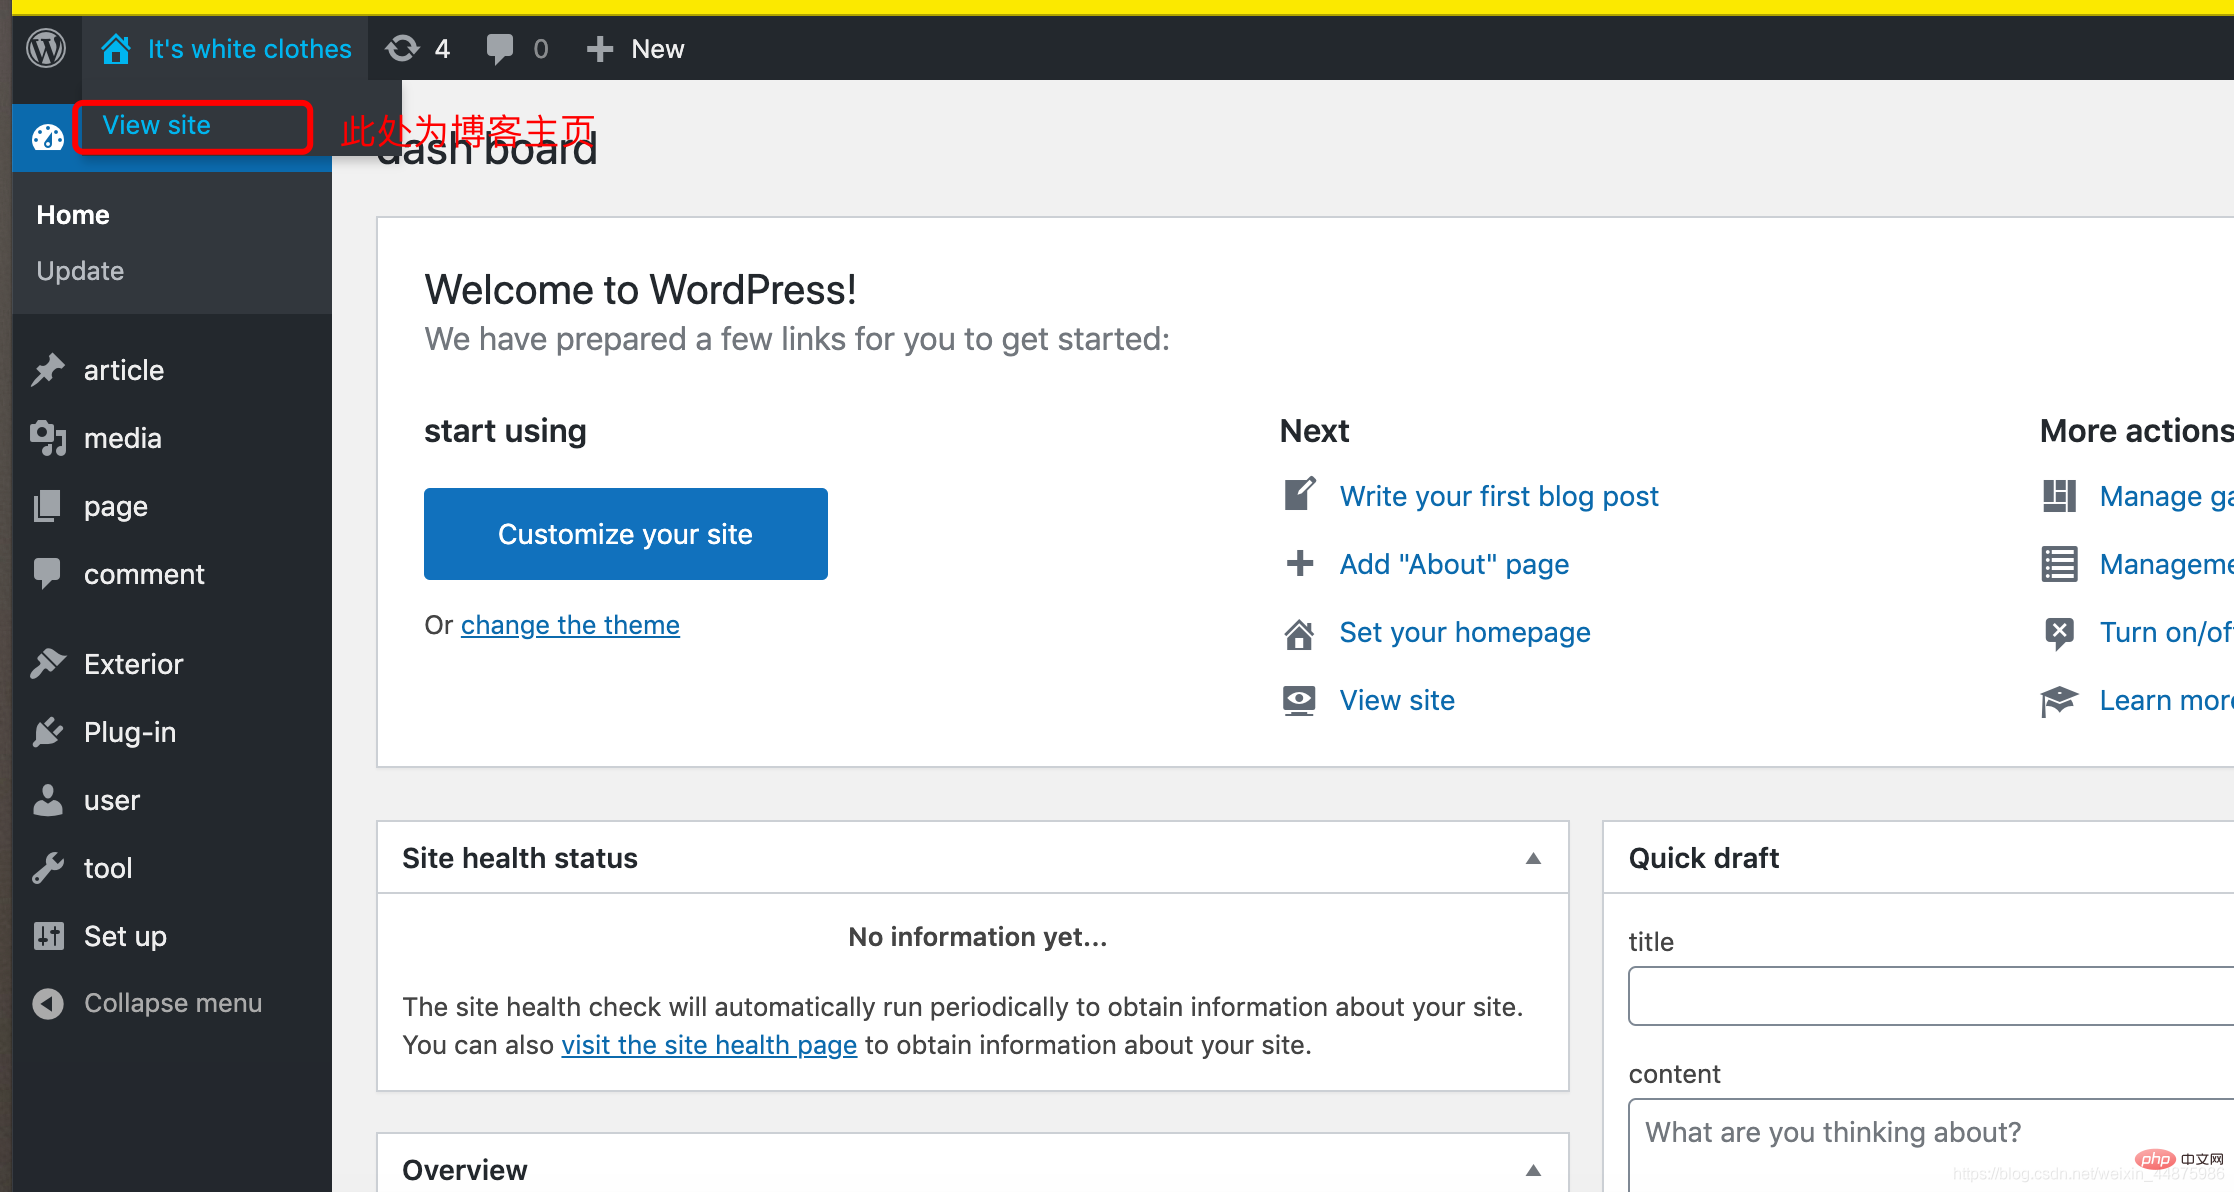
After logging in to your account and password, the blog backend page is as follows:
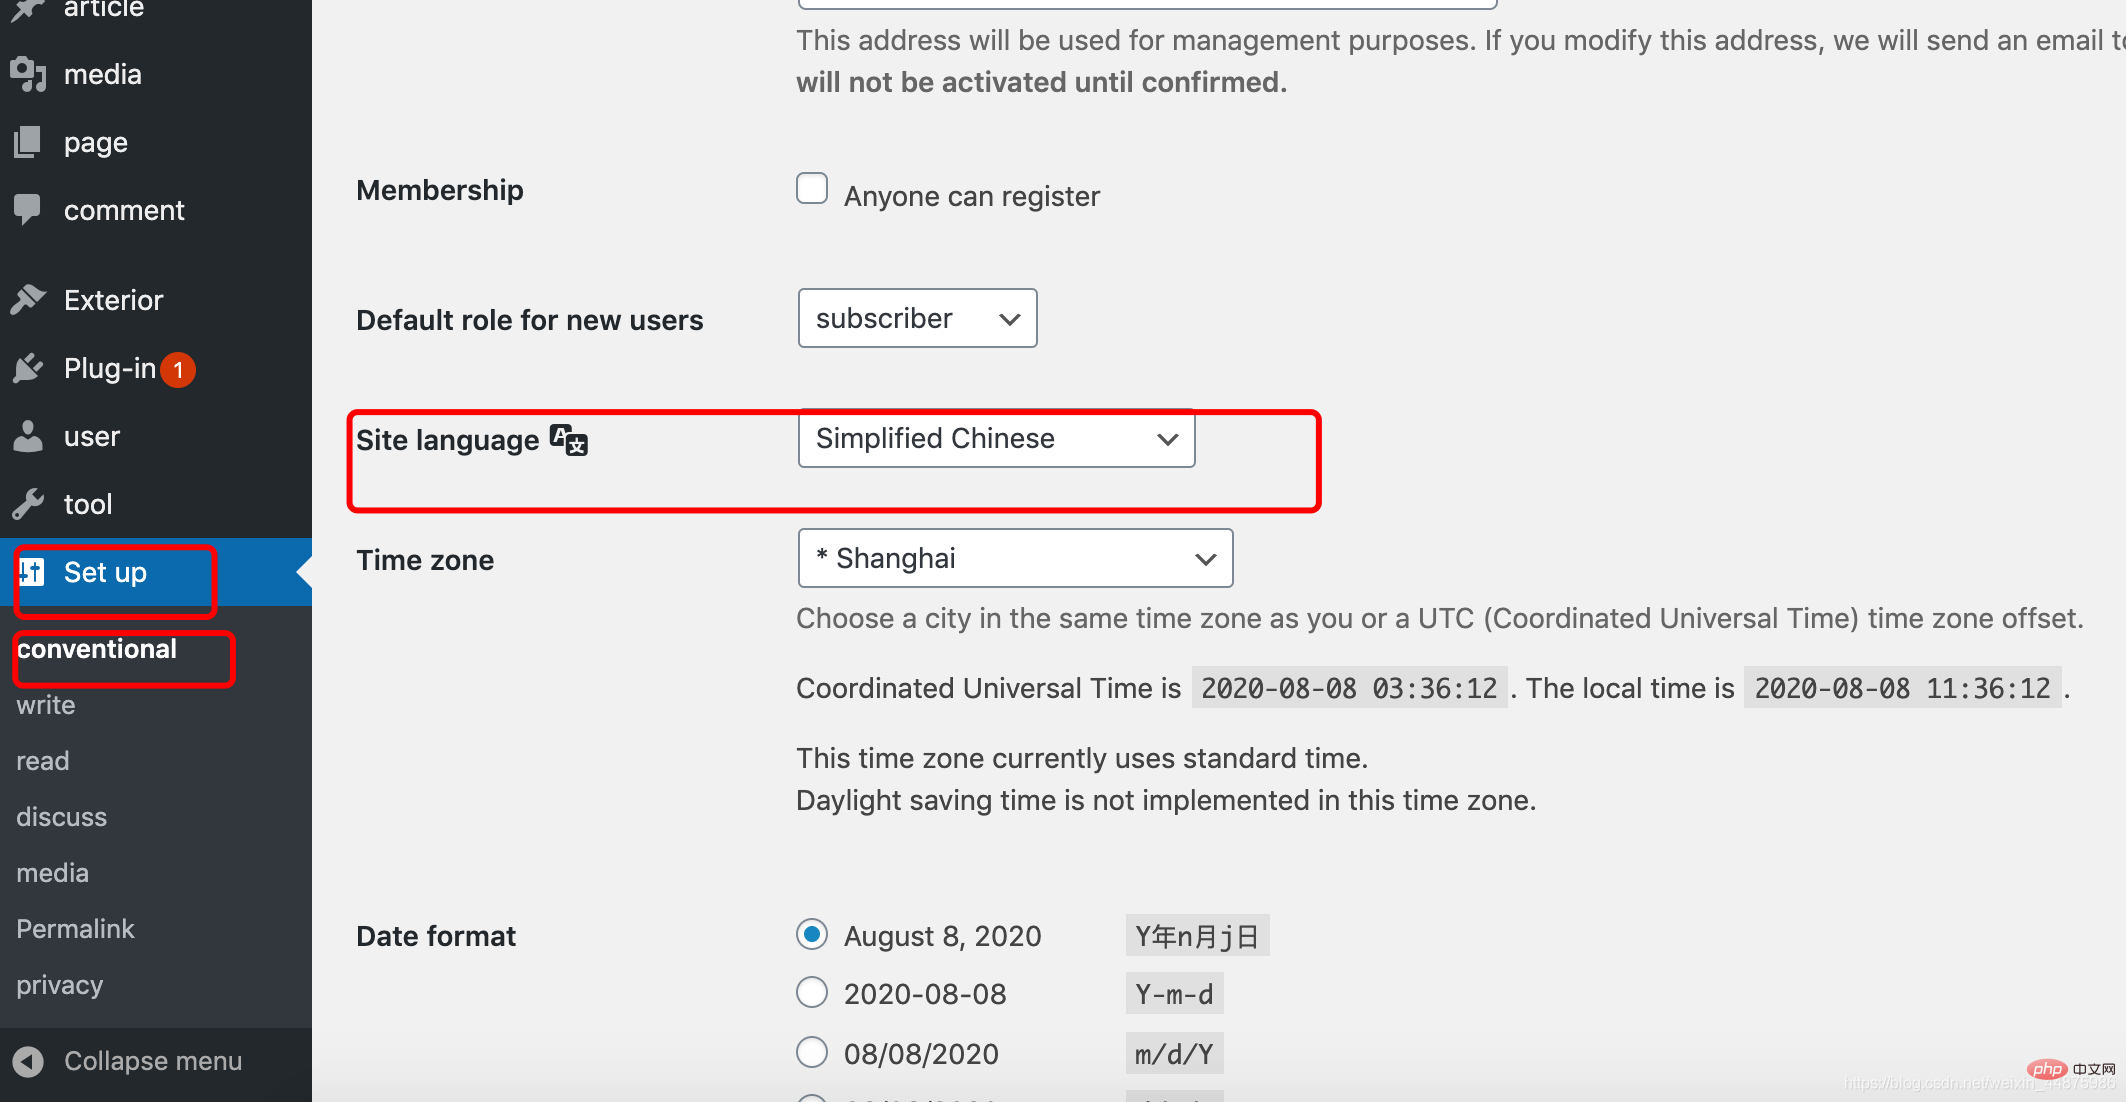
Modify language:
Modify Theme:
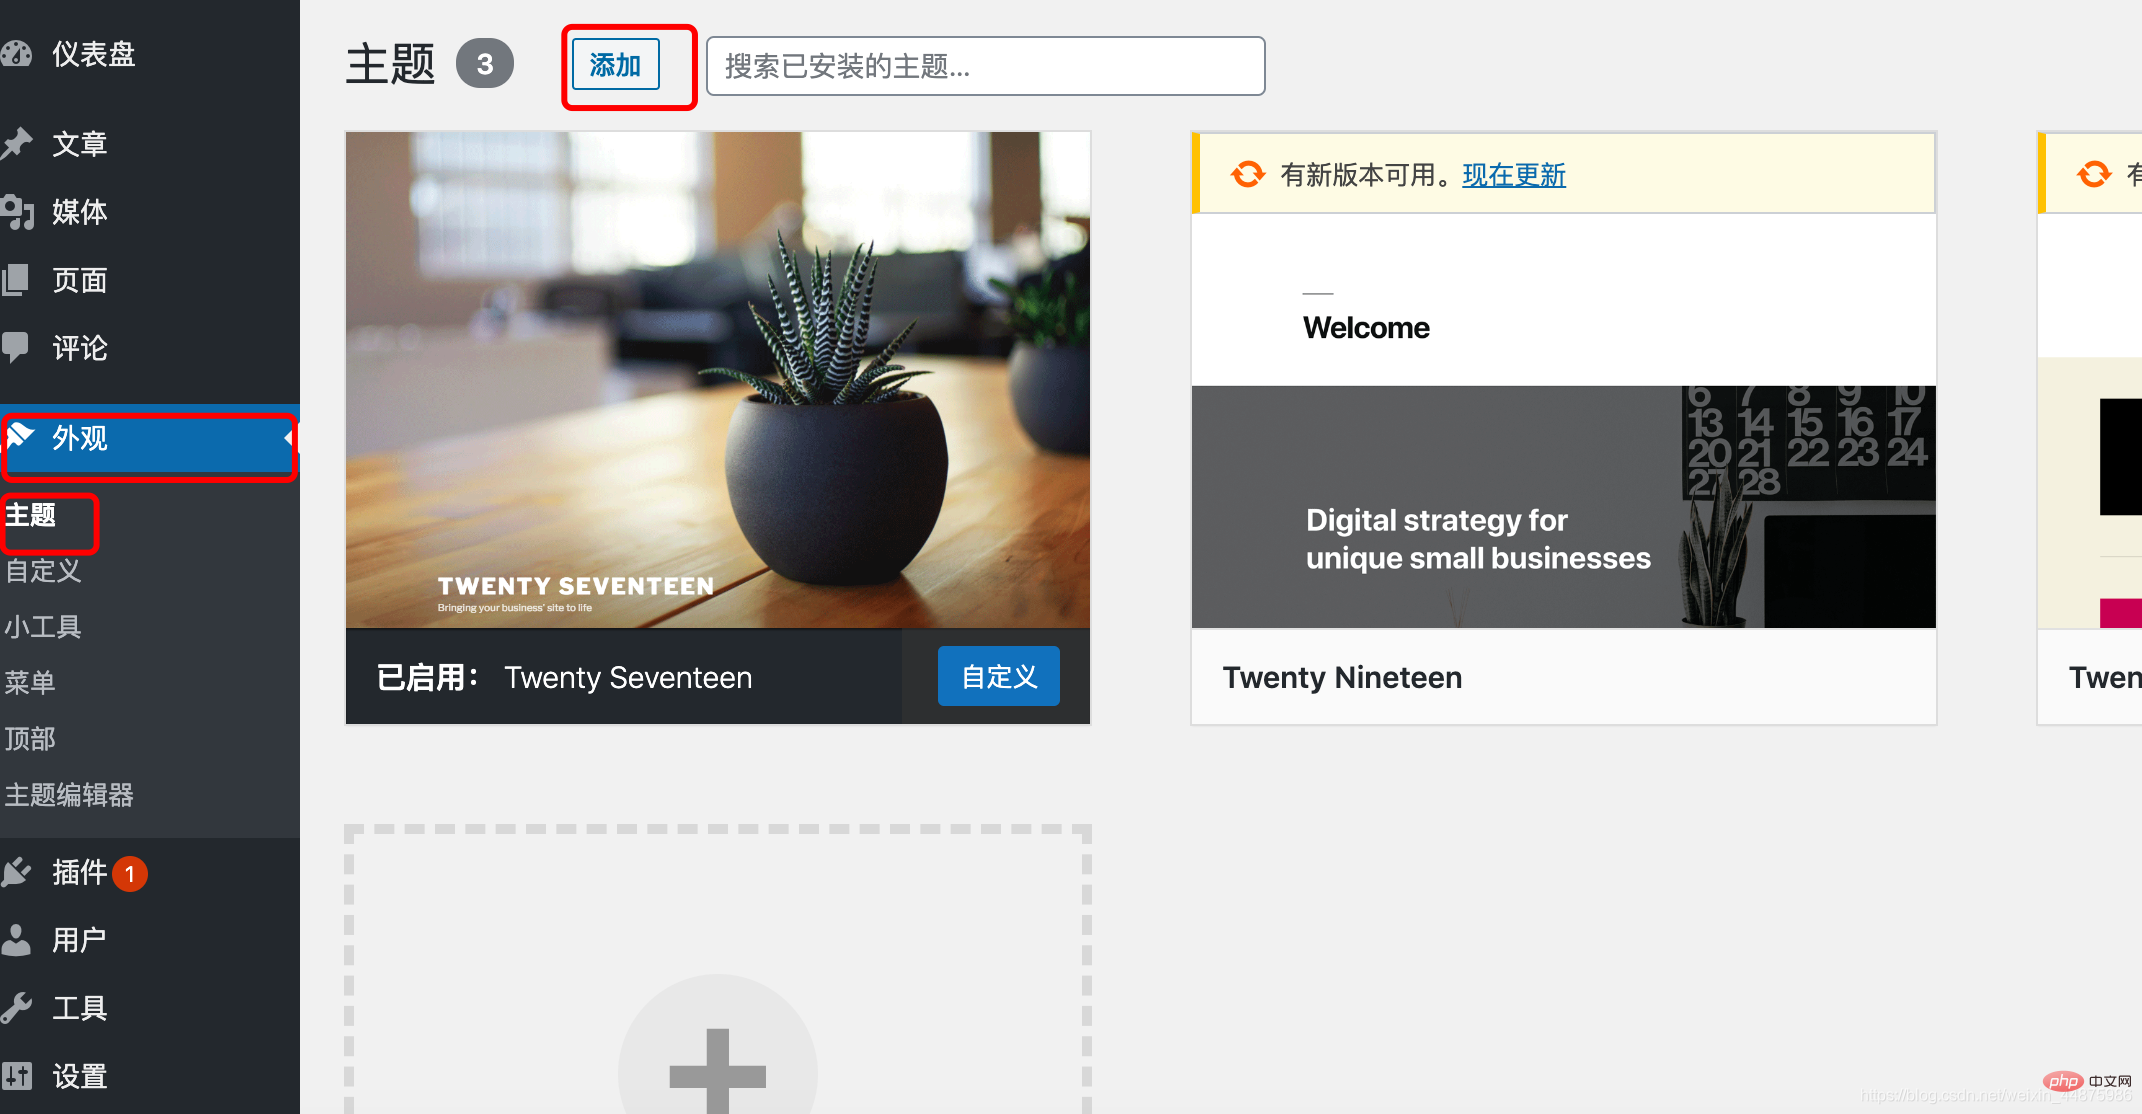
Now your personal blog is complete!
If it was helpful to you, please give it a like!
The above is the detailed content of How to build a blog with Docker and wordpress (steps with pictures and text). For more information, please follow other related articles on the PHP Chinese website!

Hot AI Tools

Undresser.AI Undress
AI-powered app for creating realistic nude photos

AI Clothes Remover
Online AI tool for removing clothes from photos.

Undress AI Tool
Undress images for free

Clothoff.io
AI clothes remover

Video Face Swap
Swap faces in any video effortlessly with our completely free AI face swap tool!

Hot Article
Hot Tools

Notepad++7.3.1
Easy-to-use and free code editor

SublimeText3 Chinese version
Chinese version, very easy to use

Zend Studio 13.0.1
Powerful PHP integrated development environment

Dreamweaver CS6
Visual web development tools

SublimeText3 Mac version
God-level code editing software (SublimeText3)
Hot Topics


 How to adjust the wordpress article list
Apr 20, 2025 am 10:48 AM
How to adjust the wordpress article list
Apr 20, 2025 am 10:48 AM
There are four ways to adjust the WordPress article list: use theme options, use plugins (such as Post Types Order, WP Post List, Boxy Stuff), use code (add settings in the functions.php file), or modify the WordPress database directly.
 What are the plugins for wordpress blocking ip
Apr 20, 2025 am 08:27 AM
What are the plugins for wordpress blocking ip
Apr 20, 2025 am 08:27 AM
WordPress IP blocking plugin selection is crucial. The following types can be considered: based on .htaccess: efficient, but complex operation; database operation: flexible, but low efficiency; firewall: high security performance, but complex configuration; self-written: highest control, but requires more technical level.
 Docker on Linux: Containerization for Linux Systems
Apr 22, 2025 am 12:03 AM
Docker on Linux: Containerization for Linux Systems
Apr 22, 2025 am 12:03 AM
Docker is important on Linux because Linux is its native platform that provides rich tools and community support. 1. Install Docker: Use sudoapt-getupdate and sudoapt-getinstalldocker-cedocker-ce-clicotainerd.io. 2. Create and manage containers: Use dockerrun commands, such as dockerrun-d--namemynginx-p80:80nginx. 3. Write Dockerfile: Optimize the image size and use multi-stage construction. 4. Optimization and debugging: Use dockerlogs and dockerex
 How to build a website for wordpress host
Apr 20, 2025 am 11:12 AM
How to build a website for wordpress host
Apr 20, 2025 am 11:12 AM
To build a website using WordPress hosting, you need to: select a reliable hosting provider. Buy a domain name. Set up a WordPress hosting account. Select a topic. Add pages and articles. Install the plug-in. Customize your website. Publish your website.
 How to change the head image of the wordpress theme
Apr 20, 2025 am 10:00 AM
How to change the head image of the wordpress theme
Apr 20, 2025 am 10:00 AM
A step-by-step guide to replacing a header image of WordPress: Log in to the WordPress dashboard and navigate to Appearance >Theme. Select the topic you want to edit and click Customize. Open the Theme Options panel and look for the Site Header or Header Image options. Click the Select Image button and upload a new head image. Crop the image and click Save and Crop. Click the Save and Publish button to update the changes.
 How to cancel the editing date of wordpress
Apr 20, 2025 am 10:54 AM
How to cancel the editing date of wordpress
Apr 20, 2025 am 10:54 AM
WordPress editing dates can be canceled in three ways: 1. Install the Enable Post Date Disable plug-in; 2. Add code in the functions.php file; 3. Manually edit the post_modified column in the wp_posts table.
 How to write a header of a wordpress
Apr 20, 2025 pm 12:09 PM
How to write a header of a wordpress
Apr 20, 2025 pm 12:09 PM
The steps to create a custom header in WordPress are as follows: Edit the theme file "header.php". Add your website name and description. Create a navigation menu. Add a search bar. Save changes and view your custom header.
 How do containerization technologies (like Docker) affect the importance of Java's platform independence?
Apr 22, 2025 pm 06:49 PM
How do containerization technologies (like Docker) affect the importance of Java's platform independence?
Apr 22, 2025 pm 06:49 PM
Containerization technologies such as Docker enhance rather than replace Java's platform independence. 1) Ensure consistency across environments, 2) Manage dependencies, including specific JVM versions, 3) Simplify the deployment process to make Java applications more adaptable and manageable.
