
 Backend Development
PHP Tutorial
How to quickly create dynamic web pages through html+css+mysql+php
Backend Development
PHP Tutorial
How to quickly create dynamic web pages through html+css+mysql+php
How to quickly create dynamic web pages through html+css+mysql+php

Let me introduce to you how to quickly create dynamic web pages through html css mysql php. Let us set out to explore the unknown mysteries together! ! !
1. Construction of development environment
(1)apache php mysql environment construction
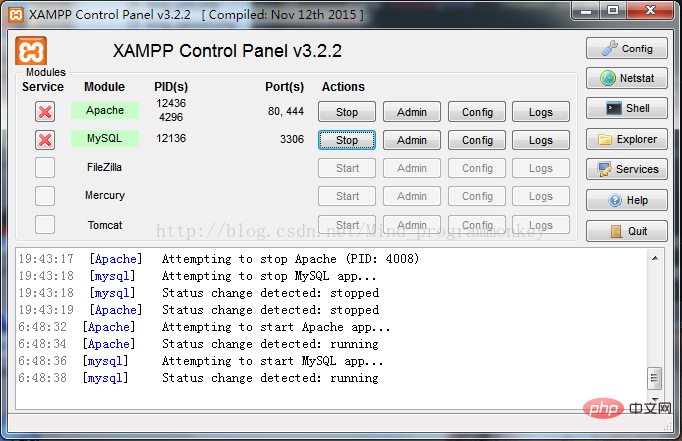
Because Apache is used as the server, MySQL is used as the database to store data, and PHP is used to write code to realize the interactive data between the web page and the database, so the above software needs to be downloaded, but the installation environment of the above software , configuration is very troublesome, so here I use a powerful website building integration software package---XAMPP,
(2) Database client software navigat
It is inconvenient and not straightforward enough to operate the database directly on the cmd command console. Of course, you can also directly use phpmyadmin to operate it (after installing the above xampp software package, enter 127.0 in the browser .0.1/phpmyadmin can be opened), but phpmyadmin is inconvenient to operate. Here we use the database client Navicat
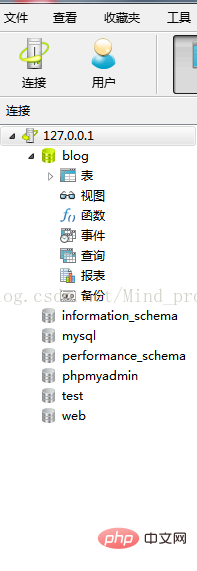
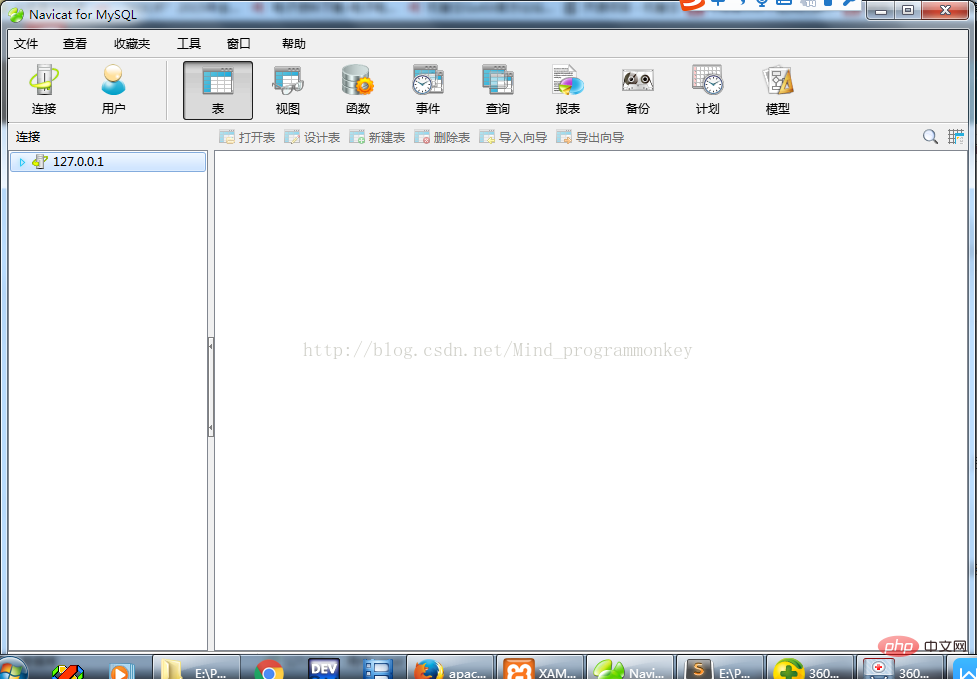 produced by Oracle. Click on the connection and enter the connection name. (Here I took it directly. The name of the IP address is 127.0.0.1), the host name and port number do not need to be changed, the user name and password here are. If you are using xampp, then the username is root and the password is empty; if you are not using xampp to install it, just log in according to the username and password you set. After filling in, click the connection test. If there are no problems, you can directly connect to the database.
## In addition, if you want to master the database, simply speaking any operation of the database, you must operate the SQL statement. In general, it is divided into four operations: increase Delete, modify and check.
①Add: Write data to the database
Statement: insert into users (`username`,`password`) values ('name','passwd')
(PS novices must pay attention to the `` symbol behind the users data table, which is a quotation mark above the tab key, and the one after values is a single quotation mark)
②Delete: Delete existing data
Statement: delete from users WHERE id='3'
③Change: Modify data
Statement: update set users username='new value', password='new value' WHERE id=3
④Check: Read data from the database
Statement: select * from users where id>1 order by id desc limit 0,2
(3) HTML web page writing tool sublime text
Sublime Text is a code editor (Sublime Text 2 is a paid software, but it can be tried indefinitely), and it is also an advanced text editor for HTML and prose. device. Sublime text has a beautiful user interface and powerful functions, which is very suitable for programmers who write code.
Using sublime text to write web page code, you can master this little trick, first create a new file, save the format as html web page format, and then in Open it in sublime text, enter html:4s and press the tab key to generate the general frame. Of course, if you want to use this shortcut key, you must follow the link I gave above and follow the steps to install the Emmet plug-in before you can use it. 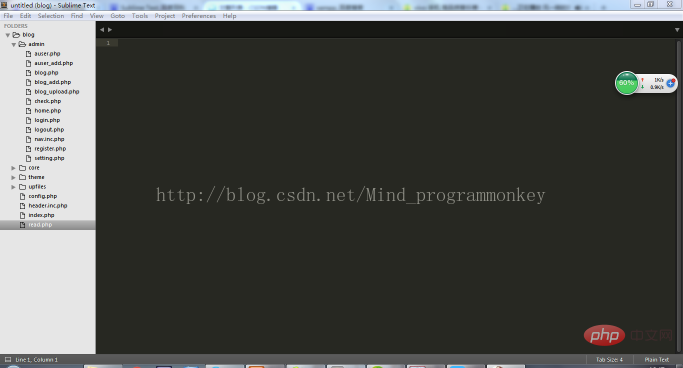
(
4)Configuration of website domain name
Generally speaking, when you open the URL 127.0.0.1 in the browser, it will be redirected to apache A URL in the default directory. Here I modify it and change it to the directory where I do the project, E:\PHP
\xampp\apache\conf , open the httpd.conf file, and change the path inside to the directory where you store the website. Here I changed it to DocumentRoot "E:/php
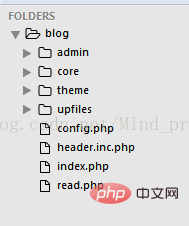
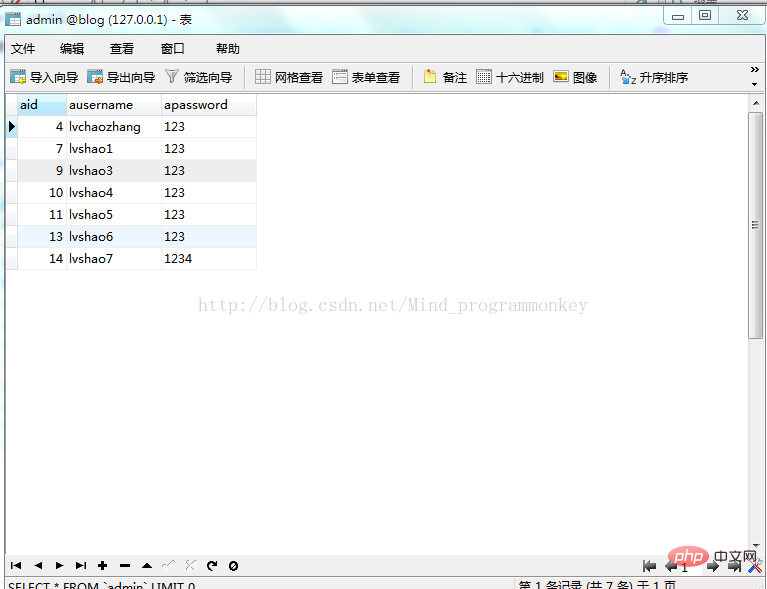
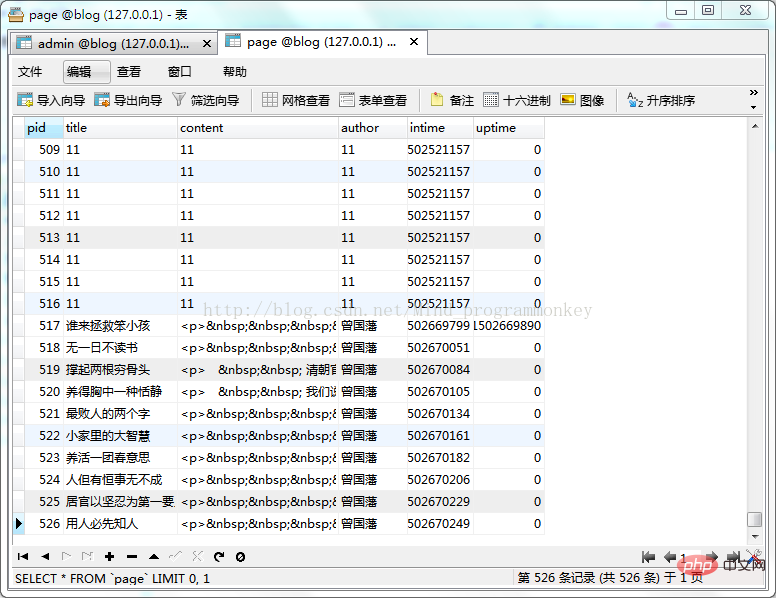
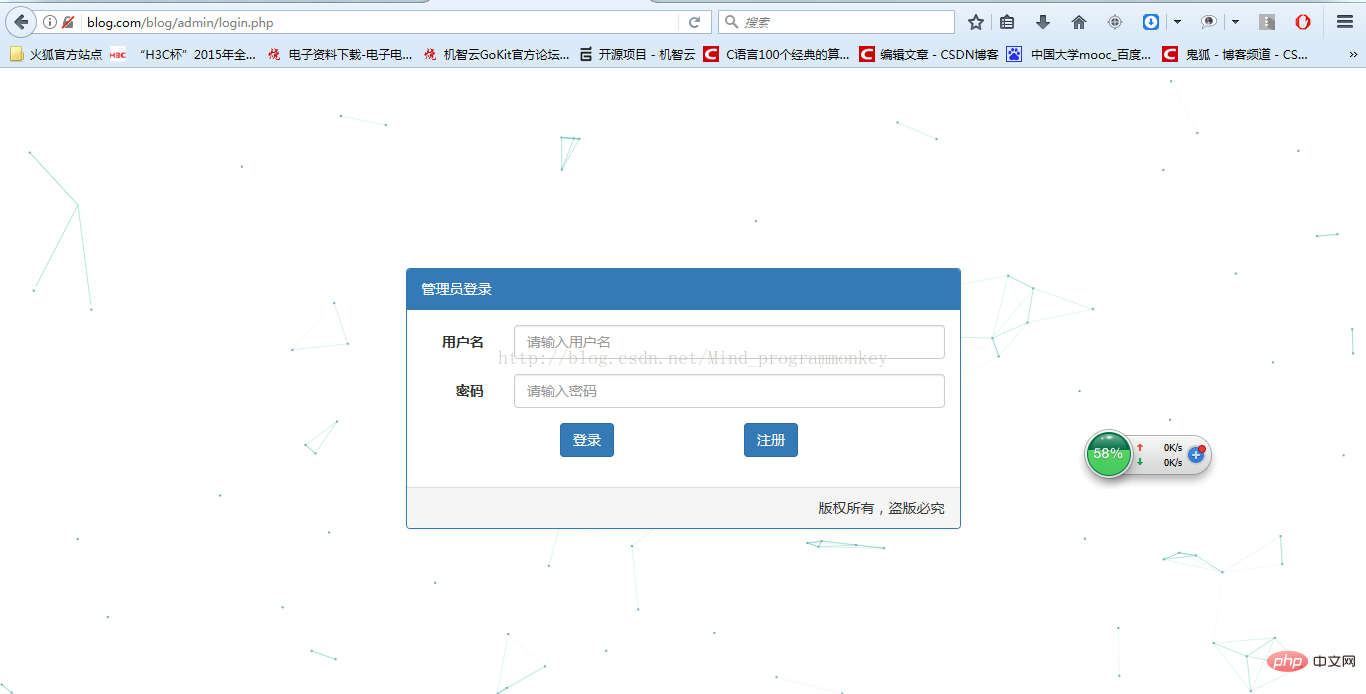
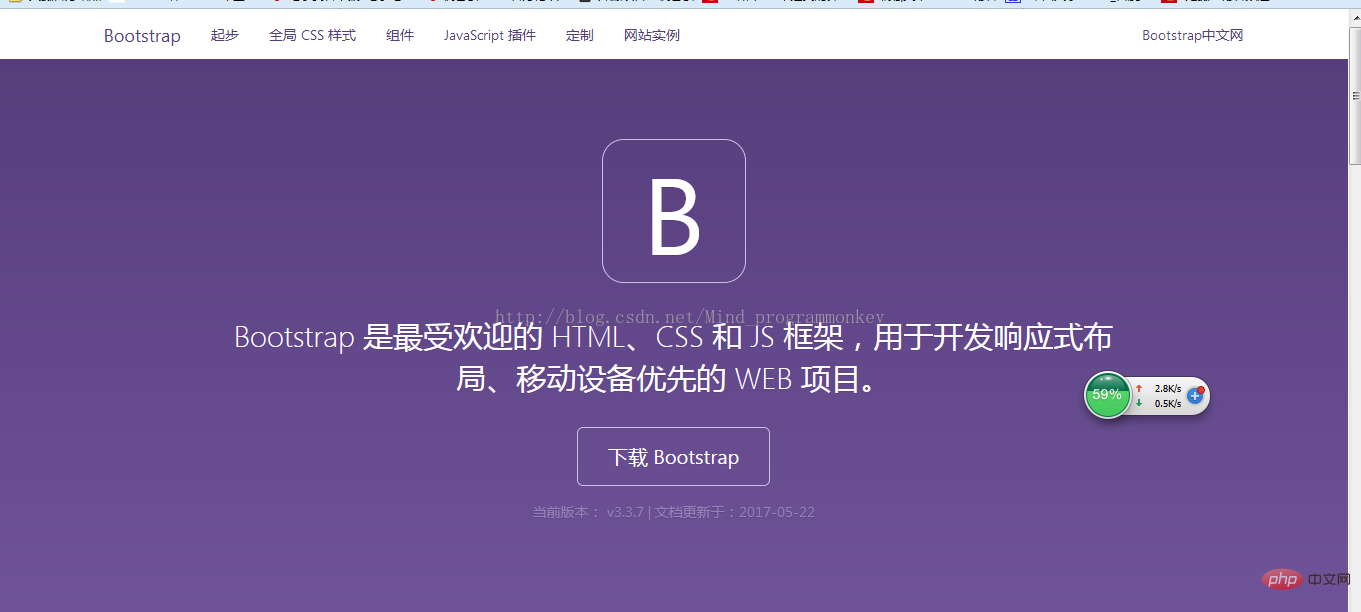
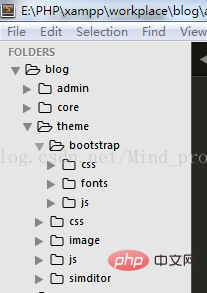
/xampp/workplace" Here you should pay attention to modify the path to your own directory according to your own download. Secondly, I also modified the 127.0.0.1 URL again to make its virtual domain name blog.com. After modification, after restarting, Enter blog.com in the browser, and the following scene will appear: Here I found the DNS configuration I modified, and I don’t know when I added a comment in front of it. , resulting in the inability to open it. Everyone should also pay attention to configuring the connection according to the connection I gave. If it cannot be opened, check the configuration file for errors. In short, the configuration environment and tools have been basically set up successfully. Next, I will start to explain the blog project. 2. Writing the blog website 1. Overall framework First of all, let me introduce my overall structure here Let me explain the framework so that everyone can get familiar with it first. Blog is the name of the project, the admin folder stores the background login file, the core folder stores the core files, and the theme folder stores the style files of the web page upfiles folder It stores the image information uploaded from the local to the server. Then the config.php file is the configuration file of the entire blog website. The header.inc.php loads a page style information. The index.php file is the homepage of the website. The read.php file It is a specific link to the article on the homepage of the website. The design of the database table is given here for your reference and study. Here I mainly created three tables. The admin representation is used to store background administrator registrations. And login data, that is, account and password: (1)Login interface (login.php) Regarding this page, I will give the source code here. The login page is actually a process of reading from the database. I mainly used bootstrap to design this login page. If you don’t understand, you can Baidu bootstrap, It contains various styles, components and JavaScript plug-ins, which can be said to be very useful. ## This is here to download Bootstrap, then press the file to press it to the file folder. I have given detailed explanations in both. Source code: 


<?php
/*
后台管理员登录窗口
*/
/*启动session服务,记录账号登录的cookies*/
session_start();
/*包含一个配置文件*/
include('../config.php');
if($input->get('do')=='check'){
/*获取页面提交的用户名和密码数据*/
$ausername=$input->post('ausername');
$apassword=$input->post('apassword');
/*查询页面提交的数据是否在数据库提供的数据存在的sql语句*/
$sql="select * from admin where ausername='{$ausername}' and apassword='{$apassword}' ";
/*数据库查询语句返回结果*/
$mysqli_result=$db->query($sql);
/*以数组形式存储数据库查询语句的返回结果*/
$row=$mysqli_result->fetch_array( MYSQLI_ASSOC);
/*如果row确实返回了结果,则将结果的aid存储在session里,并转向home.php文件*/
if(is_array($row)){
$_SESSION['aid']=$row['aid'];
header("location:home.php");
}else{
echo("账户或密码错误");
}
}
?>
<!--后台管理员登录界面></!-->
<!DOCTYPE HTML PUBLIC "-//W3C//DTD HTML 4.01//EN" "http://www.w3.org/TR/html4/strict.dtd">
<html lang="en">
<head>
<meta http-equiv="Content-Type" content="text/html;charset=UTF-8">
<title>管理员登录界面</title>
<!--加载包含bootstrap里css和javascript里的文件></!-->
<?php include(PATH . '/header.inc.php');?>
</head>
<body>
<!--最外面的container容器></!-->
<p class="container">
<!--bootstrap使用时建议使用一个row表格类,包含12个列></!-->
<p class="row" style="margin-top:200px;">
<!--距左边3个列></!-->
<p class="col-md-3"></p>
<!--中间部分占据6列></!-->
<p class="col-md-6" ">
<p class="panel panel-primary">
<!--登录头部分></!-->
<p class="panel-heading">管理员登录</p>
<!--登录的身体部分></!-->
<p class="panel-body">
<form class="form-horizontal" action="login.php?do=check" method="post">
<!--登录的用户名那一行></!-->
<p class="form-group">
<label for="inputEmail3" class="col-sm-2 control-label">用户名</label>
<p class="col-sm-10">
<input type="text" class="form-control" name="ausername" id="ausername" placeholder="请输入用户名" datatype="*3-10" errormsg="请输入长度 范围在3-10之间的昵称">
</p>
</p>
<!--登录的密码那一行></!-->
<p class="form-group">
<label for="inputEmail3" class="col-sm-2 control-label">密码</label>
<p class="col-sm-10">
<input type="password" class="form-control" name="apassword" id="apassword" placeholder="请输入密码">
</p>
</p>
<!--登录、注册那一行></!-->
<p class="form-group">
<p class="col-sm-3"></p>
<!--登录></!-->
<p class="col-sm-4">
<input type="submit" value="登录" class='btn btn-primary'>
</p>
<!--注册></!-->
<p class="col-sm-4">
<a href="register.php"><input type="button" value="注册" class="btn btn-primary"> </a>
</p>
</p>
</form>
</p>
<!--登录的尾部分></!-->
<p class="panel-footer text-right">版权所有,盗版必究</p>
</p>
</p>
<!--距离右边三列></!-->
<p class="col-md-3"></p>
</p>
</p>
<!--窗口背景的script加载></!-->
<script type="text/javascript">
window.onload = function() {
var config = {
vx : 4,
vy : 4,
height : 2,
width : 2,
count : 100,
color : "121, 162, 185",
stroke : "100, 200, 180",
dist : 6000,
e_dist : 20000,
max_conn : 10
}
CanvasParticle(config);
}
</script>
<script type="text/javascript" src="../theme/js/canvas-particle.js"></script>
</script>
</body>
</html>
(2) Registration interface (register.php)
The registration interface is actually a process of adding data to the database.Still give the source code, I gave a detailed explanation in the source code.
<?php
/*包含一个配置文件*/
include('../config.php');
if($input->get('do')=='check'){
/*获取用户页面注册传来的用户名和密码数据*/
$ausername=$input->post('ausername');
$apassword=$input->post('apassword');
$aconfirmpassword=$input->post('aconfirmpassword');
/*注册时的处理*/
if($apassword!=$aconfirmpassword){
echo "前后两次输入的密码不一致";
exit;
}
/*将用户填入的数据插入到数据库的sql语句*/
$sql="INSERT INTO admin(`ausername`,`apassword`) values('$ausername','$apassword')";
/*提交sql语句到数据库处理*/
$is=$db->query($sql);
/*判断是否注册成功*/
if($is){
echo "注册成功";
header("Location:login.php");
}else{
echo "注册失败";
}
}
?>
<!--后台管理员登录界面></!-->
<!DOCTYPE HTML PUBLIC "-//W3C//DTD HTML 4.01//EN" "http://www.w3.org/TR/html4/strict.dtd">
<html lang="en">
<head>
<meta http-equiv="Content-Type" content="text/html;charset=UTF-8">
<title>管理员注册界面</title>
<!--加载包含bootstrap里css和javascript里的文件></!-->
<?php include(PATH . '/header.inc.php');?>
</head>
<body>
<!--最外面的container容器></!-->
<p class="container">
<!--bootstrap使用时建议使用一个row表格类,包含12个列></!-->
<p class="row" style="margin-top:200px;">
<!--距左边3个列></!-->
<p class="col-md-3"></p>
<!--中间部分占据6列></!-->
<p class="col-md-6" ">
<p class="panel panel-primary">
<!--注册头部分></!-->
<p class="panel-heading">管理员注册</p>
<!--注册的身体部分></!-->
<p class="panel-body">
<form class="form-horizontal" action="register.php?do=check" method="post">
<!--注册的用户名那一行></!-->
<p class="form-group">
<label for="inputEmail3" class="col-sm-2 control-label">用户名</label>
<p class="col-sm-10">
<input type="text" class="form-control" name="ausername" id="ausername" placeholder="请输入用户名">
</p>
</p>
<!--注册的密码那一行></!-->
<p class="form-group">
<label for="inputEmail3" class="col-sm-2 control-label">密码</label>
<p class="col-sm-10">
<input type="password" class="form-control" name="apassword" id="apassword" placeholder="请输入密码">
</p>
</p>
<!--注册的密码确定那一行></!-->
<p class="form-group">
<label for="inputEmail3" class="col-sm-2 control-label">确认密码</label>
<p class="col-sm-10">
<input type="password" class="form-control" name="aconfirmpassword" id="aconfirmpassword" placeholder="请再次输入密码">
</p>
</p>
<!--提交注册那一行></!-->
<p class="form-group">
<p class="col-sm-4"></p>
<p class="col-sm-6">
<input type="submit" value="注册" class='btn btn-primary btn-lg btn-block'>
</p>
</p>
</form>
</p>
<!--登录的尾部分></!-->
<p class="panel-footer text-right">版权所有,盗版必究</p>
</p>
</p>
<!--距离右边三列></!-->
<p class="col-md-3"></p>
</p>
</p>
<!--窗口背景的script加载></!-->
<script type="text/javascript">
window.onload = function() {
var config = {
vx : 4,
vy : 4,
height : 2,
width : 2,
count : 100,
color : "121, 162, 185",
stroke : "100, 200, 180",
dist : 6000,
e_dist : 20000,
max_conn : 10
}
CanvasParticle(config);
}
</script>
<script type="text/javascript" src="../theme/js/canvas-particle.js"></script>
</script>
</body>
</html>  (
(
3)Backend management page (home.php)
In the source code, add the above The title part of the website has been taken out separately and made into a file (nav.inc.php). The source code is also given here for your study and reference.
home.php source code
<?php /* 后台管理员登录之后php控制端 */ include ('check.php'); ?> <!--后台管理员登录之后的界面<>/!--> <!DOCTYPE HTML PUBLIC "-//W3C//DTD HTML 4.01//EN" "http://www.w3.org/TR/html4/strict.dtd"> <html lang="en"> <head> <meta http-equiv="Content-Type" content="text/html;charset=UTF-8"> <title>管理员登录</title> <?php include(PATH . '/header.inc.php');?> <!--所有的页面都需加载这个文件></!--> </head> <body> <?php include('nav.inc.php');?> <!--管理员登录页面的标题部分></!--> </body> </html>
<!--后台管理界面的上方标题></!--> <nav class="navbar navbar-default" role="navigation"> <p class="container-fluid"> <!-- Brand and toggle get grouped for better mobile display --> <p class="navbar-header"> <button type="button" class="navbar-toggle collapsed" data-toggle="collapse" data-target="#bs-example-navbar-collapse-1" aria-expanded="false"> <span class="sr-only">Toggle navigation</span> <span class="icon-bar"></span> <span class="icon-bar"></span> <span class="icon-bar"></span> </button> <a class="navbar-brand" href="home.php">ADMIN</a> </p> <!-- Collect the nav links, forms, and other content for toggling --> <p class="collapse navbar-collapse" id="bs-example-navbar-collapse-1"> <ul class="nav navbar-nav"> <li ><a href="blog.php">博客管理 <span class="sr-only">(current)</span></a></li> <li><a href="auser.php">管理员管理</a></li> <li><a href="setting.php">系统管理</a></li> </ul> <ul class="nav navbar-nav navbar-right"> <li class="dropdown"> <a href="#" class="dropdown-toggle" data-toggle="dropdown" role="button" aria-haspopup="true" aria-expanded="false"> <?php echo $session_user['ausername'];?> <span class="caret"></span></a> <!--输出此时登录的账户名></!--> <ul class="dropdown-menu"> <li><a href="logout.php">退出</a></li> </ul> </li> </ul> </p><!-- /.navbar-collapse --> </p><!-- /.container-fluid --> </nav>
(
4)Blog management interface (blog.php)
There are three functions here, modify, delete, and add blog interface. Below I will list the add blog interface separately
( 5) Add blog interface (blog_add.php)

在这里这个编辑器如果需要图片上传功能的话,需要在文件中设置,这个文件设置为(blog_uopload.php)
blog_add.php源码
<?php
/*后台除去管理员登录界面,均需加载这个文件,来验证该页面管理员是否登录*/
include ('check.php');
/*取出传来的pid从而判断是添加还是修改操作*/
$pid=$input->get('pid');
/*初始化page,为了区别添加还是修改操作*/
$page=array(
'title' => '',
'author' => '',
'content' => '',
);
/*如果pid大于0,可以得出并不是添加操作,而是修改操作*/
if($pid>0){
$sql="select * from page where pid ='{$pid}' ";
$res=$db->query($sql);
$page=$res->fetch_array(MYSQLI_ASSOC);
}
/*对于添加操作操作而言,账户或密码不能为空*/
if($input->get('do')=='add'){
$title=$input->post('title');
$author=$input->post('author');
$content=$input->post('content');
if(empty($title)||empty($author)||empty($content)){
echo("数据不能为空");
}
/*如果aid大于1,则得出更新操作,否则执行添加操作*/
if($pid>0){
$uptime=time();
$sqlTpl="UPDATE page set title='%s',author='%s',content='%s',uptime='%d' where pid='%d' ";
$sql=sprintf($sqlTpl,$title,$author,$content,$uptime,$pid);
}
else{
$intime=time();
$sqlTpl="INSERT INTO page(`title`,`author`,`content`,`intime`,`uptime`) values('%s','%s','%s','%d','%d')";
$sql=sprintf($sqlTpl,$title,$author,$content,$intime,0);
}
/*判断是否有结果*/
$is=$db->query($sql);
if($is){
header("location:blog.php");
}else{
echo "执行失败";
}
}
?>
<!--管理员添加博客或修改博客的界面<>/!-->
<!DOCTYPE HTML PUBLIC "-//W3C//DTD HTML 4.01//EN" "http://www.w3.org/TR/html4/strict.dtd">
<html lang="en">
<head>
<meta http-equiv="Content-Type" content="text/html;charset=UTF-8">
<title>添加博客</title>
<?php include(PATH . '/header.inc.php');?>
<!--加载simiditor编辑器的文件></!-->
<link rel="stylesheet" type="text/css" href="../theme/simditor/styles/simditor.css" />
<script type="text/javascript" src="../theme/simditor/scripts/module.js"></script>
<script type="text/javascript" src="../theme/simditor/scripts/hotkeys.js"></script>
<script type="text/javascript" src="../theme/simditor/scripts/uploader.js"></script>
<script type="text/javascript" src="../theme/simditor/scripts/simditor.js"></script>
</head>
<body>
<?php include('nav.inc.php');?>
<p class="container">
<h2> 博客管理 <small class="pull-right"><a class='btn btn-default' href="blog.php">返回</a></small></h2>
<hr/>
<p class="rows">
<form class="form-horizontal" role="form" action="blog_add.php?do=add&pid=<?php echo $pid;?>" method="post">
<p class="form-group">
<label for="inputEmail3" class="col-sm-2 control-label">标题</label>
<p class="col-sm-6">
<input type="text" class="form-control" name="title" placeholder="请输入标题" value='<?php echo $page['title'];?>'>
</p>
</p>
<p class="form-group">
<label for="inputPassword3" class="col-sm-2 control-label">作者</label>
<p class="col-sm-4">
<input type="text" class="form-control" name="author" placeholder="请输入作者" value='<?php echo $page['author'];?>' >
</p>
</p>
<p class="form-group">
<label for="inputPassword3" class="col-sm-2 control-label">正文</label>
<p class="col-sm-8">
<textarea id="content" name="content" class="form-control"><?php echo $page['content'];?></textarea>
<!--在script中初始化编辑器,在这里注意script里加载的textarea的ID要与上方textarea的id号一致></!-->
<script>
var editor = new Simditor({
textarea: $('#content'),
upload:{
url:'blog_upload.php',
fileKey:'file1'
}
//optional options
});
</script>
</p>
</p>
<p class="form-group">
<p class="col-sm-offset-2 col-sm-6">
<button type="submit" class="btn btn-default">提交</button>
</p>
</p>
</form>
</p>
</p>
</body>
</html>blog_upload.php源码
<?php
/*后台除去管理员登录界面,均需加载这个文件,来验证该页面管理员是否登录*/
include('check.php');
/*将文件上传到服务器的目录里*/
$key='file1';
$dir='../upfiles/';
if(isset($_FILES[$key])){
$file=$_FILES[$key];
if($file['error']==0){
/*文件所处服务器的目录*/
$pathName=$dir . $file['name'];
/*文件所在服务器的网址*/
$urlName='http://blog.com/blog/upfiles' . $file['name'];
$is=move_uploaded_file($file['tmp_name'], $pathName);
/*判断是否移动成功*/
if(!$is){
die("上传失败");
}
/*编辑器来判断是否成功上传图片*/
$json=array(
'success' => true,
'msg' => '',
'file_path'=>$urlName
);
echo json_encode($json);
}
}
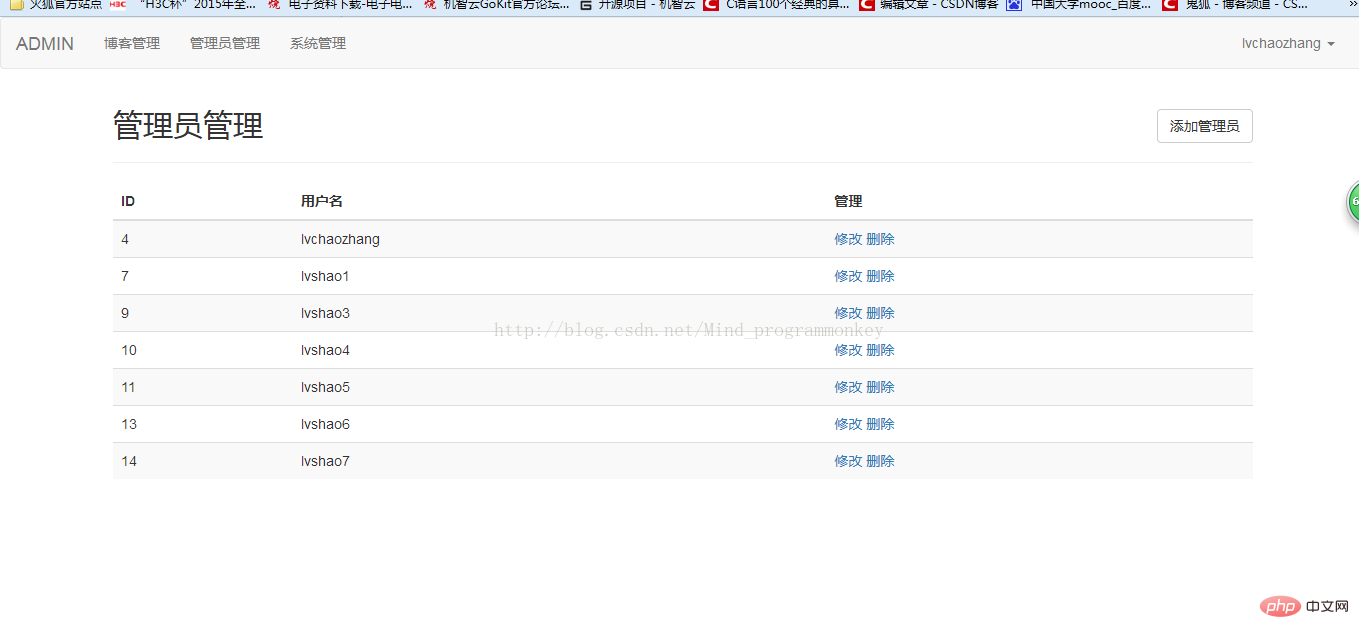
?>(6)管理员管理界面(auser.php)
这里还是有三个功能,修改、删除和添加,这里我就不单独一一列出来了,具体可参考文末给出的源码
(7)系统管理界面
系统管理可以在这里设置标题、介绍和博客每页的显示数量

3.主界面(index.php)
这里是游客访问的主界面,这里给出源码大家作为参考,
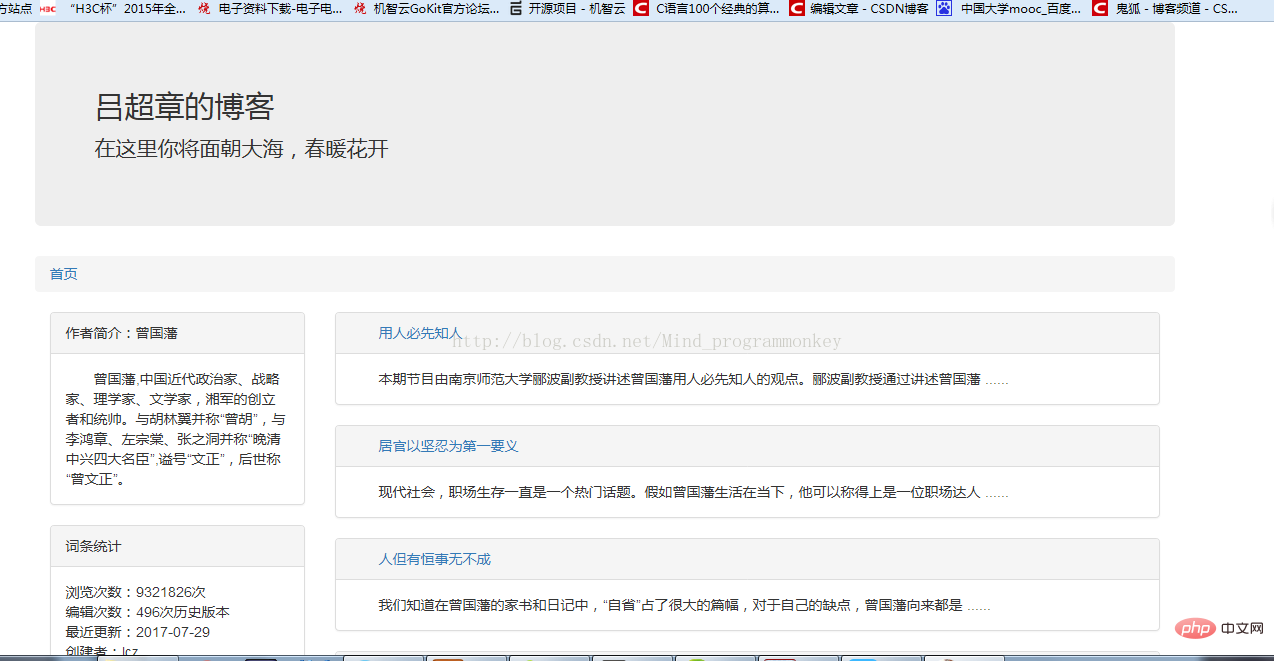
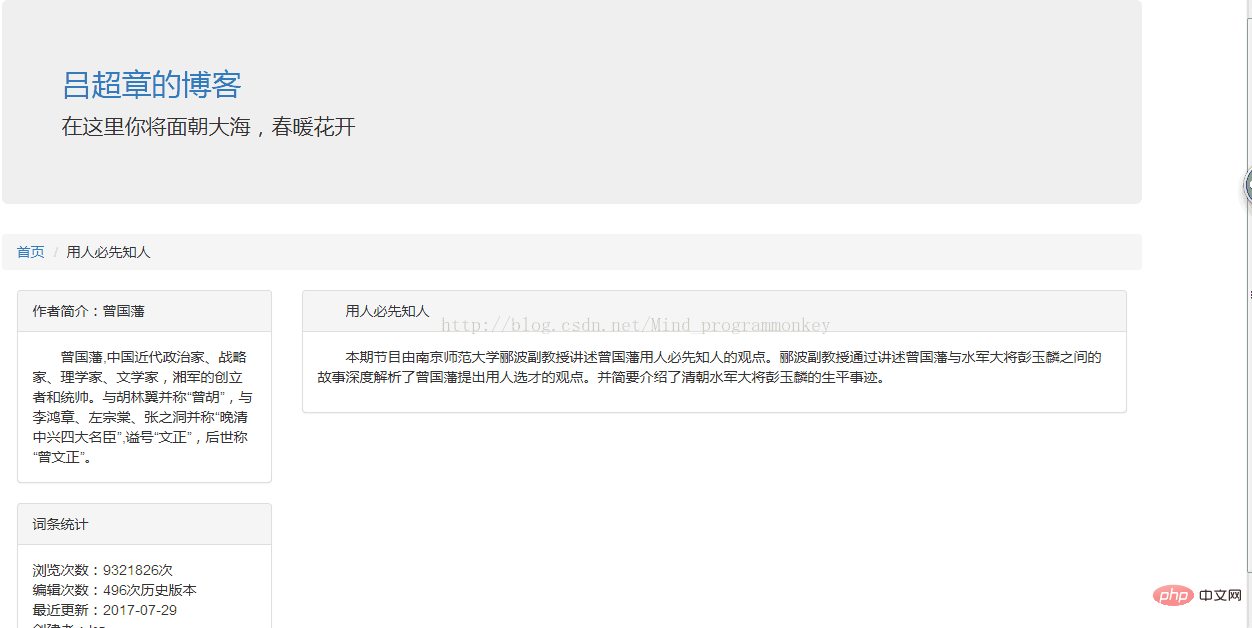
阅读界面(read.php)
当你想阅读该文章时,可点击标题进入阅读页,进行阅读,同样给出源码,作为参考
推荐学习:《PHP视频教程》
The above is the detailed content of How to quickly create dynamic web pages through html+css+mysql+php. For more information, please follow other related articles on the PHP Chinese website!

Hot AI Tools

Undresser.AI Undress
AI-powered app for creating realistic nude photos

AI Clothes Remover
Online AI tool for removing clothes from photos.

Undress AI Tool
Undress images for free

Clothoff.io
AI clothes remover

Video Face Swap
Swap faces in any video effortlessly with our completely free AI face swap tool!

Hot Article
Hot Tools

Notepad++7.3.1
Easy-to-use and free code editor

SublimeText3 Chinese version
Chinese version, very easy to use

Zend Studio 13.0.1
Powerful PHP integrated development environment

Dreamweaver CS6
Visual web development tools

SublimeText3 Mac version
God-level code editing software (SublimeText3)
Hot Topics
 1655
1655
 14
1413
52
1306
25
1252
29
1226
24
14
1413
52
1306
25
1252
29
1226
24

 MySQL and phpMyAdmin: Core Features and Functions
Apr 22, 2025 am 12:12 AM
MySQL and phpMyAdmin: Core Features and Functions
Apr 22, 2025 am 12:12 AM
MySQL and phpMyAdmin are powerful database management tools. 1) MySQL is used to create databases and tables, and to execute DML and SQL queries. 2) phpMyAdmin provides an intuitive interface for database management, table structure management, data operations and user permission management.
 HTML vs. CSS and JavaScript: Comparing Web Technologies
Apr 23, 2025 am 12:05 AM
HTML vs. CSS and JavaScript: Comparing Web Technologies
Apr 23, 2025 am 12:05 AM
HTML, CSS and JavaScript are the core technologies for building modern web pages: 1. HTML defines the web page structure, 2. CSS is responsible for the appearance of the web page, 3. JavaScript provides web page dynamics and interactivity, and they work together to create a website with a good user experience.
 Which 2025 currency exchanges are more secure?
Apr 20, 2025 pm 06:09 PM
Which 2025 currency exchanges are more secure?
Apr 20, 2025 pm 06:09 PM
The top ten safe and reliable exchanges in the 2025 cryptocurrency circle include: 1. Binance, 2. OKX, 3. Gate.io (Sesame Open), 4. Coinbase, 5. Kraken, 6. Huobi Global, 7. Gemini, 8. Crypto.com, 9. Bitfinex, 10. KuCoin. These exchanges are rated as safe and reliable based on compliance, technical strength and user feedback.
 The Compatibility of IIS and PHP: A Deep Dive
Apr 22, 2025 am 12:01 AM
The Compatibility of IIS and PHP: A Deep Dive
Apr 22, 2025 am 12:01 AM
IIS and PHP are compatible and are implemented through FastCGI. 1.IIS forwards the .php file request to the FastCGI module through the configuration file. 2. The FastCGI module starts the PHP process to process requests to improve performance and stability. 3. In actual applications, you need to pay attention to configuration details, error debugging and performance optimization.
 Explain the purpose of foreign keys in MySQL.
Apr 25, 2025 am 12:17 AM
Explain the purpose of foreign keys in MySQL.
Apr 25, 2025 am 12:17 AM
In MySQL, the function of foreign keys is to establish the relationship between tables and ensure the consistency and integrity of the data. Foreign keys maintain the effectiveness of data through reference integrity checks and cascading operations. Pay attention to performance optimization and avoid common errors when using them.
 SQL vs. MySQL: Clarifying the Relationship Between the Two
Apr 24, 2025 am 12:02 AM
SQL vs. MySQL: Clarifying the Relationship Between the Two
Apr 24, 2025 am 12:02 AM
SQL is a standard language for managing relational databases, while MySQL is a database management system that uses SQL. SQL defines ways to interact with a database, including CRUD operations, while MySQL implements the SQL standard and provides additional features such as stored procedures and triggers.
 Compare and contrast MySQL and MariaDB.
Apr 26, 2025 am 12:08 AM
Compare and contrast MySQL and MariaDB.
Apr 26, 2025 am 12:08 AM
The main difference between MySQL and MariaDB is performance, functionality and license: 1. MySQL is developed by Oracle, and MariaDB is its fork. 2. MariaDB may perform better in high load environments. 3.MariaDB provides more storage engines and functions. 4.MySQL adopts a dual license, and MariaDB is completely open source. The existing infrastructure, performance requirements, functional requirements and license costs should be taken into account when choosing.
 How to import the source code of wordpress
Apr 20, 2025 am 11:24 AM
How to import the source code of wordpress
Apr 20, 2025 am 11:24 AM
Importing WordPress source code requires the following steps: Create a sub-theme for theme modification. Import the source code and overwrite the files in the sub-topic. Activate the sub-theme to make it effective. Test the changes to make sure everything works.
