

How to implement a simple GET request in Nodejs

This article will introduce to you Node.jsHow to implement a simple GET request. It has certain reference value. Friends in need can refer to it. I hope it will be helpful to everyone.

[Recommended study: "nodejs Tutorial"]
The identification of GET requests is very simple, it is the URL. To identify, use url.parse(req.url,true).query
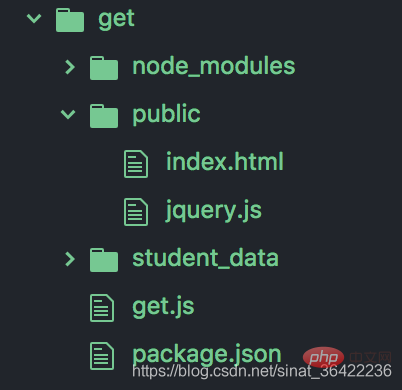
Let’s take a look at the directory first
##public The index.html file under <!DOCTYPE html>
<html>
<head>
<meta charset="UTF-8">
<meta name="viewport" content="width=device-width, initial-scale=1.0">
<meta http-equiv="X-UA-Compatible" content="ie=edge">
<title>Document</title>
</head>
<body>
<div>
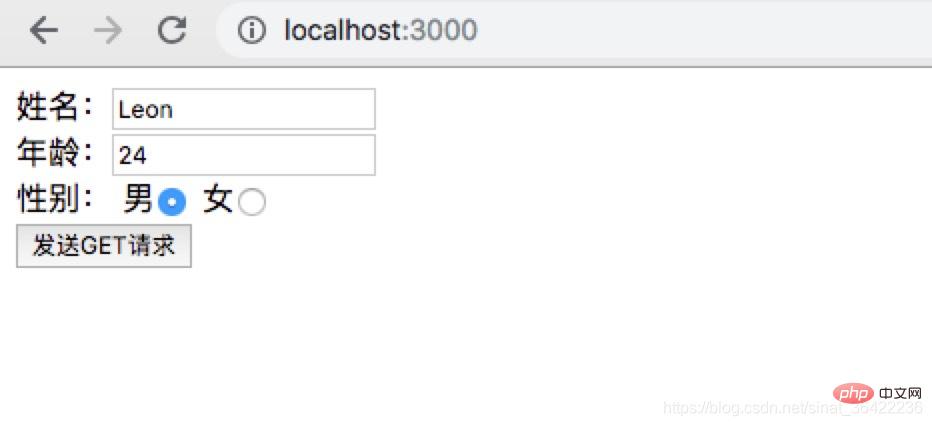
<span>姓名:</span><input type="text" name="name" value="">
</div>
<div>
<span>年龄:</span><input type="text" name="age" value="">
</div>
<div>
<span>性别:</span> <span>男</span><input type="radio" name="sex" value="男">
<span>女</span><input type="radio" name="sex" value="女">
</div>
<div>
<button id="btn">发送GET请求</button>
</div>
<script type="text/javascript" src="./jquery.js"></script>
<script>
$('#btn').click(() => {
//读取表单
var name = $('input[name=name]').val();
var age = $('input[name=age]').val();
var sex = $('input[name=sex]:checked').val();
//发送请求
$.get('/addStudent',{
name,
age,
sex
},(data) => {
if(data == 'ok'){
alert('恭喜,添加成功!');
}else{
alert('对不起,服务器错误');
}
})
})
</script>
</body>
</html>Copy after login
<!DOCTYPE html>
<html>
<head>
<meta charset="UTF-8">
<meta name="viewport" content="width=device-width, initial-scale=1.0">
<meta http-equiv="X-UA-Compatible" content="ie=edge">
<title>Document</title>
</head>
<body>
<div>
<span>姓名:</span><input type="text" name="name" value="">
</div>
<div>
<span>年龄:</span><input type="text" name="age" value="">
</div>
<div>
<span>性别:</span> <span>男</span><input type="radio" name="sex" value="男">
<span>女</span><input type="radio" name="sex" value="女">
</div>
<div>
<button id="btn">发送GET请求</button>
</div>
<script type="text/javascript" src="./jquery.js"></script>
<script>
$('#btn').click(() => {
//读取表单
var name = $('input[name=name]').val();
var age = $('input[name=age]').val();
var sex = $('input[name=sex]:checked').val();
//发送请求
$.get('/addStudent',{
name,
age,
sex
},(data) => {
if(data == 'ok'){
alert('恭喜,添加成功!');
}else{
alert('对不起,服务器错误');
}
})
})
</script>
</body>
</html>package.json file
installs these two dependencies (execute these two commands first)npm install finalhandler --saveThen automatically generate the following package.json filenpm install serve-static --save
{
  "dependencies": {
    "finalhandler": "^1.1.1",
    "serve-static": "^1.13.2"
  }
}The most important get.js//这个案例展示get请求参数如何获得
var finalhandler = require('finalhandler')
var serveStatic = require('serve-static')//之前安装的两个依赖
var http = require('http')
var url = require('url')
var fs = require('fs')//node内置模块
// Serve up public/ftp folder
//配置静态资源服务器,将public文件夹静态化出来
var serve = serveStatic('public', {'index': ['index.html', 'index.htm']})
// Create server
var server = http.createServer(function onRequest (req, res) {
//路由
var pathname = url.parse(req.url).pathname;
if(pathname == '/addStudent'){
//拿到GET请求参数,就是拿到地址栏中的东西。
var queryJSON = url.parse(req.url,true).query;
var data = `姓名:${queryJSON.name}\r\n年龄:${queryJSON.age}\r\n性别:${queryJSON.sex}\r\n`;
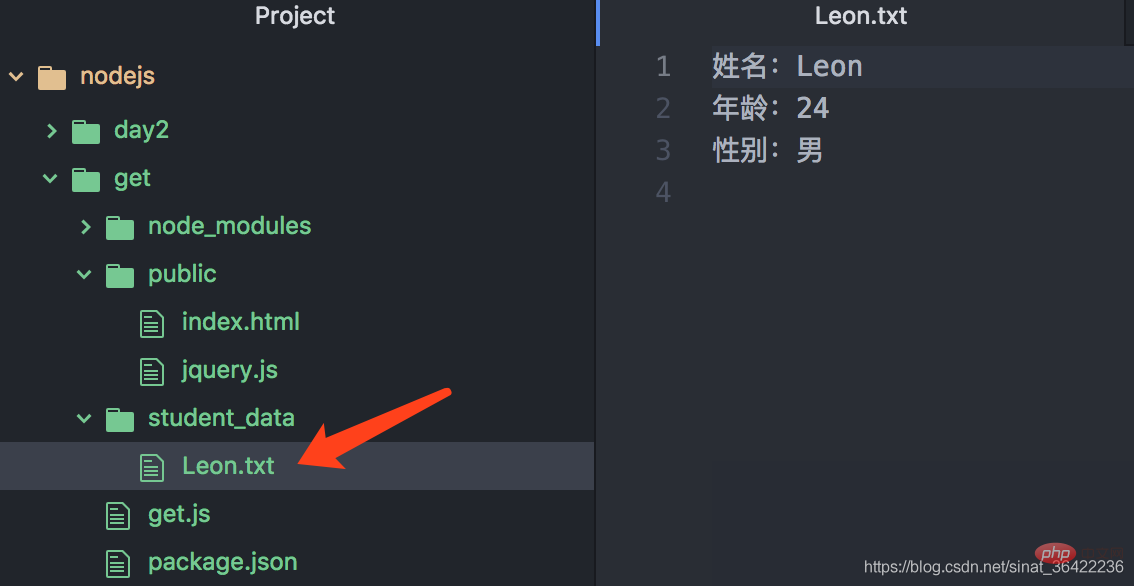
fs.writeFile(`./student_data/${queryJSON.name}.txt`,data,(err) => {//判断如果是addStudent这个接口,会获得数据后自动生成一个txt文件
//console.log(err);
//返回状态码
if(err){
res.end('cuowu');
}else{
res.end('ok');
}
})
return;
}
serve(req, res, finalhandler(req, res))
})
// Listen
server.listen(3000)Copy after login
//这个案例展示get请求参数如何获得
var finalhandler = require('finalhandler')
var serveStatic = require('serve-static')//之前安装的两个依赖
var http = require('http')
var url = require('url')
var fs = require('fs')//node内置模块
// Serve up public/ftp folder
//配置静态资源服务器,将public文件夹静态化出来

var serve = serveStatic('public', {'index': ['index.html', 'index.htm']})

// Create server
var server = http.createServer(function onRequest (req, res) {
    //路由
    var pathname = url.parse(req.url).pathname;
    if(pathname == '/addStudent'){
        //拿到GET请求参数,就是拿到地址栏中的东西。
        var queryJSON = url.parse(req.url,true).query;
        var data = `姓名:${queryJSON.name}\r\n年龄:${queryJSON.age}\r\n性别:${queryJSON.sex}\r\n`;
        fs.writeFile(`./student_data/${queryJSON.name}.txt`,data,(err) => {//判断如果是addStudent这个接口,会获得数据后自动生成一个txt文件
            //console.log(err);
            //返回状态码
            if(err){
                res.end('cuowu');
            }else{
                res.end('ok');
            }
        })
        return;
    }
    serve(req, res, finalhandler(req, res))
})

// Listen
server.listen(3000)The last step is to open your terminal, find the directory where get.js is located and thennode get.js
Copy after loginThis small project will It will run on your 3000 port
node get.js
The data is stored in this folder
programming video! !
The above is the detailed content of How to implement a simple GET request in Nodejs. For more information, please follow other related articles on the PHP Chinese website!

Hot AI Tools

Undresser.AI Undress
AI-powered app for creating realistic nude photos

AI Clothes Remover
Online AI tool for removing clothes from photos.

Undress AI Tool
Undress images for free

Clothoff.io
AI clothes remover

Video Face Swap
Swap faces in any video effortlessly with our completely free AI face swap tool!

Hot Article
Hot Tools

Notepad++7.3.1
Easy-to-use and free code editor

SublimeText3 Chinese version
Chinese version, very easy to use

Zend Studio 13.0.1
Powerful PHP integrated development environment

Dreamweaver CS6
Visual web development tools

SublimeText3 Mac version
God-level code editing software (SublimeText3)
Hot Topics
 1666
1666
 14
1425
52
1328
25
1273
29
1253
24
14
1425
52
1328
25
1273
29
1253
24

 Detailed graphic explanation of the memory and GC of the Node V8 engine
Mar 29, 2023 pm 06:02 PM
Detailed graphic explanation of the memory and GC of the Node V8 engine
Mar 29, 2023 pm 06:02 PM
This article will give you an in-depth understanding of the memory and garbage collector (GC) of the NodeJS V8 engine. I hope it will be helpful to you!
 An article about memory control in Node
Apr 26, 2023 pm 05:37 PM
An article about memory control in Node
Apr 26, 2023 pm 05:37 PM
The Node service built based on non-blocking and event-driven has the advantage of low memory consumption and is very suitable for handling massive network requests. Under the premise of massive requests, issues related to "memory control" need to be considered. 1. V8’s garbage collection mechanism and memory limitations Js is controlled by the garbage collection machine
 Let's talk about how to choose the best Node.js Docker image?
Dec 13, 2022 pm 08:00 PM
Let's talk about how to choose the best Node.js Docker image?
Dec 13, 2022 pm 08:00 PM
Choosing a Docker image for Node may seem like a trivial matter, but the size and potential vulnerabilities of the image can have a significant impact on your CI/CD process and security. So how do we choose the best Node.js Docker image?
 Node.js 19 is officially released, let's talk about its 6 major features!
Nov 16, 2022 pm 08:34 PM
Node.js 19 is officially released, let's talk about its 6 major features!
Nov 16, 2022 pm 08:34 PM
Node 19 has been officially released. This article will give you a detailed explanation of the 6 major features of Node.js 19. I hope it will be helpful to you!
 Let's talk in depth about the File module in Node
Apr 24, 2023 pm 05:49 PM
Let's talk in depth about the File module in Node
Apr 24, 2023 pm 05:49 PM
The file module is an encapsulation of underlying file operations, such as file reading/writing/opening/closing/delete adding, etc. The biggest feature of the file module is that all methods provide two versions of **synchronous** and **asynchronous**, with Methods with the sync suffix are all synchronization methods, and those without are all heterogeneous methods.
 Let's talk about the event loop in Node
Apr 11, 2023 pm 07:08 PM
Let's talk about the event loop in Node
Apr 11, 2023 pm 07:08 PM
The event loop is a fundamental part of Node.js and enables asynchronous programming by ensuring that the main thread is not blocked. Understanding the event loop is crucial to building efficient applications. The following article will give you an in-depth understanding of the event loop in Node. I hope it will be helpful to you!
 Let's talk about how to use pkg to package Node.js projects into executable files.
Dec 02, 2022 pm 09:06 PM
Let's talk about how to use pkg to package Node.js projects into executable files.
Dec 02, 2022 pm 09:06 PM
How to package nodejs executable file with pkg? The following article will introduce to you how to use pkg to package a Node project into an executable file. I hope it will be helpful to you!
 What should I do if node cannot use npm command?
Feb 08, 2023 am 10:09 AM
What should I do if node cannot use npm command?
Feb 08, 2023 am 10:09 AM
The reason why node cannot use the npm command is because the environment variables are not configured correctly. The solution is: 1. Open "System Properties"; 2. Find "Environment Variables" -> "System Variables", and then edit the environment variables; 3. Find the location of nodejs folder; 4. Click "OK".
