

How to upload ID card in uniapp

Uniapp implements the method of uploading ID cards: first open the upload ID card page; then install the Dcloud plug-in market template; then integrate it into your own project, modify and use it according to the requirements of the project; finally introduce the plug-in "pathToBase64" , and convert the image path to base64.

The operating environment of this tutorial: windows7 system, uni-app2.5.1 version, Dell G3 computer.
Recommended (free): uni-app tutorial
uniapp-app uploads the photo of the document (ID card/bank card) and then converts it to base64 and sends it to the background function to implement
Function description:
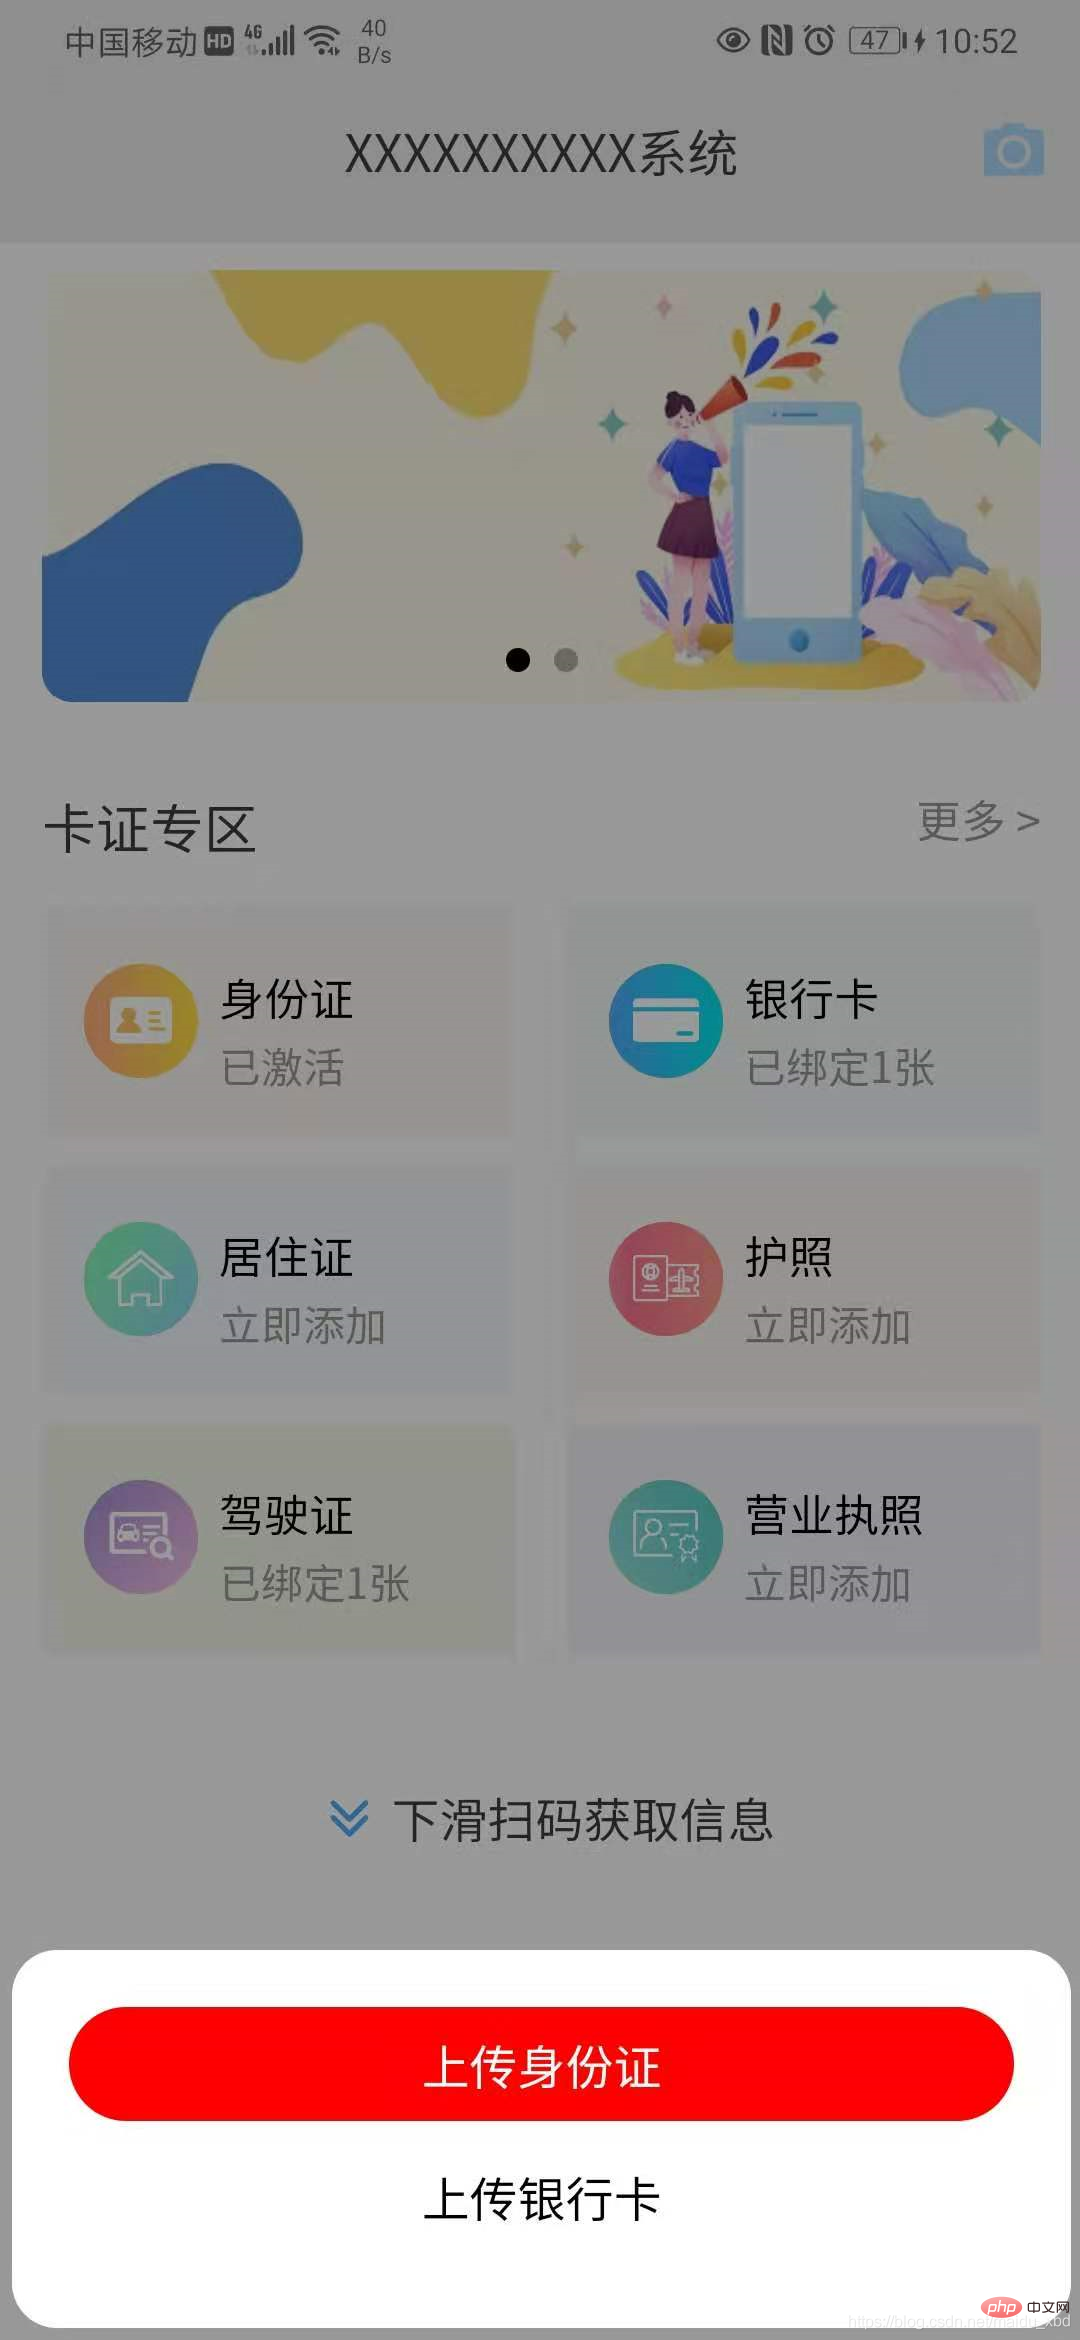
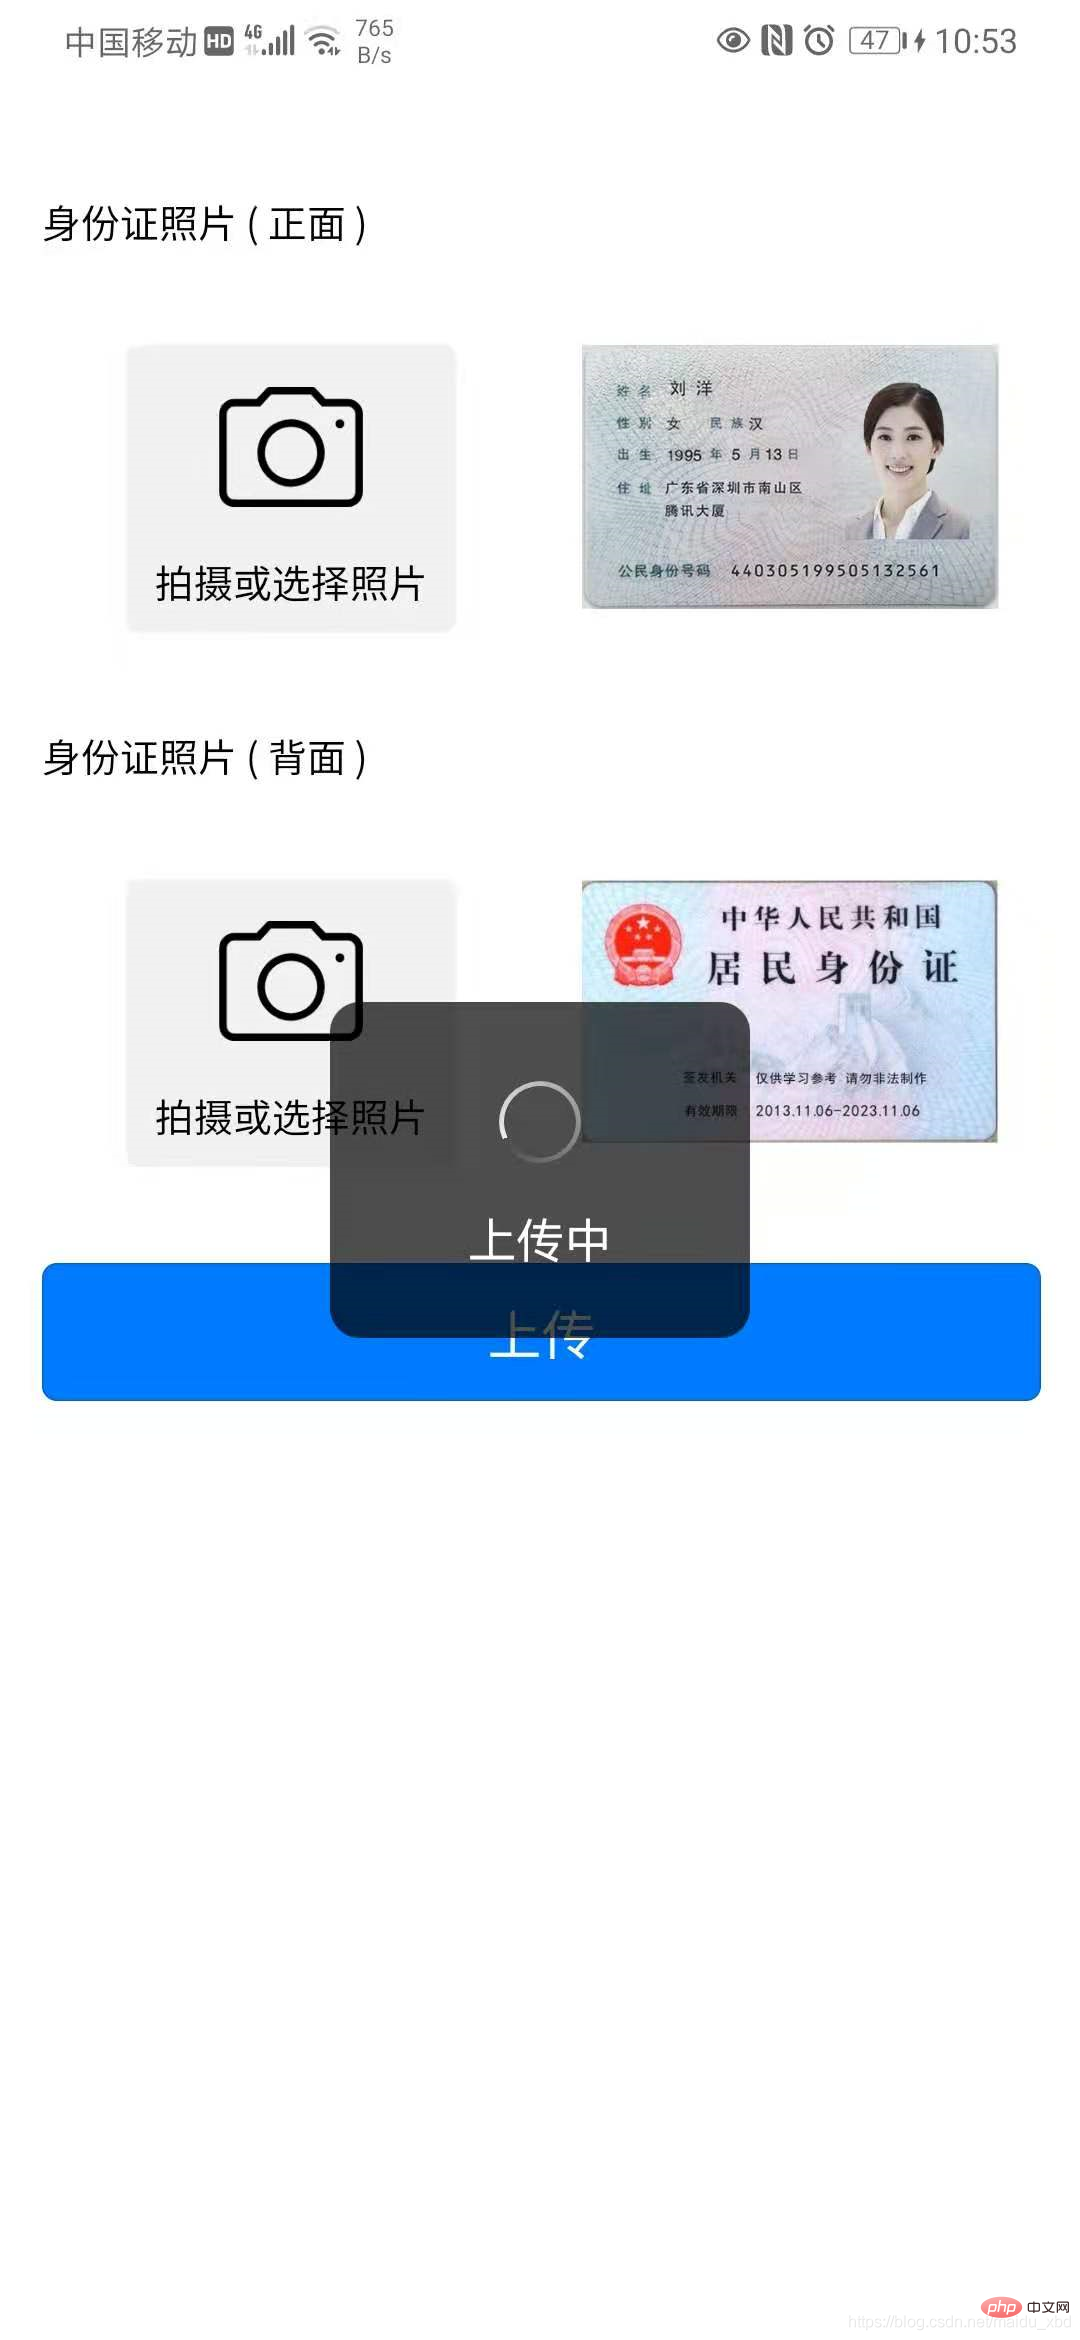
As shown below, click the icon in the upper right corner of the homepage to display a pop-up box. Click to select "Upload ID Card" or "Bank Card". After selecting the certificate and photo, click the upload button to upload the image. Upload to the background for OCR recognition.

Solution:
Key points 1. Implementation of the interface for uploading certificates; 2. Convert the image URL to base64 for processing.
The specific implementation steps are as follows
(1) Click the button, click the icon in the upper right corner of the homepage to display a pop-up box, click to select "Upload ID Card" or "Bank Card", Jump to upload license page
template:
<view @click="upload" class="iconfont icon-paizhao2"></view>
<!-- 选择证件弹窗 -->
<uni-popup ref="cardpopup" type="bottom">
<view class="dialog" >
<view @click="selectItem(index)" :class="active==index ? 'active':''" v-for="(item,index) in cardTypeList" :key="index">
{{item.name}}
</view>
</view>
</uni-popup>data:
data(){
    return{
        cardTypeList:[{name:"上传身份证"},{name:"上传银行卡"}],
    }
}methods:
methods:{

    upload(){
				this.$refs.cardpopup.open()
			},
        //选择上传身份证/银行卡
	selectItem(index){
		this.active=index;
		if(index==0){
			// 选择上传身份证
			uni.navigateTo({
				url:"/pages/idcard/idcard"
			})
		}else{
			// 选择上传银行卡
			uni.navigateTo({
				url:"/pages/bankcard/bankcard"
			})
		}
	},

}style
<style lang="scss">
.dialog{
	background-color: #fff;
	padding:40rpx;
	border-radius: 15px;
	margin:10rpx;
	view{
		height: 80rpx;
		line-height: 80rpx;
		text-align: center;
		margin-bottom: 6px;
	}
	.active{
		background-color: red;
		border-radius: 80rpx;
		color:#fff;

	}
}
</style>(2)Implementation of uploading certificate interface: Install Dcloud plug-in market template graceUI [free interface] - ID card selection upload template
ps: GraceUI provides a wealth of Components, layouts and interface libraries, such as login and registration, personal center, avatar cropping, mall sets, etc., can be used directly, which greatly improves development efficiency. https://www.graceui.com/
(3) After installing the plug-in, integrate it into your own project, modify and use it according to the requirements of the project.
(4) Image URL conversion to base64 processing: Install the Dcloud plug-in market plug-in image-tools image conversion tool, which can be used for image and base64 conversion
Introduce the plug-in [pathToBase64] to convert the image path to base64
import { pathToBase64 } from '../../js_sdk/gsq-image-tools/image-tools/index.js'Use the plug-in to convert the image url to base64 after the image is uploaded, and save it
methods: {
		// 选择身份证正面照片
		selectImg1 : function() {
			uni.chooseImage({
				count:1,
				success:(res)=>{
					this.idCard1 = res.tempFilePaths[0];
					//将图片url转换为base64
					pathToBase64(res.tempFilePaths[0]).then(base64=>{
						// console.log(base64)
						this.idCard1base64=base64
					}).catch(error=>{
						console.log(error)
					})
				}
			})
		}
}Attach the bank card below The complete code for the upload page is similar to the code for uploading the ID card (it is recommended to encapsulate the uploading ID card function into a reusable component)
<template>
	<!-- 上传银行卡页面 -->
	<view>
		<view class="grace-idcard-main">
			<view class="grace-idcard-desc">
			</view>
			<view class="grace-idcard-text">
				银行卡照片 ( 正面 )
			</view>
			<view class="grace-idcard-items">
				<view class="grace-idcard-uper-btn" @tap="selectImg">
					<view class="img"><image src="../../static/images/camera.png" mode="widthFix" /></view>
					<view class="text">拍摄或选择照片</view>
				</view>
				<view class="grace-idcard-preview">
					<image :src="bankCard"  @tap="previewImg" mode="widthFix"></image>
				</view>
			</view>
			<view style="margin-top:38upx;">
				<button type="primary" @tap="uploadCards">上传</button>
			</view>
		</view>
	</view>
</template>
<script>
import { pathToBase64  } from '../../js_sdk/gsq-image-tools/image-tools/index.js'
var _self;
export default {
	data() {
		return {
			bankCard : '../../static/images/bankcard.jpg',
			bankCardBase64:null
		};
	},
	onLoad:function(){
		_self = this;
	},
	methods: {
		// 选择银行卡正面照片
		selectImg : function() {
			uni.chooseImage({
				count:1,
				success:(res)=>{
					this.bankCard = res.tempFilePaths[0];
					//将图片url转换为base64
					pathToBase64(res.tempFilePaths[0]).then(base64=>{
						this.bankCardBase64=base64
					}).catch(error=>{
						console.log(error)
					})
				}
			})
		},
		// 预览银行卡正面照片
		previewImg: function(){
			uni.previewImage({
				urls:[_self.bankCard]
			});
		},
		// 上传银行卡
		uploadCards : function(){
			if(this.bankCard == '../../static/images/bankcard.jpg'){
				uni.showToast({title:"请选择银行卡照片", icon:"none"});
				return;
			}
			uni.showLoading({title:"上传中"});
			var param={
				type:2,
				images:[
					{
						side:"front",
						image:this.bankCardBase64,
						orderNum:1
					}

				]
			}
			// 向后台发送请求
			this.$myRequest({
				url:"card/ocr",
				method:"POST",
				data:param
			}).then(res=>{
				console.log("上传银行卡返回结果:",res)
				if(res.data.respCode=="00000"){
					uni.hideLoading();
					uni.showToast({title:res.data.respDesc,icon:"none"})
					uni.navigateTo({
						url:"/pages/cardInfo/cardInfo?data="+JSON.stringify(res.data.result)
					})
				}else{
					uni.hideLoading();
					uni.showToast({title:res.data.respDesc,icon:"none"})
				}
			})
		}
	},
}
</script>
<style>
view{font-size:28upx;}
.grace-idcard-main{margin:20upx 30upx;}
.grace-idcard-desc{line-height:2em; background:#FFFFFF; padding:40upx; border-radius:10upx;}
.grace-idcard-text{line-height:2em; margin-top:30upx;}
.grace-idcard-items{background:#FFFFFF; padding:30upx 0; display:flex; margin:30upx 0; border-radius:10upx; align-items: flex-start;}
.grace-idcard-uper-btn{width:276upx; margin:0 60upx; background:#F1F1F1; padding-bottom:10upx; border-radius:10upx; text-align:center;}
.grace-idcard-uper-btn .img{width:100upx; height:100upx; margin:0 auto; margin-top:30upx;}
.grace-idcard-uper-btn .img image{width:100upx; height:100upx;}
.grace-idcard-uper-btn .text{width:100%; margin-top:10upx; text-align:center; line-height:2em;}
.grace-idcard-preview{width:50%; margin:0 30upx; }
.grace-idcard-preview image{width:100%; border-radius: 10rpx;}
</style>The above is the detailed content of How to upload ID card in uniapp. For more information, please follow other related articles on the PHP Chinese website!

Hot AI Tools

Undresser.AI Undress
AI-powered app for creating realistic nude photos

AI Clothes Remover
Online AI tool for removing clothes from photos.

Undress AI Tool
Undress images for free

Clothoff.io
AI clothes remover

Video Face Swap
Swap faces in any video effortlessly with our completely free AI face swap tool!

Hot Article
Hot Tools

Notepad++7.3.1
Easy-to-use and free code editor

SublimeText3 Chinese version
Chinese version, very easy to use

Zend Studio 13.0.1
Powerful PHP integrated development environment

Dreamweaver CS6
Visual web development tools

SublimeText3 Mac version
God-level code editing software (SublimeText3)
Hot Topics
 1666
1666
 14
1426
52
1328
25
1273
29
1253
24
14
1426
52
1328
25
1273
29
1253
24

 What are the disadvantages of uniapp
Apr 06, 2024 am 04:06 AM
What are the disadvantages of uniapp
Apr 06, 2024 am 04:06 AM
UniApp has many conveniences as a cross-platform development framework, but its shortcomings are also obvious: performance is limited by the hybrid development mode, resulting in poor opening speed, page rendering, and interactive response. The ecosystem is imperfect and there are few components and libraries in specific fields, which limits creativity and the realization of complex functions. Compatibility issues on different platforms are prone to style differences and inconsistent API support. The security mechanism of WebView is different from native applications, which may reduce application security. Application releases and updates that support multiple platforms at the same time require multiple compilations and packages, increasing development and maintenance costs.
 How to start preview of uniapp project developed by webstorm
Apr 08, 2024 pm 06:42 PM
How to start preview of uniapp project developed by webstorm
Apr 08, 2024 pm 06:42 PM
Steps to launch UniApp project preview in WebStorm: Install UniApp Development Tools plugin Connect to device settings WebSocket launch preview
 Which one is better, uniapp or mui?
Apr 06, 2024 am 05:18 AM
Which one is better, uniapp or mui?
Apr 06, 2024 am 05:18 AM
Generally speaking, uni-app is better when complex native functions are needed; MUI is better when simple or highly customized interfaces are needed. In addition, uni-app has: 1. Vue.js/JavaScript support; 2. Rich native components/API; 3. Good ecosystem. The disadvantages are: 1. Performance issues; 2. Difficulty in customizing the interface. MUI has: 1. Material Design support; 2. High flexibility; 3. Extensive component/theme library. The disadvantages are: 1. CSS dependency; 2. Does not provide native components; 3. Small ecosystem.
 What is the difference between uniapp and flutter
Apr 06, 2024 am 04:30 AM
What is the difference between uniapp and flutter
Apr 06, 2024 am 04:30 AM
UniApp is based on Vue.js, and Flutter is based on Dart. Both support cross-platform development. UniApp provides rich components and easy development, but its performance is limited by WebView; Flutter uses a native rendering engine, which has excellent performance but is more difficult to develop. UniApp has an active Chinese community, and Flutter has a large and global community. UniApp is suitable for scenarios with rapid development and low performance requirements; Flutter is suitable for complex applications with high customization and high performance.

 Solve the problem of UniApp error: unable to find 'xxx' animation effect
Nov 25, 2023 am 11:43 AM
Solve the problem of UniApp error: unable to find 'xxx' animation effect
Nov 25, 2023 am 11:43 AM
Solve the problem of UniApp error: 'xxx' animation effect cannot be found UniApp is a cross-platform application development framework based on the Vue.js framework, which can be used to develop applications for multiple platforms such as WeChat applets, H5, and App. During the development process, we often use animation effects to improve user experience. However, sometimes you will encounter an error: The 'xxx' animation effect cannot be found. This error will cause the animation to fail to run normally, causing inconvenience to development. This article will introduce several ways to solve this problem.
 What basics are needed to learn uniapp?
Apr 06, 2024 am 04:45 AM
What basics are needed to learn uniapp?
Apr 06, 2024 am 04:45 AM
uniapp development requires the following foundations: front-end technology (HTML, CSS, JavaScript) mobile development knowledge (iOS and Android platforms) Node.js other foundations (version control tools, IDE, mobile development simulator or real machine debugging experience)
 Which is better, uniapp or native development?
Apr 06, 2024 am 05:06 AM
Which is better, uniapp or native development?
Apr 06, 2024 am 05:06 AM
When choosing between UniApp and native development, you should consider development cost, performance, user experience, and flexibility. The advantages of UniApp are cross-platform development, rapid iteration, easy learning and built-in plug-ins, while native development is superior in performance, stability, native experience and scalability. Weigh the pros and cons based on specific project needs. UniApp is suitable for beginners, and native development is suitable for complex applications that pursue high performance and seamless experience.
