How to use ps to create color disc

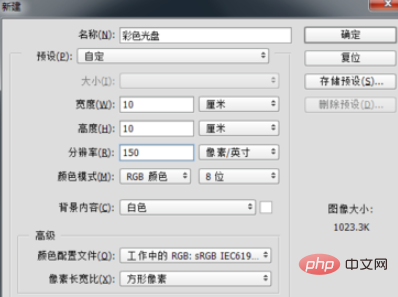
Open ps, create a new 10x10cm file with a resolution of 150, as shown in the picture:
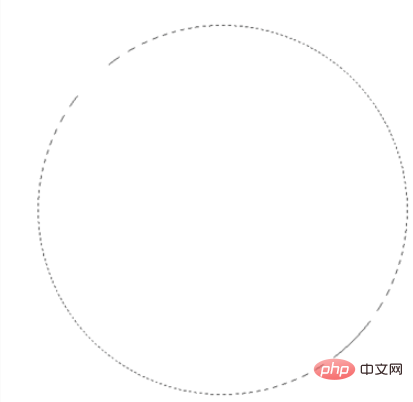
Create a new layer , select the Elliptical Marquee Tool, hold down the Shift Alt key to draw a circular selection, as shown in the figure:
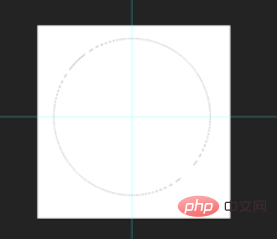
Press Ctrl R to display the ruler, and drag out two rulers Line, locate the center of the circle (that is, the intersection of the two ruler lines), as shown in the figure:
Select the gradient tool, and select "Angle Gradient" in the property bar. Just choose the fill color you like, as shown in the picture:

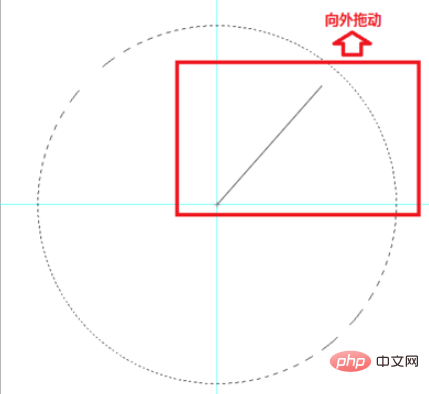
#After setting the properties of the gradient tool, click on the center of the selection and hold down the left mouse button outward. Drag, then release the mouse to fill the selected color. As shown in the picture:
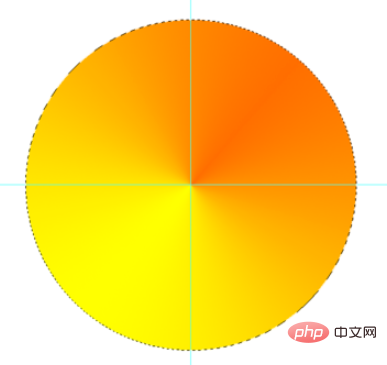
Press Ctrl D to cancel the selection, select the Elliptical Marquee Tool, and center on the intersection of the two ruler lines. Click and hold down the Shift Alt key to draw a circular selection, then press the Delete key to delete the selection content, then press Ctrl D to cancel the selection, press Ctrl ; to cancel the ruler line, and press Ctrl R to cancel the ruler. At this point, the color disc is completed.
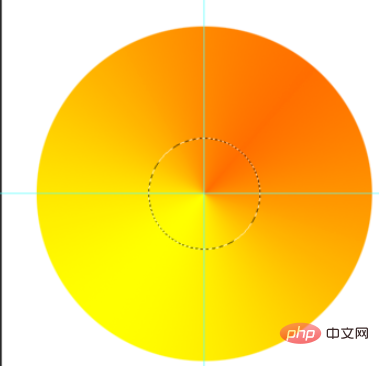
The final effect, as shown in the picture:

Recommended related articles and tutorials: ps tutorial
The above is the detailed content of How to use ps to create color disc. For more information, please follow other related articles on the PHP Chinese website!

Hot AI Tools

Undresser.AI Undress
AI-powered app for creating realistic nude photos

AI Clothes Remover
Online AI tool for removing clothes from photos.

Undress AI Tool
Undress images for free

Clothoff.io
AI clothes remover

Video Face Swap
Swap faces in any video effortlessly with our completely free AI face swap tool!

Hot Article

Hot Tools

Notepad++7.3.1
Easy-to-use and free code editor

SublimeText3 Chinese version
Chinese version, very easy to use

Zend Studio 13.0.1
Powerful PHP integrated development environment

Dreamweaver CS6
Visual web development tools

SublimeText3 Mac version
God-level code editing software (SublimeText3)

Hot Topics
 1674
1674
 14
14
 1429
1429
 52
52
 1333
1333
 25
25
 1278
1278
 29
29
 1257
1257
 24
24
 Introduction to the process of extracting line drawings in PS
Apr 01, 2024 pm 12:51 PM
1. Open the software and import a piece of material, as shown in the picture below. 2. Then ctrl+shift+u to remove color. 3. Then press ctrl+J to copy the layer. 4. Then reverse ctrl+I, and then set the layer blending mode to Color Dodge. 5. Click Filter--Others--Minimum. 6. In the pop-up dialog box, set the radius to 2 and click OK. 7. Finally, you can see the line draft extracted.
 PS copy layer shortcut key
Feb 23, 2024 pm 02:34 PM
In the PS copy layer shortcut keys, we can know that if you want to copy a layer when using PS, you can use the shortcut key [Ctrl+J] for quick copying. This introduction to the shortcut keys for copying layers can tell you the specific operation method. The following is the detailed content, so take a look. PS copy layer shortcut key answer: [Ctrl+J] Specific method: 1. Open the image in PS and select the layer that needs to be copied. 2. Press [Ctrl+J] on the keyboard at the same time to complete the copy of the layer. Other copying methods: 1. After opening the image, press and hold the layer and move the [New Layer] icon downwards. 2. After moving to the icon, let go. 3. The layer copy is completed.
 How to automate tasks using PowerShell
Feb 20, 2024 pm 01:51 PM
If you are an IT administrator or technology expert, you must be aware of the importance of automation. Especially for Windows users, Microsoft PowerShell is one of the best automation tools. Microsoft offers a variety of tools for your automation needs, without the need to install third-party applications. This guide will detail how to leverage PowerShell to automate tasks. What is a PowerShell script? If you have experience using PowerShell, you may have used commands to configure your operating system. A script is a collection of these commands in a .ps1 file. .ps1 files contain scripts executed by PowerShell, such as basic Get-Help
 Complete list of ps shortcut keys
Mar 11, 2024 pm 04:31 PM
1. Ctrl + N: Create a new document. 2. Ctrl + O: Open a file. 3. Ctrl + S: Save the current file. 4. Ctrl + Shift + S: Save as. 5. Ctrl + W: Close the current document. 6. Ctrl + Q: Exit Photoshop. 7. Ctrl + Z: Undo. 8. Ctrl + Y: Redo. 9. Ctrl + X: Cut the selected content. 10. Ctrl + C: Copy the selected content.
 Operation guide for creating mobile Excel tables
Feb 18, 2024 pm 02:41 PM
Mobile Excel table creation tutorial With the popularity of mobile devices and the continuous advancement of technology, mobile phones have become one of the indispensable tools in our daily life and work. Using Excel spreadsheets on your mobile phone can easily record, calculate and analyze data and improve work efficiency. This article will share with you the basic operations and techniques for creating mobile Excel tables. 1. Choose the right application. There are many mobile Excel applications on the market to choose from, such as GoogleSheets, Micro
 What is the ps curve shortcut key?
Aug 22, 2023 am 10:44 AM
The ps curve shortcut key is Ctrl+M. Other curve shortcut keys: 1. Convert to point control curve, Alt+Shift+Ctrl+T; 2. Automatically align the curve, Alt+Shift+Ctrl+O; 3. Restore the default curve, Ctrl+Alt+Shift+R; 4. Copy the curve, Ctrl+Alt+Shift+C; 5. Paste the curve, Ctrl+Alt+Shift+V; 6. Adjust the curve slope, Shift+up and down arrows; 7. Adjust the curve brightness, Shift+left and right arrows
 Detailed explanation of PS1, PS2, PS3, PS4 variables under Linux
Mar 22, 2024 am 09:00 AM
In the Linux system, PS1, PS2, PS3 and PS4 are specific environment variables, each of which plays a different role in controlling prompts and menu prompt information. These PS variables can provide users with a flexible way to customize and control the appearance and behavior of the command line in Linux systems, thereby improving the user's interaction experience with the system. Note: If you want to permanently modify the prompt for a long time, you can add the command to modify the prompt to the $HOME/.bashrc or $HOME/.bash_profile file. 1. PS1 variable is mainly used to set the shell command prompt. Whenever you enter a command in the terminal, the string displayed is controlled by the PS1 variable. can be based on your own
 Specific method to create film movement effect in PPT
Mar 26, 2024 pm 04:00 PM
1. Start PPT, create a new blank document, select all text boxes and delete them. 2. Execute the Insert-Shape command, drag a rectangle in the document, and fill the shape with black. 3. Drag the rectangle to elongate it, execute the Insert-Shape command, drag out the small square, and set the fill color to white. 4. Copy and paste the small squares one by one so that the top and bottom are evenly distributed on both sides of the film. After selecting them all with ctrl+a, right-click and select Group. 5. Execute the Insert-Picture command, find the picture to be inserted in the pop-up dialog box, click to open, and adjust the size and position of the picture. 6. Repeat step 5 to insert and set the remaining pictures in order to form a film picture. 7. Select the film, execute animation-add animation command


