

PHP learning to quickly build a WAMP environment

The main content of this article is to use PHP to manually build a WAMP environment. Friends in need can take a look.
Step one: Install the apache program
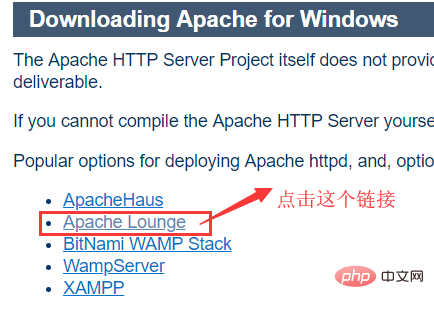
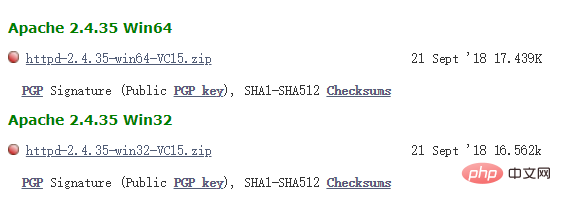
First you need to go to the Apache official website to download Apache2.4 (http://httpd.apache.org/download.cgi), The operation is as shown in the figure below:
<br/>
After the download is complete, unzip it, and then run ApacheMonitor.exe, if there is an error message missing. The dll file needs to be removed from the corresponding software, usually the VC runtime library is missing.
Step 2: Install the mysql program
First, go to the MySQL official website to download the MySQL service program (https://dev.mysql.com/doc/relnotes/mysql /5.6/en/news-5-6-17.html), the author downloaded the version of MySQL5.6 here. There are two versions of the installation program here, namely the .zip compressed package version and the .msi installation package version. , here the author is using the .zip compressed package version. After the download is completed, it is recommended to unzip the program file to the same directory as Apache2.4.
Step 3: Install the php language pack
First go to the PHP official website to download the PHP language pack (https://windows.php.net/download#php-5.6 ), the author downloaded the PHP5.6 version here. As shown in the figure below:
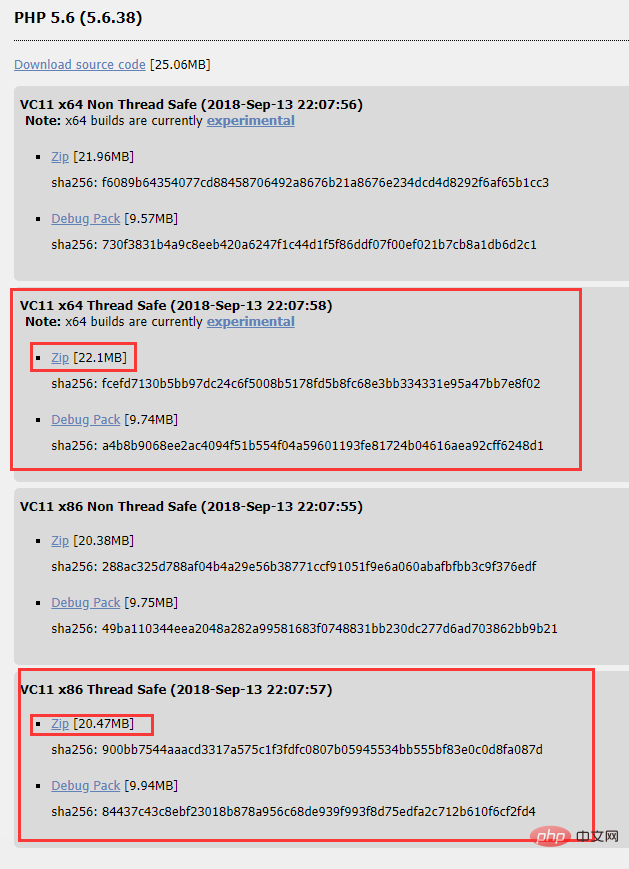
Select the thread-safe compression package version here, and then select 64-bit or 32-bit according to your system
To this step We have prepared all the installation package programs that WAMP needs to prepare. The following is the installation service and environment configuration
Step 4: mysql service configuration and installation
Modify the configuration file
First find the decompression path of MySQL, find my-default.ini, and change the file name to my.ini. Edit the file and replace the original content with the following content:
[client]
port=3306
#Client port number
default-character-set=utf8
#The client character type must be consistent with the server , it is recommended that utf8
[mysqld]
port=3306
#server port number
character_set_server=utf8
#Server character type, it is recommended to utf8
basedir=D :\WAMP\mysql-5.6.17-winx64
#Fill in your own decompression root directory
datadir=D:\WAMP\mysql -5.6.17-winx64\data
#Fill in your own decompression root directory\data
sql_mode=NO_ENGINE_SUBSTITUTION,STRICT_TRANS_TABLES
[WinMySQLAdmin]
D:\WAMP\mysql-5.6.17-winx64\bin\mysqld.exe
#Fill in your own decompression root directory\bin\mysqld.exe
Configure environment variables
1. My Computer-Properties-Advanced- Environment variable-new
2. Variable MYSQL_HOME value D:\WAMP\mysql-5.6.17-winx64 (please fill in the path according to your actual situation)
3. Find the variable path and edit it. Add ;%MYSQL_HOME%\bin
Install MySQL service
Press the shortcut key Win R to bring up run, then enter cmd and press Enter to open the command Console, use the console command to enter the MySQL directory on the computer.
C:\Documents and Settings\Administrator>cd\
C:\>d:
D:\>cd WAMP
##D:\WAMP>cd mysql-5.6.17-winx64
D:\WAMP\ mysql-5.6.17-winx64>cd bin
D:\WAMP\mysql-5.6.17-winx64\bin>
D :\WAMP\mysql-5.6.17-winx64\bin>mysqld -install
提示:以上路径根据自己实际路径输入,输入后显示Service successfully installed.及即安装成功。
启动、停止、移除MYSQL服务
启动MYSQL服务:net start mysql
停止MYSQL服务:net stop mysql
移除mysql服务:mysqld -remove
这里启动服务,方便下一步操作。
第五步:apache服务安装及配置
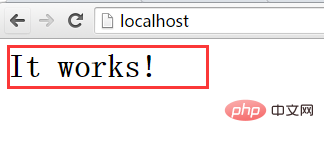
首先打开命令控制台进入到Apache2.4的bin目录下面(操作方法同上面的MySQL),然后输入“httpd -k -install”指令,如果显示“Service is already installed”则表示Apache服务已经安装完成,接下来打开Apache2.4的bin目录下的ApacheMonitor.exe程序,打开后点击右边的“start”按钮,如果报错请按照之间安装apache的报错提示操作。以上操作完成后打开浏览器在地址栏输入“localhost”如果出现以下页面表示安装成功:
然后我们把PHP模块配置到Apache里面,在apache路径下面找到conf目录下面的httpd.conf,打开编辑在文件最后输入以下代码:
LoadModule php5_module D:\WAMP\php-5.6.30-Win32-VC11-x64\php5apache2_4.dll
AddType application/x-httpd-php .php
LoadModule php5_module modules/libphp5.so
PHPIniDir D:\WAMP\php-5.6.30-Win32-VC11-x64
这里路径设置成自己的实际路径。
第六步:PHP配置
PHP的配置比较简单,只需要打开PHP根目录下面的php.ini文件,然后按下快捷键Ctrl+F搜索关键字“extension_dir”,然后去掉前面的注释符号“;”并且后面输入自己“ext”文件夹的实际路径,如“extension_dir = "D:\AMP\php-5.6.30-Win32-VC11-x64\ext"”。接下来搜索“extension”关键字出现如下图所示:
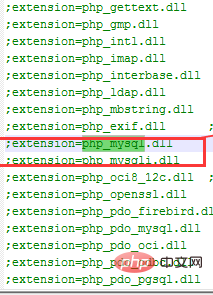
这是php扩展,根据需要去除前面的注释符“;”即可,我们这里将mysql服务扩展打开,如图圈中所示。
做完这些我就完整的配置了一遍WAMP环境,然后就可以去Apache目录下的htdocs目录里面编写php的项目代码了,我们可以在里面新建一个phpinfo.php文件写入
<br/>
1 <?php
2     phpinfo();
3 ?>
保存然后浏览器访问“localhost/phpinfo.php”测试一下
相关教程:PHP视频教程
The above is the detailed content of PHP learning to quickly build a WAMP environment. For more information, please follow other related articles on the PHP Chinese website!

Hot AI Tools

Undresser.AI Undress
AI-powered app for creating realistic nude photos

AI Clothes Remover
Online AI tool for removing clothes from photos.

Undress AI Tool
Undress images for free

Clothoff.io
AI clothes remover

Video Face Swap
Swap faces in any video effortlessly with our completely free AI face swap tool!

Hot Article
Hot Tools

Notepad++7.3.1
Easy-to-use and free code editor

SublimeText3 Chinese version
Chinese version, very easy to use

Zend Studio 13.0.1
Powerful PHP integrated development environment

Dreamweaver CS6
Visual web development tools

SublimeText3 Mac version
God-level code editing software (SublimeText3)
Hot Topics


 PHP 8.4 Installation and Upgrade guide for Ubuntu and Debian
Dec 24, 2024 pm 04:42 PM
PHP 8.4 Installation and Upgrade guide for Ubuntu and Debian
Dec 24, 2024 pm 04:42 PM
PHP 8.4 brings several new features, security improvements, and performance improvements with healthy amounts of feature deprecations and removals. This guide explains how to install PHP 8.4 or upgrade to PHP 8.4 on Ubuntu, Debian, or their derivati
 How To Set Up Visual Studio Code (VS Code) for PHP Development
Dec 20, 2024 am 11:31 AM
How To Set Up Visual Studio Code (VS Code) for PHP Development
Dec 20, 2024 am 11:31 AM
Visual Studio Code, also known as VS Code, is a free source code editor — or integrated development environment (IDE) — available for all major operating systems. With a large collection of extensions for many programming languages, VS Code can be c
 Explain JSON Web Tokens (JWT) and their use case in PHP APIs.
Apr 05, 2025 am 12:04 AM
Explain JSON Web Tokens (JWT) and their use case in PHP APIs.
Apr 05, 2025 am 12:04 AM
JWT is an open standard based on JSON, used to securely transmit information between parties, mainly for identity authentication and information exchange. 1. JWT consists of three parts: Header, Payload and Signature. 2. The working principle of JWT includes three steps: generating JWT, verifying JWT and parsing Payload. 3. When using JWT for authentication in PHP, JWT can be generated and verified, and user role and permission information can be included in advanced usage. 4. Common errors include signature verification failure, token expiration, and payload oversized. Debugging skills include using debugging tools and logging. 5. Performance optimization and best practices include using appropriate signature algorithms, setting validity periods reasonably,
 PHP Program to Count Vowels in a String
Feb 07, 2025 pm 12:12 PM
PHP Program to Count Vowels in a String
Feb 07, 2025 pm 12:12 PM
A string is a sequence of characters, including letters, numbers, and symbols. This tutorial will learn how to calculate the number of vowels in a given string in PHP using different methods. The vowels in English are a, e, i, o, u, and they can be uppercase or lowercase. What is a vowel? Vowels are alphabetic characters that represent a specific pronunciation. There are five vowels in English, including uppercase and lowercase: a, e, i, o, u Example 1 Input: String = "Tutorialspoint" Output: 6 explain The vowels in the string "Tutorialspoint" are u, o, i, a, o, i. There are 6 yuan in total
 How do you parse and process HTML/XML in PHP?
Feb 07, 2025 am 11:57 AM
How do you parse and process HTML/XML in PHP?
Feb 07, 2025 am 11:57 AM
This tutorial demonstrates how to efficiently process XML documents using PHP. XML (eXtensible Markup Language) is a versatile text-based markup language designed for both human readability and machine parsing. It's commonly used for data storage an
 Explain late static binding in PHP (static::).
Apr 03, 2025 am 12:04 AM
Explain late static binding in PHP (static::).
Apr 03, 2025 am 12:04 AM
Static binding (static::) implements late static binding (LSB) in PHP, allowing calling classes to be referenced in static contexts rather than defining classes. 1) The parsing process is performed at runtime, 2) Look up the call class in the inheritance relationship, 3) It may bring performance overhead.
 What are PHP magic methods (__construct, __destruct, __call, __get, __set, etc.) and provide use cases?
Apr 03, 2025 am 12:03 AM
What are PHP magic methods (__construct, __destruct, __call, __get, __set, etc.) and provide use cases?
Apr 03, 2025 am 12:03 AM
What are the magic methods of PHP? PHP's magic methods include: 1.\_\_construct, used to initialize objects; 2.\_\_destruct, used to clean up resources; 3.\_\_call, handle non-existent method calls; 4.\_\_get, implement dynamic attribute access; 5.\_\_set, implement dynamic attribute settings. These methods are automatically called in certain situations, improving code flexibility and efficiency.
 PHP and Python: Comparing Two Popular Programming Languages
Apr 14, 2025 am 12:13 AM
PHP and Python: Comparing Two Popular Programming Languages
Apr 14, 2025 am 12:13 AM
PHP and Python each have their own advantages, and choose according to project requirements. 1.PHP is suitable for web development, especially for rapid development and maintenance of websites. 2. Python is suitable for data science, machine learning and artificial intelligence, with concise syntax and suitable for beginners.
