 Web Front-end
 H5 Tutorial
 How does HTML5 canvas realize the fade-in and fade-out effect of mosaic (code)
How does HTML5 canvas realize the fade-in and fade-out effect of mosaic (code)
When displaying a mosaic image, the fade-in animation is the process of gradually changing from very blurry to very clear mosaic. The processing of the fade-out animation is the process of the image becoming clear and then slowly becoming blurry. Let’s take a look at the details below. Content.

Let’s first take a look at the fade-in effect of the mosaic image
The code is as follows
<!DOCTYPE html>
<html>
<head>
<meta http-equiv="Content-Type" content="text/html; charset=utf-8"/>
<title></title>
<meta charset="utf-8" />
<script type="text/javascript">
var imageData;
var fadeMosaicSize = 0;
var THandle;
var mem_canvas;
var mem_context;
var context;
var img;
function loadImage() {
img = new Image();
mem_canvas = document.createElement('canvas');
img.onload = function onImageLoad() {
mem_canvas.width = img.width;
mem_canvas.height = img.height;
mem_context = mem_canvas.getContext('2d');
mem_context.drawImage(img, 0, 0);
imageData = mem_context.getImageData(0, 0, mem_canvas.width, mem_canvas.height);
startFadeIn();
}
img.src = 'img/luffy.jpg';
var canvas = document.getElementById('SimpleCanvas');
if (!canvas || !canvas.getContext) {
return false;
}else{
context = canvas.getContext('2d');
}
}
function startFadeIn() {
fadeMosaicSize = 64;
THandle = setInterval(onFadeIn, 50);
}
function onFadeIn() {
if (fadeMosaicSize <= 1) {
clearInterval(THandle);
context.drawImage(img, 32, 32);
} else {
CreateMosaic(mem_context, mem_canvas.width, mem_canvas.height, fadeMosaicSize);
context.drawImage(mem_canvas, 32, 32);
fadeMosaicSize = Math.floor(fadeMosaicSize / 1.5);
}
}
function CreateMosaic(context, width,height,mosaicSize) {
var x=0;
var y=0;
for (y = 0; y < height; y = y + mosaicSize) {
for (x = 0; x < width; x = x + mosaicSize) {
var cR = imageData.data[(y * width + x) * 4];
var cG = imageData.data[(y * width + x) * 4 + 1];
var cB = imageData.data[(y * width + x) * 4 + 2];
context.fillStyle = "rgb("+cR+","+cG+","+cB+")";
context.fillRect(x, y, x + mosaicSize, y + mosaicSize);
}
}
}
</script>
</head>
<body onload="loadImage();" style="background-color:#D0D0D0;">
<canvas id="SimpleCanvas" width="640" height="360" style="background-color:#FFFFFF;"></canvas>
<div>Canvas Demo</div>
<div id="output"></div>
</body>
</html>Note:
Due to the onload event of the body tag, processing will start by calling the loadImagen() function when the page is displayed.
After the page is displayed, create the internally drawn Canves object and read the image. Get the drawn pixel data. After that, start the timer processing, create the mosaic image in the timer's event and draw it to the screen. When executing timer processing, the mosaic size (fadeMosaicSize) will be reduced, starting from a very thick mosaic to a very clear mosaic animation to represent the fade-in effect.
To adjust the gradient speed, you can change the timer interval,
fadeMosaicSize = Math.floor(fadeMosaicSize / 1.5);
Running results:
Display the above HTML file. Displays a deep mosaic image.
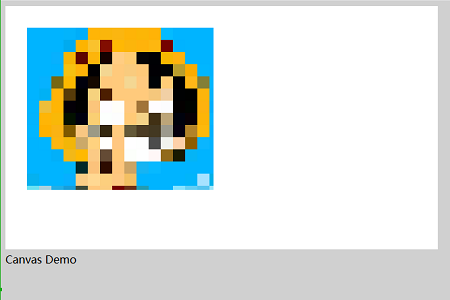
This is a dynamic process, the image will slowly become clearer, and finally the following effect will appear
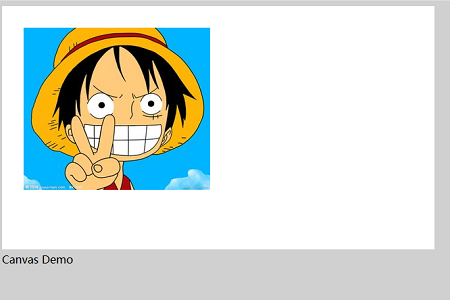
After seeing the fade-in effect, let’s take a look at the implementation of the fade-in and fade-out effect of the mosaic image
The code is as follows
<!DOCTYPE html>
<html>
<head>
<meta http-equiv="Content-Type" content="text/html; charset=utf-8"/>
<title></title>
<meta charset="utf-8" />
<script type="text/javascript">
var imageData;
var fadeMosaicSize = 0;
var THandle;
var mem_canvas;
var mem_context;
var context;
var img;
function loadImage() {
img = new Image();
mem_canvas = document.createElement('canvas');
img.onload = function onImageLoad() {
mem_canvas.width = img.width;
mem_canvas.height = img.height;
mem_context = mem_canvas.getContext('2d');
mem_context.drawImage(img, 0, 0);
imageData = mem_context.getImageData(0, 0, mem_canvas.width, mem_canvas.height);
startFadeIn();
}
img.src = 'img/luffy.jpg';
var canvas = document.getElementById('SimpleCanvas');
if (!canvas || !canvas.getContext) {
return false;
}else{
context = canvas.getContext('2d');
}
}
function startFadeIn() {
fadeMosaicSize = 64;
THandle = setInterval(onFadeIn, 50);
}
function startFadeOut() {
fadeMosaicSize = 1;
THandle = setInterval(onFadeOut, 50);
}
function onFadeIn() {
if (fadeMosaicSize <= 1) {
clearInterval(THandle);
context.drawImage(img, 32, 32);
THandle = setInterval(onShow, 2000);
} else {
CreateMosaic(mem_context, mem_canvas.width, mem_canvas.height, fadeMosaicSize);
context.drawImage(mem_canvas, 32, 32);
fadeMosaicSize = Math.floor(fadeMosaicSize / 1.5);
}
}
function onShow() {
clearInterval(THandle);
startFadeOut();
}
function onFadeOut() {
if (64 < fadeMosaicSize) {
clearInterval(THandle);
context.fillStyle = "#FFFFFF";
context.fillRect(32, 32, mem_canvas.width, mem_canvas.height);
} else {
CreateMosaic(mem_context, mem_canvas.width, mem_canvas.height, fadeMosaicSize);
context.drawImage(mem_canvas, 32, 32);
fadeMosaicSize = Math.ceil(fadeMosaicSize * 1.5);
}
}
function CreateMosaic(context, width,height,mosaicSize) {
var x=0;
var y=0;
for (y = 0; y < height; y = y + mosaicSize) {
for (x = 0; x < width; x = x + mosaicSize) {
var cR = imageData.data[(y * width + x) * 4];
var cG = imageData.data[(y * width + x) * 4 + 1];
var cB = imageData.data[(y * width + x) * 4 + 2];
context.fillStyle = "rgb("+cR+","+cG+","+cB+")";
context.fillRect(x, y, x + mosaicSize, y + mosaicSize);
}
}
}
</script>
</head>
<body onload="loadImage();" style="background-color:#D0D0D0;">
<canvas id="SimpleCanvas" width="640" height="360" style="background-color:#FFFFFF;"></canvas>
<div>Canvas Demo</div>
<div id="output"></div>
</body>
</html>Instructions:
In After the previous code is processed, it executes a 2 second interval and then in that interval it executes onFadeOut, which is the code that was executed before fading out.
Run results
Execute the above HTML file, the following mosaic effect will be displayed
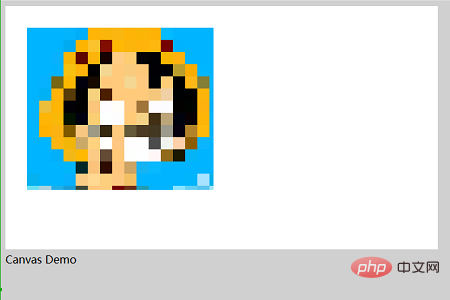
Then it gradually becomes clear, as follows
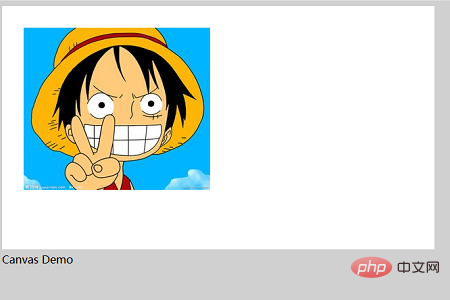
After that, the image is displayed for about two seconds, and then the image begins to have a mosaic effect, as shown below
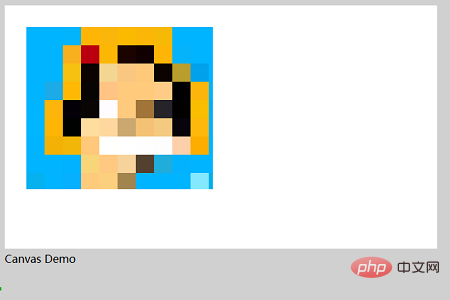
Then, the mosaic gradually becomes thicker and finally disappears, as shown below, and there is nothing on the page
The above is the detailed content of How does HTML5 canvas realize the fade-in and fade-out effect of mosaic (code). For more information, please follow other related articles on the PHP Chinese website!

Hot AI Tools

Undresser.AI Undress
AI-powered app for creating realistic nude photos

AI Clothes Remover
Online AI tool for removing clothes from photos.

Undress AI Tool
Undress images for free

Clothoff.io
AI clothes remover

Video Face Swap
Swap faces in any video effortlessly with our completely free AI face swap tool!

Hot Article

Hot Tools

Notepad++7.3.1
Easy-to-use and free code editor

SublimeText3 Chinese version
Chinese version, very easy to use

Zend Studio 13.0.1
Powerful PHP integrated development environment

Dreamweaver CS6
Visual web development tools

SublimeText3 Mac version
God-level code editing software (SublimeText3)

Hot Topics
 What exactly does H5 page production mean?
Apr 06, 2025 am 07:18 AM
H5 page production refers to the creation of cross-platform compatible web pages using technologies such as HTML5, CSS3 and JavaScript. Its core lies in the browser's parsing code, rendering structure, style and interactive functions. Common technologies include animation effects, responsive design, and data interaction. To avoid errors, developers should be debugged; performance optimization and best practices include image format optimization, request reduction and code specifications, etc. to improve loading speed and code quality.
 How to run the h5 project
Apr 06, 2025 pm 12:21 PM
Running the H5 project requires the following steps: installing necessary tools such as web server, Node.js, development tools, etc. Build a development environment, create project folders, initialize projects, and write code. Start the development server and run the command using the command line. Preview the project in your browser and enter the development server URL. Publish projects, optimize code, deploy projects, and set up web server configuration.
 How to make h5 click icon
Apr 06, 2025 pm 12:15 PM
The steps to create an H5 click icon include: preparing a square source image in the image editing software. Add interactivity in the H5 editor and set the click event. Create a hotspot that covers the entire icon. Set the action of click events, such as jumping to the page or triggering animation. Export H5 documents as HTML, CSS, and JavaScript files. Deploy the exported files to a website or other platform.
 What is the H5 programming language?
Apr 03, 2025 am 12:16 AM
H5 is not a standalone programming language, but a collection of HTML5, CSS3 and JavaScript for building modern web applications. 1. HTML5 defines the web page structure and content, and provides new tags and APIs. 2. CSS3 controls style and layout, and introduces new features such as animation. 3. JavaScript implements dynamic interaction and enhances functions through DOM operations and asynchronous requests.
 What Does H5 Refer To? Exploring the Context
Apr 12, 2025 am 12:03 AM
H5referstoHTML5,apivotaltechnologyinwebdevelopment.1)HTML5introducesnewelementsandAPIsforrich,dynamicwebapplications.2)Itsupportsmultimediawithoutplugins,enhancinguserexperienceacrossdevices.3)SemanticelementsimprovecontentstructureandSEO.4)H5'srespo
 How to make pop-up windows with h5
Apr 06, 2025 pm 12:12 PM
H5 pop-up window creation steps: 1. Determine the triggering method (click, time, exit, scroll); 2. Design content (title, text, action button); 3. Set style (size, color, font, background); 4. Implement code (HTML, CSS, JavaScript); 5. Test and deployment.
 What application scenarios are suitable for H5 page production
Apr 05, 2025 pm 11:36 PM
H5 (HTML5) is suitable for lightweight applications, such as marketing campaign pages, product display pages and corporate promotion micro-websites. Its advantages lie in cross-platformity and rich interactivity, but its limitations lie in complex interactions and animations, local resource access and offline capabilities.
 Is h5 same as HTML5?
Apr 08, 2025 am 12:16 AM
"h5" and "HTML5" are the same in most cases, but they may have different meanings in certain specific scenarios. 1. "HTML5" is a W3C-defined standard that contains new tags and APIs. 2. "h5" is usually the abbreviation of HTML5, but in mobile development, it may refer to a framework based on HTML5. Understanding these differences helps to use these terms accurately in your project.


