

ps制作高端大气的球面海报

Photoshop功能强大,如果只是用来修图未免太可惜,很多高大上的海报都可以通过ps制作出来,简单几步就可完成,表面看似高端大气,其实新手也可制作,好了,下面我们一起来学习吧!
方法/步骤
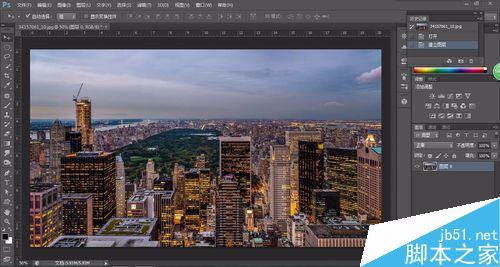
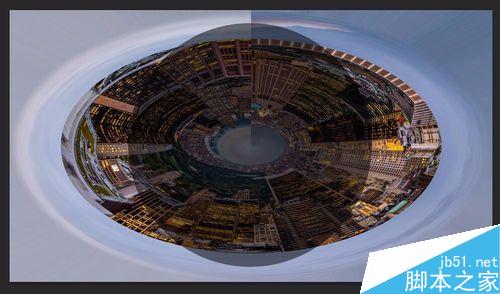
首先从网络上找到一张高清的风景图,在ps中打开,自己拍摄的更好,可以更贴近自己的审美
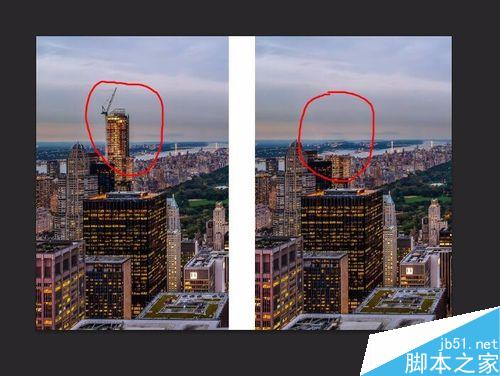
然后观察画面,最好让所有建筑物都在同一个水平线上,这张图有座大厦太高了,在这里运用 ‘工具栏—修补工具’ 将其抹掉
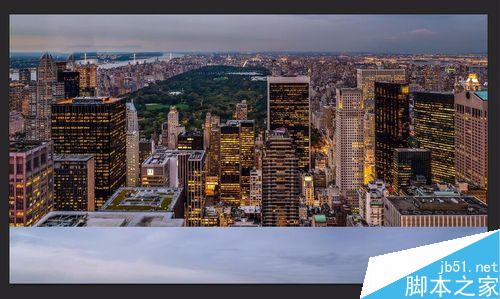
然后我们将天空截取一部分,拖至图片的下层,并合并图层,注意天空不可以截取太多
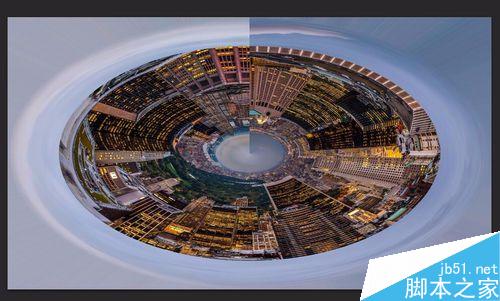
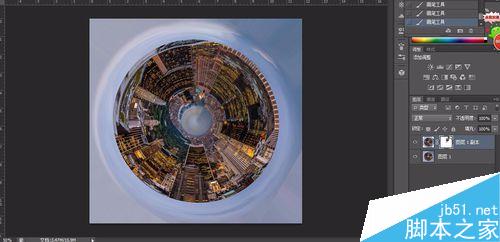
接着使用‘菜单栏—滤镜—扭曲—极坐标’,将图片扭曲成球形
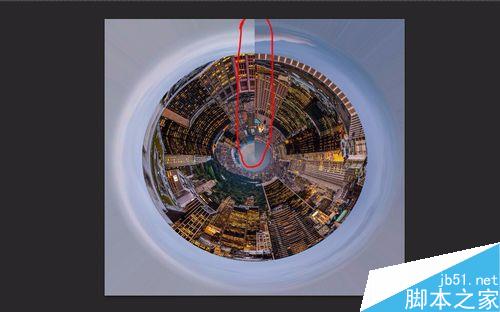
我们新建一个图层,画出一个圆形,并降低它的不透明度作为一个参考
然后点击被扭曲过得原图,然后按住‘ctrl+T‘,按照参考的圆形,将原图变形成一个圆形
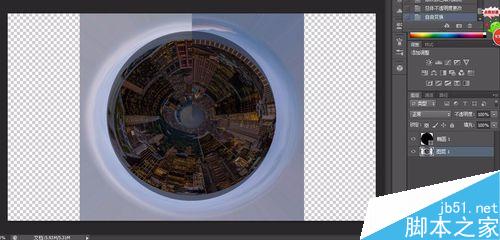
变形完毕后,删掉参考的圆形,然后使用 ‘工具—裁剪工具’修建图片,这时候我们可以看见图片的过度很不自然
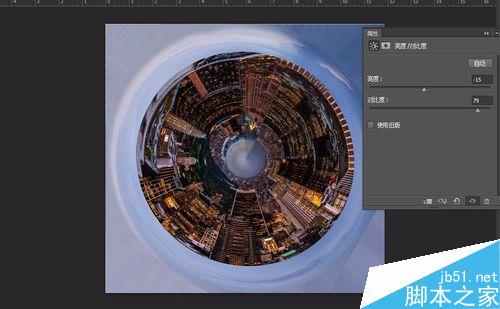
我们将图片复制一层,并实行步骤‘ctrl+T’,将复制图层稍微旋转一点点
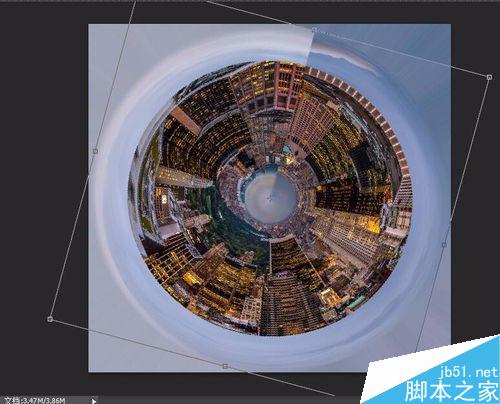
在复制层添加蒙版,并且适当降低画笔的不透明度,将不自然的过度的痕迹抹掉
最后 ‘菜单栏—图像—调整—亮度/对比度’,调整图片细节使画面更精致
注意事项
使用修补工具修补突出来的物体时,不需要太精细,因为一使用扭曲这些粗糙的小细节基本可以忽略
将天空一部分移动到图片下方是因为一旦扭曲图片,下方的建筑就会被扭曲,所以必须要留有一点空白
以上就是ps制作高端大气的球面海报方法介绍,操作很简单的,大家学会了吗?希望这篇文章能对大家有所帮助!

Hot AI Tools

Undresser.AI Undress
AI-powered app for creating realistic nude photos

AI Clothes Remover
Online AI tool for removing clothes from photos.

Undress AI Tool
Undress images for free

Clothoff.io
AI clothes remover

Video Face Swap
Swap faces in any video effortlessly with our completely free AI face swap tool!

Hot Article
Hot Tools

Notepad++7.3.1
Easy-to-use and free code editor

SublimeText3 Chinese version
Chinese version, very easy to use

Zend Studio 13.0.1
Powerful PHP integrated development environment

Dreamweaver CS6
Visual web development tools

SublimeText3 Mac version
God-level code editing software (SublimeText3)
Hot Topics
 1666
1666
 14
1425
52
1328
25
1273
29
1253
24
14
1425
52
1328
25
1273
29
1253
24

 ps serial number cs5 permanently free 2020
Jul 13, 2023 am 10:06 AM
ps serial number cs5 permanently free 2020
Jul 13, 2023 am 10:06 AM
PS serial numbers cs5 permanent free 2020 include: 1. 1330-1384-7388-4265-2355-8589 (Chinese); 2. 1330-1409-7892-5799-0412-7680 (Chinese); 3. 1330-1616-1993 -8375-9492-6951 (Chinese); 4. 1330-1971-2669-5043-0398-7801 (Chinese), etc.
 8 Ways to Fix Contact Photos and Posters Disabled in iOS 17
Sep 22, 2023 am 10:33 AM
8 Ways to Fix Contact Photos and Posters Disabled in iOS 17
Sep 22, 2023 am 10:33 AM
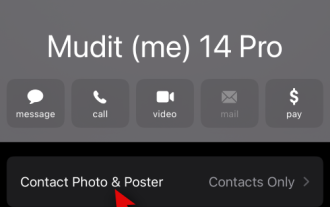
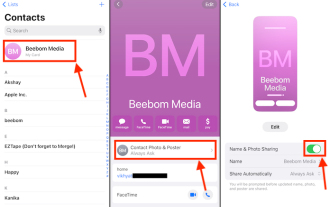
Learn the correct way to set up Contact Photos and Posters Contact Photos and Posters is a new feature that can be set up in iOS 17 for your contact cards and other contacts saved on your iPhone. For those who don’t know, the feature allows you to personalize the look of your call screen with custom posters, which you can design with photos, names, colors, fonts, emojis, and Memoji. Once created, contact posters can be shared with your saved contacts or restricted so that only a few selected people can view them. To learn how to create your own contact poster and how to share it with others, you can check out the guide at the following link: Contact Photos and Contact Posters Disabled: 8 Fixes Explained Despite Setting Contact Photos
 What to do if ps installation cannot write registry value error 160
Mar 22, 2023 pm 02:33 PM
What to do if ps installation cannot write registry value error 160
Mar 22, 2023 pm 02:33 PM
Solution to error 160 when ps installation cannot write registry value: 1. Check whether there is 2345 software on the computer, and if so, uninstall the software; 2. Press "Win+R" and enter "Regedit" to open the system registry, and then Find "Photoshop.exe" and delete the Photoshop item.
 How to personalize your iPhone on the latest iOS 17
Sep 21, 2023 am 08:17 AM
How to personalize your iPhone on the latest iOS 17
Sep 21, 2023 am 08:17 AM
How to Personalize Calls on iPhone Apple’s iOS 17 introduces a new feature called Contact Posters that allows you to personalize the look of your call screen on your iPhone. This feature allows you to design a poster using selected photos, colors, fonts, and Memoji as contact cards. So when you make a call, your custom image will appear on the recipient's iPhone exactly as you envisioned. You can choose to share your unique contact poster with all your saved contacts, or choose who can see it. Likewise, during a call exchange, you will also see other people's contact posters. Additionally, Apple lets you set specific contact photos for individual contacts, making calls from those contacts
 6 Fixes: How to solve the problem of contact poster not displaying properly on iPhone?
Sep 17, 2023 pm 12:41 PM
6 Fixes: How to solve the problem of contact poster not displaying properly on iPhone?
Sep 17, 2023 pm 12:41 PM
1. Check if your iPhone supports iOS17 If the contact poster feature does not work on your iPhone, the first thing you should do is check if your iPhone supports iOS17. This new feature is only available on iPhones running iOS 17, so be sure to update your phone to the latest update. Additionally, even if your iPhone is running iOS17, your contacts should have iPhones with iOS17 updates. Here is a list of all iPhones that support iOS17: iPhone15, 15PlusiPhone15Pro, 15ProMaxiPhone14, 14PlusiPhone14Pro, 1
 What should I do if the PS interface font is too small?
Dec 01, 2022 am 11:31 AM
What should I do if the PS interface font is too small?
Dec 01, 2022 am 11:31 AM
How to fix the PS interface font that is too small: 1. Open PS, click the "Edit" button on the top menu bar of PS to expand the editing menu; 2. Click the "Preferences" button in the expanded editing menu, and then click "Interface. .." button; 3. In the interface settings, set the user interface font size to "Large", set the UI scaling to "200%" and save the settings, then restart PS to take effect.
 How to delete selected area in ps
Aug 07, 2023 pm 01:46 PM
How to delete selected area in ps
Aug 07, 2023 pm 01:46 PM
Steps to delete the selected area in PS: 1. Open the picture you want to edit; 2. Use the appropriate tool to create a selection; 3. You can use a variety of methods to delete the content in the selection, use the "Delete" key, use the "Healing Brush Tool" , use "Content-Aware Fill", use the "Stamp Tool", etc.; 4. Use tools to repair any obvious traces or defects to make the picture look more natural; 5. After completing editing, click "File" > in the menu bar "Save" to save the editing results.
 Introduction to the process of extracting line drawings in PS
Apr 01, 2024 pm 12:51 PM
Introduction to the process of extracting line drawings in PS
Apr 01, 2024 pm 12:51 PM
1. Open the software and import a piece of material, as shown in the picture below. 2. Then ctrl+shift+u to remove color. 3. Then press ctrl+J to copy the layer. 4. Then reverse ctrl+I, and then set the layer blending mode to Color Dodge. 5. Click Filter--Others--Minimum. 6. In the pop-up dialog box, set the radius to 2 and click OK. 7. Finally, you can see the line draft extracted.
