
 Web Front-end
JS Tutorial
About the code for configuring ueditor in nodejs+mongodb+vue front and backend
Web Front-end
JS Tutorial
About the code for configuring ueditor in nodejs+mongodb+vue front and backend
About the code for configuring ueditor in nodejs+mongodb+vue front and backend

This article mainly introduces the sample code for configuring ueditor in the front and backend of nodejs mongodb vue. The content is quite good. I will share it with you now and give it as a reference.
When I was working on a personal blog project, I needed a rich text box input component to interact with the background, but there was no official configuration about nodejs, so I checked the information and researched it myself, and finally applied it to the system. .
1. Backend configuration
First of all, I found this project: https://github.com/netpi/ueditor, you can apply ueditor through its open source code On the node, the approximate method is as follows:
1. Install dependencies first:
npm install ueditor --save
2. Configure Node settings
//引入接口文件
const api = require('./api');
//引入文件模块
const fs = require('fs');
//引入处理路径模块
const path = require('path');
//引入处理post数据模块
var bodyParser = require('body-parser');

//引入express
const express = require('express');
const app = express();
//引入ueditor
const ueditor = require("ueditor")

// parse application/x-www-form-urlencoded
app.use(bodyParser.urlencoded({ extended: false }))

//更改限定大小
app.use(bodyParser.json({ limit: '50mb' }));
app.use(bodyParser.urlencoded({ limit: '50mb', extended: true }));
// parse application/json
app.use(bodyParser.json())
app.use(api)

app.use("/ueditor/ue", ueditor(path.join(__dirname, 'public'), function(req, res, next) {
  //客户端上传文件设置
  var imgDir = '/img/ueditor/'
  var ActionType = req.query.action;
  if (ActionType === 'uploadimage' || ActionType === 'uploadfile' || ActionType === 'uploadvideo') {
    var file_url = imgDir; //默认图片上传地址
    /*其他上传格式的地址*/
    if (ActionType === 'uploadfile') {
      file_url = '/file/ueditor/'; //附件
    }
    if (ActionType === 'uploadvideo') {
      file_url = '/video/ueditor/'; //视频
    }
    res.ue_up(file_url); //你只要输入要保存的地址 。保存操作交给ueditor来做
    res.setHeader('Content-Type', 'text/html');
  }
  // 客户端发起图片列表请求
  else if (req.query.action === 'listimage') {
    var dir_url = imgDir;
    res.ue_list(dir_url); // 客户端会列出 dir_url 目录下的所有图片
  }
  // 客户端发起其它请求
  else {
    // console.log('config.json')
    res.setHeader('Content-Type', 'application/json');
    res.redirect('../nodejs/config.json');
  }
}));

//处理静态文件 todo
// 访问静态资源文件 这里是访问所有dist目录下的静态资源文件
app.use(express.static(path.resolve(__dirname, 'public/')))
app.use('/ueditor', function(req, res) {
  res.render('views/');
});

//监听8888端口
app.listen(8888);
console.log('sucess listen......')It should be noted here that because ueditor has been required, the plug-in has been installed in node_module, so there is no need to copy additional files, you only need to copy them in this directory Create a new public folder to store the data returned to the backend. In addition, you also need to introduce the configuration file config.json
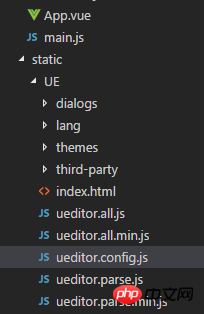
2. Front-end configuration
The front-end configuration of vue requires downloading ueditor The file is placed in the directory, I placed it in the static folder, and introduced the ueditor file in the vue entry file:
import '../static/UE/ueditor.config.js'
import '../static/UE/ueditor.all.min.js'
import '../static/UE/lang/zh-cn/zh-cn.js'
import '../static/UE/ueditor.parse.min.js'
is worth mentioning What is needed is that the directory in the ueditor.config.js file needs to be configured as the directory where the plug-in is placed:
window.UEDITOR_HOME_URL = "/static/UE/"
Then Just configure it in the component
My UE.vue component:
<template>
<script :id=id type="text/plain"></script>
</template>
<script>
export default {
name: 'UE',
data () {
return {
editor: null
}
},
props: {
defaultMsg: {
type: String
},
config: {
type: Object
},
id: {
type: String
},
},
mounted() {
const _this = this;
this.editor = UE.getEditor(this.id, this.config); // 初始化UE
this.editor.addListener("ready", function () {
_this.editor.setContent(_this.defaultMsg); // 确保UE加载完成后,放入内容。
});
},
methods: {
getUEContent() { // 获取内容方法
return this.editor.getContent()
}
},
destroyed() {
this.editor.destroy();
}
}
</script>Introduction method:
<UE :defaultMsg=defaultMsg :config=config :id=ue1 ref="ue"></UE>

data() {
  return {
   defaultMsg: "",
   image: "",
   config: {
    initialFrameWidth: null,
    initialFrameHeight: 350
   },
   ue1: "ue1"
  };
},You can successfully configure the basic functions of ueditor
3. Front and backend request agent
In the vue dev environment You can set up webpack's proxyTable to forward the backend request proxy, and you can easily debug the file upload function. Similarly, files after vue build need to use Node to proxy static files to the same port as the backend before requesting the backend. Port
has limited space, and the article may not be clear enough. For details, you can see the code of my project: https://github.com/cheer4chai/myBlog
The above is the entire article Content, I hope it will be helpful to everyone’s learning. For more related content, please pay attention to the PHP Chinese website!
Related recommendations:
About The way ajax handles cross-domain processing in jquery
##angular2 and nodejs implement the function of image upload
The above is the detailed content of About the code for configuring ueditor in nodejs+mongodb+vue front and backend. For more information, please follow other related articles on the PHP Chinese website!

Hot AI Tools

Undresser.AI Undress
AI-powered app for creating realistic nude photos

AI Clothes Remover
Online AI tool for removing clothes from photos.

Undress AI Tool
Undress images for free

Clothoff.io
AI clothes remover

Video Face Swap
Swap faces in any video effortlessly with our completely free AI face swap tool!

Hot Article
Hot Tools

Notepad++7.3.1
Easy-to-use and free code editor

SublimeText3 Chinese version
Chinese version, very easy to use

Zend Studio 13.0.1
Powerful PHP integrated development environment

Dreamweaver CS6
Visual web development tools

SublimeText3 Mac version
God-level code editing software (SublimeText3)
Hot Topics


 Is nodejs a backend framework?
Apr 21, 2024 am 05:09 AM
Is nodejs a backend framework?
Apr 21, 2024 am 05:09 AM
Node.js can be used as a backend framework as it offers features such as high performance, scalability, cross-platform support, rich ecosystem, and ease of development.
 How to connect nodejs to mysql database
Apr 21, 2024 am 06:13 AM
How to connect nodejs to mysql database
Apr 21, 2024 am 06:13 AM
To connect to a MySQL database, you need to follow these steps: Install the mysql2 driver. Use mysql2.createConnection() to create a connection object that contains the host address, port, username, password, and database name. Use connection.query() to perform queries. Finally use connection.end() to end the connection.
 What are the global variables in nodejs
Apr 21, 2024 am 04:54 AM
What are the global variables in nodejs
Apr 21, 2024 am 04:54 AM
The following global variables exist in Node.js: Global object: global Core module: process, console, require Runtime environment variables: __dirname, __filename, __line, __column Constants: undefined, null, NaN, Infinity, -Infinity
 What is the difference between npm and npm.cmd files in the nodejs installation directory?
Apr 21, 2024 am 05:18 AM
What is the difference between npm and npm.cmd files in the nodejs installation directory?
Apr 21, 2024 am 05:18 AM
There are two npm-related files in the Node.js installation directory: npm and npm.cmd. The differences are as follows: different extensions: npm is an executable file, and npm.cmd is a command window shortcut. Windows users: npm.cmd can be used from the command prompt, npm can only be run from the command line. Compatibility: npm.cmd is specific to Windows systems, npm is available cross-platform. Usage recommendations: Windows users use npm.cmd, other operating systems use npm.
 Pi Node Teaching: What is a Pi Node? How to install and set up Pi Node?
Mar 05, 2025 pm 05:57 PM
Pi Node Teaching: What is a Pi Node? How to install and set up Pi Node?
Mar 05, 2025 pm 05:57 PM
Detailed explanation and installation guide for PiNetwork nodes This article will introduce the PiNetwork ecosystem in detail - Pi nodes, a key role in the PiNetwork ecosystem, and provide complete steps for installation and configuration. After the launch of the PiNetwork blockchain test network, Pi nodes have become an important part of many pioneers actively participating in the testing, preparing for the upcoming main network release. If you don’t know PiNetwork yet, please refer to what is Picoin? What is the price for listing? Pi usage, mining and security analysis. What is PiNetwork? The PiNetwork project started in 2019 and owns its exclusive cryptocurrency Pi Coin. The project aims to create a one that everyone can participate
 Is there a big difference between nodejs and java?
Apr 21, 2024 am 06:12 AM
Is there a big difference between nodejs and java?
Apr 21, 2024 am 06:12 AM
The main differences between Node.js and Java are design and features: Event-driven vs. thread-driven: Node.js is event-driven and Java is thread-driven. Single-threaded vs. multi-threaded: Node.js uses a single-threaded event loop, and Java uses a multi-threaded architecture. Runtime environment: Node.js runs on the V8 JavaScript engine, while Java runs on the JVM. Syntax: Node.js uses JavaScript syntax, while Java uses Java syntax. Purpose: Node.js is suitable for I/O-intensive tasks, while Java is suitable for large enterprise applications.
 Is nodejs a back-end development language?
Apr 21, 2024 am 05:09 AM
Is nodejs a back-end development language?
Apr 21, 2024 am 05:09 AM
Yes, Node.js is a backend development language. It is used for back-end development, including handling server-side business logic, managing database connections, and providing APIs.
 Can nodejs write front-end?
Apr 21, 2024 am 05:00 AM
Can nodejs write front-end?
Apr 21, 2024 am 05:00 AM
Yes, Node.js can be used for front-end development, and key advantages include high performance, rich ecosystem, and cross-platform compatibility. Considerations to consider are learning curve, tool support, and small community size.
