

How to make an organizational tree component using Vue
Recently, the company is working on a project based on Vue. The project needs to develop a tree component that displays the organizational structure. I searched online for a long time and did not find a suitable one. Below, I will share with you an organizational structure tree component based on Vue. Friends who need it can refer to it
Due to the company's business needs, it is necessary to develop a tree component that displays the organizational structure (the company's project is based on Vue). After searching for a long time on GitHub, there are not many such components, and there are no components that meet business needs, so I decided to build my own wheel!
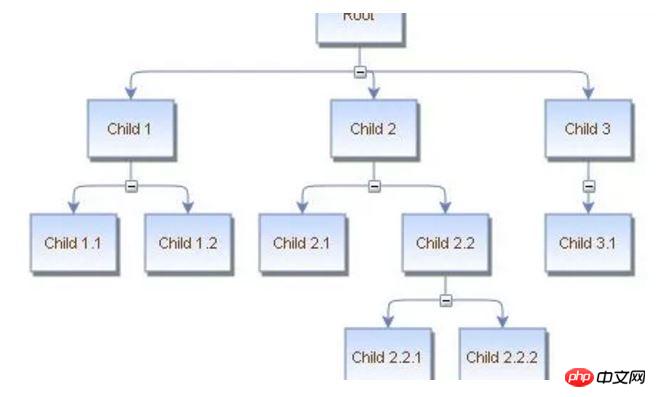
Analysis
#Since it is a tree, each node should be the same component
Nodes are nested under nodes, so the node component should be a recursive component
Then, here comes the problem. How to write recursive components?
Recursive components
Vue official documentation says this:
Components can be called recursively within its template Own. However, this can only be done if it has the name option
Next, let’s write a tree node recursive component:
<template>
<p class="org-tree-node">
<p class="org-tree-node-label">{{data.label}}</p>
<p class="org-tree-node-children" v-if="data.children">
<org-tree-node v-for="node in data.children" :data="node" :key="data.id"></org-tree-node>
</p>
</p>
</template>
<script>
export default {
name: 'OrgTreeNode',
props: {
data: Object
}
}
</script>
<style>
/* ... */
</style>Then render this component, the effect is as follows
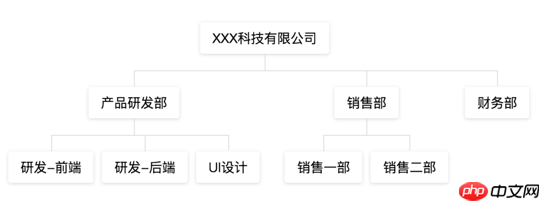
At this point, a simple organizational structure tree component is completed.
However, things are far from over. . .
Requirements: The label of the node must support customization, and the tree must support horizontal display!
Therefore, we make the following modifications to the recursive component:
<template>
<p class="org-tree-node">
<p class="org-tree-node-label">
<slot>{{data.label}}</slot>
</p>
<p class="org-tree-node-children" v-if="data.children">
<org-tree-node v-for="node in data.children" :data="node" :key="data.id"></org-tree-node>
</p>
</p>
</template>
<script>
export default {
name: 'OrgTreeNode',
props: {
data: Object
}
}
</script>
<style>
/* ... */
</style>We use slot slots to support label customization, but the problem comes again: we find that only the first-level node label can Custom, nested child nodes cannot effectively pass slot slots. After searching online for a long time, there was still no result, so I looked at the official documentation. Found a functional component. Since I have used the tree component of element-ui before, I was inspired to think of passing a renderContent function like the tree component of element-ui, and the caller can render the node label by himself, thus achieving the purpose of node customization!
Functional component
Next, we transform the tree node template component into a functional component. Writing node.js:
First we implement a render function
export const render = (h, context) => {
 const {props} = context
 return renderNode(h, props.data, context)
}Implement the renderNode function
export const renderNode = (h, data, context) => {
 const {props} = context
 const childNodes = []
 childNodes.push(renderLabel(h, data, context))
 if (props.data.children && props.data.children.length) {
 childNodes.push(renderChildren(h, props.data.children, context))
 }
 return h('p', {
 domProps: {
 className: 'org-tree-node'
 }
 }, childNodes)
}Implement the renderLabel function. The key to node label customization is here:
export const renderLabel = (h, data, context) => {
 const {props} = context
 const renderContent = props.renderContent
 const childNodes = []
 // 节点label定制,由调用者传入的renderContent实现
 if (typeof renderContent === 'function') {
 let vnode = renderContent(h, props.data)
 vnode && childNodes.push(vnode)
 } else {
 childNodes.push(props.data.label)
 }
 return h('p', {
 domProps: {
 className: 'org-tree-node-label'
 }
 }, childNodes)
}Implement the renderChildren function. Here renderNode is called recursively, and the recursive component is implemented.
export const renderChildren = (h, list, context) => {
 if (Array.isArray(list) && list.length) {
 const children = list.map(item => {
 return renderNode(h, item, context)
 })
 return h('p', {
 domProps: {
 className: 'org-tree-node-children'
 }
 }, children)
 }
 return ''
}At this point, our render function is completed. Next, use the render function to define functional components. Declare in the tree component:
<template>
<!-- ... -->
</template>
<script>
import render from './node.js'
export default {
name: 'OrgTree',
components: {
OrgTreeNode: {
render,
// 定义函数式组件
functional: true
}
}
}
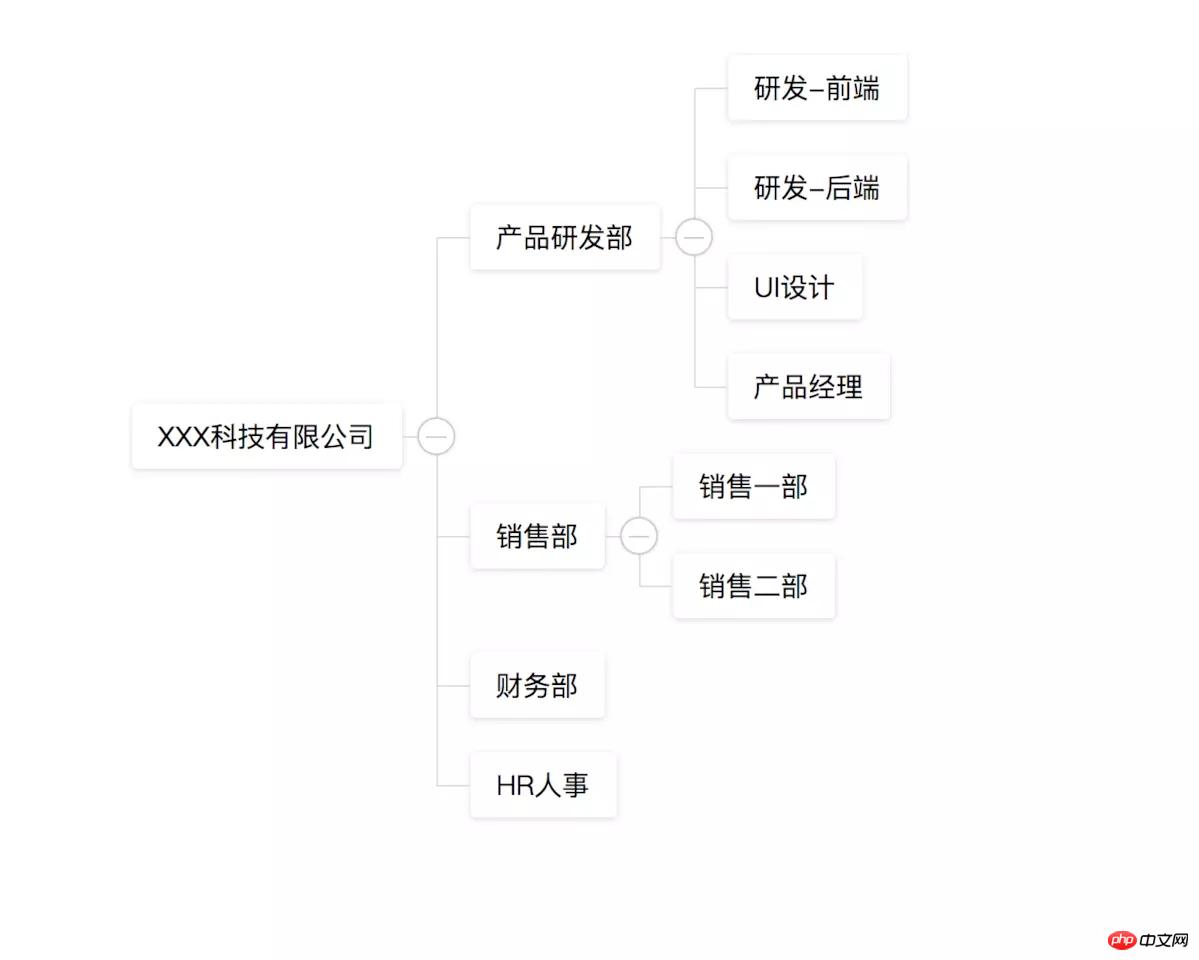
</script>At this point, our functional component transformation is completed. As for the horizontal display, we can use style control.
CSS Styles
Styles are precompiled using less. The lines between nodes are drawn using the border of :before and :after pseudo-elements
Function extension
Add Added labelClassName attribute to support style customization of node labels
Added labelWidth attribute to limit the width of node labels
Added props attribute, refer to the props attribute of the tree component of element-ui to support complex data structures
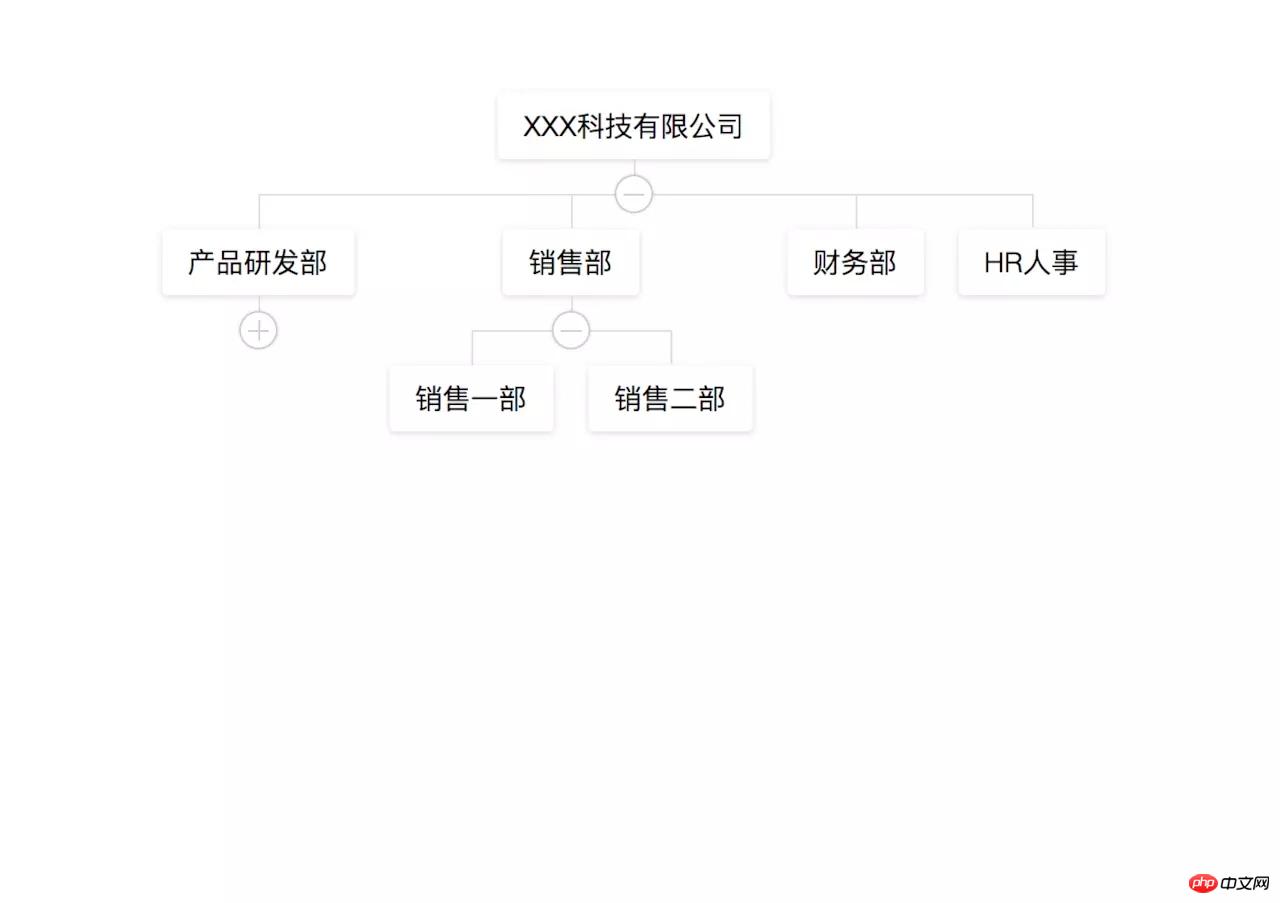
Added the collapsable attribute to support the expansion and collapse of child nodes (expand and collapse operations Needs to be implemented by the caller)
At first, the flex layout was used, but it needed to be compatible with IE9, and later changed to display: table layout
Finally Effect:
default
##Problem SummaryYou can define a tree store to store the status of each node, so that the expanded and collapsed status of the tree nodes can be maintained internally
The above is what I compiled for everyone. , I hope it will be helpful to everyone in the future.
Related articles:
How to implement a series of functions such as image uploading in the WeChat appletAbout null values and The statement of false valueAbout automated construction in Webpack (detailed tutorial)BUG encountered in JavaScriptThe above is the detailed content of How to make an organizational tree component using Vue. For more information, please follow other related articles on the PHP Chinese website!

Hot AI Tools

Undresser.AI Undress
AI-powered app for creating realistic nude photos

AI Clothes Remover
Online AI tool for removing clothes from photos.

Undress AI Tool
Undress images for free

Clothoff.io
AI clothes remover

Video Face Swap
Swap faces in any video effortlessly with our completely free AI face swap tool!

Hot Article
Hot Tools

Notepad++7.3.1
Easy-to-use and free code editor

SublimeText3 Chinese version
Chinese version, very easy to use

Zend Studio 13.0.1
Powerful PHP integrated development environment

Dreamweaver CS6
Visual web development tools

SublimeText3 Mac version
God-level code editing software (SublimeText3)
Hot Topics
 1662
1662
 14
1419
52
1312
25
1262
29
1235
24
14
1419
52
1312
25
1262
29
1235
24

 How to use bootstrap in vue
Apr 07, 2025 pm 11:33 PM
How to use bootstrap in vue
Apr 07, 2025 pm 11:33 PM
Using Bootstrap in Vue.js is divided into five steps: Install Bootstrap. Import Bootstrap in main.js. Use the Bootstrap component directly in the template. Optional: Custom style. Optional: Use plug-ins.
 How to add functions to buttons for vue
Apr 08, 2025 am 08:51 AM
How to add functions to buttons for vue
Apr 08, 2025 am 08:51 AM
You can add a function to the Vue button by binding the button in the HTML template to a method. Define the method and write function logic in the Vue instance.
 How to use watch in vue
Apr 07, 2025 pm 11:36 PM
How to use watch in vue
Apr 07, 2025 pm 11:36 PM
The watch option in Vue.js allows developers to listen for changes in specific data. When the data changes, watch triggers a callback function to perform update views or other tasks. Its configuration options include immediate, which specifies whether to execute a callback immediately, and deep, which specifies whether to recursively listen to changes to objects or arrays.
 What does vue multi-page development mean?
Apr 07, 2025 pm 11:57 PM
What does vue multi-page development mean?
Apr 07, 2025 pm 11:57 PM
Vue multi-page development is a way to build applications using the Vue.js framework, where the application is divided into separate pages: Code Maintenance: Splitting the application into multiple pages can make the code easier to manage and maintain. Modularity: Each page can be used as a separate module for easy reuse and replacement. Simple routing: Navigation between pages can be managed through simple routing configuration. SEO Optimization: Each page has its own URL, which helps SEO.
 How to return to previous page by vue
Apr 07, 2025 pm 11:30 PM
How to return to previous page by vue
Apr 07, 2025 pm 11:30 PM
Vue.js has four methods to return to the previous page: $router.go(-1)$router.back() uses <router-link to="/" component window.history.back(), and the method selection depends on the scene.
 React vs. Vue: Which Framework Does Netflix Use?
Apr 14, 2025 am 12:19 AM
React vs. Vue: Which Framework Does Netflix Use?
Apr 14, 2025 am 12:19 AM
Netflixusesacustomframeworkcalled"Gibbon"builtonReact,notReactorVuedirectly.1)TeamExperience:Choosebasedonfamiliarity.2)ProjectComplexity:Vueforsimplerprojects,Reactforcomplexones.3)CustomizationNeeds:Reactoffersmoreflexibility.4)Ecosystema
 How to use vue traversal
Apr 07, 2025 pm 11:48 PM
How to use vue traversal
Apr 07, 2025 pm 11:48 PM
There are three common methods for Vue.js to traverse arrays and objects: the v-for directive is used to traverse each element and render templates; the v-bind directive can be used with v-for to dynamically set attribute values for each element; and the .map method can convert array elements into new arrays.
 How to jump to the div of vue
Apr 08, 2025 am 09:18 AM
How to jump to the div of vue
Apr 08, 2025 am 09:18 AM
There are two ways to jump div elements in Vue: use Vue Router and add router-link component. Add the @click event listener and call this.$router.push() method to jump.
