

How to implement favorites using vue
This article mainly introduces laravel5.3 vue to implement the favorites function. This article introduces it to you in great detail through example code. Friends who need it can refer to it.
The following will introduce laravel5.3 to you through this article. vue implements the favorites function. The specific code is as follows:
{
 "private": true,
 "scripts": {
 "prod": "gulp --production",
 "dev": "gulp watch"
 },
 "devDependencies": {
 "bootstrap-sass": "^3.3.7",
 "gulp": "^3.9.1",
 "jquery": "^3.1.0",
 "laravel-elixir": "^6.0.0-14",
 "laravel-elixir-vue-2": "^0.2.0",
 "laravel-elixir-webpack-official": "^1.0.2",
 "lodash": "^4.16.2",
 "vue": "^2.0.1",
 "vue-resource": "^1.0.3"
 }
}1.0.2 Modify gulpfile.js
Change the original require('laravel-elixir-vue' ); Modify to require('laravel-elixir-vue-2');
const elixir = require('laravel-elixir');
require('laravel-elixir-vue-2');
/*
 |--------------------------------------------------------------------------
 | Elixir Asset Management
 |--------------------------------------------------------------------------
 |
 | Elixir provides a clean, fluent API for defining some basic Gulp tasks
 | for your Laravel application. By default, we are compiling the Sass
 | file for our application, as well as publishing vendor resources.
 |
 */
elixir(mix => {
 mix.sass('app.scss')
 .webpack('app.js');
});1.0.3 Modify resource/assets/js/app.js
The original el: 'body' is changed to el: '#app'
const app = new Vue({
 el: '#app'
});1.1 Install npm module
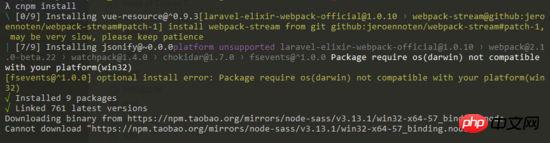
(if this operation has not been performed before)
npm install
1.2 Creating models and migration
We need a User model (included with laravel), a Post model and a Favorite model and their respective migration file. Because we have created a Post model before, we only need to create a Favorite model.
php artisan make:model App\Models\Favorite -m

This will create a Favorite
model and migration file.
1.3 Modify the up method of posts migration table and favorites
Add a user_id field after the id field to the posts table
php artisan make:migration add_userId_to_posts_table --table=posts
Modify database/migrations/2018_01_18_145843_add_userId_to_posts_table.php
public function up()
 {
 Schema::table('posts', function (Blueprint $table) {
  $table->integer('user_id')->unsigned()->after('id');
 });
 }
database/migrations/2018_01_18_142146_create_favorites_table.php
public function up()
 {
 Schema::create('favorites', function (Blueprint $table) {
  $table->increments('id');
  $table->integer('user_id')->unsigned();
  $table->integer('post_id')->unsigned();
  $table->timestamps();
 });
}The favorites table contains two columns:
user_id The user ID of the collected article.
post_id The ID of the collected post.
Then perform table migration
php artisan migrate
1.4 User authentication
Because we have done it before It has already been created, so there is no need to create it again here.
If you have not created a user authentication module, you need to execute php artisan make:auth
2. Complete the favorites function
Modify routes/web.php
2.1 Create a router
Auth::routes();
Route::post('favorite/{post}', 'ArticleController@favoritePost');
Route::post('unfavorite/{post}', 'ArticleController@unFavoritePost');
Route::get('my_favorites', 'UsersController@myFavorites')->middleware('auth');2.2 Many-to-many relationship between articles and users
Since users can mark many articles as Favorites, and an article can be marked as favorites by many users, so the relationship between users and the most favorited articles will be a many-to-many relationship. To define this relationship, open the User model and add a favorites() app/User.php
Note that the namespace of the post model is App\Models\Post, so be sure to introduce use App\Models\ in the header Post;
public function favorites()
 {
 return $this->belongsToMany(Post::class, 'favorites', 'user_id', 'post_id')->withTimeStamps();
}The second parameter is the name of the pivot table (favorite). The third parameter is the foreign key name (user_id) of the model to define the relationship (User), and the fourth parameter is the foreign key name (post_id) of the model (Post) to be added. Notice that we link withTimeStamps() to belongsToMany(). This will allow when a row is inserted or updated, the timestamp (create_at and updated_at) columns on the pivot table will be affected.
2.3 Create article controller
Because we have created it before, there is no need to create it here.
If you have not created it before, please execute php artisan make:controller ArticleController
2.4 Add favoritePost and unFavoritePost two methods in the article controller
Note that the header must be introduced use Illuminate\Support\Facades\Auth;
<?php
namespace App\Http\Controllers;
use Illuminate\Http\Request;
use App\Models\Post;
use Illuminate\Support\Facades\Auth;
class ArticleController extends Controller
{
public function index()
{
$data = Post::paginate(5);
return view('home.article.index', compact('data'));
}
public function show($id)
{
$data = Post::find($id);
return view('home.article.list', compact('data'));
}
public function favoritePost(Post $post)
{
Auth::user()->favorites()->attach($post->id);
return back();
}
public function unFavoritePost(Post $post)
{
Auth::user()->favorites()->detach($post->id);
return back();
}
}2.5 Integrate axios module
•Install axios
npm install axios --save
•Introduce axios module resource/assets/js/bootstrap.js and add at the end
import axios from 'axios';
window.axios = axios;
2.6 Create a favorites component
// resources/assets/js/components/Favorite.vue
<template>
<span>
<a href="#" rel="external nofollow" rel="external nofollow" v-if="isFavorited" @click.prevent="unFavorite(post)">
<i class="fa fa-heart"></i>
</a>
<a href="#" rel="external nofollow" rel="external nofollow" v-else @click.prevent="favorite(post)">
<i class="fa fa-heart-o"></i>
</a>
</span>
</template>
<script>
export default {
props: ['post', 'favorited'],
data: function() {
return {
isFavorited: '',
}
},
mounted() {
this.isFavorited = this.isFavorite ? true : false;
},
computed: {
isFavorite() {
return this.favorited;
},
},
methods: {
favorite(post) {
axios.post('/favorite/'+post)
.then(response => this.isFavorited = true)
.catch(response => console.log(response.data));
},
unFavorite(post) {
axios.post('/unfavorite/'+post)
.then(response => this.isFavorited = false)
.catch(response => console.log(response.data));
}
}
}
</script>2.7 View Introducing components
Before using the view component, we first introduce the font file resource/views/layouts/app.blade.php and introduce the font file
<link rel="stylesheet" href="https://cdnjs.cloudflare.com/ajax/libs/font-awesome/4.7.0/css/font-awesome.min.css" />
in the head of app.blade .php Add my favorites link
// 加在logout-form之后
<form id="logout-form" action="{{ url('/logout') }}" method="POST" style="display: none;">
{{ csrf_field() }}
</form>
<a href="{{ url('my_favorites') }}" rel="external nofollow" >我的收藏夹</a>Use components
// resources/views/home/article/index.blade.php
if (Auth::check())
<p class="panel-footer">
<favorite
:post={{ $list->id }}
:favorited={{ $list->favorited() ? 'true' : 'false' }}
></favorite>
</p>endif
Then we need to create favorited() Open app/Models/Post.php Add favorited() Method
Note to reference the namespace in the header use App\Models\Favorite; use Illuminate\Support\Facades\Auth;
public function favorited()
 {
 return (bool) Favorite::where('user_id', Auth::id())
    ->where('post_id', $this->id)
    ->first();
}2.8 Use components
Introducing Favorite.vue component resources/assets/js/app.js
Vue.component('favorite', require('./components/Favorite.vue'));
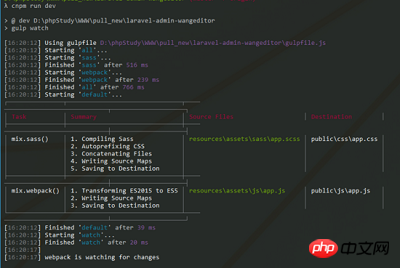
Compilation
npm run dev
Rendering
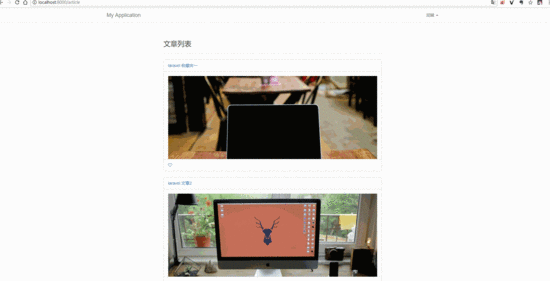
##3. Complete my favorites
##3.1 Create user controllerphp artisan make:controller UsersController
app/Http/Controllers/UsersController.php
<?php
namespace App\Http\Controllers;
use Illuminate\Http\Request;
use Illuminate\Support\Facades\Auth;
class UsersController extends Controller
{
public function myFavorites()
{
$myFavorites = Auth::user()->favorites;
return view('users.my_favorites', compact('myFavorites'));
}
}Add view file
// resources/views/users/my_favorites.blade.php
extends('layouts.app')
@section('content')
<p class="container">
<p class="row">
<p class="col-md-8 col-md-offset-2">
<p class="page-header">
<h3>My Favorites</h3>
</p>
@forelse ($myFavorites as $myFavorite)
<p class="panel panel-default">
<p class="panel-heading">
<a href="/article/{{ $myFavorite->id }}" rel="external nofollow" >
{{ $myFavorite->title }}
</a>
</p>
<p class="panel-body" style="max-height:300px;overflow:hidden;">
<img src="/uploads/{!! ($myFavorite->cover)[0] !!}" style="max-width:100%;overflow:hidden;" alt="">
</p>
@if (Auth::check())
<p class="panel-footer">
<favorite
:post={{ $myFavorite->id }}
:favorited={{ $myFavorite->favorited() ? 'true' : 'false' }}
></favorite>
</p>
@endif
</p>
@empty
<p>You have no favorite posts.</p>
@endforelse
</p>
</p>
</p>
@endsectionThen add a route to the root directory routes/web.php
Route::get('/', 'ArticleController@index');
 Finally The renderings
above are what I compiled for you. I hope it will be helpful to you in the future.
Related articles:
How to process arrays through v-for in vue
##Referencing bmob js-sdk in VUE (detailed tutorial)
Should we add new when creating objects in js?
What are the usages of html-webpack-plugin?
The above is the detailed content of How to implement favorites using vue. For more information, please follow other related articles on the PHP Chinese website!

Hot AI Tools

Undresser.AI Undress
AI-powered app for creating realistic nude photos

AI Clothes Remover
Online AI tool for removing clothes from photos.

Undress AI Tool
Undress images for free

Clothoff.io
AI clothes remover

Video Face Swap
Swap faces in any video effortlessly with our completely free AI face swap tool!

Hot Article
Hot Tools

Notepad++7.3.1
Easy-to-use and free code editor

SublimeText3 Chinese version
Chinese version, very easy to use

Zend Studio 13.0.1
Powerful PHP integrated development environment

Dreamweaver CS6
Visual web development tools

SublimeText3 Mac version
God-level code editing software (SublimeText3)
Hot Topics


 Laravel Introduction Example
Apr 18, 2025 pm 12:45 PM
Laravel Introduction Example
Apr 18, 2025 pm 12:45 PM
Laravel is a PHP framework for easy building of web applications. It provides a range of powerful features including: Installation: Install the Laravel CLI globally with Composer and create applications in the project directory. Routing: Define the relationship between the URL and the handler in routes/web.php. View: Create a view in resources/views to render the application's interface. Database Integration: Provides out-of-the-box integration with databases such as MySQL and uses migration to create and modify tables. Model and Controller: The model represents the database entity and the controller processes HTTP requests.
 Netflix's Frontend: Examples and Applications of React (or Vue)
Apr 16, 2025 am 12:08 AM
Netflix's Frontend: Examples and Applications of React (or Vue)
Apr 16, 2025 am 12:08 AM
Netflix uses React as its front-end framework. 1) React's componentized development model and strong ecosystem are the main reasons why Netflix chose it. 2) Through componentization, Netflix splits complex interfaces into manageable chunks such as video players, recommendation lists and user comments. 3) React's virtual DOM and component life cycle optimizes rendering efficiency and user interaction management.
 Solve caching issues in Craft CMS: Using wiejeben/craft-laravel-mix plug-in
Apr 18, 2025 am 09:24 AM
Solve caching issues in Craft CMS: Using wiejeben/craft-laravel-mix plug-in
Apr 18, 2025 am 09:24 AM
When developing websites using CraftCMS, you often encounter resource file caching problems, especially when you frequently update CSS and JavaScript files, old versions of files may still be cached by the browser, causing users to not see the latest changes in time. This problem not only affects the user experience, but also increases the difficulty of development and debugging. Recently, I encountered similar troubles in my project, and after some exploration, I found the plugin wiejeben/craft-laravel-mix, which perfectly solved my caching problem.
 Laravel user login function
Apr 18, 2025 pm 12:48 PM
Laravel user login function
Apr 18, 2025 pm 12:48 PM
Laravel provides a comprehensive Auth framework for implementing user login functions, including: Defining user models (Eloquent model), creating login forms (Blade template engine), writing login controllers (inheriting Auth\LoginController), verifying login requests (Auth::attempt) Redirecting after login is successful (redirect) considering security factors: hash passwords, anti-CSRF protection, rate limiting and security headers. In addition, the Auth framework also provides functions such as resetting passwords, registering and verifying emails. For details, please refer to the Laravel documentation: https://laravel.com/doc
 Laravel framework installation method
Apr 18, 2025 pm 12:54 PM
Laravel framework installation method
Apr 18, 2025 pm 12:54 PM
Article summary: This article provides detailed step-by-step instructions to guide readers on how to easily install the Laravel framework. Laravel is a powerful PHP framework that speeds up the development process of web applications. This tutorial covers the installation process from system requirements to configuring databases and setting up routing. By following these steps, readers can quickly and efficiently lay a solid foundation for their Laravel project.
 How to learn Laravel How to learn Laravel for free
Apr 18, 2025 pm 12:51 PM
How to learn Laravel How to learn Laravel for free
Apr 18, 2025 pm 12:51 PM
Want to learn the Laravel framework, but suffer from no resources or economic pressure? This article provides you with free learning of Laravel, teaching you how to use resources such as online platforms, documents and community forums to lay a solid foundation for your PHP development journey from getting started to master.
 How to view the version number of laravel? How to view the version number of laravel
Apr 18, 2025 pm 01:00 PM
How to view the version number of laravel? How to view the version number of laravel
Apr 18, 2025 pm 01:00 PM
The Laravel framework has built-in methods to easily view its version number to meet the different needs of developers. This article will explore these methods, including using the Composer command line tool, accessing .env files, or obtaining version information through PHP code. These methods are essential for maintaining and managing versioning of Laravel applications.
 What versions of laravel are there? How to choose the version of laravel for beginners
Apr 18, 2025 pm 01:03 PM
What versions of laravel are there? How to choose the version of laravel for beginners
Apr 18, 2025 pm 01:03 PM
In the Laravel framework version selection guide for beginners, this article dives into the version differences of Laravel, designed to assist beginners in making informed choices among many versions. We will focus on the key features of each release, compare their pros and cons, and provide useful advice to help beginners choose the most suitable version of Laravel based on their skill level and project requirements. For beginners, choosing a suitable version of Laravel is crucial because it can significantly impact their learning curve and overall development experience.
