

How to achieve hexagonal button special effects
This time I will show you how to implement hexagonal button special effects, and what are the precautions for realizing hexagonal button special effects. The following is a practical case, let’s take a look.
Code Interpretation
Define dom, the container only contains 1 button:
<nav>
    <ul>
        <li>Home</li>
    </ul>
</nav>
Define button style:
nav {
    --h: 3em;
}
nav ul {
    padding: 0;
}
nav ul li {
    list-style-type: none;
    width: calc(var(--h) * 1.732);
    height: var(--h);
    background-color: #333;
    color: white;
    font-family: sans-serif;
    text-align: center;
    line-height: var(--h);
}Use pseudo elements to add 2 tilts rectangle:
nav ul li {
    position: relative;
}
nav ul li::before,
nav ul li::after {
    content: '';
    position: absolute;
    top: 0;
    left: 0;
    width: inherit;
    height: inherit;
    background-color: #333;
}
nav ul li::before{
    transform: rotate(60deg) translateX(calc(var(--h) * -2));
}
nav ul li::after{
    transform: rotate(-60deg) translateX(calc(var(--h) * 2));
}Add mouse over effect:
nav ul li::before,
nav ul li::after {
    z-index: -1;
    filter: opacity(0);
    transition: 0.3s;
}
nav ul li:hover::before {
    filter: opacity(1);
    transform: rotate(60deg) translateX(0);
}
nav ul li:hover::after {
    filter: opacity(1);
    transform: rotate(-60deg) translateX(0);
}Add several buttons in dom to form a group of buttons:
<nav>
    <ul>
        <li>Home</li>
        <li>Products</li>
        <li>Services</li>
        <li>Contact</li>
    </ul>
</nav>
The mouse over effect is between the buttons Leave some margin:
nav ul li {
    margin: 2em;
}Add two more sets of buttons:
<nav> <ul> <li>Home</li> <li>Products</li> <li>Services</li> <li>Contact</li> </ul> </nav> <nav> <ul> <li>Home</li> <li>Products</li> <li>Services</li> <li>Contact</li> </ul> </nav>
Finally, try some variations:
nav {
    --h: 3em;
}
nav:nth-child(1) {
    --rate: 1.5;
    --bgcolor: black;
}
nav:nth-child(2) {
    --rate: 1.732;
    --bgcolor: brown;
}
nav:nth-child(3) {
    --rate: 2;
    --bgcolor: green;
}
nav ul li {
    width: calc(var(--h) * var(--rate));
    background-color: var(--bgcolor);
}
nav ul li::before,
nav ul li::after {
    background-color: var(--bgcolor);
}You’re done!
I believe you have mastered the method after reading the case in this article. For more exciting information, please pay attention to other related articles on the php Chinese website!
Recommended reading:
Detailed explanation of the steps to implement the JS carousel stay effect
##Linux background running node service instruction step method
The above is the detailed content of How to achieve hexagonal button special effects. For more information, please follow other related articles on the PHP Chinese website!

Hot AI Tools

Undresser.AI Undress
AI-powered app for creating realistic nude photos

AI Clothes Remover
Online AI tool for removing clothes from photos.

Undress AI Tool
Undress images for free

Clothoff.io
AI clothes remover

Video Face Swap
Swap faces in any video effortlessly with our completely free AI face swap tool!

Hot Article
Hot Tools

Notepad++7.3.1
Easy-to-use and free code editor

SublimeText3 Chinese version
Chinese version, very easy to use

Zend Studio 13.0.1
Powerful PHP integrated development environment

Dreamweaver CS6
Visual web development tools

SublimeText3 Mac version
God-level code editing software (SublimeText3)
Hot Topics


 How to use Vue to implement pop-up window effects
Sep 22, 2023 am 09:40 AM
How to use Vue to implement pop-up window effects
Sep 22, 2023 am 09:40 AM
How to use Vue to implement pop-up window effects requires specific code examples. In recent years, with the development of web applications, pop-up window effects have become one of the commonly used interaction methods among developers. As a popular JavaScript framework, Vue provides rich functions and ease of use, and is very suitable for implementing pop-up window effects. This article will introduce how to use Vue to implement pop-up window effects and provide specific code examples. First, we need to create a new Vue project using Vue's CLI tool. open end
![Change the power button action on Windows 11 [5 Tips]](https://img.php.cn/upload/article/000/887/227/169600135086895.png?x-oss-process=image/resize,m_fill,h_207,w_330) Change the power button action on Windows 11 [5 Tips]
Sep 29, 2023 pm 11:29 PM
Change the power button action on Windows 11 [5 Tips]
Sep 29, 2023 pm 11:29 PM
The power button can do more than shut down your PC, although this is the default action for desktop users. If you want to change the power button action in Windows 11, it's easier than you think! Keep in mind that the physical power button is different from the button in the Start menu, and the changes below won't affect the operation of the latter. Additionally, you'll find slightly different power options depending on whether it's a desktop or laptop. Why should you change the power button action in Windows 11? If you put your computer to sleep more often than you shut it down, changing the way your hardware power button (that is, the physical power button on your PC) behaves will do the trick. The same idea applies to sleep mode or simply turning off the display. Change Windows 11
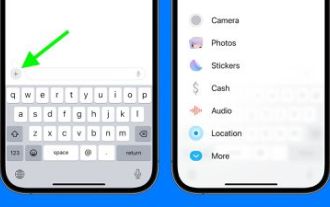 iOS 17: How to organize iMessage apps in Messages
Sep 18, 2023 pm 05:25 PM
iOS 17: How to organize iMessage apps in Messages
Sep 18, 2023 pm 05:25 PM
In iOS 17, Apple not only added several new messaging features, but also tweaked the design of the Messages app to give it a cleaner look. All iMessage apps and tools, such as the camera and photo options, can now be accessed by tapping the "+" button above the keyboard and to the left of the text input field. Clicking the "+" button brings up a menu column with a default order of options. Starting from the top, there's camera, photos, stickers, cash (if available), audio, and location. At the very bottom is a "More" button, which when tapped will reveal any other installed messaging apps (you can also swipe up to reveal this hidden list). How to reorganize your iMessage app You can do this below
 How to use Vue to implement button countdown effects
Sep 21, 2023 pm 02:03 PM
How to use Vue to implement button countdown effects
Sep 21, 2023 pm 02:03 PM
How to use Vue to implement button countdown effects With the increasing popularity of web applications, we often need to use some dynamic effects to improve user experience when users interact with the page. Among them, the countdown effect of the button is a very common and practical effect. This article will introduce how to use the Vue framework to implement button countdown effects and give specific code examples. First, we need to create a Vue component that contains a button and countdown function. In Vue, a component is a reusable Vue instance, and a view will
 How to use Vue to implement full-screen mask effects
Sep 19, 2023 pm 04:14 PM
How to use Vue to implement full-screen mask effects
Sep 19, 2023 pm 04:14 PM
How to use Vue to implement full-screen masking effects. In web development, we often encounter scenarios that require full-screen masking, such as displaying a masking layer when loading data to prevent users from performing other operations, or in some special scenarios. Use a mask layer to highlight an element. Vue is a popular JavaScript framework that provides convenient tools and components to achieve various effects. In this article, I will introduce how to use Vue to achieve the effect of full-screen masking, and provide some specific code examples. At first, we
 Why won't my laptop start up after pressing the power button?
Mar 10, 2024 am 09:31 AM
Why won't my laptop start up after pressing the power button?
Mar 10, 2024 am 09:31 AM
There could be several reasons why your Windows laptop won't boot. Memory failure, dead battery, faulty power button, or hardware issues are all common causes. Here are some solutions to help you resolve this issue. Laptop won't turn on after pressing the power button If your Windows laptop still won't turn on after pressing the power button, here are some steps you can take to resolve the issue: Is your laptop fully charged? Perform a hard reset to clean your laptop Reseat the memory Transparent CMOS type battery Take your laptop for repair. 1] Is your laptop fully charged? The first thing to do is to check if your laptop is fully charged. Laptop won't start if battery is drained
 What does iPhone 16 look like? What changes are there in iPhone 16?
Apr 07, 2024 pm 05:10 PM
What does iPhone 16 look like? What changes are there in iPhone 16?
Apr 07, 2024 pm 05:10 PM
After the release of the iPhone 15 series, there have been constant revelations about the appearance and configuration of Apple’s new iPhone 16. What does iPhone 16 look like? Is there any improvement in iPhone 16? Recently, an overseas blogger showed off the design of the iPhone 16 series. The overall design is basically the same as the iPhone 15 series. As you can see from the picture, the entire iPhone 16 series is equipped with a new "shoot" button as standard, allowing users to take photos more conveniently. In addition, other design details are still unknown. The message shows that this new button will be used to shoot videos and is located below the power button. Previous news has mentioned that it may be a capacitive solid-state button, but recent reports indicate that it should still be a
 Specific steps to create a hexagonal cluster layout in PPT
Mar 26, 2024 pm 03:21 PM
Specific steps to create a hexagonal cluster layout in PPT
Mar 26, 2024 pm 03:21 PM
1. First start PPT2010, execute the insert-picture command, insert a landscape picture material, and adjust the size. 2. Execute the insert command again, select smartart and then bring up the select smartart graphics dialog box. 3. Switch to the Picture tab, select the hexagonal cluster, and click the OK button to view the effect. 4. Then execute the Format-Add Shape command and click multiple times to add. Of course, adding shapes should be based on your actual situation. 5. Select the hexagon cluster and execute the Design-Convert-Convert to Shape command to convert it into a graphic. 6. Select the image to execute the Cut command, right-click the shape and select the Format Shape command from the drop-down menu. 7. In the Format Shape dialog box, set the fill to a picture or texture.
