
 Web Front-end
JS Tutorial
Detailed explanation of vue iview dynamic routing and permission verification steps
Web Front-end
JS Tutorial
Detailed explanation of vue iview dynamic routing and permission verification steps
Detailed explanation of vue iview dynamic routing and permission verification steps
This time I will bring you a detailed explanation of the steps of vue iview dynamic routing and permission verification. What are the precautions when using vue iview dynamic routing and permission verification. The following is a practical case, let's take a look.
There are many examples of dynamic addition of routes in Vue on github. After referring to some projects, this project completed the dynamic addition of dynamic routes and menu refresh based on the iview framework. In order to help other friends in need, I now share the implementation logic. Welcome to communicate and learn together.
Github address
iview-dynamicRouter
Achieve the goal
After the client gets the routing and permission data from the server, Refresh the project's routing and menu lists, and perform permission control.
Project basis
- ##Basic framework: The template branch project of iview component library official template project iview-admin, this project is of iview-admin Basic framework code. Project address: iview-admin
Implementation logic
Dynamic routing control loading
Generally Said that there are two types of dynamic routing control: one is to store all routing data in local files, and then obtain the user's permission information from the server. When the route jumps, add a permission judgment hook. If the page the user goes to is not Within the permission list, jumping is prohibited. The other is to store only basic routes locally, such as iview-admin project divides routing into three types:- Page routing that is not displayed as a sub-page of the Main component, such as login, 404, 403 and other error pages Routing;
- is displayed as a sub-page of the Main component but is not displayed in the left menu otherRouter, such as home page routing;
- is used as the Main component The sub-page is displayed and the routing appRouter displayed in the left menu;
router.addRoutes(routes) to complete the dynamic addition of the route list; the second part is because the page under the iview-admin framework Tags and Breadcrumb Navigation need to traverse the appRouter to obtain routing information, so we also need to store routing data in vuex for global access.
routing address is not found, will jump by default. When you get to the 404 error page, the experience is very poor, so the 404 route is not written into the routing rules first and is loaded together with the dynamic route.
The main code is implemented as follows: Data request and routing node generation//util.js
//生成路由
util.initRouter = function (vm) {
const constRoutes = [];
const otherRoutes = [];
// 404路由需要和动态路由一起注入
const otherRouter = [{
path: '/*',
name: 'error-404',
meta: {
title: '404-页面不存在'
},
component: 'error-page/404'
}];
// 模拟异步请求
util.ajax('menu.json').then(res => {
var menuData = res.data;
util.initRouterNode(constRoutes, menuData);
util.initRouterNode(otherRoutes, otherRouter);
// 添加主界面路由
vm.$store.commit('updateAppRouter', constRoutes.filter(item => item.children.length > 0));
// 添加全局路由
vm.$store.commit('updateDefaultRouter', otherRoutes);
// 刷新界面菜单
vm.$store.commit('updateMenulist', constRoutes.filter(item => item.children.length > 0));
});
};
//生成路由节点
util.initRouterNode = function (routers, data) {
for (var item of data) {
let menu = Object.assign({}, item);
menu.component = lazyLoading(menu.component);
if (item.children && item.children.length > 0) {
menu.children = [];
util.initRouterNode(menu.children, item.children);
}
//添加权限判断
meta.permission = menu.permission ? menu.permission : null;
//添加标题
meta.title = menu.title ? menu.title : null;
menu.meta = meta;
}
};Dynamic loading of components
//lazyLoading.js
export default (url) =>()=>import(`@/views/${url}.vue`)
Store缓存实现
//app.js
 // 动态添加主界面路由,需要缓存
updateAppRouter (state, routes) {
 state.routers.push(...routes);
 router.addRoutes(routes);
},
// 动态添加全局路由,不需要缓存
updateDefaultRouter (state, routes) {
 router.addRoutes(routes);
},
// 接受前台数组,刷新菜单
updateMenulist (state, routes) {
 state.menuList = routes;
}//main.js
mounted () {
// 调用方法,动态生成路由
util.initRouter(this);
}Permission control
Similar to the dynamic routing implementation method, operation permission control is generally divided into two types. The first is when the page is displayed. Without controlling permissions, all operations, such as buttons, are displayed. Then when the operation is initiated, the permissions are judged. If the user has the permissions for the operation, it passes, otherwise the user is reminded that he does not have permissions. The second is when the page is loaded. , the permissions are judged, and operations without permissions are not displayed. I prefer the second method, which will not mislead the user. I personally think that what the user sees should be operable, otherwise it will be very uncomfortable to click the button and then be prompted that there is no permission. The source of ideas for this project can be found in the reference blog post. The original blogger’s specific idea is: in the meta field of the routing structure, The main code is implemented as follows: Add the permission field in the routing data to store the permission list//menu.json,模拟异步请求数据
[
{
"path": "/groupOne",
"icon": "ios-folder",
"name": "system_index",
"title": "groupOne",
"component": "Main",
"children": [
{
"path": "pageOne",
"icon": "ios-paper-outline",
"name": "pageOne",
"title": "pageOne",
"component": "group/page1/page1",
"permission":["del"]
},
...
]
}
]在遍历生成路由节点时,将 permission 字段数据存入路由节点 meta 属性中
//util.js
//生成路由节点
util.initRouterNode = function (routers, data) {
 for (var item of data) {
  ....
  //添加权限判断
  meta.permission = menu.permission ? menu.permission : null;
  ...
 }
};定义全局命令组件,读取路由 permission 属性值获得权限列表,如果该不权限在权限列表中,则删除节点
//hasPermission.js
const hasPermission = {
 install (Vue, options) {
  Vue.directive('hasPermission', {
   bind (el, binding, vnode) {
    let permissionList = vnode.context.$route.meta.permission;
    if (permissionList && permissionList.length && !permissionList.includes(binding.value)) {
     el.parentNode.removeChild(el);
    }
   }
  });
 }
};
export default hasPermission;权限组件使用示例:
<template> <p> <h1>page1</h1> <Button v-hasPermission="'add'">添加</Button> <Button v-hasPermission="'edit'">修改</Button> <Button v-hasPermission="'del'">删除</Button> </p> </template>
全局注册组件
// main.js
import hasPermission from '@/libs/hasPermission.js';
Vue.use(hasPermission);
这种权限控制方法的优点就是,不管是管理配置还是页面处理逻辑都相对简单,没有很多重复的代码判断和节点处理,在参考对比了网上几种实现方式后,个人比较推荐这一种方法。
页面标签和面包屑导航
在我看来,页面标签和面包屑都属于系统中锦上添花的页面相关控件,提高页面管理的便捷性,在iview官方admin项目中已经实现了这两个组件。所以这个项目中,只是将其进行移植,实现了组件功能,没有深入了解,感兴趣的可以仔细研究。
相信看了本文案例你已经掌握了方法,更多精彩请关注php中文网其它相关文章!
推荐阅读:
The above is the detailed content of Detailed explanation of vue iview dynamic routing and permission verification steps. For more information, please follow other related articles on the PHP Chinese website!

Hot AI Tools

Undresser.AI Undress
AI-powered app for creating realistic nude photos

AI Clothes Remover
Online AI tool for removing clothes from photos.

Undress AI Tool
Undress images for free

Clothoff.io
AI clothes remover

Video Face Swap
Swap faces in any video effortlessly with our completely free AI face swap tool!

Hot Article
Hot Tools

Notepad++7.3.1
Easy-to-use and free code editor

SublimeText3 Chinese version
Chinese version, very easy to use

Zend Studio 13.0.1
Powerful PHP integrated development environment

Dreamweaver CS6
Visual web development tools

SublimeText3 Mac version
God-level code editing software (SublimeText3)
Hot Topics
 1660
1660
 14
1416
52
1310
25
1259
29
1233
24
14
1416
52
1310
25
1259
29
1233
24

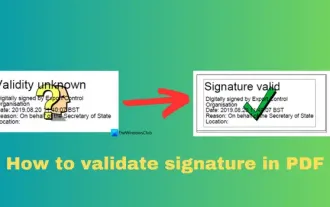 How to verify signature in PDF
Feb 18, 2024 pm 05:33 PM
How to verify signature in PDF
Feb 18, 2024 pm 05:33 PM
We usually receive PDF files from the government or other agencies, some with digital signatures. After verifying the signature, we see the SignatureValid message and a green check mark. If the signature is not verified, the validity is unknown. Verifying signatures is important, let’s see how to do it in PDF. How to Verify Signatures in PDF Verifying signatures in PDF format makes it more trustworthy and the document more likely to be accepted. You can verify signatures in PDF documents in the following ways. Open the PDF in Adobe Reader Right-click the signature and select Show Signature Properties Click the Show Signer Certificate button Add the signature to the Trusted Certificates list from the Trust tab Click Verify Signature to complete the verification Let
 Detailed method to unblock using WeChat friend-assisted verification
Mar 25, 2024 pm 01:26 PM
Detailed method to unblock using WeChat friend-assisted verification
Mar 25, 2024 pm 01:26 PM
1. After opening WeChat, click the search icon, enter WeChat team, and click the service below to enter. 2. After entering, click the self-service tool option in the lower left corner. 3. After clicking, in the options above, click the option of unblocking/appealing for auxiliary verification.
 How to validate IFSC code using regular expressions?
Aug 26, 2023 pm 10:17 PM
How to validate IFSC code using regular expressions?
Aug 26, 2023 pm 10:17 PM
Indian Financial System Code is the abbreviation. Indian bank branches participating in the electronic funds transfer system are identified by a special 11-character code. The Reserve Bank of India uses this code in internet transactions to transfer funds between banks. IFSC code is divided into two parts. Banks are identified by the first four characters, while branches are identified by the last six characters. NEFT (National Electronic Funds Transfer), RTGS (Real Time Gross Settlement) and IMPS (Immediate Payment Service) are some of the electronic transactions that require IFSC codes. Method Some common ways to validate IFSC codes using regular expressions are: Check if the length is correct. Check the first four characters. Checkthefifthcharacter.Che
 How to verify whether the input is full-width characters in golang
Jun 25, 2023 pm 02:03 PM
How to verify whether the input is full-width characters in golang
Jun 25, 2023 pm 02:03 PM
In golang, Unicode encoding and rune type are required to verify whether the input is full-width characters. Unicode encoding is a character encoding standard that assigns a unique numeric code point to each character in the character set, which includes full-width characters and half-width characters. The rune type is the type used to represent Unicode characters in golang. The first step is to convert the input into a rune type slice. This can be converted by using golang's []rune type, e.g.
 How to verify whether input is uppercase letters in golang
Jun 24, 2023 am 09:06 AM
How to verify whether input is uppercase letters in golang
Jun 24, 2023 am 09:06 AM
Golang is a high-performance, modern programming language that often involves string processing in daily development. Among them, validating whether the input is in uppercase letters is a common requirement. This article will introduce how to verify whether the input is uppercase letters in Golang. Method 1: Use the unicode package. The unicode package in Golang provides a series of functions to determine the encoding type of characters. For uppercase letters, the corresponding encoding range is 65-90 (decimal), so we can use unicod
 New features in PHP 8: Added verification and signing
Mar 27, 2024 am 08:21 AM
New features in PHP 8: Added verification and signing
Mar 27, 2024 am 08:21 AM
PHP8 is the latest version of PHP, bringing more convenience and functionality to programmers. This version has a special focus on security and performance, and one of the noteworthy new features is the addition of verification and signing capabilities. In this article, we'll take a closer look at these new features and their uses. Verification and signing are very important security concepts in computer science. They are often used to ensure that the data transmitted is complete and authentic. Verification and signatures become even more important when dealing with online transactions and sensitive information because if someone is able to tamper with the data, it could potentially
 How to verify whether the input is all Chinese characters in golang
Jun 24, 2023 am 09:16 AM
How to verify whether the input is all Chinese characters in golang
Jun 24, 2023 am 09:16 AM
With the development of the times, we pay more and more attention to the verification of data, especially the verification of user input. For language verification, how to accurately determine whether the input is all Chinese characters has become an important issue. In golang, we can use the unicode package and regexp package to achieve this requirement. 1. Unicode package The unicode package provides a series of core support for Unicode. We can use the functions in this package to accurately determine whether a character is a Chinese character.
 Authentication using Google reCAPTCHA in PHP
Jun 19, 2023 pm 05:38 PM
Authentication using Google reCAPTCHA in PHP
Jun 19, 2023 pm 05:38 PM
In the modern online world, website security and the protection of user privacy have become increasingly important topics. Among them, the technical method of human-machine verification has become one of the indispensable ways to prevent malicious attacks. GooglereCAPTCHA is a tool that is widely used for human-machine verification. Its concept has been deeply rooted in the hearts of the people, and its presence can even be seen on many websites we use every day. In this article, we will explore how to use GooglereCAPTCHA for verification in PHP
