

Using Alibaba Cloud + docker to implement simple node.js service

The content of this article is to use Alibaba Cloud docker to implement a simple node.js service. It has certain reference value. Friends in need can refer to it
# Prerequisites
## When I was in an internship, I came into contact with Docker. At that time, it was more vague about it. Now I'm back to school to do my graduation project, and there happens to be no one writing about servers, so I reviewed nodejs a little, bought an Alibaba Cloud, played around with docker, and built a simple server.
The final effect
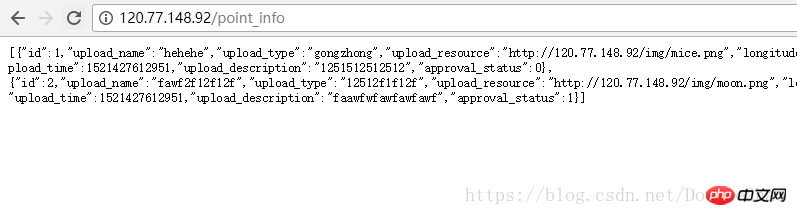
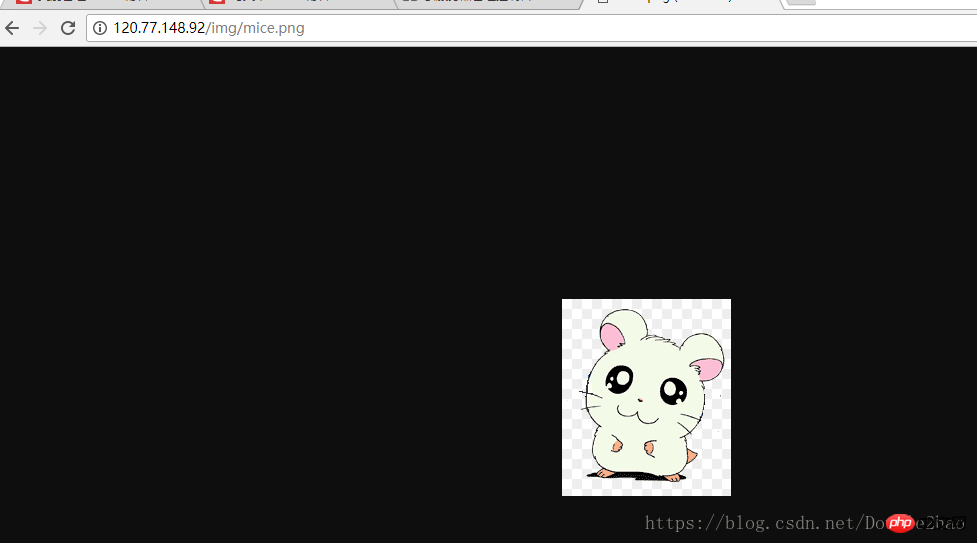
Mainly provides an HTTP server, accessed directly through IP, providing two examples:
http://120.77.148.92/point_info
http://120.77.148.92/img/mice.png
2. Nodejs service code
3. Copy the code to the server
4. Use dockerfile to create an image and build a service
2. The database uses sqlite
3. The image upload server uses connect-multiparty
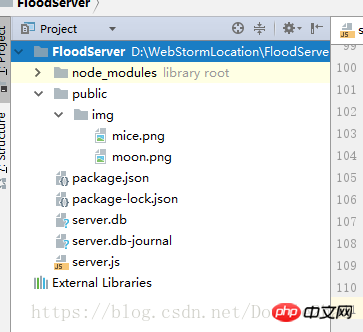 The main file is only server.js, and the code is below:
var express = require('express');
var fs = require("fs");
var sqlite3 = require('sqlite3');
var multiparty = require('connect-multiparty');
var app = express();

app.use(express.static('public'));
app.use(multiparty({uploadDir: './public/img'}));

app.get('/', function (req, res) {
    res.send('Hello World');
});

app.get('/device', function (req, res) {
    var db = new sqlite3.Database("server.db");
    db.all("SELECT * FROM device", function (err, row) {
        res.send(row);
        db.close();
    });
});

app.get('/device_data', function (req, res) {
    var db = new sqlite3.Database("server.db");
    db.all("SELECT * FROM device_data", function (err, row) {
        res.send(row);
        db.close();
    });
});

app.get('/point_info', function (req, res) {
    var db = new sqlite3.Database("server.db");
    db.all("SELECT * FROM point_info", function (err, row) {
        res.send(row);
        db.close();
    });
});var multipartMiddleware = multiparty();
app.post('/info_post', multipartMiddleware, function (req, res) {
    console.log(req.body, req.files);
    var body = req.body;
    var name = body.upload_name;
    var type = body.upload_type;
    var longitude = body.longitude;
    var latitude = body.latitude;
    var address = body.upload_address;
    var time = body.upload_time;
    var description = body.upload_description;
    var status = body.approval_status;
    var fileName = req.files.file.path.substring(11);
    var resource = "http://" + req.headers.host + "/img/" + fileName;

    console.log(resource);    var db = new sqlite3.Database("server.db");    var add = db.prepare("INSERT OR REPLACE INTO point_info " +        "(ID,upload_name, upload_type,longitude,latitude,upload_address,upload_time,upload_description," +        "approval_status,upload_resource) VALUES (?,?,?,?,?,?,?,?,?,?)");
    add.run(null, name, type, longitude, latitude, address, time, description, status, resource);
    add.finalize();
    db.close();


    res.end(JSON.stringify("success"));
});

app.get('/change_status', function (req, res) {
    console.log(req.query);
    var query = req.query;
    var id = query.id;
    var status = query.status;
    var db = new sqlite3.Database("server.db");
    var modify = db.prepare("UPDATE point_info set approval_status=? where id =?");

    modify.run(status, id);
    res.send("success");
    modify.finalize();
    db.close();
});var server = app.listen(80, function () {
    var host = server.address().address;
    var port = server.address().port;

    console.log("应用实例,访问地址为 http://%s:%s", host, port);
    var db = new sqlite3.Database("server.db");

    setInterval(function () {
        console.log("change device_data");
        for (var i = 0; i < 30; i++) {
              const modify = db.prepare("UPDATE device_data " +
                   "set rain_time = ?," +
                   "rain_fall = ?," +
                   "rain_level = ?," +
                   "water_speed = ?," +
                   "water_level = ?," +
                   "wind_speed = ?," +
                   "gas_warn = ?," +
                   "general_level = ? " +
                   "where id = ? ");

            modify.run(Math.random() * 10,Math.random() * 10,Math.random() * 10,Math.random() * 10,
            Math.random() * 10,Math.random() * 10,Math.random() * 10,Math.random() * 10,i);

            modify.finalize();
        }
    },3000)

});
FROM node
COPY ./project /home
WORKDIR /home/FloodServer
EXPOSE 80CMD npm install
FROM node: This image file inherits the official node image.At this time, there are dockerfile files and the nodejs service code written before in the current directory.COPY ./project /home: Copy all files in the project folder in the current directory (except for paths excluded by .dockerignore) into the /home directory of the image file.
WORKDIR /home/FloodServer: Specify the next working path as /home/FloodServer.
EXPOSE 80: Expose port 80 of the container and allow external connections to this port.
CMD npm install: Execute npm install to install dependencies after the container is started.
After writing the dockerfile file, run the following code to build the image:
docker image -t build my_node
After the build is completed, we can use the docker image ls command to view the image. 
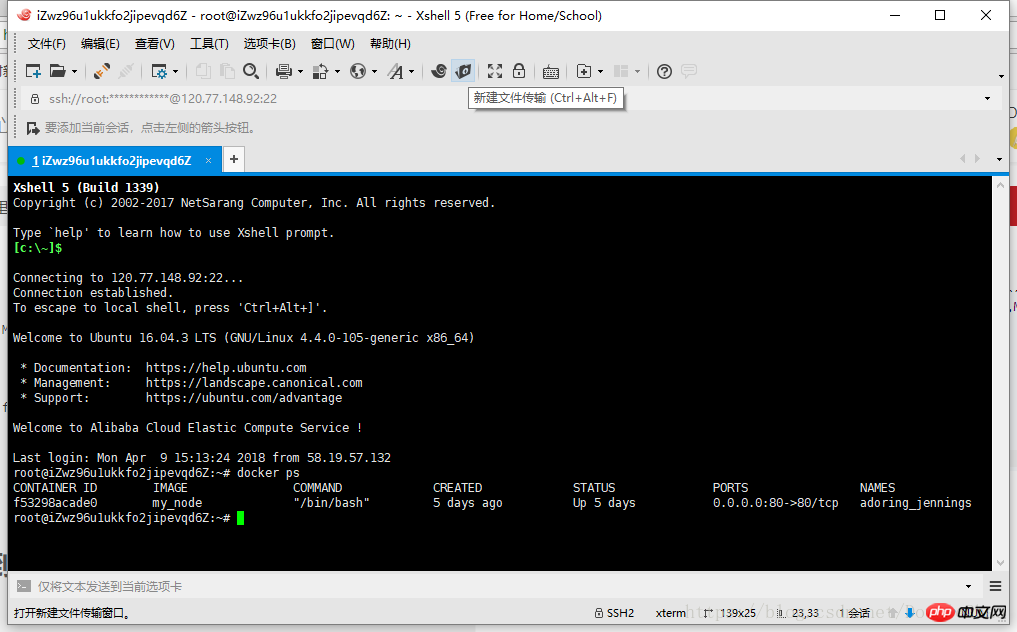
docker run -p 80:80 -it my_node /bin/bash
-p parameter: Port 80 of the container is mapped to port 80 of the local machine.After building the container, the container's Shell is mapped to the current Shell, and the service is run directly through node server.js, and the service is successfully built.-it parameter: The container's Shell is mapped to the current Shell, and then the commands you enter in the local window will be passed to the container.
my_node: the name of the image file (if there is a tag, you also need to provide the tag, the default is the latest tag).
/bin/bash: The first command executed internally after the container is started. Here is starting Bash to ensure that users can use the Shell.

The above is the detailed content of Using Alibaba Cloud + docker to implement simple node.js service. For more information, please follow other related articles on the PHP Chinese website!

Hot AI Tools

Undresser.AI Undress
AI-powered app for creating realistic nude photos

AI Clothes Remover
Online AI tool for removing clothes from photos.

Undress AI Tool
Undress images for free

Clothoff.io
AI clothes remover

Video Face Swap
Swap faces in any video effortlessly with our completely free AI face swap tool!

Hot Article
Hot Tools

Notepad++7.3.1
Easy-to-use and free code editor

SublimeText3 Chinese version
Chinese version, very easy to use

Zend Studio 13.0.1
Powerful PHP integrated development environment

Dreamweaver CS6
Visual web development tools

SublimeText3 Mac version
God-level code editing software (SublimeText3)
Hot Topics


 How to exit the container by docker
Apr 15, 2025 pm 12:15 PM
How to exit the container by docker
Apr 15, 2025 pm 12:15 PM
Four ways to exit Docker container: Use Ctrl D in the container terminal Enter exit command in the container terminal Use docker stop <container_name> Command Use docker kill <container_name> command in the host terminal (force exit)
 How to copy files in docker to outside
Apr 15, 2025 pm 12:12 PM
How to copy files in docker to outside
Apr 15, 2025 pm 12:12 PM
Methods for copying files to external hosts in Docker: Use the docker cp command: Execute docker cp [Options] <Container Path> <Host Path>. Using data volumes: Create a directory on the host, and use the -v parameter to mount the directory into the container when creating the container to achieve bidirectional file synchronization.
 How to restart docker
Apr 15, 2025 pm 12:06 PM
How to restart docker
Apr 15, 2025 pm 12:06 PM
How to restart the Docker container: get the container ID (docker ps); stop the container (docker stop <container_id>); start the container (docker start <container_id>); verify that the restart is successful (docker ps). Other methods: Docker Compose (docker-compose restart) or Docker API (see Docker documentation).
 How to check the name of the docker container
Apr 15, 2025 pm 12:21 PM
How to check the name of the docker container
Apr 15, 2025 pm 12:21 PM
You can query the Docker container name by following the steps: List all containers (docker ps). Filter the container list (using the grep command). Gets the container name (located in the "NAMES" column).
 How to start mysql by docker
Apr 15, 2025 pm 12:09 PM
How to start mysql by docker
Apr 15, 2025 pm 12:09 PM
The process of starting MySQL in Docker consists of the following steps: Pull the MySQL image to create and start the container, set the root user password, and map the port verification connection Create the database and the user grants all permissions to the database
 How to start containers by docker
Apr 15, 2025 pm 12:27 PM
How to start containers by docker
Apr 15, 2025 pm 12:27 PM
Docker container startup steps: Pull the container image: Run "docker pull [mirror name]". Create a container: Use "docker create [options] [mirror name] [commands and parameters]". Start the container: Execute "docker start [Container name or ID]". Check container status: Verify that the container is running with "docker ps".
 How to update the image of docker
Apr 15, 2025 pm 12:03 PM
How to update the image of docker
Apr 15, 2025 pm 12:03 PM
The steps to update a Docker image are as follows: Pull the latest image tag New image Delete the old image for a specific tag (optional) Restart the container (if needed)
 How to create containers for docker
Apr 15, 2025 pm 12:18 PM
How to create containers for docker
Apr 15, 2025 pm 12:18 PM
Create a container in Docker: 1. Pull the image: docker pull [mirror name] 2. Create a container: docker run [Options] [mirror name] [Command] 3. Start the container: docker start [Container name]
