

Sharing of jQuery plug-ins that handle web page layer layout

This article mainly shares with you the jQuery plug-in that handles web page layer layout. I hope it can help you.
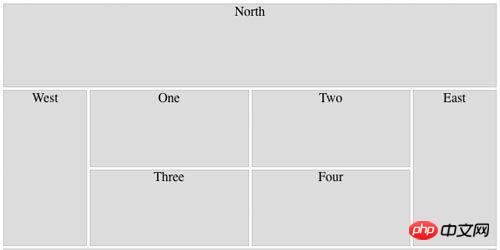
1.UI.Layout jQuery UI layout plug-in
Official website: http://layout.jquery-dev.com/index.cfm
Use size Create advanced UI layouts with collapsible nested panels and tons of options. Layouts can create any UI look you want; from a simple header or sidebar to a complex application with toolbars, menus, help panels, status bars, subforms, and more. Integrate and enhance other UI widgets such as tabs, accordions and dialogs to create rich interfaces.
2.jQUery Masonry
Official website: https://masonry.desandro.com/?resources/jquery-masonry
All item sizing and styling are handled by your own CSS. Item size can be set as a percentage of responsive layout

3.jLayout
jLayout JavaScript library provides a layout algorithm for laying out components. A component is an abstraction; it can be implemented in many ways, such as items or HTML elements in an HTML5 Canvas drawing. The jLayout library allows you to focus on drawing individual components rather than how they are arranged on the screen.
GitHub: https://github.com/bramstein/jlayout/
4.jQuery pageSlide
Query pageSlide is a jQuery Plug-in, which can control the display and closing of a hidden page. jQuery expands the left and right column plug-in PageSlide, and the pageslide plug-in function realizes the function of actually hiding the sidebar. The plug-in can read another HTML or an element in the current page. It is a popular navigation menu display form, especially on mobile phones or touch screen pages. The effect is still good
demo: http ://www.jq22.com/jquery-info343

5.jQSlickWrap
http://www.jwf.us/projects/jQSlickWrap/
jQSlickWrap is a jQuery plug-in that can actually wrap content around images. The plug-in uses the HTML5 Canvas tag and is very simple to use. Text wrapping effects on floating images can be easily and accurately achieved.

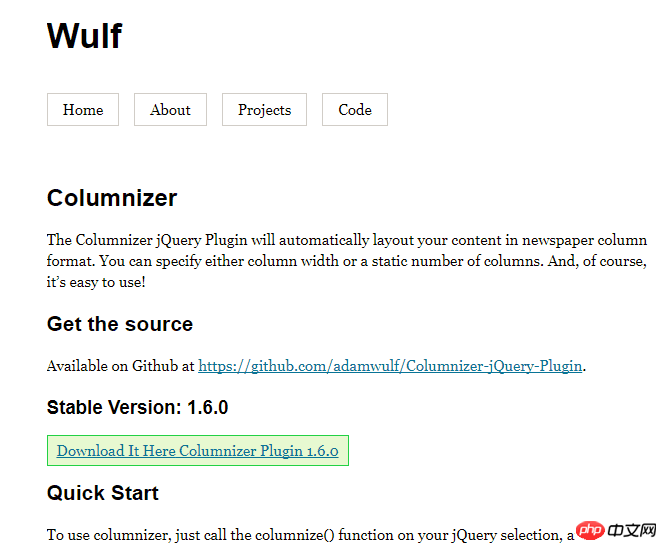
6.Columnizer
Official website: https://welcome.totheinter.net/columnizer-jquery-plugin/
Columnizer The jQuery Plugin will automatically lay out your content in newspaper column format. You can specify column widths or a static number of columns. And, of course, it's easy to use! Columnizer will add CSS classes to the columns it creates. Each column will have a "column" class name. The first column will have "first" and the last column will have "last". This makes it easier for you to target specific columns in CSS markup.
github:https://github.com/adamwulf/Columnizer-jQuery-Plugin
tag, with the corresponding id when initialized.
jquery plug-in development tab production technology sharing
Detailed explanation of jQuery Using and closing the plug-in artDialog.js
How to understand the Jquery plug-in
The above is the detailed content of Sharing of jQuery plug-ins that handle web page layer layout. For more information, please follow other related articles on the PHP Chinese website!

Hot AI Tools

Undresser.AI Undress
AI-powered app for creating realistic nude photos

AI Clothes Remover
Online AI tool for removing clothes from photos.

Undress AI Tool
Undress images for free

Clothoff.io
AI clothes remover

Video Face Swap
Swap faces in any video effortlessly with our completely free AI face swap tool!

Hot Article
Hot Tools

Notepad++7.3.1
Easy-to-use and free code editor

SublimeText3 Chinese version
Chinese version, very easy to use

Zend Studio 13.0.1
Powerful PHP integrated development environment

Dreamweaver CS6
Visual web development tools

SublimeText3 Mac version
God-level code editing software (SublimeText3)
Hot Topics
 1666
1666
 14
1425
52
1328
25
1273
29
1253
24
14
1425
52
1328
25
1273
29
1253
24

 Share three solutions to why Edge browser does not support this plug-in
Mar 13, 2024 pm 04:34 PM
Share three solutions to why Edge browser does not support this plug-in
Mar 13, 2024 pm 04:34 PM
When users use the Edge browser, they may add some plug-ins to meet more of their needs. But when adding a plug-in, it shows that this plug-in is not supported. How to solve this problem? Today, the editor will share with you three solutions. Come and try it. Method 1: Try using another browser. Method 2: The Flash Player on the browser may be out of date or missing, causing the plug-in to be unsupported. You can download the latest version from the official website. Method 3: Press the "Ctrl+Shift+Delete" keys at the same time. Click "Clear Data" and reopen the browser.
 What is the Chrome plug-in extension installation directory?
Mar 08, 2024 am 08:55 AM
What is the Chrome plug-in extension installation directory?
Mar 08, 2024 am 08:55 AM
What is the Chrome plug-in extension installation directory? Under normal circumstances, the default installation directory of Chrome plug-in extensions is as follows: 1. The default installation directory location of chrome plug-ins in windowsxp: C:\DocumentsandSettings\username\LocalSettings\ApplicationData\Google\Chrome\UserData\Default\Extensions2. chrome in windows7 The default installation directory location of the plug-in: C:\Users\username\AppData\Local\Google\Chrome\User
 How to use PUT request method in jQuery?
Feb 28, 2024 pm 03:12 PM
How to use PUT request method in jQuery?
Feb 28, 2024 pm 03:12 PM
How to use PUT request method in jQuery? In jQuery, the method of sending a PUT request is similar to sending other types of requests, but you need to pay attention to some details and parameter settings. PUT requests are typically used to update resources, such as updating data in a database or updating files on the server. The following is a specific code example using the PUT request method in jQuery. First, make sure you include the jQuery library file, then you can send a PUT request via: $.ajax({u
 jQuery Tips: Quickly modify the text of all a tags on the page
Feb 28, 2024 pm 09:06 PM
jQuery Tips: Quickly modify the text of all a tags on the page
Feb 28, 2024 pm 09:06 PM
Title: jQuery Tips: Quickly modify the text of all a tags on the page In web development, we often need to modify and operate elements on the page. When using jQuery, sometimes you need to modify the text content of all a tags in the page at once, which can save time and energy. The following will introduce how to use jQuery to quickly modify the text of all a tags on the page, and give specific code examples. First, we need to introduce the jQuery library file and ensure that the following code is introduced into the page: <
 Use jQuery to modify the text content of all a tags
Feb 28, 2024 pm 05:42 PM
Use jQuery to modify the text content of all a tags
Feb 28, 2024 pm 05:42 PM
Title: Use jQuery to modify the text content of all a tags. jQuery is a popular JavaScript library that is widely used to handle DOM operations. In web development, we often encounter the need to modify the text content of the link tag (a tag) on the page. This article will explain how to use jQuery to achieve this goal, and provide specific code examples. First, we need to introduce the jQuery library into the page. Add the following code in the HTML file:
 How to enable administrative access from the cockpit web UI
Mar 20, 2024 pm 06:56 PM
How to enable administrative access from the cockpit web UI
Mar 20, 2024 pm 06:56 PM
Cockpit is a web-based graphical interface for Linux servers. It is mainly intended to make managing Linux servers easier for new/expert users. In this article, we will discuss Cockpit access modes and how to switch administrative access to Cockpit from CockpitWebUI. Content Topics: Cockpit Entry Modes Finding the Current Cockpit Access Mode Enable Administrative Access for Cockpit from CockpitWebUI Disabling Administrative Access for Cockpit from CockpitWebUI Conclusion Cockpit Entry Modes The cockpit has two access modes: Restricted Access: This is the default for the cockpit access mode. In this access mode you cannot access the web user from the cockpit
 How Google Chrome allows animation plugins to run
Mar 28, 2024 am 08:01 AM
How Google Chrome allows animation plugins to run
Mar 28, 2024 am 08:01 AM
How does Google Chrome allow animation plugins to run? Google Chrome is very powerful. Many friends like to use this browser to watch video animations. However, if you want to watch various animated videos, you need to install animation plug-ins in the browser. Many friends use Google Chrome. After installing the animation plug-in, I still cannot care about the video. How should I deal with this problem? Next, let the editor show you the specific steps to allow the animation plug-in to run in Google Chrome. Friends who are interested can come and take a look. Specific steps for Google Chrome to allow animation plug-ins to run: 1. First run Google Chrome on your computer, and click the main menu button in the upper right corner of the homepage (as shown in the picture). 2. After opening the main menu, select the "Settings" option below (as shown in the picture). 3. In settings
 How to skillfully use excel plug-ins to improve work efficiency
Mar 20, 2024 pm 05:56 PM
How to skillfully use excel plug-ins to improve work efficiency
Mar 20, 2024 pm 05:56 PM
Sometimes you will find that you are doing the same work as your colleagues, but it takes you 4 hours to complete it in one hour. Why is this? Maybe your colleague uses an excel plug-in. In fact, as an office worker, the excel plug-in is essential. So, next, the editor will introduce how to skillfully use excel plug-ins to improve work efficiency. In the [excel] software, after installing the [square grid] plug-in, you can select cells A to I in Table 1. Then, click [Square Grid] - [View] - [Lock Selected Area], so that the entered data will be protected from being modified at will. 2. Enter "=D2-C2" in cell D2, [select] cell E2, and click [Ctrl+Shift]
