

Docker builds laravel development environment example

This article mainly uses laradock for local docker configuration. laradock has integrated the environment that laravel needs to use. You only need to simply modify the configuration to build an environment for development. It is really a good solution for development and management.
A brief explanation, in the docker environment we need to run the laravel project, and actually create several containers (containers): when the computer is still a window system , it is often necessary to build an environment based on vm services in order to develop better (should be closer to the online environment), but now under the mysterious aura of docker, it is possible to build a local development environment with minimal resources
environment, while being able to better migrate to other places.
workspace (development environment)
php-fpm (php support)
nginx (web service)
mysql (database)
These are generated based on reprocessing of laradock For containers, please refer to the directory with the corresponding name under the laradock directory, which contains Dockerfile and related configurations. Interested students can read and learn as much as you like:)
More in-depth It is recommended to move the content to laradock official documentation.
Preparation
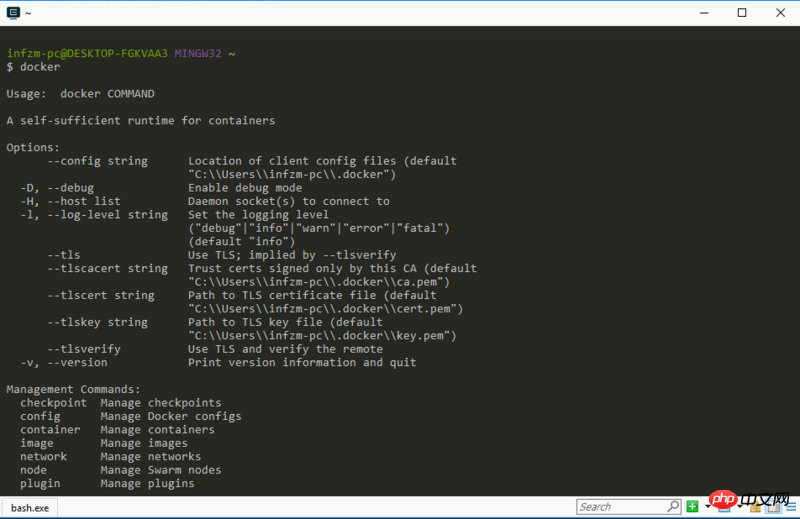
Install docker under the window system first
docker command to test it.
git to pullhttps://github.com/ laradock/laradock.gitThis package.
# 平级目录

D:/www/
 - /laradock
 - /my-project
- nginx
- php-fpm 5.6
- mysql 5.6
laradock/.env file
/www/laradock
 - .env
directory will find that the .env file does not exist. Here we need to copy a copy from env-example to modify it. <div class="code" style="position:relative; padding:0px; margin:0px;"><pre class="brush:php;toolbar:false"># /www/laradock
$ cp env-example .env</pre><div class="contentsignin">Copy after login</div></div>Modify PHP version
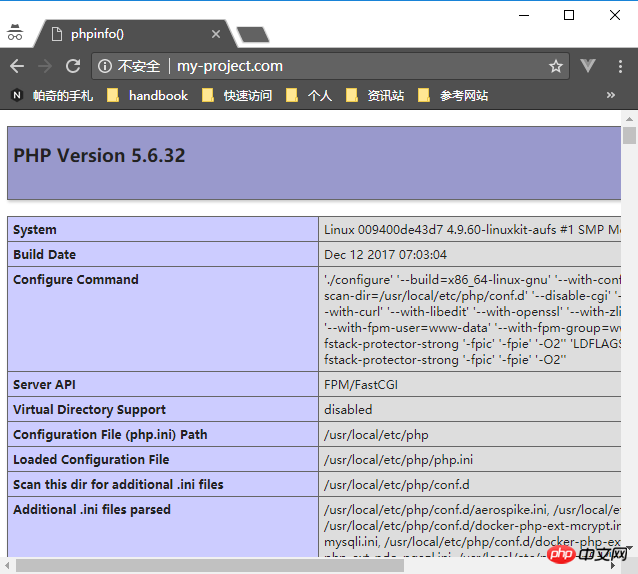
Enter the
.env file and findPHP_VERSION Modify the PHP version to 56 (default 71, optional 71, 70, 56 ). <div class="code" style="position:relative; padding:0px; margin:0px;"><pre class="brush:php;toolbar:false"># /www/laradock/.env
### PHP Version
PHP_VERSION=56</pre><div class="contentsignin">Copy after login</div></div>Modify Mysql version and configuration
Enter the
.env file and find MYSQL Modify the mysql version to 56 (default 8, optional 8, 5 , 5.6, 5.5). Other settings are filled in according to personal needs. Generally,
, MYSQL_PASSWORD, MYSQL_ROOT_PASSWORD need to be modified to ensure the link. <div class="code" style="position:relative; padding:0px; margin:0px;"><pre class="brush:php;toolbar:false"># /www/laradock/.env
### MYSQL
MYSQL_VERSION=5.6
# MYSQL_DATABASE 可选,填写后会默认创建同名数据库
MYSQL_DATABASE=default
# MYSQL_USER 用户,填写后会创建用户,默认为 default
MYSQL_USER=packy
# MYSQL_PASSWORD 密码,填写后作为新建用户的密码,默认为 secret
MYSQL_PASSWORD=123456-
# MYSQL_PORT 访问端口,默认是3306,建议不要修改
MYSQL_PORT=3306
# MYSQL_ROOT_PASSWORD root用户密码,建议使用严谨的密码,默认为 root
MYSQL_ROOT_PASSWORD=23333-
MYSQL_ENTRYPOINT_INITDB=./mysql/docker-entrypoint-initdb.d</pre><div class="contentsignin">Copy after login</div></div>About Mysql version selection
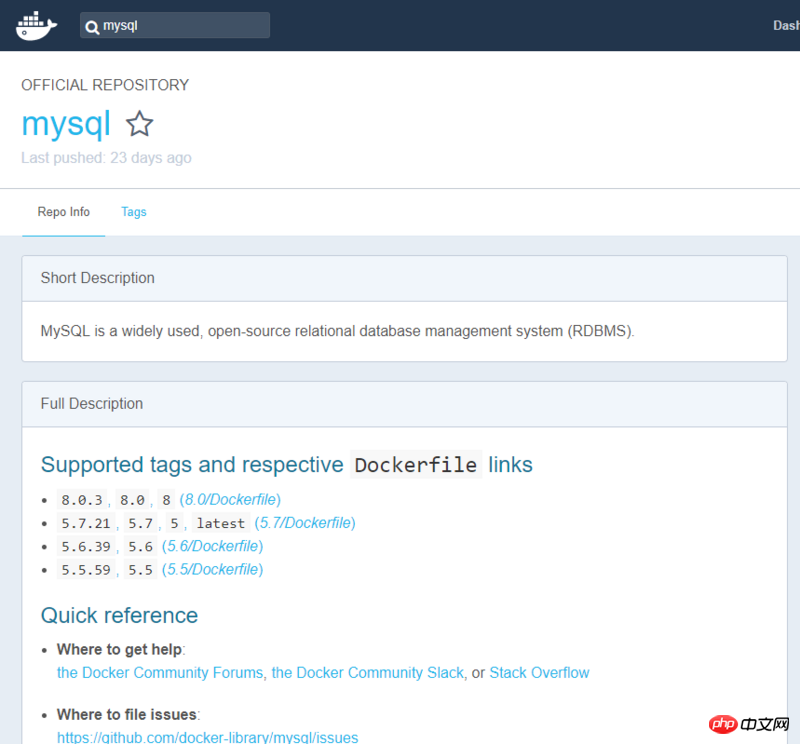
mysql uses the official image, so we can use hub.docker.com to query
mysqlwhich versions the official image contains. The specific choice depends on your individual needs.
 Modify nginx configuration
Generally, there is no need to modify anything, just use the default one. Regarding the configuration of the website, you need to enter
laradock/nginx/sites. If you need to modify the port, you can enter the
file and findnginxNGINXto modify it.<div class="code" style="position:relative; padding:0px; margin:0px;"><pre class="brush:php;toolbar:false"># /www/laradock/.env ### NGINX NGINX_HOST_HTTP_PORT=80 NGINX_HOST_HTTPS_PORT=443 # NGINX_HOST_LOG_PATH log存放位置,默认位置在laradock/logs/nginx/ NGINX_HOST_LOG_PATH=./logs/nginx/ # NGINX_SITES_PATH 网站配置, 默认位置在laradock/nginx/sites/ NGINX_SITES_PATH=./nginx/sites/ NGINX_PHP_UPSTREAM_CONTAINER=php-fpm NGINX_PHP_UPSTREAM_PORT=9000</pre><div class="contentsignin">Copy after login</div></div>About Nginx configuration
The configuration file is stored under laradock/nginx/sites. If you need to create a new website, you can copy it. .example and rename it to .conf for modification. Note: Only .conf files will be loaded under nginx. Here I copy
as an example and rename it to my-project.conf: <div class="code" style="position:relative; padding:0px; margin:0px;"><pre class="brush:php;toolbar:false"># laradock/nginx/sites/my-project.conf
server {
listen 80;
listen [::]:80;
# 域名,改为你的域名
server_name my-project.com;
# 项目目录,均以 /var/www/ 开头。这个约定后续会说明
root /var/www/my-project;
index index.php index.html index.htm;
location / {
try_files $uri $uri/ /index.php$is_args$args;
}
location ~ \.php$ {
try_files $uri /index.php =404;
fastcgi_pass php-upstream;
fastcgi_index index.php;
fastcgi_buffers 16 16k;
fastcgi_buffer_size 32k;
fastcgi_param SCRIPT_FILENAME $document_root$fastcgi_script_name;
include fastcgi_params;
}
location ~ /\.ht {
deny all;
}
location /.well-known/acme-challenge/ {
root /var/www/letsencrypt/;
log_not_found off;
}
error_log /var/log/nginx/laravel_error.log;
access_log /var/log/nginx/laravel_access.log;
}</pre><div class="contentsignin">Copy after login</div></div>Also modify the host (that is window local machine)
<div class="code" style="position:relative; padding:0px; margin:0px;"><pre class="brush:php;toolbar:false"># C:\Windows\System32\drivers\etc\hosts

127.0.0.1   my-project.com</pre><div class="contentsignin">Copy after login</div></div>
try to run
At this point, the preparation work is almost completed.
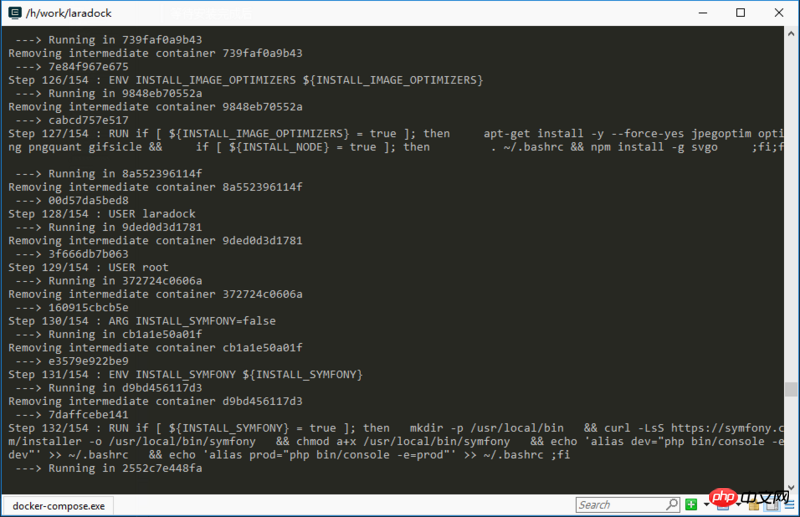
Run the following command to install and use it. Please wait patiently because the pulling time from foreign sources is slow.
docker-compose up -d nginx mysql
 After completion, enter
to see the container running status. everything is normal! ! !
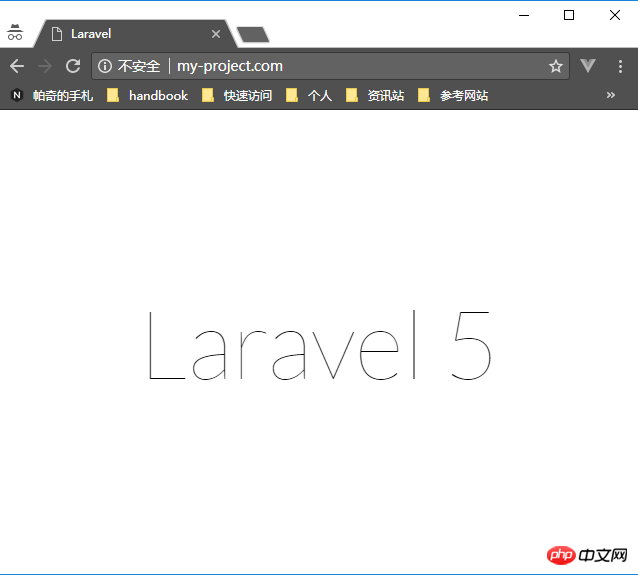
 Try visiting
to see the effect. Currently, the php file can be accessed normally.
 Running laravel
I cannot mention the
workspace container, which serves as a workspace to provide various types of Tool usage (including: PHP CLI, Composer, Git, Linuxbrew, Node, V8JS, Gulp, SQLite, xDebug, Envoy, Deployer, Vim, Yarn, etc.). How to use these functions?
首先进入workspace容器
# /www/laradock
docker-compose exec workspace bash
composer换国内源
进到容器后默认就是项目目录/var/www,由于composer用的是国外源比较慢,这里需要切换成国内源。
composer config -g repo.packagist composer https://packagist.phpcomposer.com
安装laravel
这里我们需要在my-project目录安装laravel。
*注:需要提前把my-project里的所有内容清空
composer create-project laravel/laravel my-project2 "5.2.*" && \
cd my-project && \
php artisan key:generate
配置并重启nginx
安装完成后,把laradock/nginx/sites/my-project.conf文件下的网站目录地址稍微改一下
server {

    listen 80;
    listen [::]:80;

    server_name my-project.com;
    # 加上public目录
    root /var/www/my-project/public;
    index index.php index.html index.htm;

    ...
}重启nginx容器
# /www/laradock
docker-compose restart nginx
关于数据库服务
# .env
DB_CONNECTION=mysql

# mysql的容器网络已经解析至"mysql"域,所以这里配置"mysql"域便能访问
DB_HOST=mysql

# 默认3306,一般不需要改动,如要改动端口应该与laradock/.env中的MYSQL_PORT一致
DB_PORT=3306

# 数据库
DB_DATABASE=default

# 用户
DB_USERNAME=packy

# 密码
DB_PASSWORD=123456-
一些问题:
Q:运行失败,提示ERROR: for laradock_mysql_1 Cannot create container for service mysql: Drive sharing seems blocked by a firewall
A:先暂停你本机杀毒程序的防御进程。
Q:运行失败,提示ERROR: for laradock_nginx_1 Cannot start service nginx: driver failed programming external connectivity on endpoint laradock_nginx_1 (6e4f4761d30f4cd80c44c6b0fddfbd4ef0324529099aace02bee6a6653ce453a): Error starting userland proxy: Bind for 0.0.0.0:443 failed: port is already allocated
A:建议你切换端口,我已尝试改为1443能正常运行,目前只能以这种方式处理。
# .env
### NGINX

NGINX_HOST_HTTPS_PORT=1443
Q:为何网站目录必须以/var/www开头?
A:网站访问进入的是nginx容器,/var/www目录就是容器内网站目录存放的位置。由于配置在创建容器时,会将本地目录挂载至/var/www目录,所以就能访问到本地的代码。这块设置在laradock/.env中找到APPLICATION可自行设置。
相关推荐:
The above is the detailed content of Docker builds laravel development environment example. For more information, please follow other related articles on the PHP Chinese website!

Hot AI Tools

Undresser.AI Undress
AI-powered app for creating realistic nude photos

AI Clothes Remover
Online AI tool for removing clothes from photos.

Undress AI Tool
Undress images for free

Clothoff.io
AI clothes remover

Video Face Swap
Swap faces in any video effortlessly with our completely free AI face swap tool!

Hot Article
Hot Tools

Notepad++7.3.1
Easy-to-use and free code editor

SublimeText3 Chinese version
Chinese version, very easy to use

Zend Studio 13.0.1
Powerful PHP integrated development environment

Dreamweaver CS6
Visual web development tools

SublimeText3 Mac version
God-level code editing software (SublimeText3)
Hot Topics


 Laravel Introduction Example
Apr 18, 2025 pm 12:45 PM
Laravel Introduction Example
Apr 18, 2025 pm 12:45 PM
Laravel is a PHP framework for easy building of web applications. It provides a range of powerful features including: Installation: Install the Laravel CLI globally with Composer and create applications in the project directory. Routing: Define the relationship between the URL and the handler in routes/web.php. View: Create a view in resources/views to render the application's interface. Database Integration: Provides out-of-the-box integration with databases such as MySQL and uses migration to create and modify tables. Model and Controller: The model represents the database entity and the controller processes HTTP requests.
 Laravel user login function
Apr 18, 2025 pm 12:48 PM
Laravel user login function
Apr 18, 2025 pm 12:48 PM
Laravel provides a comprehensive Auth framework for implementing user login functions, including: Defining user models (Eloquent model), creating login forms (Blade template engine), writing login controllers (inheriting Auth\LoginController), verifying login requests (Auth::attempt) Redirecting after login is successful (redirect) considering security factors: hash passwords, anti-CSRF protection, rate limiting and security headers. In addition, the Auth framework also provides functions such as resetting passwords, registering and verifying emails. For details, please refer to the Laravel documentation: https://laravel.com/doc
 Solve caching issues in Craft CMS: Using wiejeben/craft-laravel-mix plug-in
Apr 18, 2025 am 09:24 AM
Solve caching issues in Craft CMS: Using wiejeben/craft-laravel-mix plug-in
Apr 18, 2025 am 09:24 AM
When developing websites using CraftCMS, you often encounter resource file caching problems, especially when you frequently update CSS and JavaScript files, old versions of files may still be cached by the browser, causing users to not see the latest changes in time. This problem not only affects the user experience, but also increases the difficulty of development and debugging. Recently, I encountered similar troubles in my project, and after some exploration, I found the plugin wiejeben/craft-laravel-mix, which perfectly solved my caching problem.
 Laravel framework installation method
Apr 18, 2025 pm 12:54 PM
Laravel framework installation method
Apr 18, 2025 pm 12:54 PM
Article summary: This article provides detailed step-by-step instructions to guide readers on how to easily install the Laravel framework. Laravel is a powerful PHP framework that speeds up the development process of web applications. This tutorial covers the installation process from system requirements to configuring databases and setting up routing. By following these steps, readers can quickly and efficiently lay a solid foundation for their Laravel project.
 What versions of laravel are there? How to choose the version of laravel for beginners
Apr 18, 2025 pm 01:03 PM
What versions of laravel are there? How to choose the version of laravel for beginners
Apr 18, 2025 pm 01:03 PM
In the Laravel framework version selection guide for beginners, this article dives into the version differences of Laravel, designed to assist beginners in making informed choices among many versions. We will focus on the key features of each release, compare their pros and cons, and provide useful advice to help beginners choose the most suitable version of Laravel based on their skill level and project requirements. For beginners, choosing a suitable version of Laravel is crucial because it can significantly impact their learning curve and overall development experience.
 How to learn Laravel How to learn Laravel for free
Apr 18, 2025 pm 12:51 PM
How to learn Laravel How to learn Laravel for free
Apr 18, 2025 pm 12:51 PM
Want to learn the Laravel framework, but suffer from no resources or economic pressure? This article provides you with free learning of Laravel, teaching you how to use resources such as online platforms, documents and community forums to lay a solid foundation for your PHP development journey from getting started to master.
 How to view the version number of laravel? How to view the version number of laravel
Apr 18, 2025 pm 01:00 PM
How to view the version number of laravel? How to view the version number of laravel
Apr 18, 2025 pm 01:00 PM
The Laravel framework has built-in methods to easily view its version number to meet the different needs of developers. This article will explore these methods, including using the Composer command line tool, accessing .env files, or obtaining version information through PHP code. These methods are essential for maintaining and managing versioning of Laravel applications.
 The difference between laravel and thinkphp
Apr 18, 2025 pm 01:09 PM
The difference between laravel and thinkphp
Apr 18, 2025 pm 01:09 PM
Laravel and ThinkPHP are both popular PHP frameworks and have their own advantages and disadvantages in development. This article will compare the two in depth, highlighting their architecture, features, and performance differences to help developers make informed choices based on their specific project needs.
