

How to install IIS, MySQ, nginx, php7.1.7 under Win10?

How to install IIS, MySQ, nginx, php7.1.7 under Win10? This article mainly shares a detailed tutorial on installing and configuring IIS + MySQL5.7.19 + nginx1.12.1 + php7.1.7 in WIN10 system. It is very practical. Friends in need can refer to it. I hope it can help everyone.
Environment:
VMWare Workstation Player12
Windows10 Pro x64
1. Install the system
vmware will be installed quickly using the fast install method, and there is no need to configure anything.
2. Configure IIS
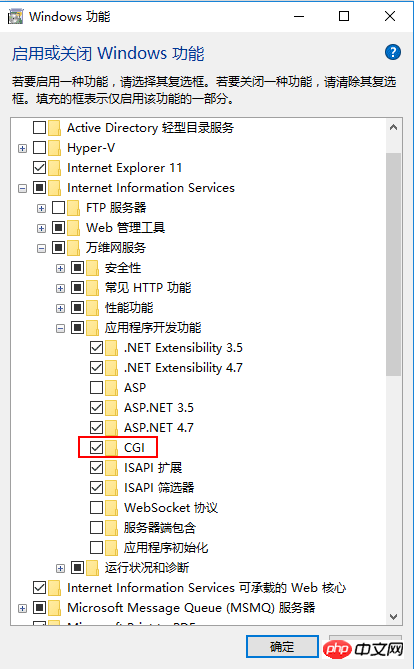
Under "Programs and Features", turn on "Turn Windows features on or off". Add the Internet Infomation Services function. It should be noted that CGI in the "Application Development Function" is not checked by default and needs to be manually selected.
Note: In actual practice During installation, I added IIS last, but it was written at the front, which has no special meaning. But this will change the binding port of IIS.
About port: After installation, since 80 is occupied, click "Bind" on the right side of "Default Web Site" and change the port number to "any", such as 8800. When accessing in the future, use "localhost:8800" ” method to access.
About virtual directories: If you need a virtual directory, you can add it. After adding, you need to access "localhost:8800/virtual directory name/page" like this, such as localhost:8800/myweb/phpinfo.php.
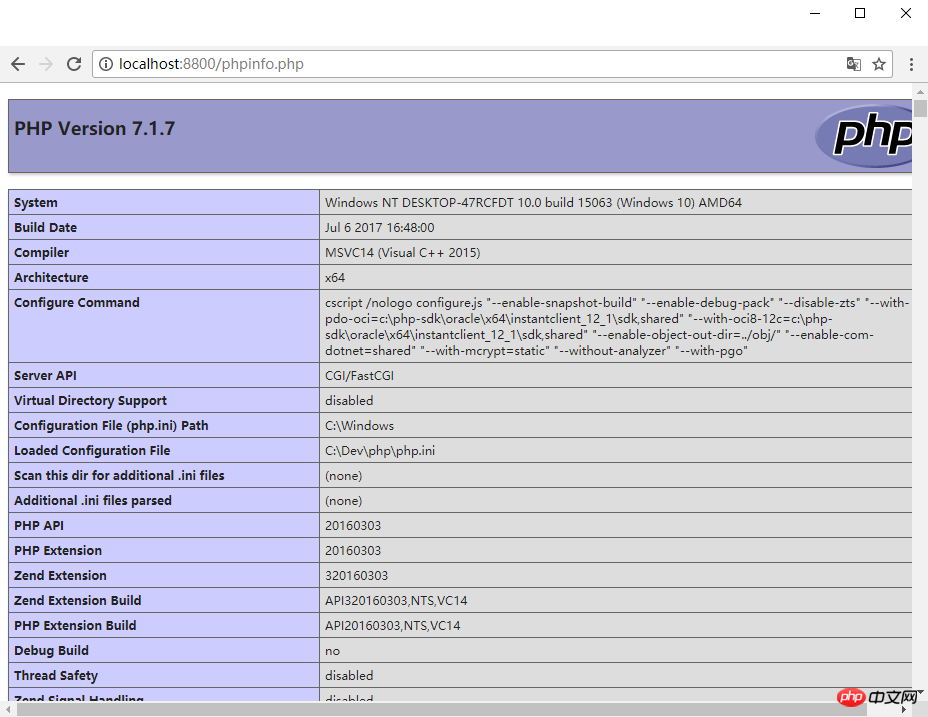
About FastCGI: Select Default Web Site, click Handler Mapping in the ribbon, and add module mapping.
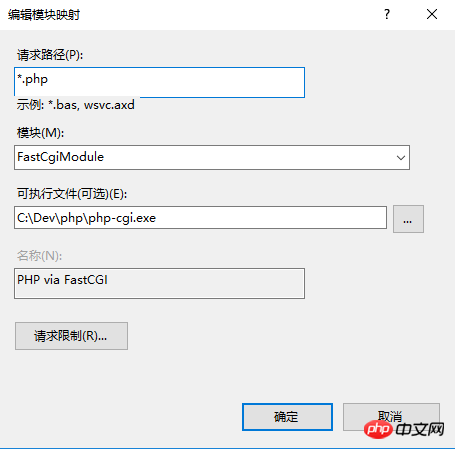
In the default/specified path of the website, place a file with the content , which can be named phpinfo.php. Start or restart the IIS service. Enter localhost:8800/phpinfo.php for the default path. Enter localhost:8800/virtual directory alias/phpinfo.php for the specified path (if placed in a virtual directory). The following picture is displayed, which is the IIS + PHP combination. Success
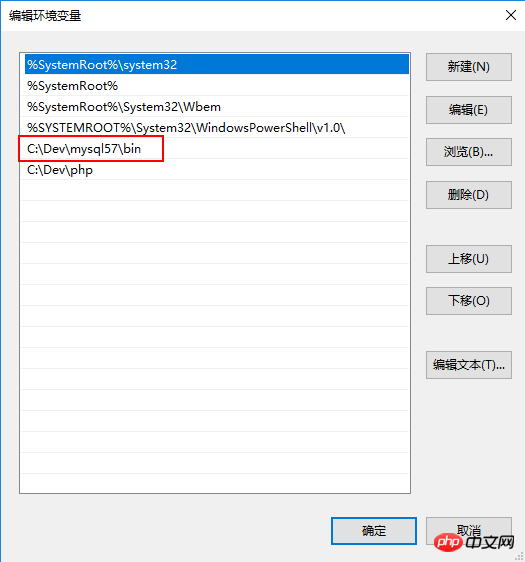
Download the mysql server in zip form and unzip it to the full English path (I haven’t tried Chinese to avoid trouble). Add environment variables and the path to MySQL in the system variable Path
[client]
port=3306
default-character-set=utf8

[mysqld]
port=3306
character_set_server=utf8

#mysql的安装/解压目录
basedir=C:\Dev\mysql57

#mysql的数据目录
datadir=C:\Dev\mysql57\data

sql_mode=NO_ENGINE_SUBSTITUTION,STRICT_TRANS_TABLES

mysqld --initialize --user=mysql --console
mysqld --install MySQL
net start mysql Start Service
net stop mysql Stop service
sc delete MySQL Delete service (use on demand)
4. Install php
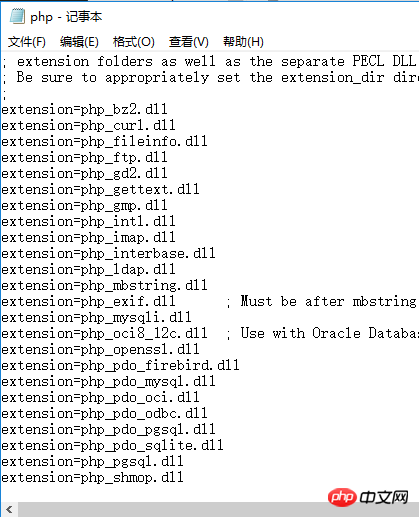
php download Non Thread Safe or Thread Safe Both are fine, I don’t know what the specific runtime difference is at the moment. Unzip it to the specified folder, follow the numerous "tutorials" on the Internet to copy php.ini-development or php.ini-production to php.ini, and modify the extension_dir inside to the ext folder in the PHP installation directory, as shown below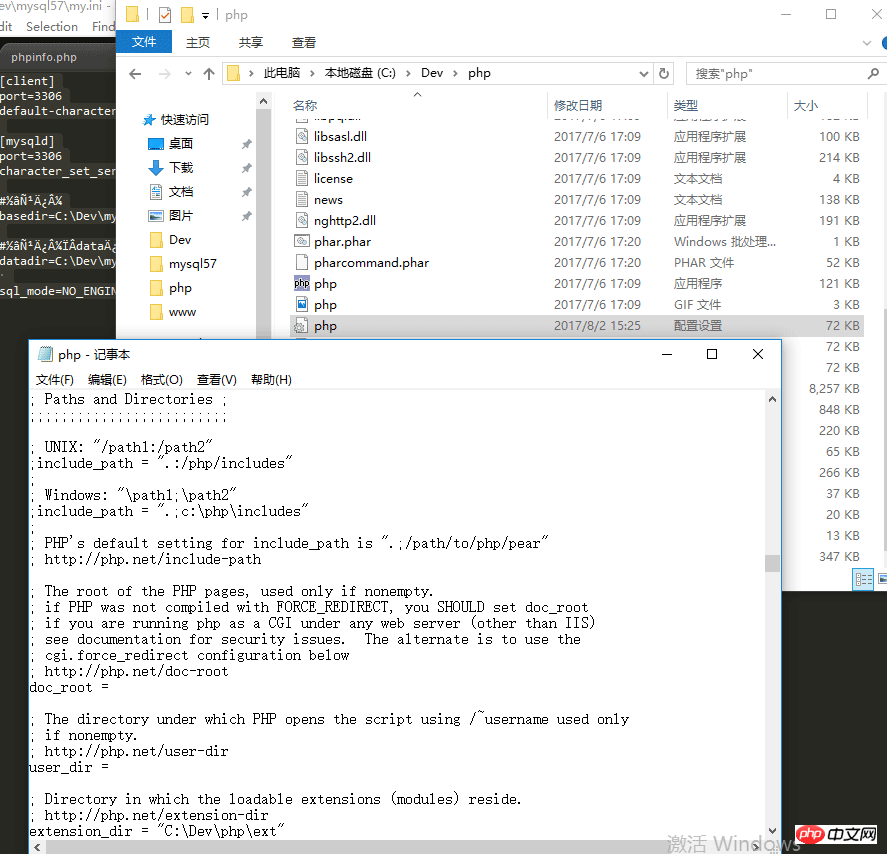
5. Install nginx
Download nginx and extract it to the full English directory. Enter the conf folder and modify the nginx.conf file. Compared with php, the configuration file of nginx is much shorter. Modify the location {} and #pass the php scripts to FastCGI...the two parts below are location{}.Modify the root element: change it to the web path. For example, the default path of the web page is C:\www, change it to this.
Modify fastcgi_pass: I have not changed it by default, but the port number can definitely be modified
In cmd command line administrator running mode, cd to switch to the nginx directory, run start nginx to start the service. Since I installed nginx first during the actual installation, occupying port 80, running localhost directly through the browser should display the welcome screen of nginx.

At this point, the configuration in the windows environment is completed.
Note: As of the time of writing, the combination of nginx + php and phpinfo have not been displayed correctly. We will fix this tomorrow. And study the issue of who runs first and who occupies port 80 first.
Related recommendations:
Detailed introduction to the Win10 system
The download and installation steps of Mysql5.7 green version under win10 report an error Solution
Detailed tutorial on configuration of mysql 5.6.35 winx64 installation-free version under win10
The above is the detailed content of How to install IIS, MySQ, nginx, php7.1.7 under Win10?. For more information, please follow other related articles on the PHP Chinese website!

Hot AI Tools

Undresser.AI Undress
AI-powered app for creating realistic nude photos

AI Clothes Remover
Online AI tool for removing clothes from photos.

Undress AI Tool
Undress images for free

Clothoff.io
AI clothes remover

Video Face Swap
Swap faces in any video effortlessly with our completely free AI face swap tool!

Hot Article
Hot Tools

Notepad++7.3.1
Easy-to-use and free code editor

SublimeText3 Chinese version
Chinese version, very easy to use

Zend Studio 13.0.1
Powerful PHP integrated development environment

Dreamweaver CS6
Visual web development tools

SublimeText3 Mac version
God-level code editing software (SublimeText3)
Hot Topics
 1657
1657
 14
1415
52
1309
25
1257
29
1229
24
14
1415
52
1309
25
1257
29
1229
24

 How to configure nginx in Windows
Apr 14, 2025 pm 12:57 PM
How to configure nginx in Windows
Apr 14, 2025 pm 12:57 PM
How to configure Nginx in Windows? Install Nginx and create a virtual host configuration. Modify the main configuration file and include the virtual host configuration. Start or reload Nginx. Test the configuration and view the website. Selectively enable SSL and configure SSL certificates. Selectively set the firewall to allow port 80 and 443 traffic.
 How to check the name of the docker container
Apr 15, 2025 pm 12:21 PM
How to check the name of the docker container
Apr 15, 2025 pm 12:21 PM
You can query the Docker container name by following the steps: List all containers (docker ps). Filter the container list (using the grep command). Gets the container name (located in the "NAMES" column).
 How to check whether nginx is started
Apr 14, 2025 pm 01:03 PM
How to check whether nginx is started
Apr 14, 2025 pm 01:03 PM
How to confirm whether Nginx is started: 1. Use the command line: systemctl status nginx (Linux/Unix), netstat -ano | findstr 80 (Windows); 2. Check whether port 80 is open; 3. Check the Nginx startup message in the system log; 4. Use third-party tools, such as Nagios, Zabbix, and Icinga.
 How to start containers by docker
Apr 15, 2025 pm 12:27 PM
How to start containers by docker
Apr 15, 2025 pm 12:27 PM
Docker container startup steps: Pull the container image: Run "docker pull [mirror name]". Create a container: Use "docker create [options] [mirror name] [commands and parameters]". Start the container: Execute "docker start [Container name or ID]". Check container status: Verify that the container is running with "docker ps".
 How to create containers for docker
Apr 15, 2025 pm 12:18 PM
How to create containers for docker
Apr 15, 2025 pm 12:18 PM
Create a container in Docker: 1. Pull the image: docker pull [mirror name] 2. Create a container: docker run [Options] [mirror name] [Command] 3. Start the container: docker start [Container name]
 How to check nginx version
Apr 14, 2025 am 11:57 AM
How to check nginx version
Apr 14, 2025 am 11:57 AM
The methods that can query the Nginx version are: use the nginx -v command; view the version directive in the nginx.conf file; open the Nginx error page and view the page title.
 How to configure cloud server domain name in nginx
Apr 14, 2025 pm 12:18 PM
How to configure cloud server domain name in nginx
Apr 14, 2025 pm 12:18 PM
How to configure an Nginx domain name on a cloud server: Create an A record pointing to the public IP address of the cloud server. Add virtual host blocks in the Nginx configuration file, specifying the listening port, domain name, and website root directory. Restart Nginx to apply the changes. Access the domain name test configuration. Other notes: Install the SSL certificate to enable HTTPS, ensure that the firewall allows port 80 traffic, and wait for DNS resolution to take effect.
 What to do if nginx server is hung
Apr 14, 2025 am 11:42 AM
What to do if nginx server is hung
Apr 14, 2025 am 11:42 AM
When the Nginx server goes down, you can perform the following troubleshooting steps: Check that the nginx process is running. View the error log for error messages. Check the syntax of nginx configuration. Make sure nginx has the permissions you need to access the file. Check file descriptor to open limits. Confirm that nginx is listening on the correct port. Add firewall rules to allow nginx traffic. Check reverse proxy settings, including backend server availability. For further assistance, please contact technical support.
