
 Backend Development
PHP Tutorial
Detailed explanation of Laravel image processing extension package Intervention/image
Backend Development
PHP Tutorial
Detailed explanation of Laravel image processing extension package Intervention/image
Detailed explanation of Laravel image processing extension package Intervention/image
This article mainly introduces to you the installation and use of the Intervention/image image processing extension package in Laravel and the solutions to the pitfalls that may be encountered in use. The article introduces it in great detail through sample code, which is very useful for your study or work. It has certain reference and learning value. Friends who need it can follow the editor to learn together. I hope to be helpful.
Preface
Intervention/image is an image processing tool customized for Laravel. It provides a set of easy-to-express methods. Create and edit images.
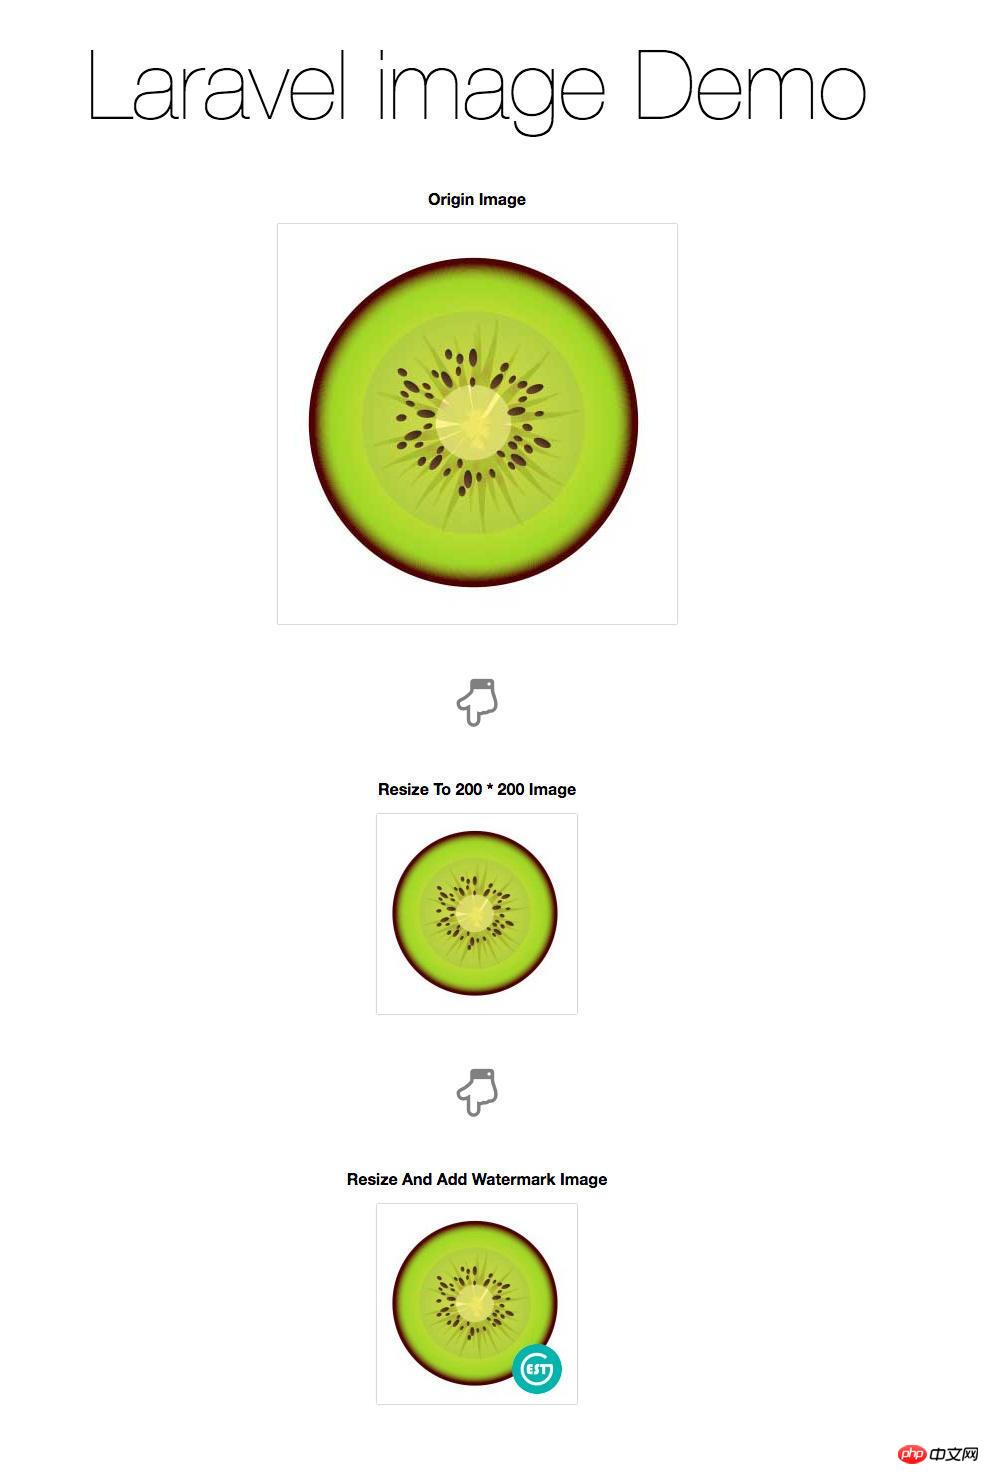
Demo
Demo screenshot
Demo Run
Please refer to the document how to use Homestead to quickly run a Laravel project.
Article Overview
Installation;
Modify configuration information;
Basic usage ;
- ##Special features.
The following is a detailed explanation.
##1. Install
composer require intervention/image
2). Modify app/config/app.php and add ServiceProvider:
// 将下面代码添加到 providers 数组中
'providers' => [
 // ...
 Intervention\Image\ImageServiceProvider::class,
 // ...
 ],


// 将下面代码添加到 aliases 数组中
'aliases' => [
 // ...
 'Image' => Intervention\Image\Facades\Image::class,
 // ...
 ],
2. Image processing library configuration
This extension package uses PHP's GD library for image processing by default, but since the GD library's image processing efficiency is slightly inferior to the imagemagick library, it is recommended to replace it with the imagemagick library for image processing.
Before you start, you must first make sure that GD or Imagick has been installed locally.
When using Intervention Image, you only need to pass an array parameter to ImageManager to complete the communication between GD and Imagick libraries. Switch between each other.
As shown below:
// 引入 composer autoload
require 'vendor/autoload.php';

// 导入 Intervention Image Manager Class
use Intervention\Image\ImageManager;

// 通过指定 driver 来创建一个 image manager 实例
$manager = new ImageManager(array('driver' => 'imagick'));

// 最后创建 image 实例
$image = $manager->make('public/foo.jpg')->resize(300, 200);
Alternatively, you can also use the static version of ImageManager, as shown below:
// 引入 composer autoload
require 'vendor/autoload.php';

// 导入 Intervention Image Manager Class
use Intervention\Image\ImageManagerStatic as Image;

// 通过指定 driver 来创建一个 image manager 实例 (默认使用 gd)
Image::configure(array('driver' => 'imagick'));

// 最后创建 image 实例
$image = Image::make('public/foo.jpg')->resize(300, 200);
Generate the config/image.php configuration file:
php artisan vendor:publish --provider="Intervention\Image\ImageServiceProviderLaravel5"
After running the above command, the config/image.php configuration file will be generated in the project. Open this file and modify the driver to imagick:
return array(
 'driver' => 'imagick'
);
This is it, this expansion package is Installation successful!
3. Basic usage// 修改指定图片的大小
$img = Image::make('images/avatar.jpg')->resize(200, 200);
// 插入水印, 水印位置在原图片的右下角, 距离下边距 10 像素, 距离右边距 15 像素
$img->insert('images/watermark.png', 'bottom-right', 15, 10);
// 将处理后的图片重新保存到其他路径
$img->save('images/new_avatar.jpg');
/* 上面的逻辑可以通过链式表达式搞定 */
$img = Image::make('images/avatar.jpg')->resize(200, 200)->insert('images/new_avatar.jpg', 'bottom-right', 15, 10);
4. Featured functions
In addition to the basic usage introduced above, this expansion pack also supports:
- Image upload function;
- Image caching function;
- Image filtering function: Convert images according to unified rules;
- Dynamic image processing: According to the URL of accessed images Parameters automatically adjust image size
- For more examples, please refer to the official documentation.
A small pit in intervention/image and its How to crack itIn fact, intervention/iamge has been used for a long time. Its API is very concisely designed, the documentation is also very comprehensive, and it is quite easy to use.
But recently I accidentally discovered a small pit. Because I need to synthesize a QR code with a WeChat avatar, I use Image::make($avatarUrl) ($avatarUrl here is the link to the WeChat avatar) to generate the avatar, and then synthesize it into the QR code image (including some other operations, such as using template backgrounds and writing text).
After I finished writing, I found that it was quite slow when I ran it, taking about 23 seconds on average. At first I thought it was because there were many operations and the size was relatively large during the synthesis process, so it should have been this speed. But then I got some free time and started trying to optimize. Even if I couldn't improve the speed, I could at least figure out why it was so time-consuming.
After much fiddling around, I discovered that the truth has little to do with the number and size of synthesis operations. The key lies in the pose in which I create the avatar data.
In order to illustrate this problem, the following code was specially written for comparison.
// 记录开始时间
$startTimestamp = microtime(true);

$url = 'http://wx.qlogo.cn/mmopen/XxT9TiaJ1ibf06TNRCMjQADS4opDHvQLguLZHpqkRlvuJYZicvJW4iaOalPsKIs0kpZ3F6864ZzibyObYiaucUQSrdp4pFTNDyIpxw/0';

$avatar = \Image::make($url);

// 记录结束时间
$endTimestamp = microtime(true);

info($startTimestamp);
info($endTimestamp);
info($endTimestamp - $startTimestamp);
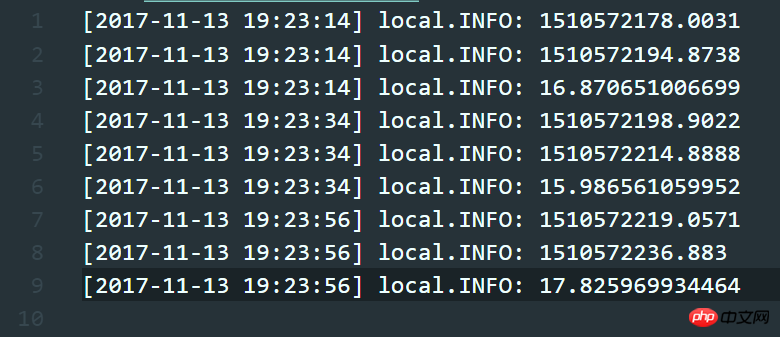
The above code uses the form of Image::make($url) to generate an avatar directly from the url. Judging from the recorded log data, the time taken is basically around 16 seconds.
Later, I thought of a new posture. In fact, I came up with it while trying to optimize. See the code below:
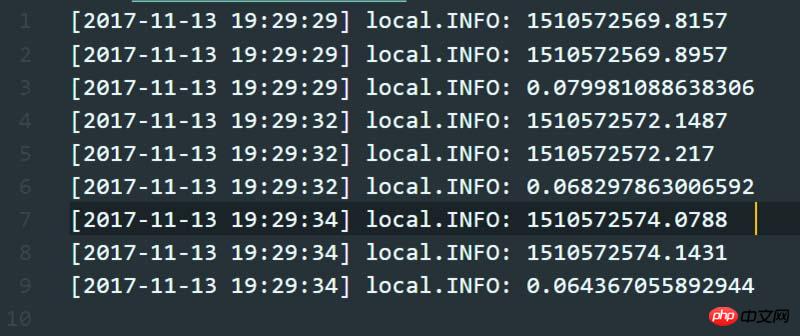
$startTimestamp = microtime(true);

$client = new \GuzzleHttp\Client();

$url = 'http://wx.qlogo.cn/mmopen/XxT9TiaJ1ibf06TNRCMjQADS4opDHvQLguLZHpqkRlvuJYZicvJW4iaOalPsKIs0kpZ3F6864ZzibyObYiaucUQSrdp4pFTNDyIpxw/0';

$avatarResponse = $client->get($url);

$avatar = \Image::make($avatarResponse->getBody()->getContents());

$endTimestamp = microtime(true);

info($startTimestamp);
info($endTimestamp);
info($endTimestamp - $startTimestamp);
Here I first use GuzzleHttp to get the avatar, and then use Image::make($data) to create the avatar.
Attention, it’s about to climax... sunglasses
Look at the screenshot of the log below. The average time taken three times is about 0.07 seconds, which is more than 200 times worse than the previous 16 seconds.
As for why this phenomenon occurs, I don’t know yet, but this is undoubtedly a useful and niche experience.
Related recommendations:
Detailed explanation of Laravel’s localization module
Detailed explanation of how to obtain routing parameters in Laravel
Detailed explanation of the loading process and principle of Facade in Laravel
The above is the detailed content of Detailed explanation of Laravel image processing extension package Intervention/image. For more information, please follow other related articles on the PHP Chinese website!

Hot AI Tools

Undresser.AI Undress
AI-powered app for creating realistic nude photos

AI Clothes Remover
Online AI tool for removing clothes from photos.

Undress AI Tool
Undress images for free

Clothoff.io
AI clothes remover

Video Face Swap
Swap faces in any video effortlessly with our completely free AI face swap tool!

Hot Article
Hot Tools

Notepad++7.3.1
Easy-to-use and free code editor

SublimeText3 Chinese version
Chinese version, very easy to use

Zend Studio 13.0.1
Powerful PHP integrated development environment

Dreamweaver CS6
Visual web development tools

SublimeText3 Mac version
God-level code editing software (SublimeText3)
Hot Topics
 1660
1660
 14
1417
52
1311
25
1261
29
1234
24
14
1417
52
1311
25
1261
29
1234
24

 Laravel Eloquent ORM in Bangla partial model search)
Apr 08, 2025 pm 02:06 PM
Laravel Eloquent ORM in Bangla partial model search)
Apr 08, 2025 pm 02:06 PM
LaravelEloquent Model Retrieval: Easily obtaining database data EloquentORM provides a concise and easy-to-understand way to operate the database. This article will introduce various Eloquent model search techniques in detail to help you obtain data from the database efficiently. 1. Get all records. Use the all() method to get all records in the database table: useApp\Models\Post;$posts=Post::all(); This will return a collection. You can access data using foreach loop or other collection methods: foreach($postsas$post){echo$post->
 Laravel Introduction Example
Apr 18, 2025 pm 12:45 PM
Laravel Introduction Example
Apr 18, 2025 pm 12:45 PM
Laravel is a PHP framework for easy building of web applications. It provides a range of powerful features including: Installation: Install the Laravel CLI globally with Composer and create applications in the project directory. Routing: Define the relationship between the URL and the handler in routes/web.php. View: Create a view in resources/views to render the application's interface. Database Integration: Provides out-of-the-box integration with databases such as MySQL and uses migration to create and modify tables. Model and Controller: The model represents the database entity and the controller processes HTTP requests.
 Solve caching issues in Craft CMS: Using wiejeben/craft-laravel-mix plug-in
Apr 18, 2025 am 09:24 AM
Solve caching issues in Craft CMS: Using wiejeben/craft-laravel-mix plug-in
Apr 18, 2025 am 09:24 AM
When developing websites using CraftCMS, you often encounter resource file caching problems, especially when you frequently update CSS and JavaScript files, old versions of files may still be cached by the browser, causing users to not see the latest changes in time. This problem not only affects the user experience, but also increases the difficulty of development and debugging. Recently, I encountered similar troubles in my project, and after some exploration, I found the plugin wiejeben/craft-laravel-mix, which perfectly solved my caching problem.
 Laravel user login function
Apr 18, 2025 pm 12:48 PM
Laravel user login function
Apr 18, 2025 pm 12:48 PM
Laravel provides a comprehensive Auth framework for implementing user login functions, including: Defining user models (Eloquent model), creating login forms (Blade template engine), writing login controllers (inheriting Auth\LoginController), verifying login requests (Auth::attempt) Redirecting after login is successful (redirect) considering security factors: hash passwords, anti-CSRF protection, rate limiting and security headers. In addition, the Auth framework also provides functions such as resetting passwords, registering and verifying emails. For details, please refer to the Laravel documentation: https://laravel.com/doc
 Laravel framework installation method
Apr 18, 2025 pm 12:54 PM
Laravel framework installation method
Apr 18, 2025 pm 12:54 PM
Article summary: This article provides detailed step-by-step instructions to guide readers on how to easily install the Laravel framework. Laravel is a powerful PHP framework that speeds up the development process of web applications. This tutorial covers the installation process from system requirements to configuring databases and setting up routing. By following these steps, readers can quickly and efficiently lay a solid foundation for their Laravel project.
 Laravel's geospatial: Optimization of interactive maps and large amounts of data
Apr 08, 2025 pm 12:24 PM
Laravel's geospatial: Optimization of interactive maps and large amounts of data
Apr 08, 2025 pm 12:24 PM
Efficiently process 7 million records and create interactive maps with geospatial technology. This article explores how to efficiently process over 7 million records using Laravel and MySQL and convert them into interactive map visualizations. Initial challenge project requirements: Extract valuable insights using 7 million records in MySQL database. Many people first consider programming languages, but ignore the database itself: Can it meet the needs? Is data migration or structural adjustment required? Can MySQL withstand such a large data load? Preliminary analysis: Key filters and properties need to be identified. After analysis, it was found that only a few attributes were related to the solution. We verified the feasibility of the filter and set some restrictions to optimize the search. Map search based on city
 Laravel and the Backend: Powering Web Application Logic
Apr 11, 2025 am 11:29 AM
Laravel and the Backend: Powering Web Application Logic
Apr 11, 2025 am 11:29 AM
How does Laravel play a role in backend logic? It simplifies and enhances backend development through routing systems, EloquentORM, authentication and authorization, event and listeners, and performance optimization. 1. The routing system allows the definition of URL structure and request processing logic. 2.EloquentORM simplifies database interaction. 3. The authentication and authorization system is convenient for user management. 4. The event and listener implement loosely coupled code structure. 5. Performance optimization improves application efficiency through caching and queueing.
 How to learn Laravel How to learn Laravel for free
Apr 18, 2025 pm 12:51 PM
How to learn Laravel How to learn Laravel for free
Apr 18, 2025 pm 12:51 PM
Want to learn the Laravel framework, but suffer from no resources or economic pressure? This article provides you with free learning of Laravel, teaching you how to use resources such as online platforms, documents and community forums to lay a solid foundation for your PHP development journey from getting started to master.
