

HTML5 uses go+websocket to build a websocket service example

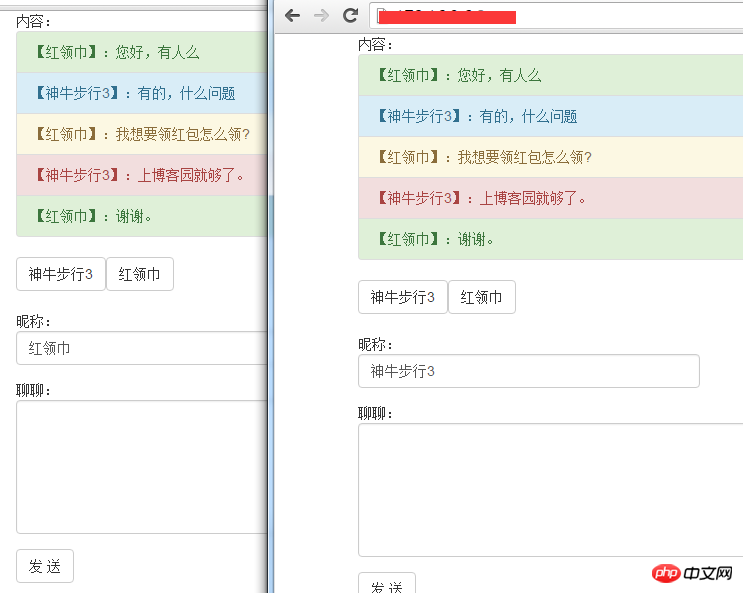
This time I will just post the code screenshots. It should be a simple chat in the background using Go language. No special knowledge is used here. It is the simplest way to achieve the effect. The main purpose is to share how to use websocket in h5. , the main part of go building websocket service.
go code part:
// WebChat project main.go
package main

import (
    "fmt"
    "net/http"
    "time"

    "encoding/json"

    "strings"

    "golang.org/x/net/websocket"
)

//全局信息
var datas Datas
var users map[*websocket.Conn]string

func main() {
    fmt.Println("启动时间")
    fmt.Println(time.Now())

    //初始化
    datas = Datas{}
    users = make(map[*websocket.Conn]string)

    //绑定效果页面
    http.HandleFunc("/", h_index)
    //绑定socket方法
    http.Handle("/webSocket", websocket.Handler(h_webSocket))
    //开始监听
    http.ListenAndServe(":8", nil)
}

func h_index(w http.ResponseWriter, r *http.Request) {

    http.ServeFile(w, r, "index.html")
}

func h_webSocket(ws *websocket.Conn) {

    var userMsg UserMsg
    var data string
    for {

        //判断是否重复连接
        if _, ok := users[ws]; !ok {
            users[ws] = "匿名"
        }
        userMsgsLen := len(datas.UserMsgs)
        fmt.Println("UserMsgs", userMsgsLen, "users长度:", len(users))

        //有消息时,全部分发送数据
        if userMsgsLen > 0 {
            b, errMarshl := json.Marshal(datas)
            if errMarshl != nil {
                fmt.Println("全局消息内容异常...")
                break
            }
            for key, _ := range users {
                errMarshl = websocket.Message.Send(key, string(b))
                if errMarshl != nil {
                    //移除出错的链接
                    delete(users, key)
                    fmt.Println("发送出错...")
                    break
                }
            }
            datas.UserMsgs = make([]UserMsg, 0)
        }

        fmt.Println("开始解析数据...")
        err := websocket.Message.Receive(ws, &data)
        fmt.Println("data:", data)
        if err != nil {
            //移除出错的链接
            delete(users, ws)
            fmt.Println("接收出错...")
            break
        }

        data = strings.Replace(data, "\n", "", 0)
        err = json.Unmarshal([]byte(data), &userMsg)
        if err != nil {
            fmt.Println("解析数据异常...")
            break
        }
        fmt.Println("请求数据类型:", userMsg.DataType)

        switch userMsg.DataType {
        case "send":
            //赋值对应的昵称到ws
            if _, ok := users[ws]; ok {
                users[ws] = userMsg.UserName

                //清除连接人昵称信息
                datas.UserDatas = make([]UserData, 0)
                //重新加载当前在线连接人
                for _, item := range users {

                    userData := UserData{UserName: item}
                    datas.UserDatas = append(datas.UserDatas, userData)
                }
            }
            datas.UserMsgs = append(datas.UserMsgs, userMsg)
        }
    }

}

type UserMsg struct {
    UserName string
    Msg      string
    DataType string
}

type UserData struct {
    UserName string
}

type Datas struct {
    UserMsgs  []UserMsg
    UserDatas []UserData
}HTML code part:
<!DOCTYPE html>
<html>
<head>
<title></title>
<meta name="viewport" content="width=device-width, initial-scale=1, maximum-scale=1, user-scalable=no">
<!-- 新 Bootstrap 核心 CSS 文件 -->
<link rel="stylesheet" href="//cdn.bootcss.com/bootstrap/3.3.5/css/bootstrap.min.css">
<script src="//cdn.bootcss.com/jquery/1.11.3/jquery.min.js"></script>
<!-- <script src="//cdn.bootcss.com/bootstrap/3.3.5/js/bootstrap.min.js"></script>-->
</head>
<body>
<div>
<div>内容:</div>
<div id="divShow">
<!--<div class="list-group-item list-group-item-success">1111</div>
<div class="list-group-item list-group-item-info">1111</div>
<div class="list-group-item list-group-item-warning">1111</div>
<div class="list-group-item list-group-item-danger">1111</div>-->
</div>
<div id="divUsers">
在线:<br />
<!--<div class="btn btn-default">111</div>-->
</div>
<div>
昵称:<input id="txtUserName" value="红领巾" type="text" maxlength="20" style="width: 30%; margin-bottom: 15px" />
聊聊:<textarea id="txtContent" autofocus rows="6" placeholder="想聊的内容" maxlength="200" required style="width: 60%; "></textarea>
<button class="btn btn-default" id="btnSend" style="margin-top:15px">发 送</button>
</div>
</div>
</body>
</html>
<script>
var tool = function () {
var paperLoopNum = 0;
var paperTempleArr = [
'<div class="list-group-item list-group-item-success">{0}</div>',
'<div class="list-group-item list-group-item-info">{0}</div>',
'<div class="list-group-item list-group-item-warning">{0}</div>',
'<div class="list-group-item list-group-item-danger">{0}</div>'
];
return {
paperDiv: function (val) {
var hl = paperTempleArr[paperLoopNum];
paperLoopNum++;
if (paperLoopNum >= paperTempleArr.length) { paperLoopNum = 0; }
return this.formart(hl, [val])
},
formart: function (str, arrVal) {
for (var i = 0; i < arrVal.length; i++) {
str = str.replace("{" + i + "}", arrVal[i]);
}
return str;
}
}
}
function showMsg(id, hl, isAppend) {
if (!isAppend) { $("#" + id).html(hl); } else {
$("#" + id).append(hl);
}
}
$(function () {
//初始化工具方法
var tl = new tool();
var wsUrl = "ws://172.16.9.6:8/webSocket";
ws = new WebSocket(wsUrl);
try {
ws.onopen = function () {
//showMsg("divShow", tl.paperDiv("连接服务器-成功"));
}
ws.onclose = function () {
if (ws) {
ws.close();
ws = null;
}
showMsg("divShow", tl.paperDiv("连接服务器-关闭"), true);
}
ws.onmessage = function (result) {
//console.log(result.data);
var data = JSON.parse(result.data);
$(data.UserMsgs).each(function (i, item) {
showMsg("divShow", tl.paperDiv("【" + item.UserName + "】:" + item.Msg), true);
});
var userDataShow = [];
$(data.UserDatas).each(function (i, item) {
userDataShow.push('<div class="btn btn-default">' + item.UserName + '</div>');
});
showMsg("divUsers", userDataShow.join(''), false);
}
ws.onerror = function () {
if (ws) {
ws.close();
ws = null;
}
showMsg("divShow", tl.paperDiv("连接服务器-关闭"), true);
}
} catch (e) {
alert(e.message);
}
$("#btnSend").on("click", function () {
var tContentObj = $("#txtContent");
var tContent = $.trim( tContentObj.val()).replace("/[\n]/g", "");
var tUserName = $.trim( $("#txtUserName").val()); tUserName = tUserName.length <= 0 ? "匿名" : tUserName;
if (tContent.length <= 0 || $.trim(tContent).length <= 0) { alert("请输入发送内容!"); return; }
if (ws == null) { alert("连接失败,请F5刷新页面!"); return; }
var request = tl.formart('{"UserName": "{0}", "DataType": "{1}", "Msg": "{2}" }',
[tUserName, "send", tContent]);
ws.send(request);
tContentObj.val("");
tContentObj.val($.trim(tContentObj.val()).replace("/[\n]/g", ""));
});
$("#txtContent").on("keydown", function (event) {
if (event.keyCode == 13) {
$("#btnSend").trigger("click");
}
});
})
</script>Rendering:
The above is the detailed content of HTML5 uses go+websocket to build a websocket service example. For more information, please follow other related articles on the PHP Chinese website!

Hot AI Tools

Undresser.AI Undress
AI-powered app for creating realistic nude photos

AI Clothes Remover
Online AI tool for removing clothes from photos.

Undress AI Tool
Undress images for free

Clothoff.io
AI clothes remover

Video Face Swap
Swap faces in any video effortlessly with our completely free AI face swap tool!

Hot Article
Hot Tools

Notepad++7.3.1
Easy-to-use and free code editor

SublimeText3 Chinese version
Chinese version, very easy to use

Zend Studio 13.0.1
Powerful PHP integrated development environment

Dreamweaver CS6
Visual web development tools

SublimeText3 Mac version
God-level code editing software (SublimeText3)
Hot Topics
 1658
1658
 14
1415
52
1309
25
1257
29
1231
24
14
1415
52
1309
25
1257
29
1231
24

 Table Border in HTML
Sep 04, 2024 pm 04:49 PM
Table Border in HTML
Sep 04, 2024 pm 04:49 PM
Guide to Table Border in HTML. Here we discuss multiple ways for defining table-border with examples of the Table Border in HTML.
 Nested Table in HTML
Sep 04, 2024 pm 04:49 PM
Nested Table in HTML
Sep 04, 2024 pm 04:49 PM
This is a guide to Nested Table in HTML. Here we discuss how to create a table within the table along with the respective examples.
 HTML margin-left
Sep 04, 2024 pm 04:48 PM
HTML margin-left
Sep 04, 2024 pm 04:48 PM
Guide to HTML margin-left. Here we discuss a brief overview on HTML margin-left and its Examples along with its Code Implementation.
 HTML Table Layout
Sep 04, 2024 pm 04:54 PM
HTML Table Layout
Sep 04, 2024 pm 04:54 PM
Guide to HTML Table Layout. Here we discuss the Values of HTML Table Layout along with the examples and outputs n detail.
 HTML Input Placeholder
Sep 04, 2024 pm 04:54 PM
HTML Input Placeholder
Sep 04, 2024 pm 04:54 PM
Guide to HTML Input Placeholder. Here we discuss the Examples of HTML Input Placeholder along with the codes and outputs.
 HTML Ordered List
Sep 04, 2024 pm 04:43 PM
HTML Ordered List
Sep 04, 2024 pm 04:43 PM
Guide to the HTML Ordered List. Here we also discuss introduction of HTML Ordered list and types along with their example respectively
 HTML onclick Button
Sep 04, 2024 pm 04:49 PM
HTML onclick Button
Sep 04, 2024 pm 04:49 PM
Guide to HTML onclick Button. Here we discuss their introduction, working, examples and onclick Event in various events respectively.
 Moving Text in HTML
Sep 04, 2024 pm 04:45 PM
Moving Text in HTML
Sep 04, 2024 pm 04:45 PM
Guide to Moving Text in HTML. Here we discuss an introduction, how marquee tag work with syntax and examples to implement.
