

How to delete a single file in yii2.0
This article mainly introduces the method of integrating Alibaba Cloud oss with yii2.0 to delete a single file. It has certain reference value. Interested friends can refer to the main ideas of
and pass it in the controller. Obtain the fileid of the file to be deleted, pass the fileid to the model's deletefile method for processing, and return the processing result.
In the deletefile method, first find the corresponding file information based on the ID, and then delete the records in the data, the files in Alibaba Cloud oss, and the local files.
The main steps are as follows:
1 First, build a view, or write an ajax to send a request. The code is omitted here (let the front end write it).
2 Receive parameters in the controller and transfer them to the model. The code reference in the controller UploadController.php is as follows:
/**
   * 根据fileid删除文件
   * @return mixed 删除是否成功
   */
  public function actionDeletefile()
  {
    $res['error'] = 1;     // 准备返回数据
    Yii::$app->response->format = Response::FORMAT_JSON;  // 设置返回格式
    if (Yii::$app->request->isPost){            // 如果是post请求
      $postdata = Yii::$app->request->post('fileid',0);  // 从post里边获取文件id

      if ($postdata==0){                 // 如果文件id为0
        $res['errmsg'] = '删除失败,请重试';        // 准备返回数据
        return $res;                  // 返回结果
      }
      $model = new UploadForm();             // 实例化model
      $delres = $model->deletefile($postdata);      // 根据id调用deletefile方法

      if ($delres['error']==0){              // 如果删除成功
        $res['error'] = 0;               // 准备返回信息
      } else {
        $res['errmsg'] = $delres['errmsg'];       // 如果删除失败,准备返回信息
      }

    } else {
      $res['errmsg'] = '非法请求';             // 主要考虑post请求,get请求请自行修改代码
    }

    return $res;                      // 返回删除结果
}3 When the controller transfers the file ID to UploadForm.php, delete it in the deletefile method.
   /**
   * 删除阿里云oss里存储的文件和数据库里边保存到文件上传信息
   * @param $fileid  文件表里边的主键id
   * @return boolean  删除是否成功
   */
  public function deletefile($fileid)
  {
    $res['error'] = 1;  // 1表示默认有错误。
    $fileinfo = Yii::$app->db->createCommand('select ossfile,filePath,userid from file where id=:id')->bindParam(':id', $fileid)->queryOne();
    // 根据主键从数据库里边查询文件的信息,至少要一个服务器文件的完整路径(用来删除服务器文件)和一个ossfile的名称(删除阿里云oss里边的文件)

    if (count($fileinfo) > 0) {           // 如果找到了文件的记录

      // 这里边的验证可以更丰富一些,比如验证用户是否有权限删除该文件,文件是否属于该用户等等

      $ossfile = $fileinfo['ossfile'];      // 获取ossfile
      $realfile = $fileinfo['filePath'];     // 获取服务器上的文件
      $owner = $fileinfo['userid'];        // 获取上传图片用户的id
      $operator = Yii::$app->user->id;      // 获取删除图片的用户

      if ($owner != $operator) {         // 如果删除图片的用户不是上传的用户,报错并返回
        $res['errmsg'] = '您删除的图片不存在';
        return $res;
      }

      $trans = Yii::$app->db->beginTransaction(); // 开启事务
      try {
        $delstatus = Yii::$app->db->createCommand()->delete('file', 'id = ' . $fileid)->execute();
        //删除数据库里边的记录

        if ($delstatus) {            // 如果删除成功
          if (Yii::$app->Aliyunoss->delete($ossfile)) { //删除阿里云oss上的文件
            @unlink($realfile);       // 删除服务器上的文件
            $res['error'] = 0;       // 准备返回信息
            $trans->commit();        // 提交事务
          }
        }
        $trans->rollBack();           // 删除失败,事务回滚
      } catch (Exception $e) {          // 发生异常
        $res['errmsg'] = '删除失败';       // 准备返回信息
        $trans->rollBack();           // 事务回滚
      }

    } else {
      $res['errmsg'] = '图片不存在,请重试';      // 图片不存在
    }

    return $res;                   // 返回删除结果
}The above is the detailed content of How to delete a single file in yii2.0. For more information, please follow other related articles on the PHP Chinese website!

Hot AI Tools

Undresser.AI Undress
AI-powered app for creating realistic nude photos

AI Clothes Remover
Online AI tool for removing clothes from photos.

Undress AI Tool
Undress images for free

Clothoff.io
AI clothes remover

Video Face Swap
Swap faces in any video effortlessly with our completely free AI face swap tool!

Hot Article
Hot Tools

Notepad++7.3.1
Easy-to-use and free code editor

SublimeText3 Chinese version
Chinese version, very easy to use

Zend Studio 13.0.1
Powerful PHP integrated development environment

Dreamweaver CS6
Visual web development tools

SublimeText3 Mac version
God-level code editing software (SublimeText3)
Hot Topics


 How to recover deleted contacts on WeChat (simple tutorial tells you how to recover deleted contacts)
May 01, 2024 pm 12:01 PM
How to recover deleted contacts on WeChat (simple tutorial tells you how to recover deleted contacts)
May 01, 2024 pm 12:01 PM
Unfortunately, people often delete certain contacts accidentally for some reasons. WeChat is a widely used social software. To help users solve this problem, this article will introduce how to retrieve deleted contacts in a simple way. 1. Understand the WeChat contact deletion mechanism. This provides us with the possibility to retrieve deleted contacts. The contact deletion mechanism in WeChat removes them from the address book, but does not delete them completely. 2. Use WeChat’s built-in “Contact Book Recovery” function. WeChat provides “Contact Book Recovery” to save time and energy. Users can quickly retrieve previously deleted contacts through this function. 3. Enter the WeChat settings page and click the lower right corner, open the WeChat application "Me" and click the settings icon in the upper right corner to enter the settings page.
 How to write a novel in the Tomato Free Novel app. Share the tutorial on how to write a novel in Tomato Novel.
Mar 28, 2024 pm 12:50 PM
How to write a novel in the Tomato Free Novel app. Share the tutorial on how to write a novel in Tomato Novel.
Mar 28, 2024 pm 12:50 PM
Tomato Novel is a very popular novel reading software. We often have new novels and comics to read in Tomato Novel. Every novel and comic is very interesting. Many friends also want to write novels. Earn pocket money and edit the content of the novel you want to write into text. So how do we write the novel in it? My friends don’t know, so let’s go to this site together. Let’s take some time to look at an introduction to how to write a novel. Share the Tomato novel tutorial on how to write a novel. 1. First open the Tomato free novel app on your mobile phone and click on Personal Center - Writer Center. 2. Jump to the Tomato Writer Assistant page - click on Create a new book at the end of the novel.
 How to enter bios on Colorful motherboard? Teach you two methods
Mar 13, 2024 pm 06:01 PM
How to enter bios on Colorful motherboard? Teach you two methods
Mar 13, 2024 pm 06:01 PM
Colorful motherboards enjoy high popularity and market share in the Chinese domestic market, but some users of Colorful motherboards still don’t know how to enter the bios for settings? In response to this situation, the editor has specially brought you two methods to enter the colorful motherboard bios. Come and try it! Method 1: Use the U disk startup shortcut key to directly enter the U disk installation system. The shortcut key for the Colorful motherboard to start the U disk with one click is ESC or F11. First, use Black Shark Installation Master to create a Black Shark U disk boot disk, and then turn on the computer. When you see the startup screen, continuously press the ESC or F11 key on the keyboard to enter a window for sequential selection of startup items. Move the cursor to the place where "USB" is displayed, and then
 What to do if the 0x80004005 error code appears. The editor will teach you how to solve the 0x80004005 error code.
Mar 21, 2024 pm 09:17 PM
What to do if the 0x80004005 error code appears. The editor will teach you how to solve the 0x80004005 error code.
Mar 21, 2024 pm 09:17 PM
When deleting or decompressing a folder on your computer, sometimes a prompt dialog box "Error 0x80004005: Unspecified Error" will pop up. How should you solve this situation? There are actually many reasons why the error code 0x80004005 is prompted, but most of them are caused by viruses. We can re-register the dll to solve the problem. Below, the editor will explain to you the experience of handling the 0x80004005 error code. Some users are prompted with error code 0X80004005 when using their computers. The 0x80004005 error is mainly caused by the computer not correctly registering certain dynamic link library files, or by a firewall that does not allow HTTPS connections between the computer and the Internet. So how about
 The secret of hatching mobile dragon eggs is revealed (step by step to teach you how to successfully hatch mobile dragon eggs)
May 04, 2024 pm 06:01 PM
The secret of hatching mobile dragon eggs is revealed (step by step to teach you how to successfully hatch mobile dragon eggs)
May 04, 2024 pm 06:01 PM
Mobile games have become an integral part of people's lives with the development of technology. It has attracted the attention of many players with its cute dragon egg image and interesting hatching process, and one of the games that has attracted much attention is the mobile version of Dragon Egg. To help players better cultivate and grow their own dragons in the game, this article will introduce to you how to hatch dragon eggs in the mobile version. 1. Choose the appropriate type of dragon egg. Players need to carefully choose the type of dragon egg that they like and suit themselves, based on the different types of dragon egg attributes and abilities provided in the game. 2. Upgrade the level of the incubation machine. Players need to improve the level of the incubation machine by completing tasks and collecting props. The level of the incubation machine determines the hatching speed and hatching success rate. 3. Collect the resources required for hatching. Players need to be in the game
 How to transfer files from Quark Cloud Disk to Baidu Cloud Disk?
Mar 14, 2024 pm 02:07 PM
How to transfer files from Quark Cloud Disk to Baidu Cloud Disk?
Mar 14, 2024 pm 02:07 PM
Quark Netdisk and Baidu Netdisk are currently the most commonly used Netdisk software for storing files. If you want to save the files in Quark Netdisk to Baidu Netdisk, how do you do it? In this issue, the editor has compiled the tutorial steps for transferring files from Quark Network Disk computer to Baidu Network Disk. Let’s take a look at how to operate it. How to save Quark network disk files to Baidu network disk? To transfer files from Quark Network Disk to Baidu Network Disk, you first need to download the required files from Quark Network Disk, then select the target folder in the Baidu Network Disk client and open it. Then, drag and drop the files downloaded from Quark Cloud Disk into the folder opened by the Baidu Cloud Disk client, or use the upload function to add the files to Baidu Cloud Disk. Make sure to check whether the file was successfully transferred in Baidu Cloud Disk after the upload is completed. That's it
 How to set font size on mobile phone (easily adjust font size on mobile phone)
May 07, 2024 pm 03:34 PM
How to set font size on mobile phone (easily adjust font size on mobile phone)
May 07, 2024 pm 03:34 PM
Setting font size has become an important personalization requirement as mobile phones become an important tool in people's daily lives. In order to meet the needs of different users, this article will introduce how to improve the mobile phone use experience and adjust the font size of the mobile phone through simple operations. Why do you need to adjust the font size of your mobile phone - Adjusting the font size can make the text clearer and easier to read - Suitable for the reading needs of users of different ages - Convenient for users with poor vision to use the font size setting function of the mobile phone system - How to enter the system settings interface - In Find and enter the "Display" option in the settings interface - find the "Font Size" option and adjust it. Adjust the font size with a third-party application - download and install an application that supports font size adjustment - open the application and enter the relevant settings interface - according to the individual
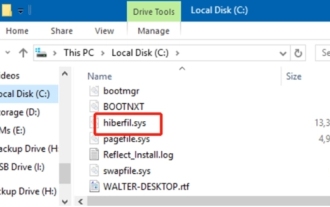 What is hiberfil.sys file? Can hiberfil.sys be deleted?
Mar 15, 2024 am 09:49 AM
What is hiberfil.sys file? Can hiberfil.sys be deleted?
Mar 15, 2024 am 09:49 AM
Recently, many netizens have asked the editor, what is the file hiberfil.sys? Can hiberfil.sys take up a lot of C drive space and be deleted? The editor can tell you that the hiberfil.sys file can be deleted. Let’s take a look at the details below. hiberfil.sys is a hidden file in the Windows system and also a system hibernation file. It is usually stored in the root directory of the C drive, and its size is equivalent to the size of the system's installed memory. This file is used when the computer is hibernated and contains the memory data of the current system so that it can be quickly restored to the previous state during recovery. Since its size is equal to the memory capacity, it may take up a larger amount of hard drive space. hiber
