 Database
 Mysql Tutorial
 Detailed graphic tutorial on the installation of multiple mysql5.7.19 (tar.gz) under Linux
Detailed graphic tutorial on the installation of multiple mysql5.7.19 (tar.gz) under Linux
This article mainly introduces multiple mysql5.7.19tar.gz installation tutorials under Linux in detail, which has certain reference value. Interested friends can refer to it
First time for beginners Please read the previous article for a tutorial on installing MySQL-5.7.19 version under Linux. If you have already installed it, please read this article to install multiple mysql-5.7.19 under Linux.
Environment: centos 6.5
1-Download
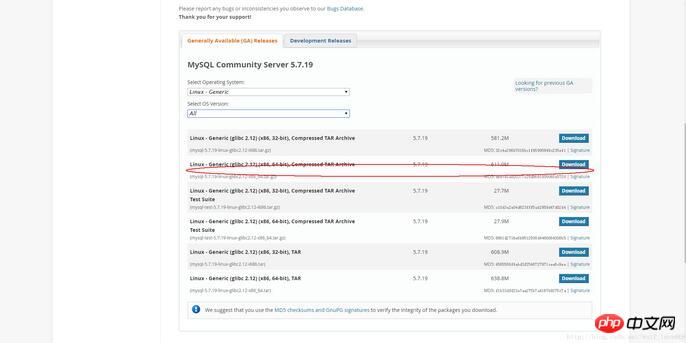
2-Skip login
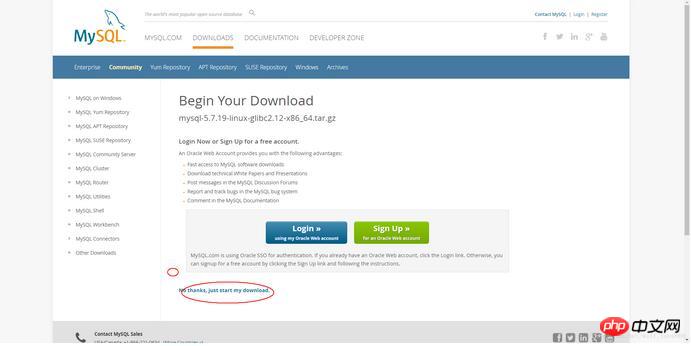
3-1 To install multiple databases, you need to configure your own my.cnf. If you only install one, and the system has not been installed before, just run this command
shell> groupadd mysql
shell> useradd -r -g mysql -s /bin/false mysql
shell> cd /usr/local
shell> tar zxvf /path/to/mysql-VERSION-OS.tar.gz
shell> ln -s full-path-to-mysql-VERSION-OS mysql
shell> cd mysql
shell> mkdir mysql-files
查看下有没有data目录如果没有的话增加个命令(mkdir data)
shell> chmod 750 mysql-files
shell> chown -R mysql .
shell> chgrp -R mysql .
shell> bin/mysql_install_db --user=mysql # MySQL 5.7.5
shell> bin/mysqld --initialize --user=mysql # MySQL 5.7.6 and up
shell> bin/mysql_ssl_rsa_setup  # MySQL 5.7.6 and up
shell> chown -R root .
shell> chown -R mysql data mysql-files
shell> bin/mysqld_safe --user=mysql &
# Next command is optional
shell> cp support-files/mysql.server /etc/init.d/mysql.server
After installation, you can jump directly to login step 5
The following is about installing multiple mysql:
3-2 To install multiple databases, you need to follow the following commands:
1-Add the configuration file my.cnf (command touch my.cnf in the mysql directory):
The following configuration files can be copied and pasted directly
Then create the log file/xcxyz/log/mysql/error.log
##
[mysqld]
basedir= /usr/local/mysql-5.7.19-3307
datadir = /usr/local/mysql-5.7.19-3307/data
port = 3307
character-set-server=utf8
server_id = 11
#该socket最好指定,不指定的话默认的话 是使用的默认的socket文件 而且登陆数据库的时候会有我下面的问题
socket = /tmp/mysql3307.sock
log-error = /xcxyz/log/mysql/error.log
pid-file = /usr/local/mysql-5.7.19-3307/data/mysql-5.7.19-3307.pid
shell> groupadd mysql
shell> useradd -r -g mysql -s /bin/false mysql
shell> cd /usr/local
shell> tar zxvf /path/to/mysql-VERSION-OS.tar.gz
shell> ln -s full-path-to-mysql-VERSION-OS mysql
shell> cd mysql
shell> mkdir mysql-files
shell> chmod 750 mysql-files
shell> chown -R mysqlosf .
shell> chgrp -R mysqlosf .
2017-07-24T03:13:47.933684Z 0 [Warning] TIMESTAMP with implicit DEFAULT value is deprecated. Please use - -explicit_defaults_for_timestamp server option (see documentation for more details).
2017-07-24T03:13:49.979892Z 0 [Warning] InnoDB: New log files created, LSN=45790
2017-07-24T03:13: 50.262941Z 0 [Warning] InnoDB: Creating foreign key constraint system tables.
2017-07-24T03:13:50.330756Z 0 [Warning] No existing UUID has been found, so we assume that this is the first time that this server has been started. Generating a new UUID: 1d702294-701e-11e7-98a1-00163e30bbf6.
2017-07-24T03:13:50.340474Z 0 [Warning] Gtid table is not ready to be used. Table 'mysql. gtid_executed' cannot be opened.
2017-07-24T03:13:50.344419Z 1 [Note] A temporary password is generated for root@localhost: jZpgHhigx5>i(It is particularly important to initialize the password later)
shell> bin/mysql_ssl_rsa_setup --defaults-file=/usr/local/mysql-5.7.19-3307/my.cnf
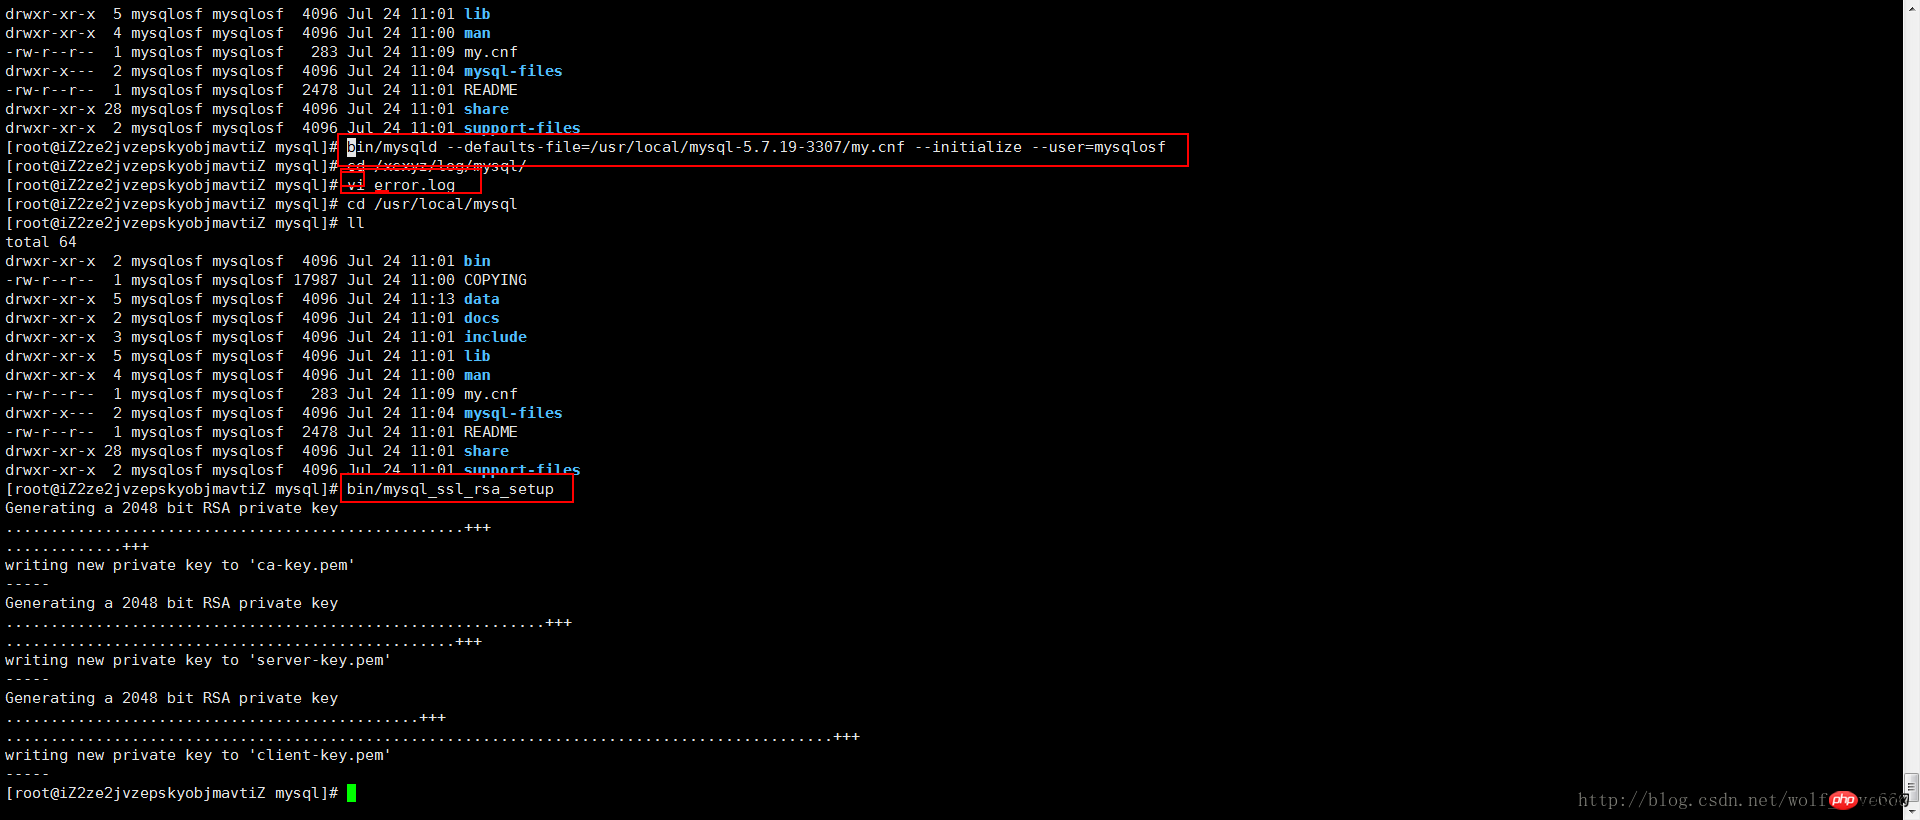
##
shell> chown -R root .
shell> chown -R mysql data mysql-files
2-7 Start background mysql
bin/mysqld_safe --defaults-file=/usr/local/full-path-to-mysql-VERSION-OS/my.cnf --user=mysqlosf &
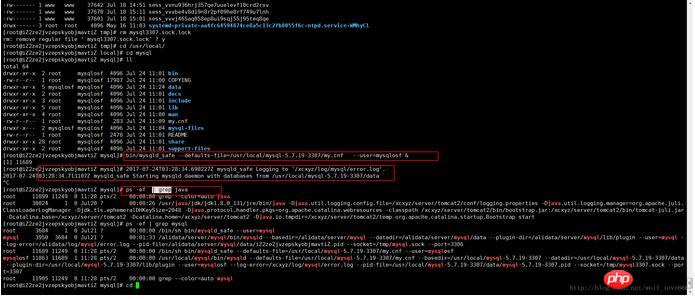 ##Next command is optional
shell> cp support-files/mysql.server /etc/init.d/mysql.server
2-8 Check whether mysql is started ps -ef | grep mysql
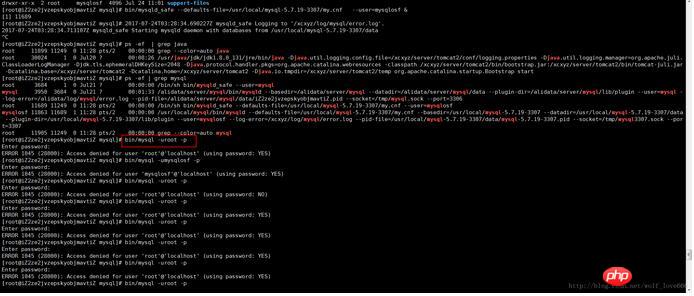 I have another problem here haha, I still can’t log in
5-After logging in to MySQL, you are required to change the password immediately, otherwise no operations can be performed. Execute the following command to change the password of
'root'@'localhost'
SET PASSWORD = PASSWORD('root');
 ALTER USER 'root'@'localhost' PASSWORD EXPIRE NEVER;
flush privileges;
6-In order to log in remotely, add a 'root'@ '%' account:
grant all privileges on *.* to 'root'@'%' identified by 'root' with grant option;
7-Local test connection
If it is like me above
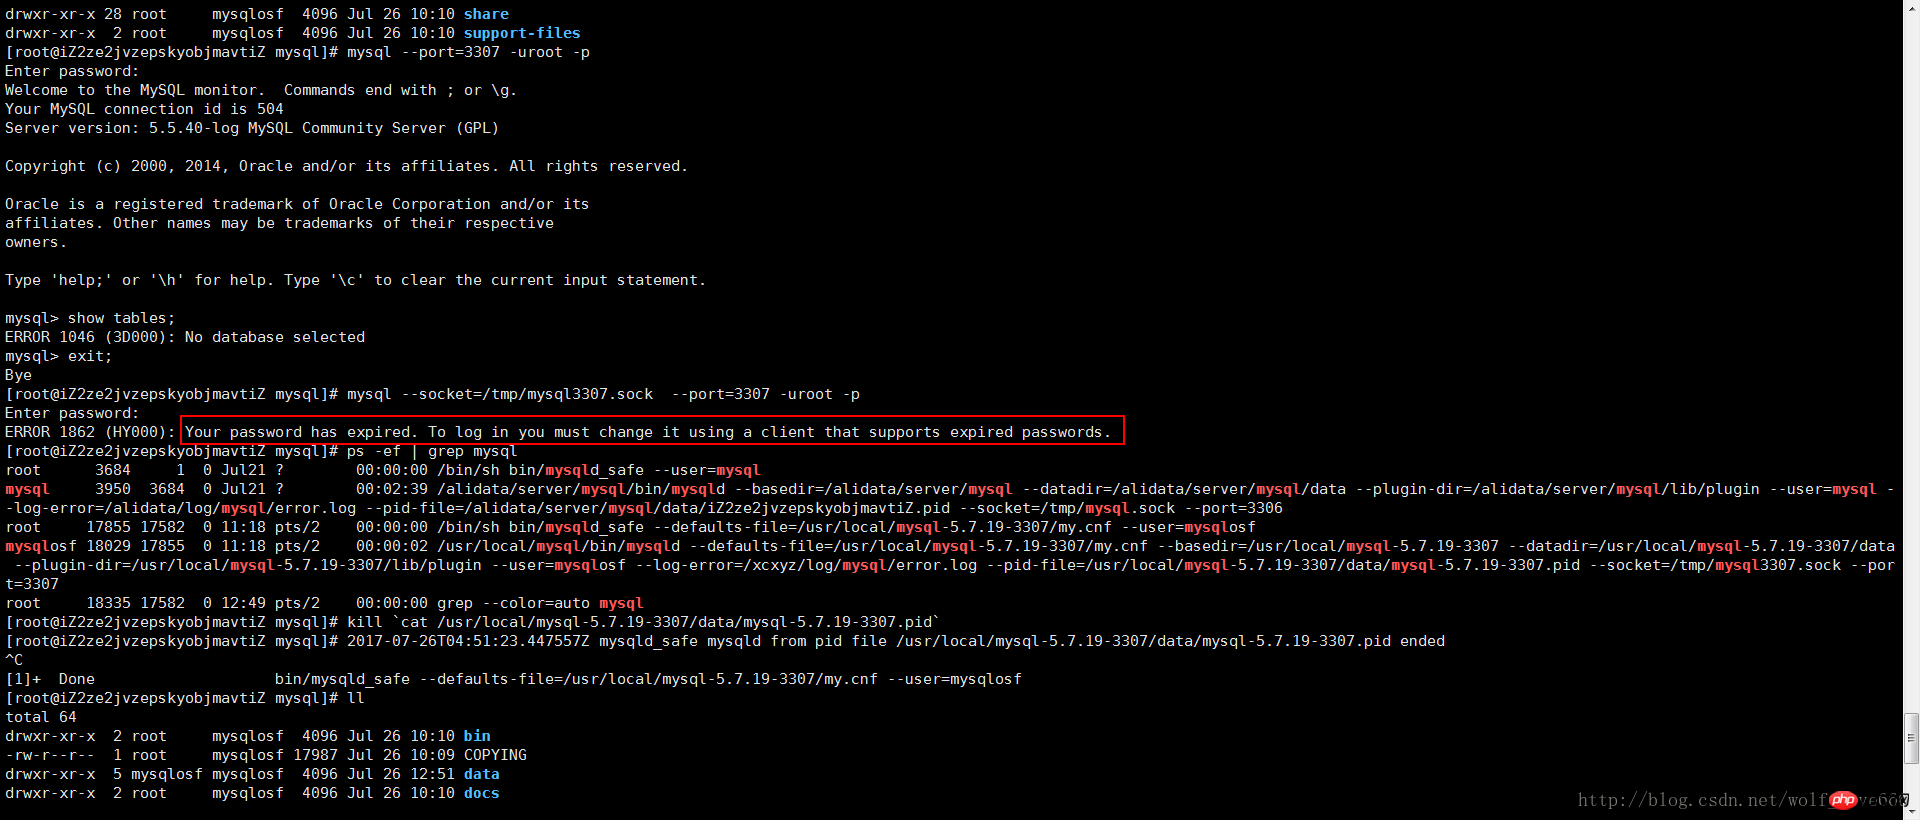
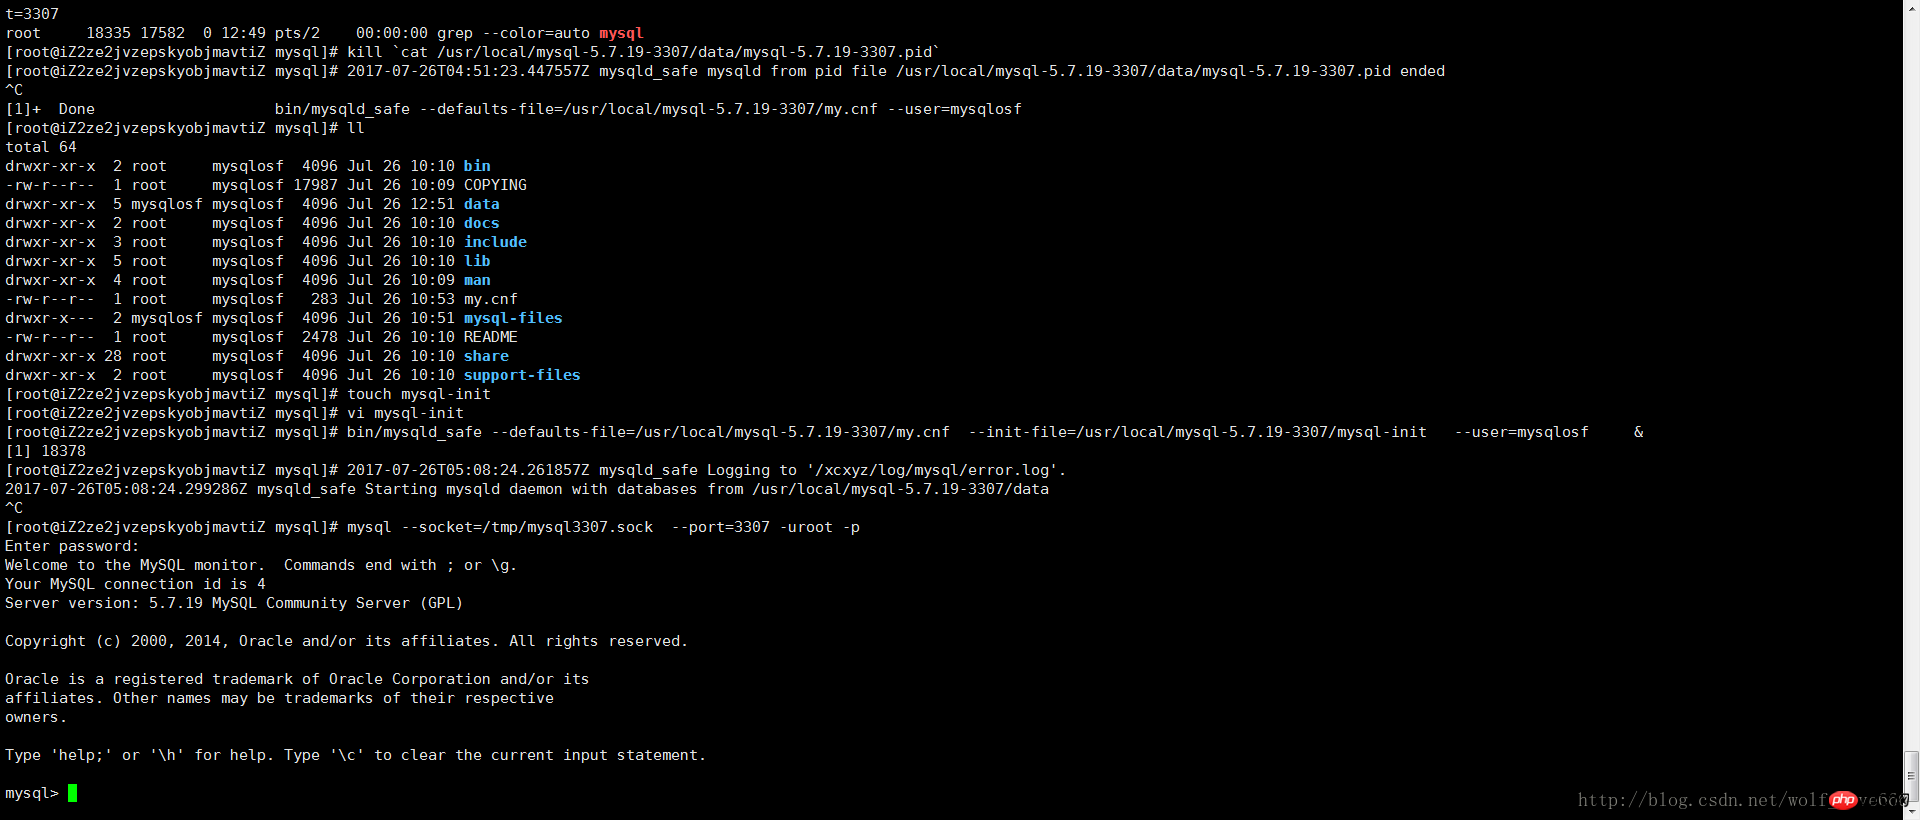
The reason is that the English in the red box below is the second mysql and needs to specify the socket and port, the English meaning That is to say, if you do not specify the socket, the default one will be selected. Because we install multiple mysql, this must be specifiedmysql --socket=/tmp/mysql3307.sock --port=3307 -uroot -p
If here If you accidentally lost your password or the password has expired, you can reset your password in this way: 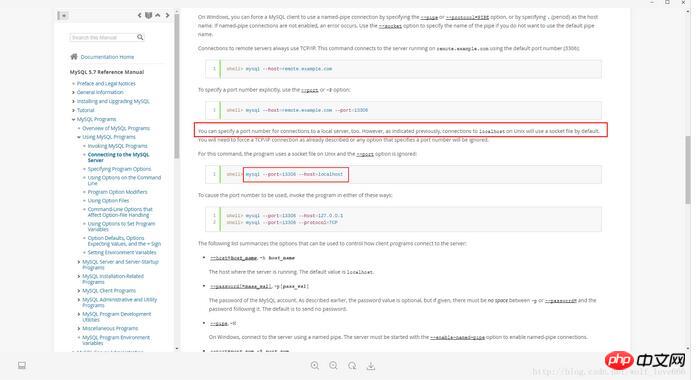
5-重置密码:
5-1关闭进程
kill `cat /usr/local/mysql-5.7.19-3307/data/mysql-5.7.19-3307.pid`
5-2创建文件mysql-init
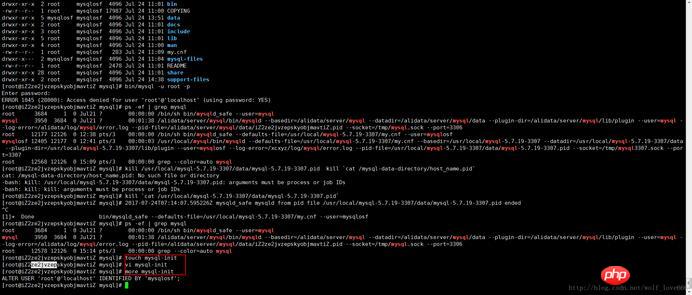
5-2-1文件内容
第一种内容:
ALTER USER 'root'@'localhost' IDENTIFIED BY 'mysqlosf';
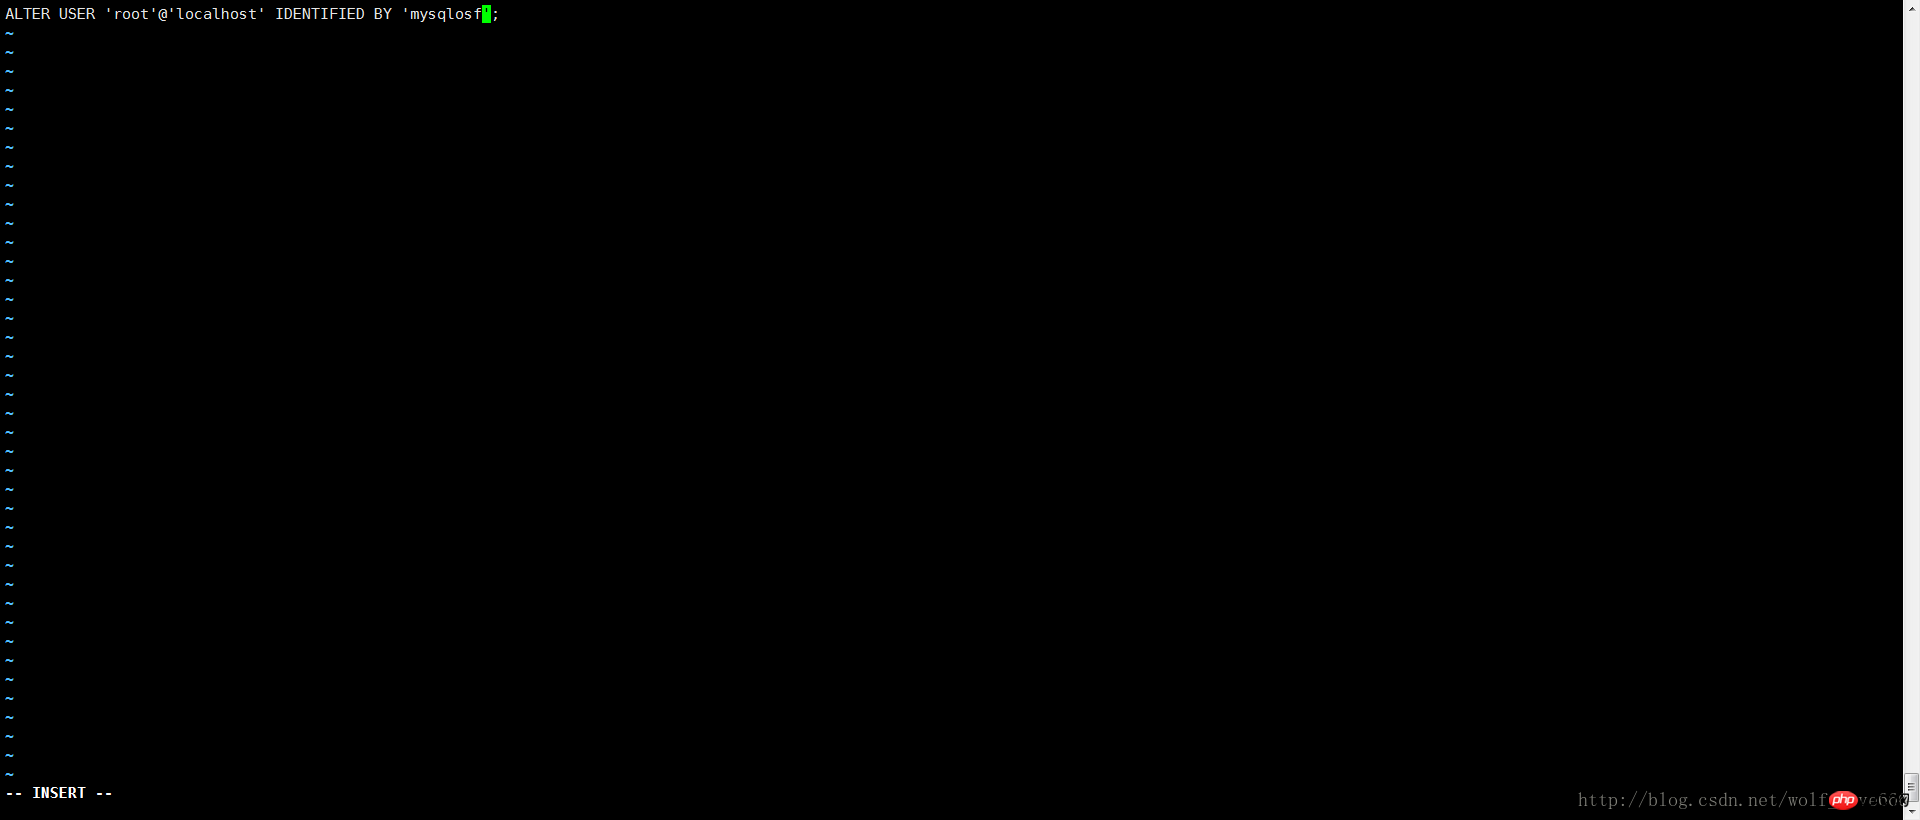
保存内容之后启动
代码如下:
bin/mysqld_safe --defaults-file=/usr/local/mysql-5.7.19-3307/my.cnf --init-file=/usr/local/mysql-5.7.19-3307/mysql-init --user=mysqlosf &
如果上述内容不成功选择第二种内容
UPDATE mysql.user
 SET authentication_string = PASSWORD('MyNewPass'), password_expired = 'N'
 WHERE User = 'root' AND Host = 'localhost';
FLUSH PRIVILEGES;
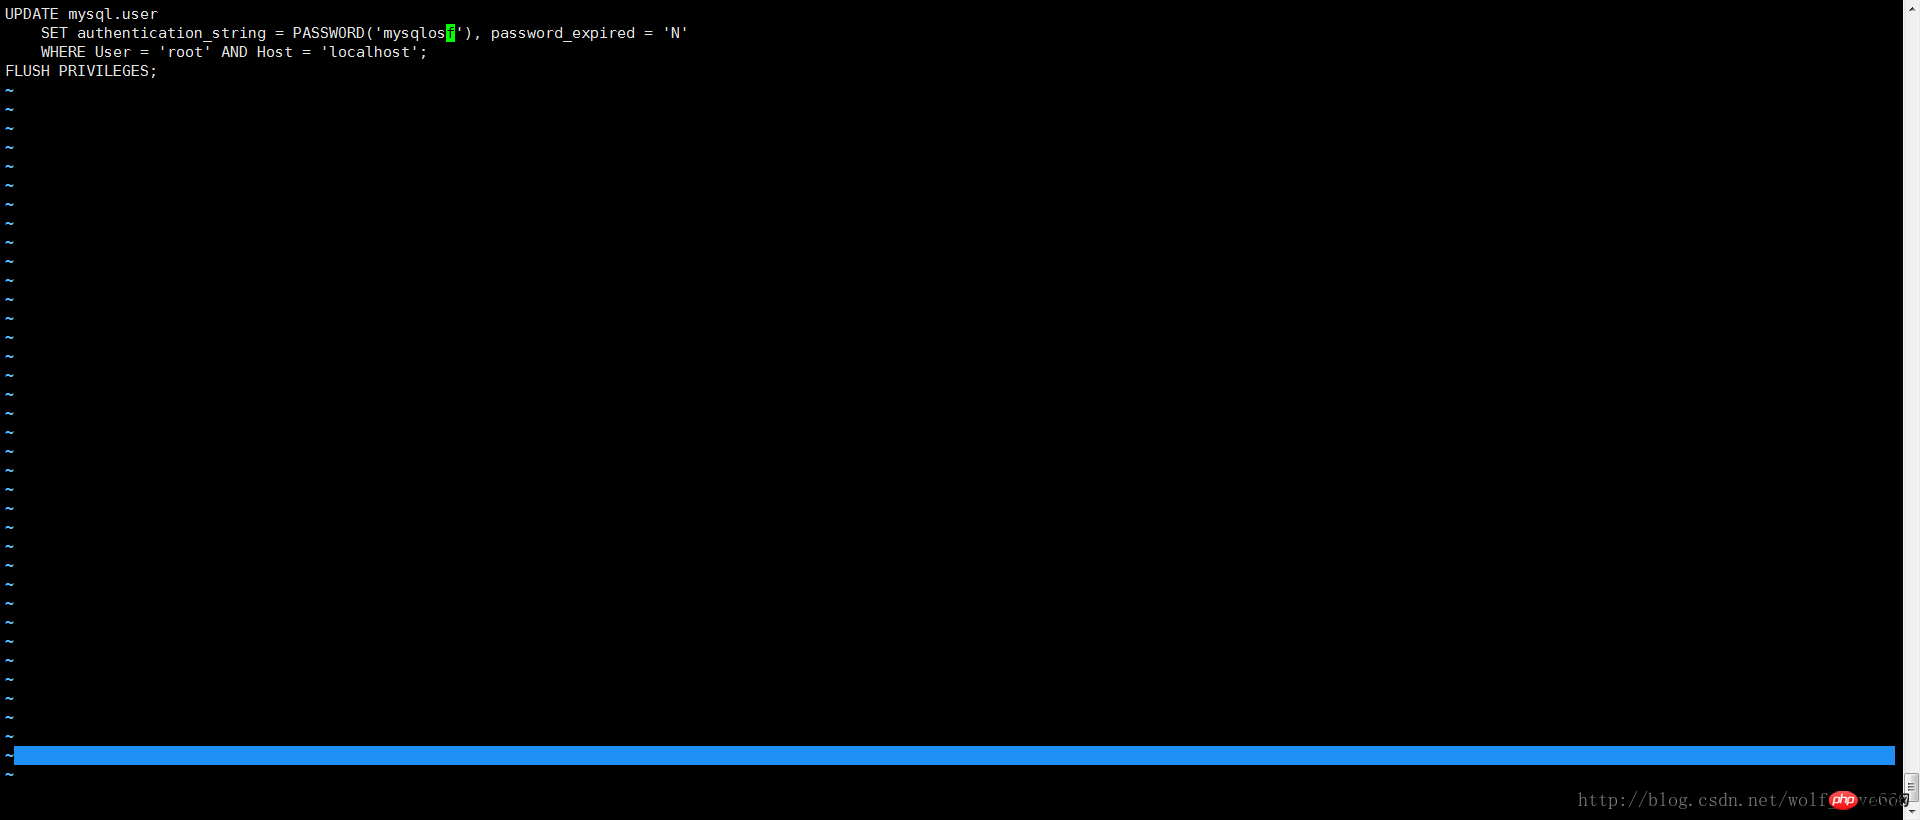
保存内容之后启动
代码如下:
bin/mysqld_safe --defaults-file=/usr/local/mysql-5.7.19-3307/my.cnf --init-file=/usr/local/mysql-5.7.19-3307/mysql-init --user=mysqlosf &
The above is the detailed content of Detailed graphic tutorial on the installation of multiple mysql5.7.19 (tar.gz) under Linux. For more information, please follow other related articles on the PHP Chinese website!

Hot AI Tools

Undresser.AI Undress
AI-powered app for creating realistic nude photos

AI Clothes Remover
Online AI tool for removing clothes from photos.

Undress AI Tool
Undress images for free

Clothoff.io
AI clothes remover

Video Face Swap
Swap faces in any video effortlessly with our completely free AI face swap tool!

Hot Article

Hot Tools

Notepad++7.3.1
Easy-to-use and free code editor

SublimeText3 Chinese version
Chinese version, very easy to use

Zend Studio 13.0.1
Powerful PHP integrated development environment

Dreamweaver CS6
Visual web development tools

SublimeText3 Mac version
God-level code editing software (SublimeText3)

Hot Topics
 What computer configuration is required for vscode
Apr 15, 2025 pm 09:48 PM
VS Code system requirements: Operating system: Windows 10 and above, macOS 10.12 and above, Linux distribution processor: minimum 1.6 GHz, recommended 2.0 GHz and above memory: minimum 512 MB, recommended 4 GB and above storage space: minimum 250 MB, recommended 1 GB and above other requirements: stable network connection, Xorg/Wayland (Linux)
 Linux Architecture: Unveiling the 5 Basic Components
Apr 20, 2025 am 12:04 AM
The five basic components of the Linux system are: 1. Kernel, 2. System library, 3. System utilities, 4. Graphical user interface, 5. Applications. The kernel manages hardware resources, the system library provides precompiled functions, system utilities are used for system management, the GUI provides visual interaction, and applications use these components to implement functions.
 vscode terminal usage tutorial
Apr 15, 2025 pm 10:09 PM
vscode built-in terminal is a development tool that allows running commands and scripts within the editor to simplify the development process. How to use vscode terminal: Open the terminal with the shortcut key (Ctrl/Cmd). Enter a command or run the script. Use hotkeys (such as Ctrl L to clear the terminal). Change the working directory (such as the cd command). Advanced features include debug mode, automatic code snippet completion, and interactive command history.
 How to run java code in notepad
Apr 16, 2025 pm 07:39 PM
Although Notepad cannot run Java code directly, it can be achieved by using other tools: using the command line compiler (javac) to generate a bytecode file (filename.class). Use the Java interpreter (java) to interpret bytecode, execute the code, and output the result.
 How to check the warehouse address of git
Apr 17, 2025 pm 01:54 PM
To view the Git repository address, perform the following steps: 1. Open the command line and navigate to the repository directory; 2. Run the "git remote -v" command; 3. View the repository name in the output and its corresponding address.
 Where to write code in vscode
Apr 15, 2025 pm 09:54 PM
Writing code in Visual Studio Code (VSCode) is simple and easy to use. Just install VSCode, create a project, select a language, create a file, write code, save and run it. The advantages of VSCode include cross-platform, free and open source, powerful features, rich extensions, and lightweight and fast.
 What is the main purpose of Linux?
Apr 16, 2025 am 12:19 AM
The main uses of Linux include: 1. Server operating system, 2. Embedded system, 3. Desktop operating system, 4. Development and testing environment. Linux excels in these areas, providing stability, security and efficient development tools.
 vscode terminal command cannot be used
Apr 15, 2025 pm 10:03 PM
Causes and solutions for the VS Code terminal commands not available: The necessary tools are not installed (Windows: WSL; macOS: Xcode command line tools) Path configuration is wrong (add executable files to PATH environment variables) Permission issues (run VS Code as administrator) Firewall or proxy restrictions (check settings, unrestrictions) Terminal settings are incorrect (enable use of external terminals) VS Code installation is corrupt (reinstall or update) Terminal configuration is incompatible (try different terminal types or commands) Specific environment variables are missing (set necessary environment variables)


